
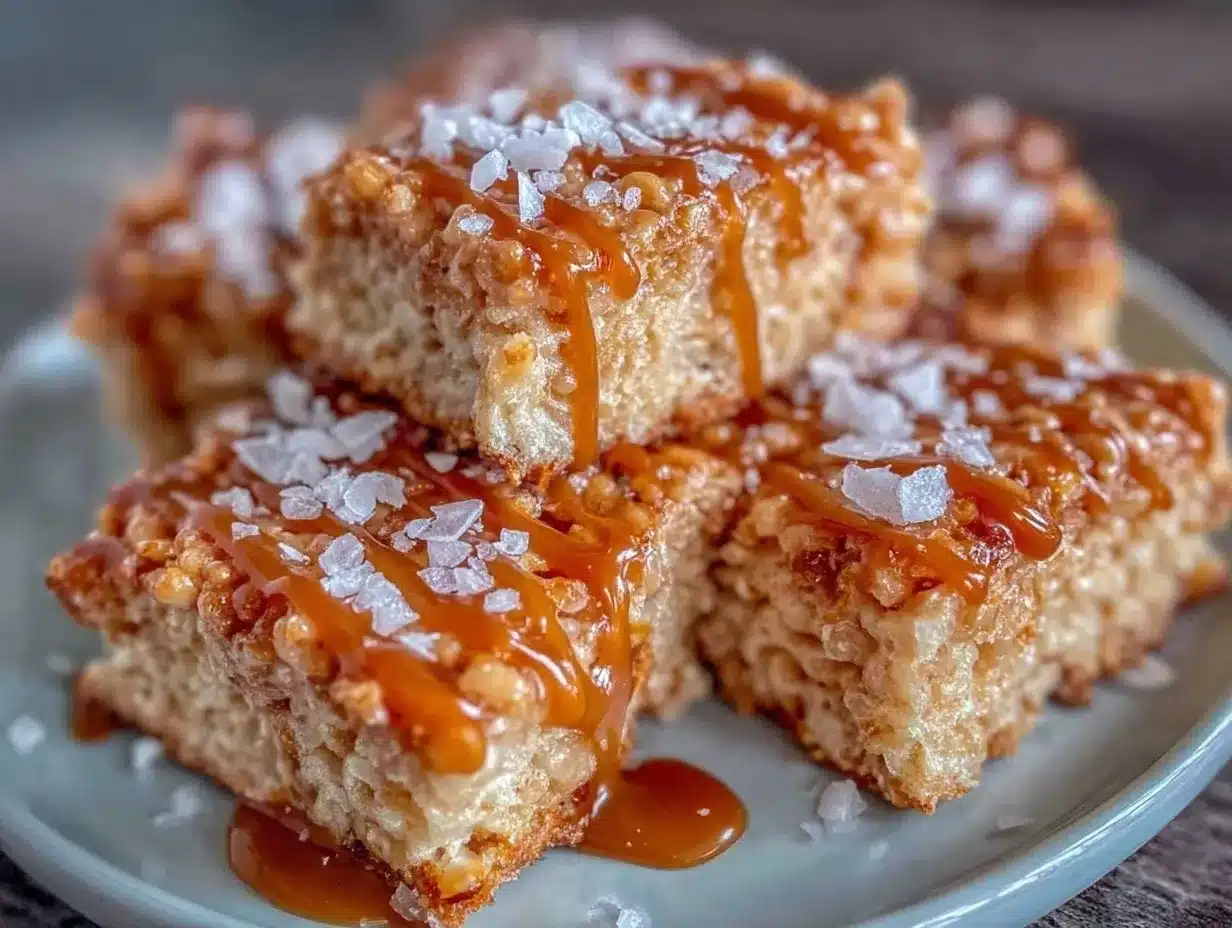
“You really think brown butter and caramel belong in Rice Krispie treats?” That was the question my skeptical friend tossed over the kitchen counter as I pulled a tray of these gooey, golden squares out of the oven. Honestly, I wasn’t sure at first either. Rice Krispie treats are the classic kid-friendly snack—usually simple, sweet, and kinda plain. But this twist? It came from a late-night baking experiment when I had a restless evening and a half-used stick of butter in the fridge. Instead of just melting it like usual, I decided to brown it, letting it turn nutty and fragrant. Then, because I had some leftover caramel sauce from a recent batch of salted caramel skillet cookies, I swirled that in. The result was magic—a crispy, buttery treat with a rich caramel ripple that tasted far more complex than what you’d expect from a quick pantry snack.
That first batch disappeared faster than I could explain the process, and since then, I’ve found myself making these treats multiple times a week—perfect for when I want something sweet but a little different. The brown butter adds this deep, toasty flavor that somehow makes the marshmallows taste extra cozy. And the caramel swirl? It’s the kind of detail that makes people lean in closer to the plate, asking for “just one more.” It’s easy enough for a weeknight sweet fix but special enough to bring to a casual get-together (no one will guess how simple it really is).
So, if you’re ready to shake up your usual Rice Krispie routine, this recipe is a little treasure. It’s proof that sometimes the best treats come from taking a classic and treating it like a blank canvas. Let’s get into the details, so you can make your own batch and maybe even surprise a few skeptics along the way.
Why You’ll Love This Recipe
After testing this recipe over several weeks and tweaking the caramel-to-butter ratio, I can confidently say this is my go-to for easy homemade desserts that impress without stress. Here’s what makes these Delicious Brown Butter Rice Krispie Treats with Caramel Swirl stand out:
- Quick & Easy: Ready in about 20 minutes, ideal for busy evenings or last-minute dessert cravings.
- Simple Ingredients: Uses pantry staples you probably already have, plus a touch of caramel for a fancy flair.
- Perfect for Casual Gatherings: Great for potlucks, birthday parties, or even an afternoon treat with coffee.
- Crowd-Pleaser: Kids love the gooey texture, and adults appreciate the deeper flavor notes from the brown butter and caramel.
- Unbelievably Delicious: The combination of toasty brown butter and sweet, slightly salty caramel swirl adds layers of flavor beyond your average Rice Krispie treat.
What sets this apart from typical Rice Krispie treats is the little technique of browning the butter rather than melting it plain. Honestly, that nutty aroma alone is worth the extra minute! Plus, swirling in caramel instead of mixing it all creates a pretty marbled effect that’s as pleasing to the eye as it is to the palate. I’ve found this recipe pairs amazingly with a cup of tea or even alongside a comforting bowl like the creamy chicken tortellini soup when you want something sweet but not too heavy after dinner.
What Ingredients You Will Need
This recipe uses simple, wholesome ingredients to deliver bold flavor and satisfying texture without the fuss. Most are pantry staples, but the caramel swirl adds a lovely gourmet touch that’s surprisingly easy to achieve.
- Unsalted butter (1/2 cup / 113g): browned for that rich, nutty flavor. I like to use Land O’Lakes for consistent results.
- Mini marshmallows (10 oz / 283g): the classic choice for chewy, gooey treats. Use fresh ones for best melting.
- Rice Krispies cereal (6 cups / 150g): the crispy base. You can swap in a gluten-free puffed rice if needed.
- Caramel sauce (1/2 cup / 120ml): homemade or store-bought. I recommend a thick, buttery caramel like Trader Joe’s or homemade if you’ve got time. Avoid runny ones; you want a swirl, not a soak.
- Vanilla extract (1 tsp / 5ml): adds warmth and depth.
- Sea salt (a pinch): to balance sweetness and highlight the caramel.
Ingredient tips: If you want to make your own caramel sauce, it’s easy to prepare in advance and keeps well in the fridge. For a dairy-free option, swap butter with coconut oil and use dairy-free caramel. In summer months, I sometimes add fresh berries on top just before setting for a fruity twist.
Equipment Needed
- Large saucepan: for browning butter and melting marshmallows.
- Mixing bowl (optional): helpful for combining cereal gently if you prefer.
- 9×13 inch baking pan: for pressing and setting the treats. Line with parchment paper for easy removal.
- Rubber spatula: essential for scraping and folding without damaging the marshmallow texture.
- Measuring cups and spoons: for precise ingredient amounts.
- Wooden spoon or heatproof whisk: for stirring during butter browning and marshmallow melting.
If you don’t have a 9×13 pan, a similarly sized glass or metal baking dish works fine. Also, I’ve found silicone spatulas easier to clean after sticky marshmallow work. Don’t worry about fancy tools here—this recipe is very forgiving, so basic kitchenware will do just fine.
Preparation Method
- Brown the butter: Place 1/2 cup (113g) unsalted butter in a large saucepan over medium heat. Stir constantly with a wooden spoon or whisk. After about 5–7 minutes, the butter will foam and then turn a golden brown with a nutty aroma. Remove from heat immediately to prevent burning.
- Add marshmallows: Quickly stir in 10 oz (283g) mini marshmallows and 1 tsp (5ml) vanilla extract. Keep stirring until marshmallows are completely melted and smooth, about 2–3 minutes. If it looks too thick, lower the heat to avoid scorching.
- Mix in cereal: Remove from heat. Pour in 6 cups (150g) Rice Krispies cereal. Fold gently with a rubber spatula until the cereal is evenly coated. Don’t overmix—keep the crispy texture intact.
- Prepare the pan: Line a 9×13 inch baking pan with parchment paper, leaving some overhang for easy removal. Lightly grease the paper with butter or non-stick spray.
- Transfer mixture: Pour half of the cereal mixture into the pan. Press down gently but firmly with a buttered spatula or clean hands to create an even layer.
- Add the caramel swirl: Drizzle 1/2 cup (120ml) caramel sauce in thin lines over the pressed layer. Use a knife or skewer to gently swirl the caramel without mixing it fully.
- Top layer: Immediately add the remaining cereal mixture on top. Press down gently to seal the caramel swirl inside and create a smooth surface.
- Cool and set: Allow the treats to cool at room temperature for at least 1 hour or until firm. For quicker setting, refrigerate for 30 minutes. Use the parchment overhang to lift the entire block out for easy slicing.
- Slice and serve: Cut into squares or rectangles with a sharp knife (warm the blade under hot water and dry it to get clean cuts).
Pro tip: Don’t wait too long to add the caramel swirl after pressing the first layer. The marshmallow mixture sets fast, and you want the caramel to nestle in without sinking all the way through.
Cooking Tips & Techniques
Browning butter is the heart of this recipe’s flavor, but it can be tricky if you’re new to it. Keep the heat medium or medium-low and stir continuously to avoid burning. As soon as the butter turns golden brown and smells nutty, take it off the heat immediately—carryover heat will finish the process. I learned this the hard way after scorched butter left a bitter taste in my first batch.
When melting marshmallows, patience is key. Use low heat once the butter is browned to prevent scorching. Stir gently but thoroughly to get a smooth, glossy mixture. Too vigorous stirring can cause marshmallows to seize up or become stringy.
Swirling caramel without mixing it completely takes a light touch. Use a thin knife or skewer and make slow, deliberate swirls. If you overdo it, you’ll lose the pretty marbled effect.
For consistent treats, measure cereal carefully—too much can make the bars dry and crumbly, too little can make them overly sticky. I like to keep a small bowl of extra cereal on hand to adjust texture as I fold.
Lastly, pressing the mixture into the pan evenly is crucial. Use a buttered spatula or your hands (lightly greased) to gently press down without squashing the crispy texture. This prevents dense, chewy bars and keeps that perfect balance.
Variations & Adaptations
- Chocolate Lover’s Twist: Add 1/2 cup (90g) mini chocolate chips to the cereal mixture before pressing. The chocolate melts slightly and pairs beautifully with brown butter and caramel.
- Nutty Upgrade: Stir in 1/2 cup (60g) toasted pecans or chopped walnuts for crunch and a flavor boost that complements the browned butter.
- Gluten-Free Option: Use certified gluten-free puffed rice cereal instead of Rice Krispies. Make sure your caramel sauce and marshmallows are gluten-free as well.
- Vegan-Friendly: Swap butter for coconut oil and use vegan marshmallows. Use a dairy-free caramel sauce or homemade coconut caramel for the swirl.
- Seasonal Flair: Try adding a sprinkle of pumpkin pie spice or cinnamon to the marshmallow melt for fall vibes. This reminds me a bit of the cozy notes in the cream cheese swirl pumpkin bread loaf I adore baking every autumn.
Serving & Storage Suggestions
These treats are best served at room temperature when the caramel swirl is soft and gooey. For a cool contrast, try pairing them with a scoop of vanilla ice cream or a hot cup of coffee or tea. They also make a fun, portable snack for picnics or lunchboxes.
Store leftovers in an airtight container at room temperature for up to 3 days. If your kitchen is warm, refrigeration helps keep the caramel from getting too sticky but may firm up the texture slightly. Leftovers can be frozen for up to 2 months—wrap tightly in plastic wrap and place in a freezer-safe container.
To reheat, pop a treat in the microwave for 10-15 seconds just to soften the caramel and butter flavors again. Flavors often deepen after a day or two, so if you can resist, letting them rest overnight will make them even tastier.
Nutritional Information & Benefits
Estimated per serving (based on 12 squares): approximately 180 calories, 7g fat, 28g carbohydrates, 1g protein.
The brown butter adds heart-healthy fats and a richer nutrient profile compared to plain butter due to the Maillard reaction forming antioxidants. Caramel does add sugar, so these treats are definitely a sweet indulgence best enjoyed in moderation.
This recipe is naturally gluten-free if you use certified gluten-free cereal and marshmallows, making it a fun option for many dietary preferences. It’s a quick source of energy and mood-boosting comfort food, perfect for busy days when you need a treat that feels homemade and special.
Conclusion
These Delicious Brown Butter Rice Krispie Treats with Caramel Swirl have become a quiet obsession in my kitchen for good reason—they bring something unexpected to a nostalgic favorite. The combination of nutty brown butter and sweet, rich caramel is simple but feels like a little homemade luxury every bite.
Whether you stick to the classic or try one of the variations, I hope you find the same joy I did in bringing new life to this easy dessert. It’s perfect for sharing, gifting, or sneaking a square when no one’s looking.
If you make them, I’d love to hear how you customized your batch or what memories they bring up. Baking is all about those personal touches, after all. Happy treat making!
FAQs
- Can I use regular-sized marshmallows instead of mini?
Yes, but chop them into smaller pieces to help them melt evenly and distribute well. - How do I prevent the caramel from sinking to the bottom?
Press half the cereal mixture firmly, then add the caramel swirl before topping gently with the rest to keep it suspended. - Can I make these ahead of time?
Absolutely! They store well at room temperature for a few days or can be frozen for longer storage. - What’s the best way to brown butter?
Use medium heat and stir constantly until it turns golden and smells nutty. Remove quickly to avoid burning. - Is there a dairy-free version of this recipe?
Yes, substitute butter with coconut oil, use vegan marshmallows, and dairy-free caramel to keep it plant-based.
Pin This Recipe!
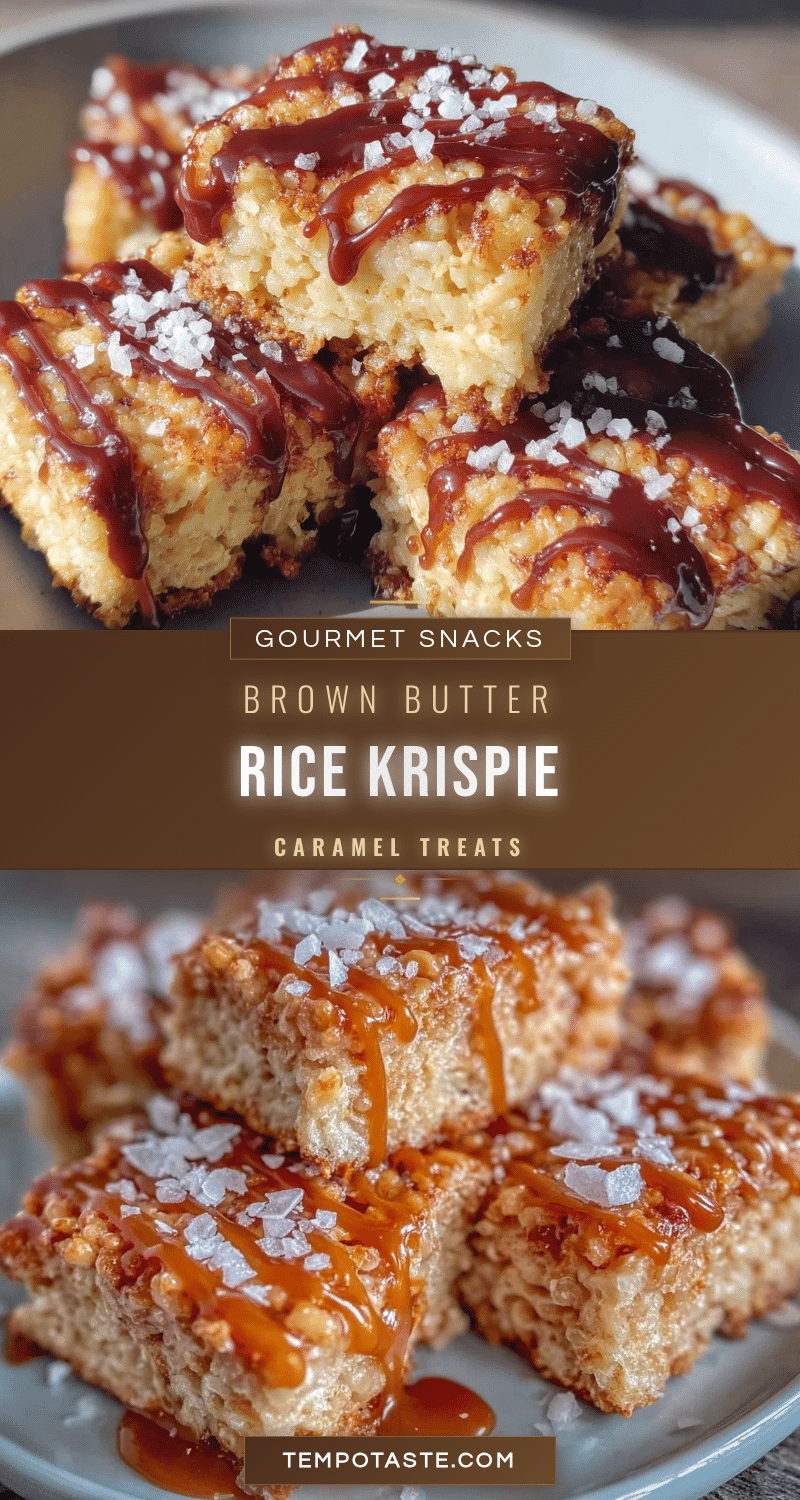
Delicious Brown Butter Rice Krispie Treats with Caramel Swirl

A quick and easy twist on classic Rice Krispie treats featuring nutty brown butter and a rich caramel swirl for a gooey, flavorful dessert.
- Prep Time: 10 minutes
- Cook Time: 10 minutes
- Total Time: 20 minutes
- Yield: 12 servings 1x
- Category: Dessert
- Cuisine: American
Ingredients
- 1/2 cup (113g) unsalted butter, browned
- 10 oz (283g) mini marshmallows
- 6 cups (150g) Rice Krispies cereal
- 1/2 cup (120ml) caramel sauce
- 1 tsp (5ml) vanilla extract
- Pinch of sea salt
Instructions
- Brown the butter: Place 1/2 cup unsalted butter in a large saucepan over medium heat. Stir constantly with a wooden spoon or whisk until the butter foams and turns golden brown with a nutty aroma, about 5–7 minutes. Remove from heat immediately.
- Add marshmallows and vanilla: Quickly stir in 10 oz mini marshmallows and 1 tsp vanilla extract. Stir until marshmallows are completely melted and smooth, about 2–3 minutes. Lower heat if mixture looks too thick.
- Mix in cereal: Remove from heat. Pour in 6 cups Rice Krispies cereal and fold gently with a rubber spatula until evenly coated. Avoid overmixing to keep crispy texture.
- Prepare pan: Line a 9×13 inch baking pan with parchment paper, leaving overhang for easy removal. Lightly grease the paper with butter or non-stick spray.
- Transfer mixture: Pour half of the cereal mixture into the pan and press down gently but firmly with a buttered spatula or clean hands to create an even layer.
- Add caramel swirl: Drizzle 1/2 cup caramel sauce in thin lines over the pressed layer. Use a knife or skewer to gently swirl the caramel without mixing it fully.
- Top layer: Immediately add the remaining cereal mixture on top and press down gently to seal the caramel swirl inside and create a smooth surface.
- Cool and set: Allow treats to cool at room temperature for at least 1 hour or refrigerate for 30 minutes for quicker setting. Use parchment overhang to lift the block out for slicing.
- Slice and serve: Cut into squares or rectangles with a sharp knife warmed under hot water and dried for clean cuts.
Notes
Do not wait too long to add the caramel swirl after pressing the first layer as the marshmallow mixture sets fast. Use medium heat and stir constantly when browning butter to avoid burning. For dairy-free version, substitute butter with coconut oil, use vegan marshmallows and dairy-free caramel. Press mixture gently to maintain crispy texture. Warm knife under hot water for clean slicing.
Nutrition
- Serving Size: 1 square (1/12 of re
- Calories: 180
- Fat: 7
- Carbohydrates: 28
- Protein: 1
Keywords: brown butter, Rice Krispie treats, caramel swirl, easy dessert, homemade treats, quick snack, kid-friendly, gooey treats


