
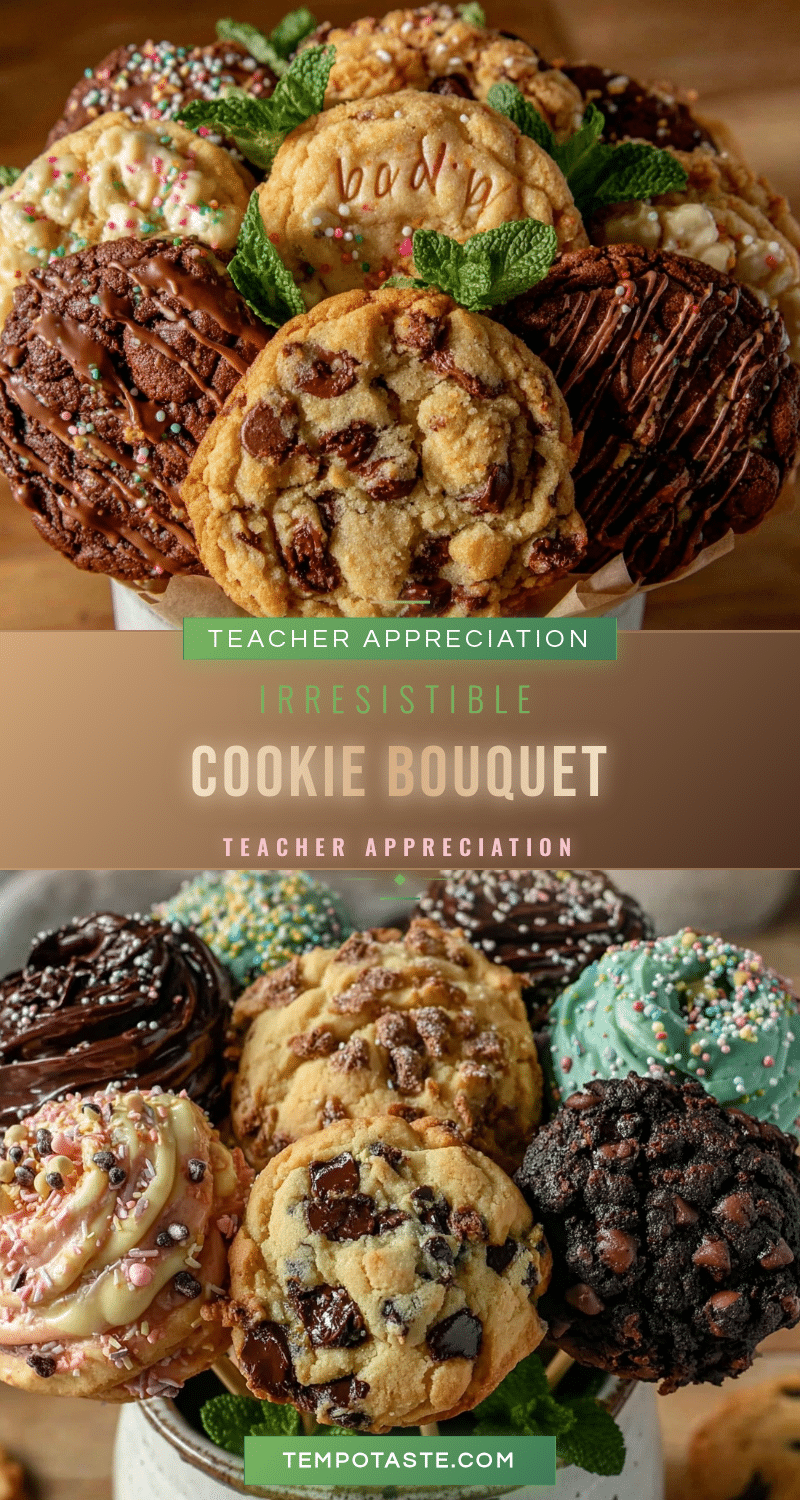
“You really think a cookie bouquet can say thank you better than a card?” my friend joked over the phone, laughter bubbling through the line. Honestly, I thought she had a point—until last spring, when I cobbled together a batch of cookies and stuck them on skewers in a mason jar. What started as a last-minute scramble turned into the perfect teacher appreciation cookie bouquet for a sweet thank you. The smell of warm vanilla and cinnamon filled the kitchen, and I remember wondering if all this fuss over cookies was a bit much.
But then, the next day, my kid’s teacher grinned wide, clutching the colorful arrangement like it was a bouquet of roses. She mentioned how the homemade cookies felt personal, thoughtful—a little edible hug after a tough week. That moment stuck with me, and I found myself making this cookie bouquet over and over, tweaking flavors and presentation. By now, this recipe has become my go-to when I want to say thanks in a way that feels both heartfelt and fun. It’s not just a gift; it’s a sweet little celebration of appreciation you can hold and share.
What I love most is how this cookie bouquet combines the comfort of homemade baking with a charming presentation that actually looks impressive—without requiring a sugar artist degree. It’s a little messy, a little imperfect, but honestly? That’s what makes it so genuine. If you’re looking for an easy, delightful way to show gratitude, this recipe will quickly become your secret weapon.
Why You’ll Love This Recipe
After several rounds of testing and gift-giving, it’s clear this teacher appreciation cookie bouquet isn’t your average cookie gift. Here’s why it’s become a favorite in my recipe box:
- Quick & Easy: From mixing dough to bouquet assembly, it takes under two hours total—perfect for those busy days when you realize you forgot to buy a gift.
- Simple Ingredients: No fancy or hard-to-find items here. You probably have flour, sugar, butter, and eggs right in your pantry.
- Perfect for Appreciation Gifts: Ideal for teachers, coaches, neighbors, or anyone who deserves a sweet thank you that feels personal and homemade.
- Crowd-Pleaser: These cookies get rave reviews from kids and adults alike—soft, buttery, with just the right touch of sweetness.
- Unbelievably Delicious: The combination of classic flavors and the fun bouquet presentation makes this gift one you’ll want to keep for yourself.
What sets this cookie bouquet apart? Well, I’ve found that baking the cookies slightly thicker than usual helps them hold their shape on skewers without breaking. Plus, I add a touch of vanilla bean paste for a rich, aromatic flavor that’s a notch above standard vanilla extract. Instead of just wrapping cookies, arranging them with colorful tissue paper and a simple mason jar gives it that homemade-but-polished feel that’s tough to resist.
Honestly, it’s the kind of gift that makes you pause and smile—because it’s thoughtful without being complicated. Whether you’re aiming to impress your kid’s teacher or just want a heartfelt way to say thanks, this cookie bouquet recipe feels like a warm, sweet handshake in edible form.
What Ingredients You Will Need
This recipe relies on straightforward, wholesome ingredients that come together to create a buttery, tender cookie perfect for bouquet arrangement. You won’t need anything exotic or intimidating—just classic pantry staples and a few extras to add a little flair.
- For the Cookie Dough:
- 2 ½ cups (320g) all-purpose flour
- 1 cup (227g) unsalted butter, softened (I prefer Kerrygold for rich flavor)
- ¾ cup (150g) granulated sugar
- ½ cup (100g) light brown sugar, packed (adds moisture and depth)
- 1 large egg, room temperature
- 1 teaspoon pure vanilla bean paste (or vanilla extract if unavailable)
- ½ teaspoon baking soda
- ½ teaspoon salt
- For Decoration and Assembly:
- Wooden skewers (6-8 inch length works well)
- Colorful tissue paper or cellophane (for bouquet wrapping)
- Mason jar or decorative vase (to hold bouquet)
- Ribbon or twine (to tie around jar or bouquet)
- Optional: Sprinkles or edible glitter for cookie decoration
If you want to switch things up, you can swap out the all-purpose flour for a gluten-free blend like Bob’s Red Mill 1-to-1 gluten-free flour without changing much else. Or, if dairy is a concern, try using a vegan butter alternative such as Earth Balance—though baking times might vary slightly. For a seasonal twist, adding a teaspoon of pumpkin pie spice or cinnamon can bring a cozy vibe perfect for autumn gifts.
Equipment Needed
Nothing fancy is required here, which is part of what makes this teacher appreciation cookie bouquet so accessible. Here’s what I use and recommend:
- Mixing Bowls: A large bowl for dough mixing and a smaller one for wet ingredients. Glass or stainless steel works fine.
- Electric Mixer: Handheld or stand mixer greatly speeds up creaming the butter and sugars, but you can mix by hand if needed.
- Baking Sheets: Two standard rimmed baking sheets lined with parchment paper prevent sticking and help even baking.
- Cooling Rack: Essential for letting the cookies cool completely so they don’t soften and break on the skewers.
- Wooden Skewers: Available at most grocery or craft stores; I prefer bamboo skewers because they’re sturdy yet lightweight.
- Mason Jar or Decorative Vase: Any sturdy container with a wide mouth works to hold the bouquet upright.
If you don’t have parchment paper, a silicone baking mat is a great reusable alternative. When it comes to mixing, I’ve found that even a basic hand whisk takes longer but still gets the job done if you’re patient. For skewers, break off sharp tips if you’re gifting to little kids just to be safe.
Preparation Method

- Preheat your oven to 350°F (175°C) and line two baking sheets with parchment paper. This step ensures even baking and simple cleanup. (Prep time: 5 minutes)
- Cream the butter and sugars: In a large mixing bowl, beat together the softened unsalted butter, granulated sugar, and brown sugar until light and fluffy—about 3-4 minutes using an electric mixer. The mixture should look pale and slightly airy. (Tip: scraping down the bowl halfway helps mix evenly.)
- Add egg and vanilla bean paste: Beat in the egg and vanilla bean paste until fully incorporated. The dough will smell wonderfully fragrant here.
- Combine dry ingredients: In a separate bowl, whisk together the all-purpose flour, baking soda, and salt. Sifting isn’t necessary but helps avoid lumps.
- Mix dry into wet: Gradually add the flour mixture to the butter mixture, stirring on low speed or folding with a spatula until just combined. Avoid overmixing to keep cookies tender.
- Shape the cookies: Scoop dough using a tablespoon or small cookie scoop and roll into balls about 1 ½ inches (3.8 cm) in diameter. Place them 2 inches (5 cm) apart on the prepared baking sheets to allow spreading.
- Bake: Place the trays in the oven and bake for 10-12 minutes. Cookies are done when edges are golden but centers still look slightly soft (they’ll firm up as they cool). Rotate the pans halfway for even baking.
- Cool completely: Transfer cookies to a cooling rack using a spatula. This step is crucial—warm cookies will break on the skewers.
- Insert skewers: Once fully cooled, gently push a wooden skewer halfway through the cookie, ensuring it’s centered and stable. If a cookie cracks, just pick another—thicker dough helps reduce this.
- Assemble the bouquet: Arrange the cookie skewers in a mason jar or vase filled with crumpled tissue paper or florist foam for stability. Add colorful tissue paper around the base to fill gaps and tie a ribbon around the jar for a polished look.
Pro tip: If you want to get creative with decoration, sprinkle some cookies with edible glitter or lightly drizzle melted chocolate before they cool. Just be sure to let chocolate set completely before skewering.
Cooking Tips & Techniques
Baking cookies that can hold up as bouquet “flowers” is a bit trickier than your average cookie batch. Here’s what I’ve learned through trial (and error!):
- Don’t overbake: Slightly softer centers will prevent brittle cookies that snap under the skewer’s weight.
- Chill the dough: If your dough feels too soft, pop it in the fridge for 20 minutes before shaping—it helps cookies hold their form.
- Use room temperature ingredients: This helps with even mixing and a smooth dough texture.
- Handle with care: When inserting skewers, do it slowly and gently to avoid cracking. Twisting the skewer slightly can help ease it through.
- Multitask baking: While cookies bake, prep your bouquet container and tissue paper so assembly is seamless once cookies cool.
One mistake I made early on was rushing the cooling process—plopping warm cookies on skewers meant many broke or crumbled. Now I always wait the full 30 minutes. Also, using a cookie scoop ensures even sizes so the bouquet looks balanced. You don’t want one giant cookie towering over the rest!
Variations & Adaptations
This recipe is a versatile base for creative spins depending on occasion or dietary needs. Here are a few ideas I’ve tried or recommend:
- Chocolate-Dipped: After baking, dip half of each cookie in melted dark or white chocolate, then let set before skewering. It adds a classy touch and texture contrast.
- Gluten-Free: Use your favorite gluten-free flour blend instead of all-purpose. I’ve had success with a 1:1 cup-for-cup swap using Bob’s Red Mill.
- Seasonal Spice: Add 1 tsp pumpkin pie spice or cinnamon and nutmeg for a fall-inspired bouquet that feels cozy and festive.
- Vegan Option: Replace butter with vegan margarine, use a flax egg (1 tbsp ground flaxseed + 3 tbsp water), and plant-based milk if needed. The texture shifts slightly but still delicious.
- Flavor Swaps: Try almond extract instead of vanilla for a nutty aroma or add citrus zest for freshness. I once made a lemon-vanilla version that disappeared fast at a summer gift exchange.
For an easy alternative gift, consider pairing this bouquet with a jar of your homemade creamy one-pot vodka rigatoni dinner or a batch of iced pistachio lattes for a complete surprise package.
Serving & Storage Suggestions
This cookie bouquet is best enjoyed within a few days to savor the fresh-baked texture. Serve it at room temperature—cold cookies can feel denser while warm cookies might be too fragile.
If you’re gifting, wrap the bouquet loosely in cellophane to protect the cookies but still let the colors show through. To keep cookies fresh longer, store them in an airtight container at room temperature for up to 5 days.
For storing beyond that, gently remove the cookies from the skewers and freeze them in a single layer inside a sealed bag. When ready to eat, thaw at room temperature—cookies retain their soft texture surprisingly well.
Over time, the cookies absorb moisture from the air, which actually mellows the flavors and makes them perfect for dipping in tea or coffee. I like pairing this bouquet with a cup of warm chai or even a neat espresso for an afternoon treat.
Nutritional Information & Benefits
These cookies are a treat, but they also bring a little nutritional value from quality ingredients. Here’s an approximate breakdown per cookie (assuming 20 cookies):
| Nutrient | Amount |
|---|---|
| Calories | 120 kcal |
| Fat | 6 g |
| Saturated Fat | 3.5 g |
| Carbohydrates | 15 g |
| Sugars | 9 g |
| Protein | 1.5 g |
The use of real butter brings in heart-healthy fats and richness, while eggs add protein and contribute to the tender crumb. For those watching carbs, swapping some flour for almond flour can lower the carb load. Just be mindful that the texture will shift.
Allergen note: This recipe contains gluten, dairy, and eggs. Substitutions can be made for allergies, but results will vary.
From a wellness perspective, this cookie bouquet feels like a mindful treat—a homemade gift that says you care without overloading on processed ingredients. It’s one of those moments where simple, quality food connects people.
Conclusion
Making the perfect teacher appreciation cookie bouquet for a sweet thank you is more than just baking—it’s about crafting a small gesture with big heart. Whether it’s your first time or you’ve been making cookie gifts for years, this recipe delivers a balance of flavor, ease, and charm that’s hard to beat.
Feel free to personalize the bouquet with your favorite cookie flavors or decoration styles. I’ve found this gift always sparks smiles, conversations, and sometimes even a request for the recipe (which I’m happy to share!).
Thanks for stopping by and trusting me with your kitchen adventures. If you try this recipe, I’d love to hear how your bouquet turned out or what variations you tried. Sharing these moments makes the experience even sweeter. Keep baking—and keep sharing those small acts of kindness one cookie at a time.
FAQs About the Teacher Appreciation Cookie Bouquet
How long do the cookies stay fresh for the bouquet?
The cookies stay fresh for up to 5 days stored in an airtight container at room temperature. For longer storage, freezing is recommended.
Can I make these cookies gluten-free?
Yes, you can substitute all-purpose flour with a 1:1 gluten-free flour blend like Bob’s Red Mill. The texture will be slightly different but still delicious.
What’s the best way to decorate the cookie bouquet?
Use colorful tissue paper to fill gaps and add visual interest. You can also add ribbons, edible glitter, or drizzle chocolate on the cookies before assembling.
Can I prepare the cookies ahead of time?
Absolutely! Cookies can be baked and stored for a few days before assembling the bouquet, or frozen and thawed as needed.
Are there any allergy-friendly variations?
For dairy-free or vegan options, replace butter with plant-based margarine and use a flax egg substitute. Gluten-free flour can replace regular flour for gluten allergies.
Pin This Recipe!
Perfect Teacher Appreciation Cookie Bouquet Recipe

A delightful and easy homemade cookie bouquet recipe perfect for teacher appreciation gifts. These soft, buttery cookies are arranged on skewers in a mason jar for a charming and thoughtful presentation.
- Prep Time: 15 minutes
- Cook Time: 12 minutes
- Total Time: 45 minutes
- Yield: 20 cookies (serves 4-6 as a gift bouquet) 1x
- Category: Dessert
- Cuisine: American
Ingredients
- 2 ½ cups (320g) all-purpose flour
- 1 cup (227g) unsalted butter, softened
- ¾ cup (150g) granulated sugar
- ½ cup (100g) light brown sugar, packed
- 1 large egg, room temperature
- 1 teaspoon pure vanilla bean paste (or vanilla extract)
- ½ teaspoon baking soda
- ½ teaspoon salt
- Wooden skewers (6-8 inch length)
- Colorful tissue paper or cellophane
- Mason jar or decorative vase
- Ribbon or twine
- Optional: Sprinkles or edible glitter
Instructions
- Preheat your oven to 350°F (175°C) and line two baking sheets with parchment paper.
- Cream the butter and sugars in a large mixing bowl until light and fluffy, about 3-4 minutes using an electric mixer.
- Beat in the egg and vanilla bean paste until fully incorporated.
- In a separate bowl, whisk together the all-purpose flour, baking soda, and salt.
- Gradually add the flour mixture to the butter mixture, stirring on low speed or folding with a spatula until just combined. Avoid overmixing.
- Scoop dough using a tablespoon or small cookie scoop and roll into balls about 1 ½ inches in diameter. Place them 2 inches apart on the prepared baking sheets.
- Bake for 10-12 minutes until edges are golden but centers still look slightly soft. Rotate pans halfway through baking.
- Transfer cookies to a cooling rack and cool completely to prevent breaking on skewers.
- Once cooled, gently push a wooden skewer halfway through the center of each cookie.
- Arrange the cookie skewers in a mason jar or vase filled with crumpled tissue paper or florist foam for stability.
- Add colorful tissue paper around the base and tie a ribbon around the jar for a polished look.
- Optional: Decorate cookies with edible glitter or drizzle melted chocolate before cooling and skewering.
Notes
Do not overbake cookies to keep centers soft and prevent brittleness. Chill dough for 20 minutes if too soft. Insert skewers gently and twist slightly to avoid cracking. Use a cookie scoop for even sizes. Cookies stay fresh up to 5 days in an airtight container at room temperature or can be frozen for longer storage.
Nutrition
- Serving Size: 1 cookie
- Calories: 120
- Sugar: 9
- Fat: 6
- Saturated Fat: 3.5
- Carbohydrates: 15
- Protein: 1.5
Keywords: cookie bouquet, teacher appreciation gift, homemade cookies, easy cookie recipe, gift ideas, cookie gift, bouquet cookies


