“You’ve got to try this caramel corn,” my neighbor said, dropping off a brown paper bag that smelled like a warm hug and a Saturday night movie marathon. I was skeptical—homemade caramel corn always seemed like a tricky thing, a candy-coated gamble with sticky fingers and burnt sugar lurking around the corner. But that batch? It was magic in a bag. Crunchy, buttery, with just the right kiss of sweetness that made me close my eyes and say, “Okay, this is something.”
That bag sparked an obsession, honestly. I found myself making batch after batch for every little thing—birthdays, thank yous, even just because it was Thursday. This recipe turns out perfectly every time, and I figured it was about time I shared the secret to these irresistible homemade caramel corn gift bags for every occasion. It’s like turning popcorn into a party, but without the stress or the mess that usually comes with candy-making.
And here’s the thing—there’s something quietly satisfying about packaging up these crunchy, golden treats in little gift bags, tying them with a ribbon, and watching faces light up when they get handed over. It’s comfort food meets thoughtful gesture, all wrapped into one.
Honestly, if you’ve ever been wary of making caramel corn at home, this recipe will make you a believer. The caramel is rich but not overwhelming, the popcorn stays crisp, and the whole process fits nicely into a busy day (no kidding). Plus, it’s the kind of gift that feels homemade without looking like you spent hours slaving away in the kitchen. That’s what made me fall for it—and I reckon you will too.
Why You’ll Love This Recipe
After making this homemade caramel corn gift bags recipe countless times, I can say it’s the one I reach for when I want a fuss-free treat that impresses. Here’s why it stands out:
- Quick & Easy: You can have these caramel corn bags ready in about 45 minutes, perfect for last-minute gifts or snack cravings.
- Simple Ingredients: No exotic items here—just pantry staples like popcorn kernels, butter, brown sugar, and a pinch of baking soda.
- Perfect for Every Occasion: Whether it’s a holiday, a birthday, or just a small thank you, these gift bags fit the bill.
- Crowd-Pleaser: Kids and adults alike keep coming back for more, which says a lot considering the picky eaters in my circle.
- Unbelievably Delicious: The caramel coating is buttery and smooth with just the right crunch, making every bite a little moment of joy.
This isn’t just another caramel corn recipe—it’s the one where the caramel gets that perfect sheen and the popcorn never sogs out. I like to think it’s the subtle touch of baking soda that lightens the caramel, or maybe the way I spread the coated popcorn on parchment paper so it cools evenly. Either way, it’s a recipe that’s been tested, tweaked, and loved (and sometimes eaten too quickly, no judgment here).
Plus, it’s a treat that feels special but doesn’t require hours in the kitchen. I’ve found that making a batch while prepping dinner or even watching an episode of my favorite show works like a charm—and it’s a great reason to keep a stash around for spontaneous gift-giving. If you’ve enjoyed seasonal sweets like perfect homemade pineapple upside-down cake, you’ll appreciate how this caramel corn fits right into that family of warm, inviting flavors.
What Ingredients You Will Need
This recipe uses simple, wholesome ingredients to deliver bold flavor and satisfying texture without the fuss. You probably have most of these in your pantry already, which is a win when you want to whip up a batch on a whim.
- Popcorn kernels – about 1/2 cup (115 g); use fresh kernels for the best pop and crunch
- Unsalted butter – 1 cup (225 g), melted; adds richness and smooth caramel flavor
- Brown sugar – 1 1/2 cups (300 g), packed; I prefer dark brown for deeper molasses notes
- Light corn syrup – 1/2 cup (120 ml); helps prevent crystallization and keeps caramel smooth
- Salt – 1/2 teaspoon; balances sweetness and enhances flavor
- Baking soda – 1/4 teaspoon; this little trick helps make the caramel lighter and less sticky
- Vanilla extract – 1 teaspoon; adds warmth and complexity
- Parchment paper – for spreading the caramel corn to cool
If you want to customize, you can swap the brown sugar for coconut sugar for a different caramel twist or use a vegan butter substitute and maple syrup for a dairy-free version. For those interested in a little salt contrast, sprinkling flaky sea salt on top right after baking is heavenly.
When picking your popcorn kernels, I’m partial to organic brands that pop consistently and avoid those stubborn unpopped bits. Also, the quality of butter really shows here—using a good European-style butter makes a noticeable difference in flavor and texture.
Equipment Needed
- Large heavy-bottomed saucepan (at least 3-quart size) – for making the caramel; a thick bottom helps prevent burning
- Large mixing bowl – for the popped corn and mixing the caramel evenly
- Baking sheet – preferably rimmed, to hold the caramel corn for cooling
- Parchment paper – essential for lining the baking sheet to prevent sticking
- Spoon or spatula – heat-resistant, for stirring the caramel sauce
- Candy thermometer (optional but helpful) – to check caramel temperature for consistent results
- Measuring cups and spoons
If you don’t have a candy thermometer, don’t stress—you can rely on timing and visual cues, like the caramel bubbling and turning a rich amber color. I’ve done it both ways, and while the thermometer helps, it’s not a deal-breaker.
For a budget-friendly alternative, any sturdy saucepan with a thick base will do. Just keep a close eye on the caramel during cooking. Also, I find that a silicone spatula works better than a wooden spoon because it scrapes the pan edges without sticking.
Preparation Method
- Pop the corn: Heat a large pot over medium heat with a tablespoon of oil. Add the 1/2 cup (115 g) popcorn kernels and cover with a lid. Shake the pot occasionally to prevent burning. When popping slows to 2-3 seconds between pops, remove from heat and transfer the popcorn to a large mixing bowl. Remove any unpopped kernels. (About 5-7 minutes)
- Preheat oven: Set your oven to 250°F (120°C). Line a rimmed baking sheet with parchment paper for cooling the caramel corn later.
- Make the caramel sauce: In a large heavy-bottomed saucepan, melt the 1 cup (225 g) unsalted butter over medium heat. Stir in 1 1/2 cups (300 g) packed brown sugar, 1/2 cup (120 ml) light corn syrup, and 1/2 teaspoon salt. Bring to a boil while stirring constantly. Once boiling, stop stirring and let it boil for 4-5 minutes without stirring—this helps develop that perfect caramel texture. (Use a candy thermometer to check for 250°F/121°C if you have one.)
- Add baking soda and vanilla: Remove the saucepan from heat immediately. Stir in 1/4 teaspoon baking soda and 1 teaspoon vanilla extract. The mixture will foam and lighten—that’s exactly what you want! This step makes the caramel less dense and helps the coating stay crisp.
- Combine caramel and popcorn: Pour the hot caramel sauce over the popped corn. Use a spatula to gently fold and toss until the popcorn is evenly coated. (Be careful—the caramel is hot!)
- Bake the caramel corn: Spread the coated popcorn in an even layer on the prepared baking sheet. Bake for 45 minutes, stirring every 15 minutes to keep the coating even and prevent clumps.
- Cool and package: Remove the baking sheet from the oven and let the caramel corn cool completely on the parchment paper. Once cool, break into clusters and portion into gift bags or airtight containers.
Pro tip: Don’t skip stirring during baking—it’s what keeps the caramel from hardening into a solid clump. And if you want, sprinkle a touch of flaky sea salt after the final stir for that addictive sweet-salty balance.
Cooking Tips & Techniques
Making caramel corn at home can feel intimidating, but a few tips learned the hard way make all the difference.
- Watch your temperature: Caramel can go from perfect to burnt fast. If you don’t have a thermometer, timing and color cues are your best friends. The caramel should be a deep golden amber—not too light, not too dark.
- Use fresh popcorn kernels: Older kernels tend to leave more unpopped bits, which can be annoying when coating with caramel.
- Don’t rush the baking: Baking at a low temperature dries out the caramel and helps it set without turning rock hard. Stir every 15 minutes for best results.
- Be patient when cooling: Trying to break apart the caramel corn too soon can lead to sticky fingers and smashed clusters. Let it cool fully on parchment for the best texture.
- Multitasking tip: I usually pop the corn and make the caramel sauce while dinner simmers—works like a charm and keeps things moving.
- Storage matters: Keep your caramel corn in airtight containers to maintain crunch. If humidity spikes, a quick zap in the oven for a few minutes refreshes the crisp.
Over the years, I’ve learned that the little things count—like using a silicone spatula to scrape every bit of caramel out of the pan, or choosing a sturdy baking sheet that spreads heat evenly. These small details add up to that perfect batch every time.
Variations & Adaptations
This homemade caramel corn recipe is wonderfully versatile. Here are some ways to customize it for different occasions and tastes:
- Nutty twist: Toss in 1 cup (100 g) of roasted pecans or almonds with the popcorn before adding caramel for an extra crunch and nutty flavor.
- Spicy kick: Add 1/2 teaspoon cayenne pepper or a dash of cinnamon to the caramel sauce for a subtle heat that pairs beautifully with the sweetness.
- Chocolate drizzle: Once cooled, drizzle melted dark or white chocolate over the caramel corn for a decadent finish. Let it set before packaging.
- Dairy-free version: Use vegan butter and replace corn syrup with maple syrup. The texture will be slightly different but delicious.
- Sweet & salty: Sprinkle flaky sea salt over the caramel corn right after baking for a salty contrast that keeps people coming back.
One variation I enjoy during the holidays includes mixing in dried cranberries and chopped pistachios, which adds a festive pop of color and flavor. It’s a nice complement to a warm drink like the creamy iced pistachio latte I make around the same time.
Serving & Storage Suggestions
Caramel corn gift bags are best served at room temperature, ideally within a week of making. The crunch is at its peak, and the flavors are fresh and vibrant.
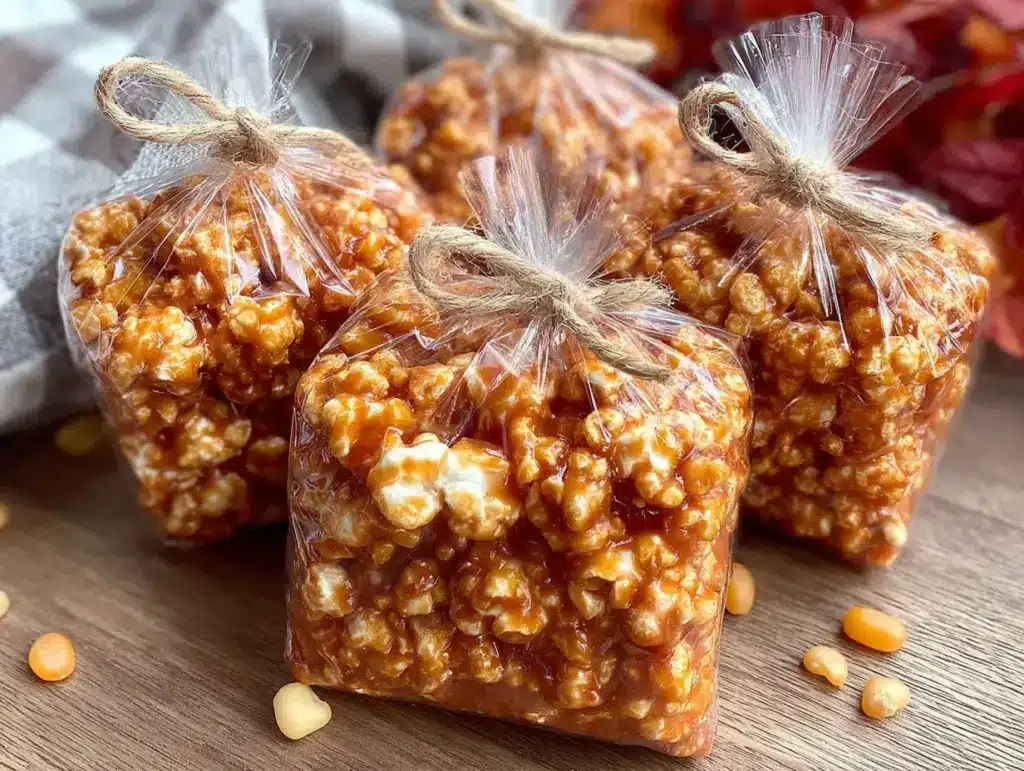
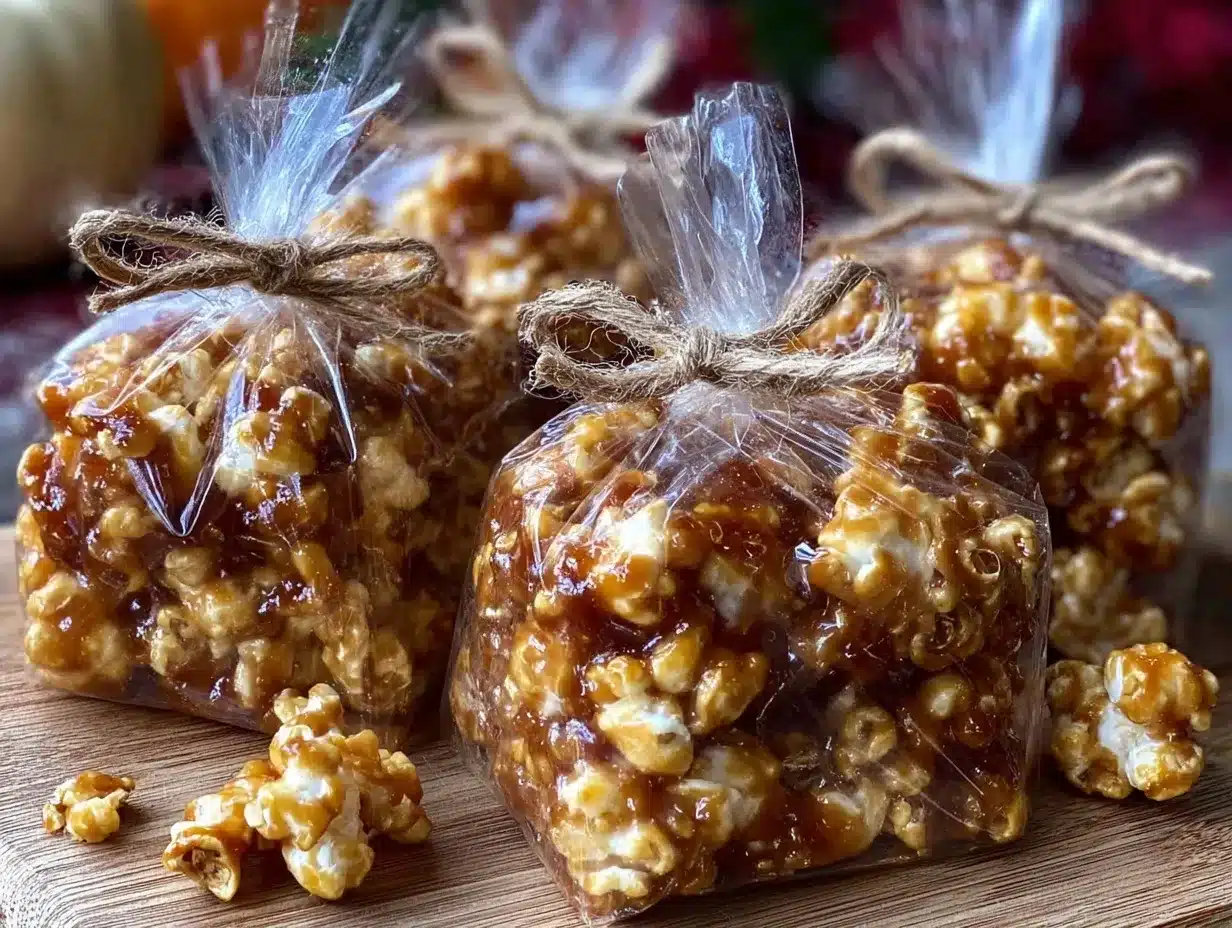
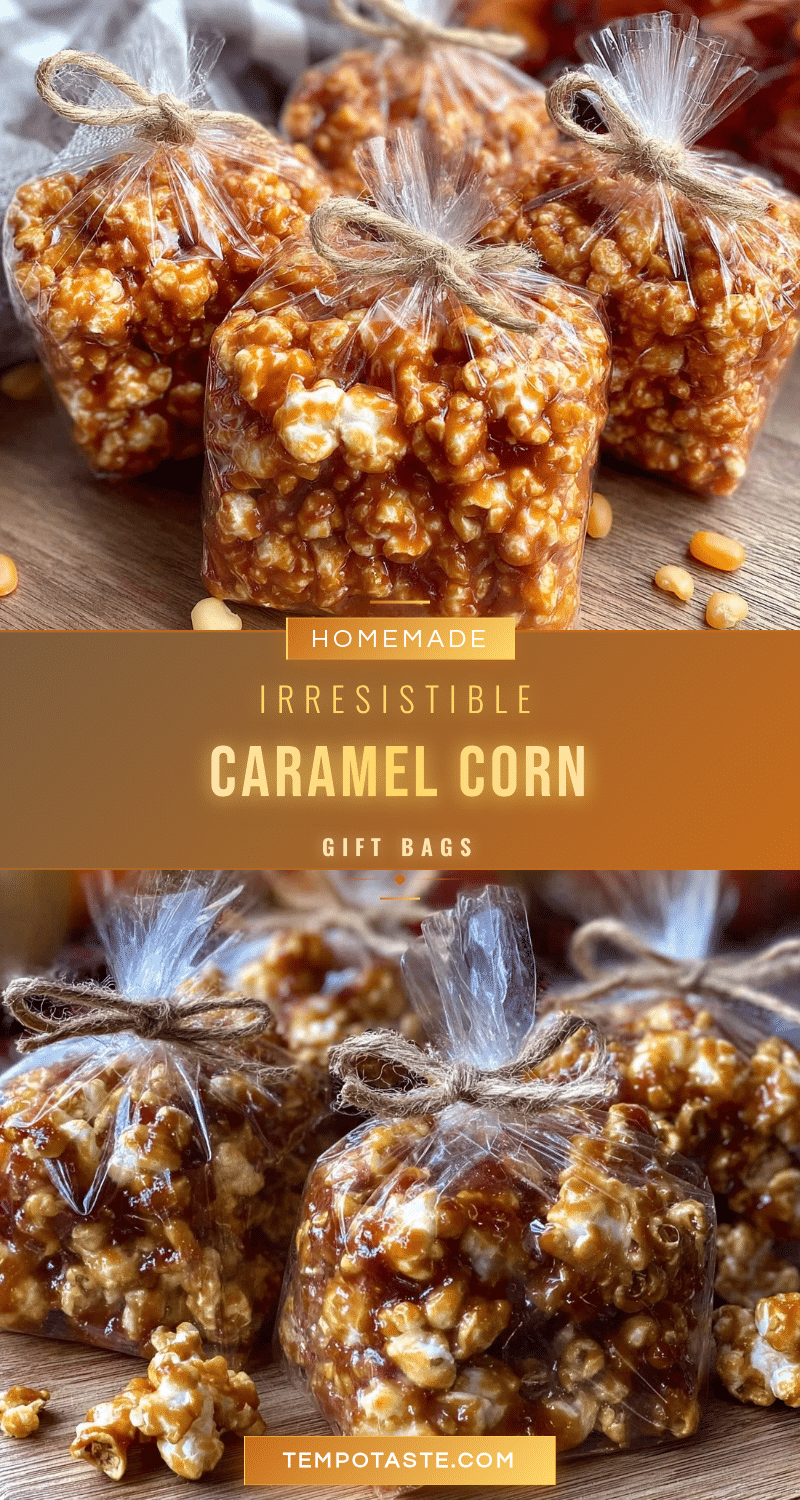
For gift-giving, clear cellophane bags tied with festive ribbons or simple kraft paper bags work beautifully, letting the golden treats shine. Adding a handwritten tag with a personal note ups the charm factor—trust me, it makes a difference!
If you’re storing leftovers, an airtight container at room temperature is your best bet. Avoid the fridge, which can introduce moisture and soften the crunch. For longer storage, caramel corn freezes well—just thaw at room temperature before enjoying.
Reheating in a 250°F (120°C) oven for 5-10 minutes refreshes the crispness, especially if the corn has softened a bit over time. Just spread it on a baking sheet and watch closely to avoid burning.
This treat pairs well with simple beverages like hot cider or a cold glass of milk, making it a delightful snack for movie nights or casual gatherings. If you like savory-sweet combos, pairing with something like the savory burst cherry tomato brown butter pasta balances the palate nicely during a cozy dinner.
Nutritional Information & Benefits
While caramel corn is definitely a treat, it’s made with real ingredients and can be portion-controlled for an occasional indulgence. One serving (about 1 cup or 30 g) provides roughly:
| Calories | 150 |
|---|---|
| Fat | 7g |
| Sugar | 18g |
| Carbohydrates | 22g |
| Protein | 2g |
Popcorn itself is a whole grain and a good source of fiber, which helps keep you full. Using unsalted butter and controlling the sugar amount gives you a bit more control over the treat’s richness. For those watching allergens, this recipe contains dairy and corn but no nuts unless you add them.
From a wellness standpoint, this caramel corn feels like a satisfying, thoughtful snack made from scratch rather than processed sweets. It’s the kind of treat you can feel good about sharing and enjoying mindfully.
Conclusion
This homemade caramel corn gift bags recipe has become a little tradition around here—comforting, sweet, and just the right amount of crunchy every time. It’s one of those recipes that feels special without demanding hours in the kitchen, which is honestly what keeps me coming back. You can tweak the flavors, add your favorite mix-ins, or keep it classic and simple—the choice is yours.
Whether you’re gifting neighbors, bringing something to a party, or just sneaking a bag for yourself, this recipe hits the spot in all the best ways. I hope it finds a place in your kitchen and your heart like it did in mine.
Give it a try, and if you make a batch, drop a comment below—I love hearing how you put your own spin on it. Happy snacking!
FAQs About Homemade Caramel Corn Gift Bags
How do I keep my caramel corn from getting soggy?
Store it in an airtight container at room temperature and avoid humidity. Baking the caramel corn at a low temperature and stirring regularly during baking also helps keep it crisp.
Can I use microwave popcorn for this recipe?
It’s best to start with plain popcorn kernels popped on the stove or in an air popper. Microwave popcorn often has added oil and salt that can affect the caramel coating.
Is there a way to make this recipe gluten-free?
Absolutely! This caramel corn is naturally gluten-free as long as you use gluten-free corn syrup and verify your popcorn kernels are uncontaminated.
Can I make caramel corn without corn syrup?
Yes, you can substitute corn syrup with an equal amount of honey or maple syrup, but the texture might be slightly different—usually a bit stickier.
How long does homemade caramel corn last?
Stored properly, it stays fresh for up to one week at room temperature. You can freeze it to extend the shelf life to a month or more.
Pin This Recipe!
Homemade Caramel Corn Gift Bags

A quick and easy recipe for perfectly crunchy, buttery caramel corn that’s ideal for gift-giving or snacking. This recipe uses simple pantry ingredients and yields a delicious treat with a smooth caramel coating.
- Prep Time: 10 minutes
- Cook Time: 50 minutes
- Total Time: 1 hour
- Yield: 8 servings 1x
- Category: Snack
- Cuisine: American
Ingredients
- 1/2 cup popcorn kernels (115 g)
- 1 cup unsalted butter (225 g), melted
- 1 1/2 cups packed brown sugar (300 g), preferably dark brown
- 1/2 cup light corn syrup (120 ml)
- 1/2 teaspoon salt
- 1/4 teaspoon baking soda
- 1 teaspoon vanilla extract
- Parchment paper for cooling
Instructions
- Pop the corn: Heat a large pot over medium heat with a tablespoon of oil. Add the popcorn kernels and cover with a lid. Shake occasionally to prevent burning. When popping slows to 2-3 seconds between pops, remove from heat and transfer popcorn to a large mixing bowl. Remove any unpopped kernels.
- Preheat oven to 250°F (120°C). Line a rimmed baking sheet with parchment paper.
- Make the caramel sauce: In a large heavy-bottomed saucepan, melt the unsalted butter over medium heat. Stir in brown sugar, light corn syrup, and salt. Bring to a boil while stirring constantly. Once boiling, stop stirring and let boil for 4-5 minutes without stirring. (Use a candy thermometer to check for 250°F/121°C if available.)
- Remove saucepan from heat. Stir in baking soda and vanilla extract. The mixture will foam and lighten.
- Pour hot caramel sauce over the popped corn. Gently fold and toss until popcorn is evenly coated.
- Spread coated popcorn evenly on the prepared baking sheet. Bake for 45 minutes, stirring every 15 minutes to keep coating even and prevent clumps.
- Remove from oven and let caramel corn cool completely on parchment paper. Break into clusters and portion into gift bags or airtight containers.
Notes
Stir the caramel corn every 15 minutes during baking to prevent clumping. Use fresh popcorn kernels for best results. Let the caramel corn cool completely before breaking into clusters to avoid sticky fingers. For a dairy-free version, substitute vegan butter and maple syrup for butter and corn syrup. Sprinkle flaky sea salt after baking for a sweet-salty contrast. Store in airtight containers at room temperature to maintain crunch. Reheat in a 250°F oven for 5-10 minutes to refresh crispness if needed.
Nutrition
- Serving Size: 1 cup (30 g)
- Calories: 150
- Sugar: 18
- Fat: 7
- Carbohydrates: 22
- Protein: 2
Keywords: caramel corn, homemade caramel corn, caramel popcorn, gift bags, easy caramel corn recipe, crunchy caramel corn, buttery caramel corn


