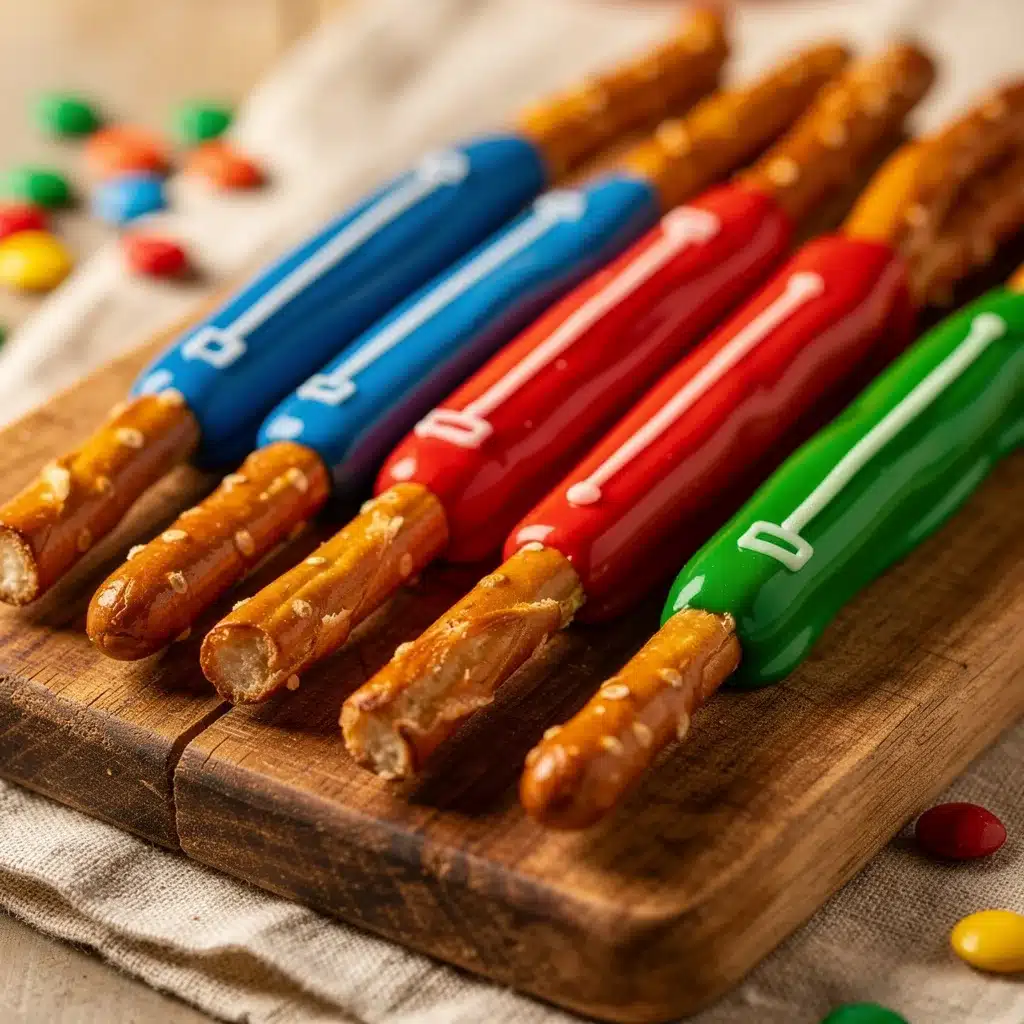
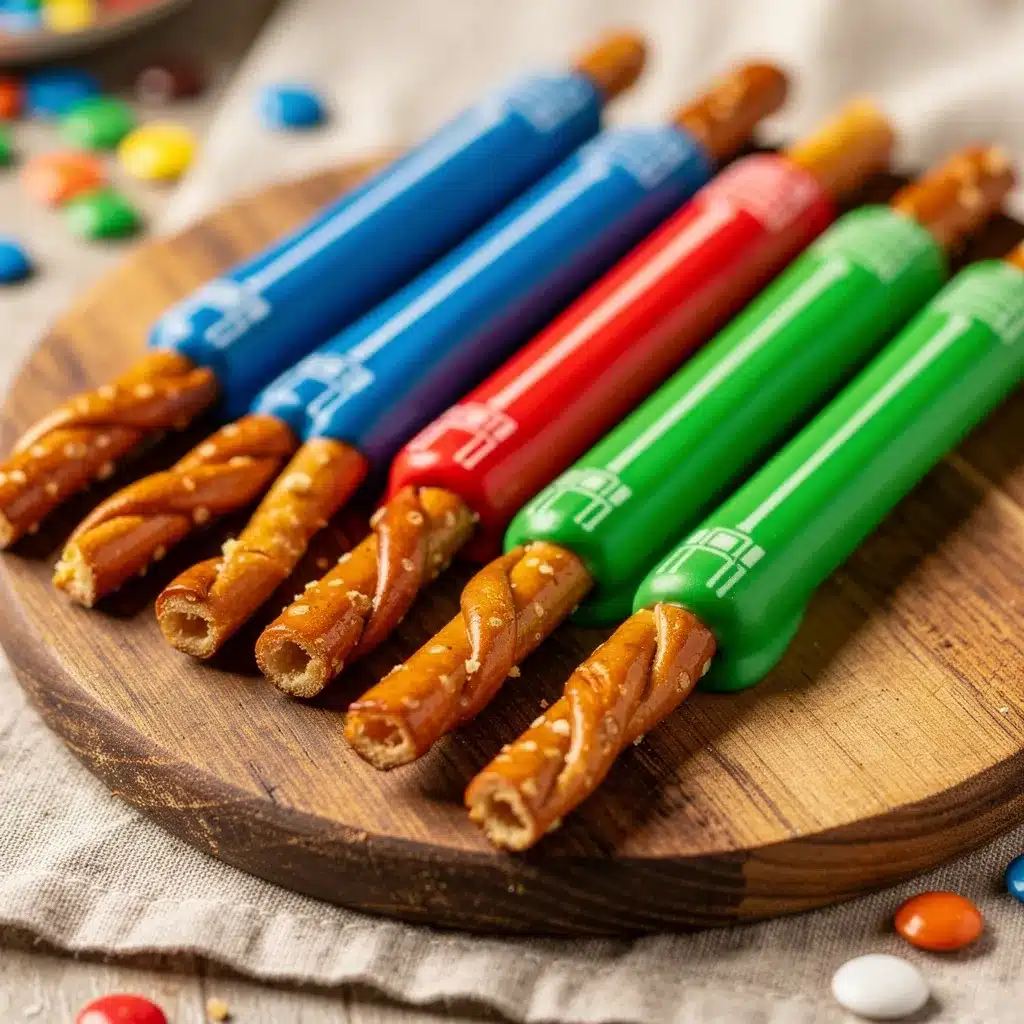
“Are you really going to eat that?” my nephew asked, eyeing the colorful pretzel rod in my hand like it was some kind of Jedi weapon. Honestly, I wasn’t sure either at first. I mean, candy-dipped pretzels? Sounds like a sugar bomb waiting to happen, right? But the whole idea came from a last-minute scramble to put together a fun treat for a Star Wars movie night. I grabbed some plain pretzel rods, melted candy melts in vibrant colors, and just started dipping without much thought. What happened next was pure magic—those pretzels transformed into epic lightsabers that were impossible not to admire or devour.
There’s something about the crackle of the pretzel combined with the smooth, sweet shell of candy coating that just hits the right note. That night, as we sat watching the battles unfold on screen, these lightsaber pretzel rods became the unofficial snack of the evening. Since then, I’ve made them a handful of times—sometimes tweaking the colors or adding sprinkles, sometimes keeping it simple. Somehow, this easy homemade treat keeps stealing the spotlight at parties and casual get-togethers. It’s a little playful, a touch nostalgic, and honestly, a perfect way to brighten up any snack table.
So, if you’re looking for a fun project that’s not just about eating but also about creating something cool and colorful, these Epic Lightsaber Pretzel Rods Dipped in Colored Candy Melts might just become your go-to. Trust me, they’re more than just a sweet snack; they’re a conversation starter and a crowd pleaser all rolled into one.
Why You’ll Love This Recipe
When it comes to whipping up something fun and tasty, these lightsaber pretzel rods hit all the marks. I’ve made these treats for all sorts of occasions, and here’s why they keep coming back:
- Quick & Easy: You can have these ready in about 30 minutes, perfect for last-minute party prep or a spontaneous movie night.
- Simple Ingredients: No need for fancy or hard-to-find items — just pretzel rods, candy melts, and a few optional toppings that you probably have around.
- Perfect for Themed Events: Whether it’s a birthday party, a sci-fi marathon, or just a fun weekend snack, they bring a playful vibe that fits right in.
- Crowd-Pleaser: Kids, adults, and those “not really a sweets person” types all tend to reach for seconds.
- Unbelievably Delicious: The crisp saltiness of the pretzel meets the creamy sweetness of the candy coating — a combo that’s seriously satisfying.
But what really sets this recipe apart is the way the candy melts coat the pretzel rods so smoothly, giving a flawless, glossy finish that looks like something from a candy shop. I prefer brands like Wilton or Ghirardelli for their melting quality and shine. Plus, the colors are vibrant and hold well without cracking, which makes these treats look as good as they taste.
This recipe isn’t just about replicating a snack; it’s about creating a little moment of fun and wonder. Each bite brings a bit of that lightsaber magic to your taste buds, and that’s what makes it stick with me every time.
What Ingredients You Will Need
These Epic Lightsaber Pretzel Rods rely on a handful of straightforward ingredients that come together to create a stunning and tasty treat. Here’s what you’ll want to gather:
- Pretzel Rods: Long, sturdy rods work best here — they hold the coating well and give you that nice crunch. Look for thin or medium thickness depending on your preference.
- Candy Melts: Colored candy melts in your choice of lightsaber colors — popular picks are blue, green, red, and purple. I usually go with Wilton’s candy melts because they melt evenly and have vibrant colors.
- Vegetable Oil or Coconut Oil (optional): Adding a teaspoon or two helps thin the candy melts for a smoother dip and glossy finish.
- Sprinkles or Edible Glitter (optional): For a little extra sparkle or texture, especially if you’re making these for a party or festive occasion.
- Wax Paper or Parchment Paper: To set the dipped pretzels without sticking.
These ingredients are all pantry-friendly and easy to find. If you want a dairy-free version, make sure your candy melts are vegan (some brands offer this), or swap with colored melting chocolate that fits your diet. For a gluten-free option, confirm that your pretzel rods don’t contain gluten or opt for gluten-free pretzels.
When it comes to colors, summer-themed parties might inspire you to try bright neon shades, but for a classic Star Wars vibe, stick to bold blues and reds. If you’re in a pinch, white chocolate melts with a few drops of food coloring can do the trick too.
Equipment Needed
Making these lightsaber pretzel rods doesn’t require fancy kitchen gadgets, which is part of the charm. Here’s what you’ll want on hand:
- Microwave-safe bowls or double boiler: For melting the candy melts. I prefer microwave bowls for speed, but a double boiler gives more control over temperature.
- Wooden skewers or chopsticks: Helpful for swirling and lifting the pretzels out of the candy melts without making a mess.
- Baking sheet or tray: To lay out the coated pretzels while they set.
- Wax paper or parchment paper: To prevent sticking as the candy hardens.
- Tongs or a fork: Optional — can be handy if you’re dipping several rods at once.
If you don’t have candy melt-specific bowls, any heat-safe glass or ceramic bowl will do. I’ve found that silicone spatulas are great for stirring melted candy without scratching bowls. Also, keep a damp cloth nearby for quick cleanups — candy melts can be sticky business!
Preparation Method
- Prepare Your Workspace: Line a baking sheet with wax or parchment paper. This will be your drying station for the dipped pretzels. Arrange your pretzel rods on a plate or tray nearby for easy access.
- Melt the Candy Melts: Place about 1 cup (150g) of candy melts into a microwave-safe bowl. Add 1 teaspoon of vegetable or coconut oil to help with smoothness and shine. Microwave in 30-second bursts, stirring in between, until fully melted and glossy. If using a double boiler, stir gently over simmering water.
- Dip the Pretzel Rods: Holding a pretzel rod near the end, dip it into the melted candy about two-thirds of the way down. I like to give it a little twist while pulling it out to create an even coating. Let excess drip back into the bowl — this usually takes about 10 seconds.
- Optional Decoration: While the candy coating is still wet, sprinkle your chosen decorations like edible glitter or colored sugar. For a clean, classic look, skip this step.
- Set the Pretzels: Place each dipped pretzel rod on the prepared lined baking sheet. Space them apart so they don’t stick together. Let them sit at room temperature until the candy hardens, which usually takes 15-20 minutes. If you’re impatient (like me!), pop them in the fridge for about 10 minutes.
- Repeat for Additional Colors: Clean your dipping bowl or use separate bowls for different colored melts. Repeat the dipping and decorating process until all your lightsaber pretzels are done.
- Final Touches: Once set, you can wrap them individually in clear cellophane for gifting or store them in an airtight container for later snacking.
Pro tip: If the candy melts start to thicken during your dipping session, just warm them briefly again in the microwave. It’s normal for melted candy to cool quickly, so keep an eye on the texture. Also, dipping pretzels on the thinner side helps prevent breakage and gives a nice candy-to-pretzel ratio.
Cooking Tips & Techniques
There are a few little tricks I’ve picked up over the many batches of these pretzel rods that help make the process smoother and the final treat neater.
- Don’t Overheat Candy Melts: Microwave in short bursts and stir often. Overheating can cause the candy to seize or become grainy, which ruins that smooth, shiny finish.
- Oil Makes a Difference: Adding a teaspoon of vegetable or coconut oil thins the candy melts just enough to coat evenly without being runny. Skip this, and your coating might be thick or patchy.
- Work Quickly: Candy melts set fast once removed from heat. Have your pretzels ready and decorations nearby so you can dip and decorate without rushing.
- Use a Gentle Twist: Twisting the pretzel rod slightly as you pull it out of the candy melt helps prevent drips and creates a smoother finish.
- Temperature Control: If your kitchen is warm, candy melts might not set quickly. Use the fridge as a shortcut to harden them faster, but don’t leave them too long or condensation can form.
- Storage Matters: Keep your finished pretzels in a cool, dry place. High humidity can cause the candy shell to soften or stick.
One time, I left my dipped rods out overnight in a humid kitchen, and the candy shell turned a little tacky. Lesson learned! Now I always package them up or refrigerate if it’s a muggy day. Also, if you want to combine this with other snacks, I highly recommend pairing these lightsaber rods with a batch of Delicious Scotcheroos for a sweet-and-salty combo that’s out of this galaxy.
Variations & Adaptations
These pretzel rods are like a blank canvas for all sorts of fun ideas. Here are a few ways I’ve played around with the recipe:
- Flavor Twists: Mix in flavored candy melts like mint, caramel, or strawberry to add a subtle taste surprise beyond the classic colors.
- Nutty Coating: After dipping, roll the pretzels lightly in crushed nuts or toffee bits for extra crunch and flavor complexity.
- Gluten-Free Version: Use gluten-free pretzel rods and check that candy melts are allergen safe. This makes a great option for school parties or friends with dietary needs.
- Seasonal Themes: Swap the colors for holidays — orange and black for Halloween, red and green for Christmas, or pastels for Easter. The method stays the same, but the vibe changes instantly.
- Mini Lightsabers: Use pretzel sticks instead of rods for bite-sized versions that are perfect for kids or smaller servings.
Personally, I once tried dipping the rods in white chocolate then swirling in blue gel coloring for a galaxy effect. It was a bit messy but looked amazing. For a savory twist, I’ve seen people drizzle a bit of dark chocolate over the candy coating for contrast. If you want to try a different snack with a similar candy melt technique, you might enjoy tender snickerdoodle cookies coated in candy melts — they bring a whole new level of cozy.
Serving & Storage Suggestions
Serving these lightsaber pretzel rods is half the fun. I like to arrange them standing upright in a tall jar or laid out on a platter where the colors can really pop. They’re best served at room temperature so the candy coating has that satisfying snap.
They make excellent party favors or additions to a dessert table, especially when wrapped individually in clear cellophane tied with a ribbon. For a casual movie night snack, just pile them on a plate and watch them disappear fast.
When it comes to storage, keep your pretzels in an airtight container at room temperature in a cool, dry place. They’ll stay fresh and crunchy for up to a week. If you want to keep them longer, store in the fridge but bring to room temperature before serving so the candy shell regains its crisp texture.
Reheating isn’t necessary, but if the candy coating gets sticky, a quick chill in the fridge helps reset it. Over time, the flavors meld a bit — the saltiness from the pretzel deepens, and the candy sweetness softens slightly, making each bite more balanced.
Nutritional Information & Benefits
While these pretzel rods are definitely a treat, they do have some nutritional perks thanks to the pretzels. Each rod typically contains around 120-150 calories, depending on the amount of candy coating.
Pretzels provide a bit of sodium and carbohydrates for quick energy, and candy melts add sugar and fat for that indulgent taste. This snack isn’t exactly a health food, but it’s a fun occasional treat that can brighten up any gathering.
If you’re mindful of allergens, note that some candy melts may contain dairy or soy, and traditional pretzels usually have gluten. For a gluten-free or vegan version, check ingredient labels carefully or swap with suitable alternatives.
I like to balance treats like these with some protein smoothies from time to time, like the ones found in this protein smoothie guide. It keeps my snack game balanced and guilt-free.
Conclusion
These Epic Lightsaber Pretzel Rods Dipped in Colored Candy Melts have become a little slice of joy in my kitchen, combining simplicity with a playful twist that anyone can make. They’re easy to customize, fun to decorate, and just the right mix of sweet and salty.
Whether you’re crafting them for a themed party, a casual snack, or a fun project with kids, they bring a unique kind of delight that’s hard to beat. I always encourage trying different colors and decorations to make them your own — that’s part of the fun!
If you give this recipe a shot, I’d love to hear how your lightsaber pretzels turned out or what creative spins you added. Sharing those moments makes cooking even better.
So, grab your pretzels, melt some candy, and may your snack table be as legendary as a galactic battle.
FAQs About Epic Lightsaber Pretzel Rods
Can I use regular chocolate instead of candy melts?
Regular chocolate can work, but it’s trickier to melt and won’t harden as smoothly or quickly as candy melts. Adding a bit of oil helps, but candy melts are designed for coatings and give a better finish.
How long do these pretzel rods stay fresh?
Stored in an airtight container at room temperature, they stay fresh for about a week. Refrigeration can extend this but may cause slight condensation on the candy shell.
Can I make these lightsaber pretzels ahead of time?
Absolutely! You can prepare them a day or two in advance. Just keep them stored well to maintain crispness and color vibrancy.
What’s the best way to avoid the candy coating cracking?
Don’t dip pretzels when the candy is too thick or cold. Make sure the candy melts are smooth and warm, and let the pretzels set at room temperature or in the fridge to harden gently.
Are these pretzel rods suitable for kids?
Yes, they’re great for kids — fun to eat and colorful to look at. Just be mindful of any allergies or choking hazards with younger children.
Pin This Recipe!
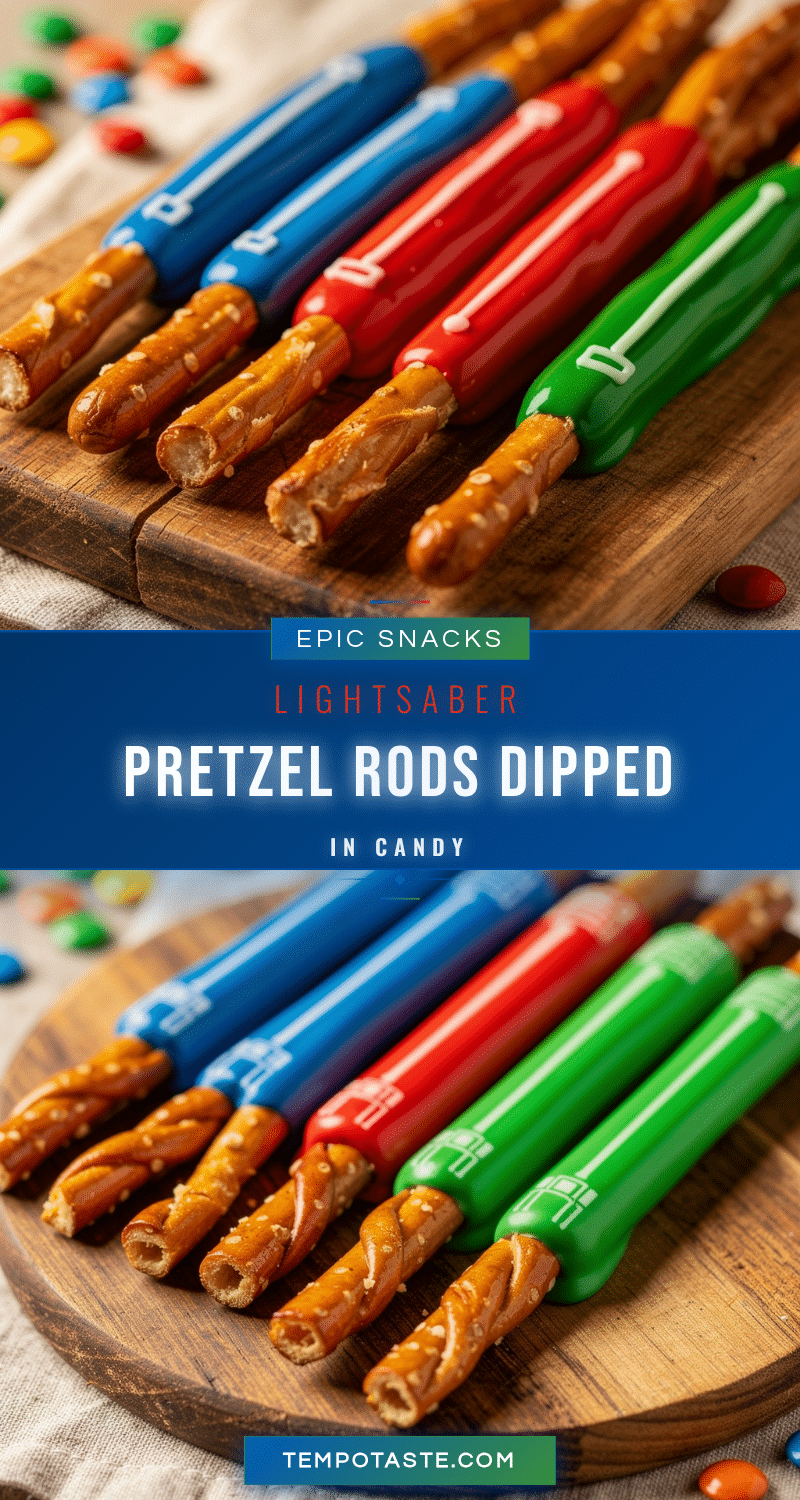
Epic Lightsaber Pretzel Rods Recipe Easy Homemade Candy Melt Treats

These colorful pretzel rods dipped in vibrant candy melts create a fun, sweet and salty treat perfect for themed parties or casual snacks. Easy to make and customizable, they bring a playful twist to any snack table.
- Prep Time: 10 minutes
- Cook Time: 20 minutes
- Total Time: 30 minutes
- Yield: 12 pretzel rods 1x
- Category: Snack
- Cuisine: American
Ingredients
- Pretzel rods (long, sturdy, thin or medium thickness)
- Colored candy melts (blue, green, red, purple, or other colors)
- 1–2 teaspoons vegetable oil or coconut oil (optional, for thinning candy melts)
- Sprinkles or edible glitter (optional, for decoration)
- Wax paper or parchment paper (for setting dipped pretzels)
Instructions
- Line a baking sheet with wax or parchment paper to create a drying station.
- Arrange pretzel rods on a plate or tray for easy access.
- Place about 1 cup (150g) of candy melts into a microwave-safe bowl.
- Add 1 teaspoon of vegetable or coconut oil to the candy melts to help with smoothness and shine.
- Microwave in 30-second bursts, stirring in between, until fully melted and glossy. Alternatively, melt using a double boiler over simmering water.
- Hold a pretzel rod near the end and dip it about two-thirds of the way into the melted candy.
- Twist the pretzel rod slightly while pulling it out to create an even coating and let excess drip back into the bowl (about 10 seconds).
- If desired, sprinkle decorations like edible glitter or colored sugar while the coating is still wet.
- Place each dipped pretzel rod on the prepared baking sheet, spacing them apart to prevent sticking.
- Let the pretzels sit at room temperature until the candy hardens, about 15-20 minutes. Alternatively, chill in the fridge for about 10 minutes to speed up setting.
- Repeat dipping and decorating for additional colors, cleaning the bowl or using separate bowls as needed.
- Once set, wrap pretzels individually in clear cellophane for gifting or store in an airtight container.
Notes
Do not overheat candy melts to avoid grainy texture. Adding oil thins candy melts for a smooth coating. Work quickly as candy sets fast. Use fridge to speed up setting but avoid condensation. Store in airtight container in a cool, dry place for up to a week. For gluten-free or vegan versions, use appropriate pretzels and candy melts.
Nutrition
- Serving Size: 1 pretzel rod
- Calories: 135
- Sugar: 15
- Sodium: 250
- Fat: 5
- Saturated Fat: 3
- Carbohydrates: 22
- Fiber: 1
- Protein: 2
Keywords: lightsaber pretzel rods, candy melts, homemade candy, party treats, Star Wars snack, easy candy recipe, colorful pretzels, kids treats


