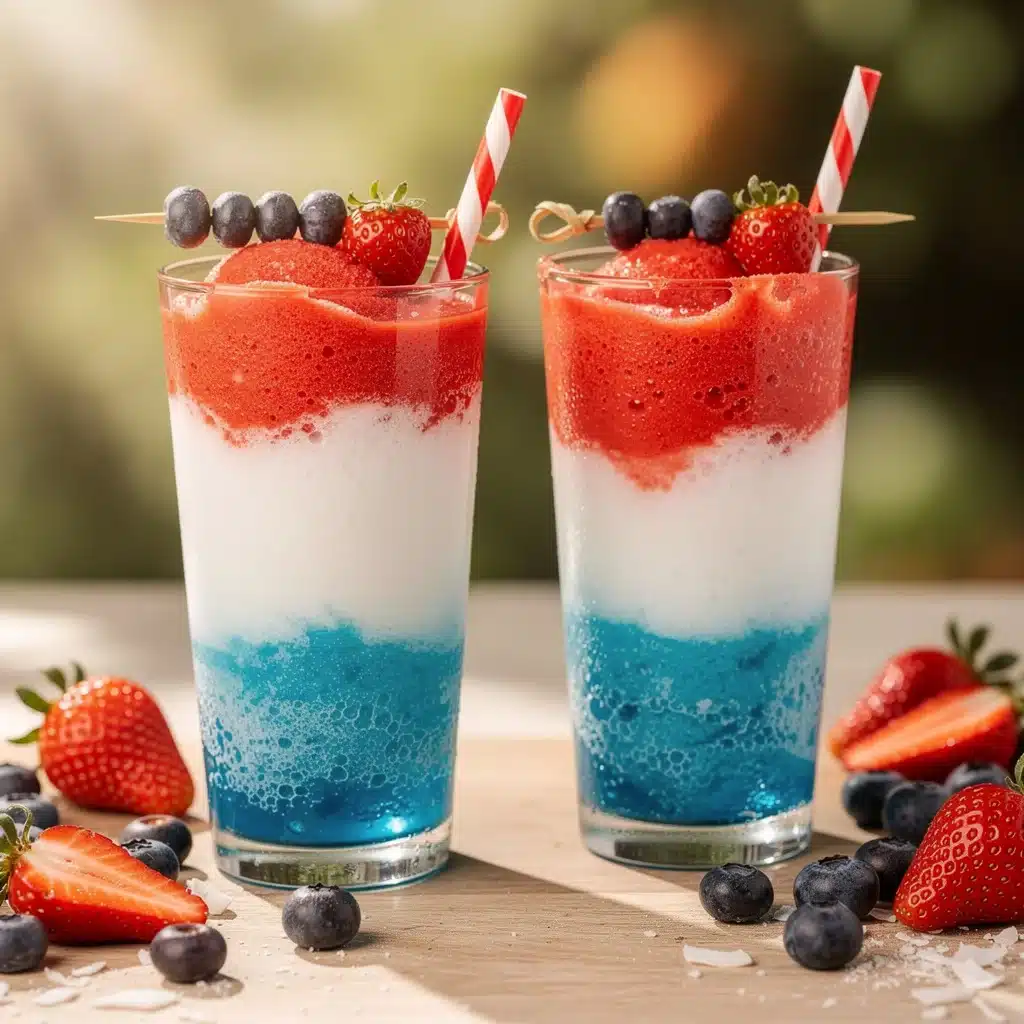
“You’ve got to try this—it’s like summer in a glass,” my neighbor said one blazing afternoon when I was dragging myself through the heat, desperate for something to cool down with. Honestly, I was skeptical. A daiquiri sounded fancy, and frozen? I imagined a sticky mess or some complicated blender ritual. But then she handed me this tall, vibrant drink with layers of red, white, and blue fruit swirling like a tiny flag. The first sip hit me with a burst of tangy strawberries, smooth coconut, and a whisper of blueberry sweetness. I was hooked.
That day, the Refreshing Red White and Blue Frozen Daiquiri with Layered Fruit became my go-to for backyard hangouts and last-minute celebrations. I’ve probably made it more times than I can count this summer alone—sometimes for just me, other times to impress a crowd (it always works). What’s wild is how simple it is to pull off, despite looking like a cocktail crafted by a pro mixologist. The layers? They settle just right if you’re patient, and the blend of fresh fruit makes it feel both indulgent and light. It’s that kind of recipe that surprises you with how easy it is yet feels like a little party, you know?
One quiet realization after many tries: this daiquiri isn’t just about the colors or the chill factor. It’s about capturing a moment—that sticky-sweet heat, the buzz of a laugh, friends dropping by unexpectedly, and that perfect sip that cools you down and lifts your spirits. It sticks around because it’s honest, uncomplicated, and just plain fun to make. If you’re ever in need of a drink that brings a burst of color and fresh flavor without fuss, this is the one you’ll want to reach for.
Why You’ll Love This Recipe
Having made this Refreshing Red White and Blue Frozen Daiquiri more times than I care to admit, I can say it’s a real crowd-pleaser and a quick fix for hot days or festive occasions. Here’s why it stands out:
- Quick & Easy: You can whip this up in under 15 minutes, which means no long waits or complicated steps when the party’s already started.
- Simple Ingredients: Most of the ingredients are staples or easy to find—fresh or frozen fruit, white rum, and a touch of lime juice. No need for specialty stores.
- Perfect for Summer Gatherings: Whether it’s a 4th of July BBQ, a backyard brunch, or just a casual hangout, this daiquiri fits the bill with its patriotic vibe and refreshing taste.
- Crowd-Pleaser: Kids love the fruity layers (minus the rum, of course), and adults appreciate the balance of sweet and tart with a boozy kick.
- Unbelievably Delicious: The way the layered fruit blends with the frozen ice creates a silky, smooth texture that feels luxurious but never heavy.
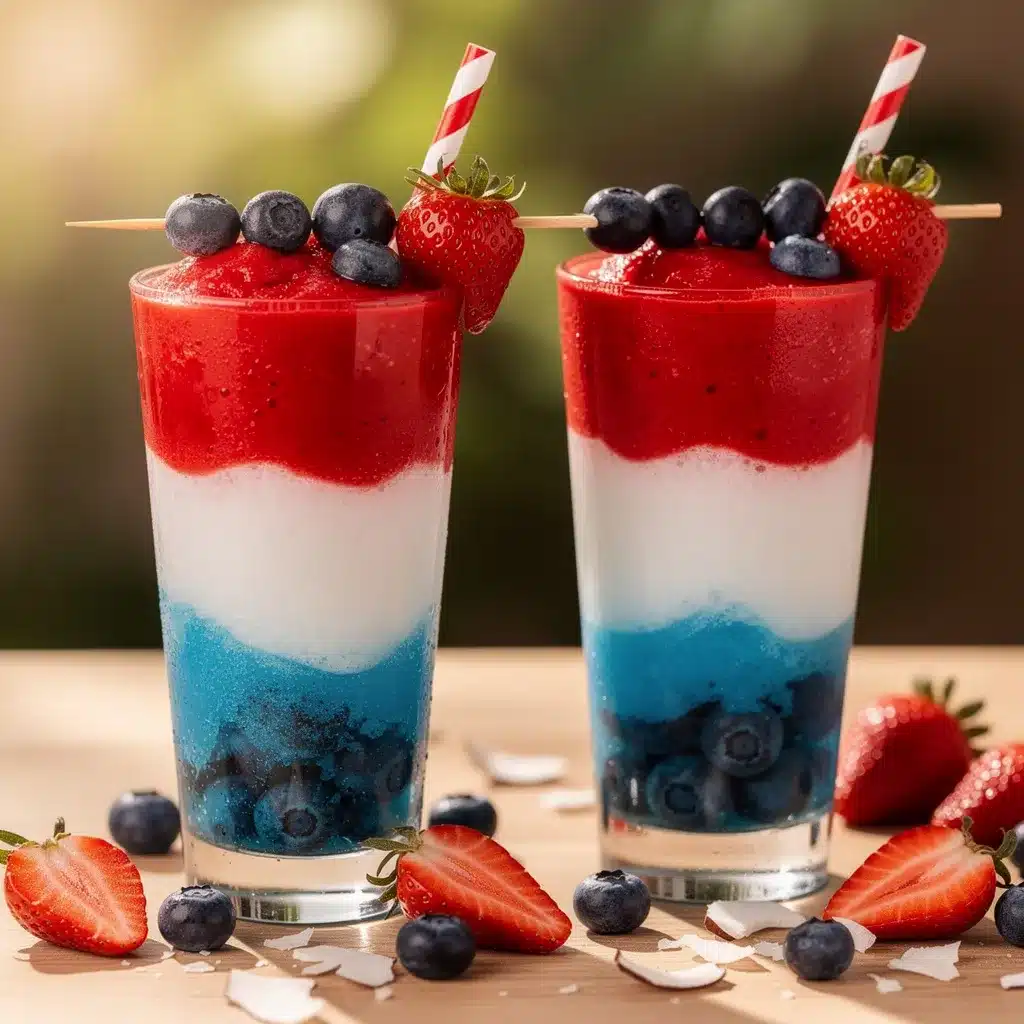
What makes this recipe different? I’ve found that layering the fruit puree separately rather than mixing everything together gives it a stunning visual appeal and allows each flavor to shine. Plus, I like blending a little coconut milk into the white layer for creaminess without overpowering the fresh fruit taste. It’s a subtle twist that makes the drink feel a bit more special—like a cocktail that knows how to have fun but won’t get in your face.
This drink isn’t just a recipe; it’s the kind that makes you pause after the first sip, savoring the cool, fruity notes that bring a little slice of summer no matter the month. Whether you’re hosting a get-together or just craving a splash of color on a quiet night, this daiquiri has the kind of charm that keeps you coming back.
What Ingredients You Will Need
This Refreshing Red White and Blue Frozen Daiquiri relies on straightforward, fresh ingredients to create its bold colors and flavors without fuss. Here’s what you’ll gather for each layer:
- Red Layer:
- Fresh or frozen strawberries (about 1 cup / 150g) – ripe and sweet for that vibrant red color
- 1 tablespoon granulated sugar or honey (adjust to taste)
- Juice of half a lime (adds brightness)
- White Layer:
- Coconut milk (1/2 cup / 120ml) – for creaminess and a tropical twist
- 1 tablespoon powdered sugar or to taste (balances the tartness)
- 1/4 cup white rum (60ml) – optional but recommended for adults
- Blue Layer:
- Fresh or frozen blueberries (1 cup / 150g) – choose plump, juicy berries
- 1 tablespoon sugar or honey
- Juice of half a lime
- Ice:
- 3 cups crushed ice (about 450g) – key to that frozen daiquiri texture
- Garnishes (optional):
- Fresh mint leaves
- Strawberry slices or whole blueberries
- Lime wedges
I usually pick out frozen berries when fresh ones aren’t in season because they freeze well and blend into that perfect icy slush. I’ve had great luck with Driscoll’s for strawberries and blueberries—they seem to hit just the right sweetness. If you want a dairy-free option, the coconut milk does all the creamy work here, so no heavy cream needed.
One tip: if your berries are tart, a little extra honey or sugar in the blender does wonders to balance the flavors without making the drink overly sweet. And if rum isn’t your thing, you can skip it or swap for a non-alcoholic spirit or soda water to keep it light but festive.
Equipment Needed
To make this layered frozen daiquiri, you don’t need a fancy bar setup, but a few key tools help make the process smooth and fun:
- High-Speed Blender: Essential for pureeing the fruit into a smooth, frozen slush. I recommend a Vitamix or Ninja if you have one, but any blender with decent power works.
- Measuring Cups and Spoons: For precise quantities so each layer tastes balanced.
- Jars or Clear Glasses: Wide-mouth glasses help show off the gorgeous layered effect. Small mason jars work great for serving.
- Spoons or Small Ladles: Helpful for carefully layering each fruit puree without mixing the colors.
- Ice Crusher or Crushed Ice: If your blender can’t crush ice well, pre-crushing ice ensures the right frozen texture.
If you don’t have a high-speed blender, freezing the fruit beforehand and blending in small batches helps get that slushy texture. For layering, patience is key—pour slowly and let each layer settle for 1-2 minutes before adding the next. If you want to keep things budget-friendly, even a good food processor and a sturdy spoon can do the trick.
Preparation Method
- Prepare the Red Strawberry Layer: In your blender, combine 1 cup strawberries, 1 tablespoon sugar, juice of half a lime, and 1 cup crushed ice (150g). Blend until smooth and slushy, about 30 seconds. Pour into your glass or jar, filling about one-third of the way. Set aside and chill in the freezer for 2-3 minutes to firm up slightly.
- Mix the White Coconut Layer: Rinse your blender or use a clean one. Blend 1/2 cup coconut milk, 1 tablespoon powdered sugar, 1/4 cup white rum (optional), and 1 cup crushed ice until creamy and smooth, about 30 seconds. Slowly pour this layer over the back of a spoon onto the strawberry layer to avoid mixing. Chill again for 2-3 minutes to help it set.
- Create the Blueberry Layer: Clean the blender again. Blend 1 cup blueberries, 1 tablespoon sugar, juice of half a lime, and 1 cup crushed ice until smooth and icy, about 30 seconds. Slowly pour over the white layer using the spoon technique.
- Garnish and Serve: Add a sprig of mint, a strawberry slice, or a few blueberries on top. Serve immediately with a straw or a festive stirrer.
Preparation Notes: Pouring slowly and chilling between layers is key to getting the visual pop of red, white, and blue instead of a blended mess. If your layers start to run together, a quick chill in the freezer firms them up nicely.
This layered daiquiri can be prepped a little ahead—just wait to add the blue layer and garnish until right before serving for the best look and flavor. It’s a small detail, but it makes a big difference!
Cooking Tips & Techniques
Making this frozen daiquiri with layered fruit is easier than it looks once you get the hang of a few simple tricks. Here’s what I’ve learned along the way:
- Use Frozen Fruit When Possible: It helps achieve that icy texture without watering down the drink. If you only have fresh fruit, add more ice but blend carefully to avoid a soupy mix.
- Sweetness Balance: Test your fruit’s natural sweetness before blending. Sometimes berries can be tart, so adjust sugar or honey gradually to avoid an overly sweet drink.
- Layering Technique: Pour each layer slowly over the back of a spoon to keep the layers distinct. Patience here pays off visually.
- Chill Between Layers: Freeze or refrigerate the glass between pours for 2-3 minutes. This helps set each layer so they don’t mix.
- Blender Tips: Blend in short pulses to avoid overheating the motor and to keep the ice from melting too fast. If you see liquid pooling, add a bit more ice.
I remember my first attempt ended up looking like a purple-pink mess because I rushed the layering. Letting the glass sit was a game-changer. Also, a tiny splash of lime juice in each layer brightens the flavors and keeps the drink refreshing rather than cloying.
Multitasking tip: While the first layer chills, prep your next fruit mix. This way, you’re not standing around waiting, and the whole process feels smooth and fun.
Variations & Adaptations
This recipe is flexible, so you can make it fit your mood, dietary needs, or the occasion. Here are some ideas:
- Non-Alcoholic Version: Skip the rum and add a splash of sparkling water or lemon-lime soda to the white layer for fizz and freshness. Perfect for family-friendly gatherings.
- Seasonal Fruit Swaps: In late summer, swap the blueberries for blackberries or raspberries for a deeper berry flavor. You can also replace strawberries with fresh peaches for a summery twist.
- Low-Sugar Option: Use stevia or monk fruit sweetener instead of sugar. Also, try Greek yogurt blended into the white layer instead of coconut milk for protein and tang.
- Herbal Infusion: Add a few fresh basil leaves to the strawberry layer or muddle mint into the blueberry layer for a fresh aromatic note.
- Frozen Fruit Cubes: Freeze small berries or fruit pieces in ice cubes and add them to the glass for extra flair and slow flavor release.
Personally, I once swapped rum for tequila and added a splash of fresh lime juice—turned out to be a fun twist for a Cinco de Mayo party. It kept the layered look but gave it a slightly bolder edge.
Serving & Storage Suggestions
This daiquiri is best served immediately, when it’s icy and the layers are crisp and distinct. Serve it in clear glasses to show off those beautiful red, white, and blue layers. Garnishes like a lime wedge or fresh berries add a nice touch and a little extra flavor boost.
Pair it with light appetizers or snacks—something like a fresh shrimp cocktail or a simple cheese platter works well. If you’re into snacks with a bit of crunch, the crispy ultimate gooey cheese pull snacks would be an indulgent sidekick to this drink’s chill vibe.
If you need to store it, keep each layer separate in airtight containers and freeze. When ready, thaw slightly and layer as usual. Avoid storing the fully assembled drink because the layers will blend and lose that signature look.
Reheat by letting the containers sit at room temperature for 5-10 minutes before blending again with fresh ice. The flavors mellow a bit overnight, making it even smoother, but the colors lose their punch, so fresh is best for presentation.
Nutritional Information & Benefits
This frozen daiquiri is a relatively light cocktail, with most calories coming from the rum and natural sugars in the fruit. Here’s a rough estimate per serving (about 8 oz / 240 ml):
| Calories | ~180-220 kcal |
|---|---|
| Carbohydrates | 20-25g (mostly from fruit sugars) |
| Fat | 3-5g (from coconut milk) |
| Protein | 1-2g |
| Alcohol | ~60ml white rum (if included) |
The fresh fruit layers pack antioxidants, vitamin C, and fiber, while coconut milk contributes healthy fats that give the drink a creamy mouthfeel without dairy. If you skip the rum, it’s a refreshing, nutrient-dense smoothie alternative.
This recipe is naturally gluten-free and can be made low-carb by reducing sugar or swapping with keto-friendly sweeteners. Be mindful if you have nut allergies, as some coconut milk brands may be processed in shared facilities.
From a wellness perspective, this drink hits a sweet spot—fun and festive but with real fruit benefits and no artificial colors or flavors. It’s a reminder that indulgence doesn’t have to mean empty calories or complicated ingredients.
Conclusion
The Refreshing Red White and Blue Frozen Daiquiri with Layered Fruit is more than just a pretty cocktail—it’s a simple, fun way to celebrate any summer moment or holiday with style. Its ease of preparation and vibrant layers make it a standout, whether you’re entertaining guests or just craving a cool treat after a long day.
Feel free to tweak the fruit, sweetness, or alcohol level to match your taste and occasion. I love how flexible this recipe is; it invites you to play with flavors while keeping the core refreshing vibe intact. Honestly, it’s become a little ritual for me during those hot afternoons when I want something that feels special but doesn’t require hours of effort.
If you try it out, I’d love to hear how you made it your own—comments, questions, or your favorite twists are always welcome. Here’s to colorful sips, good company, and those moments that deserve a touch of celebration.
Frequently Asked Questions
Can I make this daiquiri without alcohol?
Absolutely! Simply leave out the rum and add a splash of sparkling water or lemon-lime soda to the white layer for a refreshing, kid-friendly version.
How do I get the layers to stay separated?
Pour each layer slowly over the back of a spoon and chill the glass in the freezer for 2-3 minutes between layers. This helps the layers set before adding the next one.
Can I use fresh fruit instead of frozen?
Yes, but add extra crushed ice to maintain the frozen texture. Blending fresh fruit alone can result in a thinner, less icy drink.
How far in advance can I prepare this drink?
It’s best to blend and layer just before serving. However, you can prepare and freeze each fruit puree separately up to 24 hours ahead and assemble later.
What can I serve with this frozen daiquiri?
Light appetizers like shrimp cocktails, fresh salads, or snacks such as pantry cleanout dinner ideas complement this drink well, balancing its fruity sweetness and refreshing chill.
Pin This Recipe!
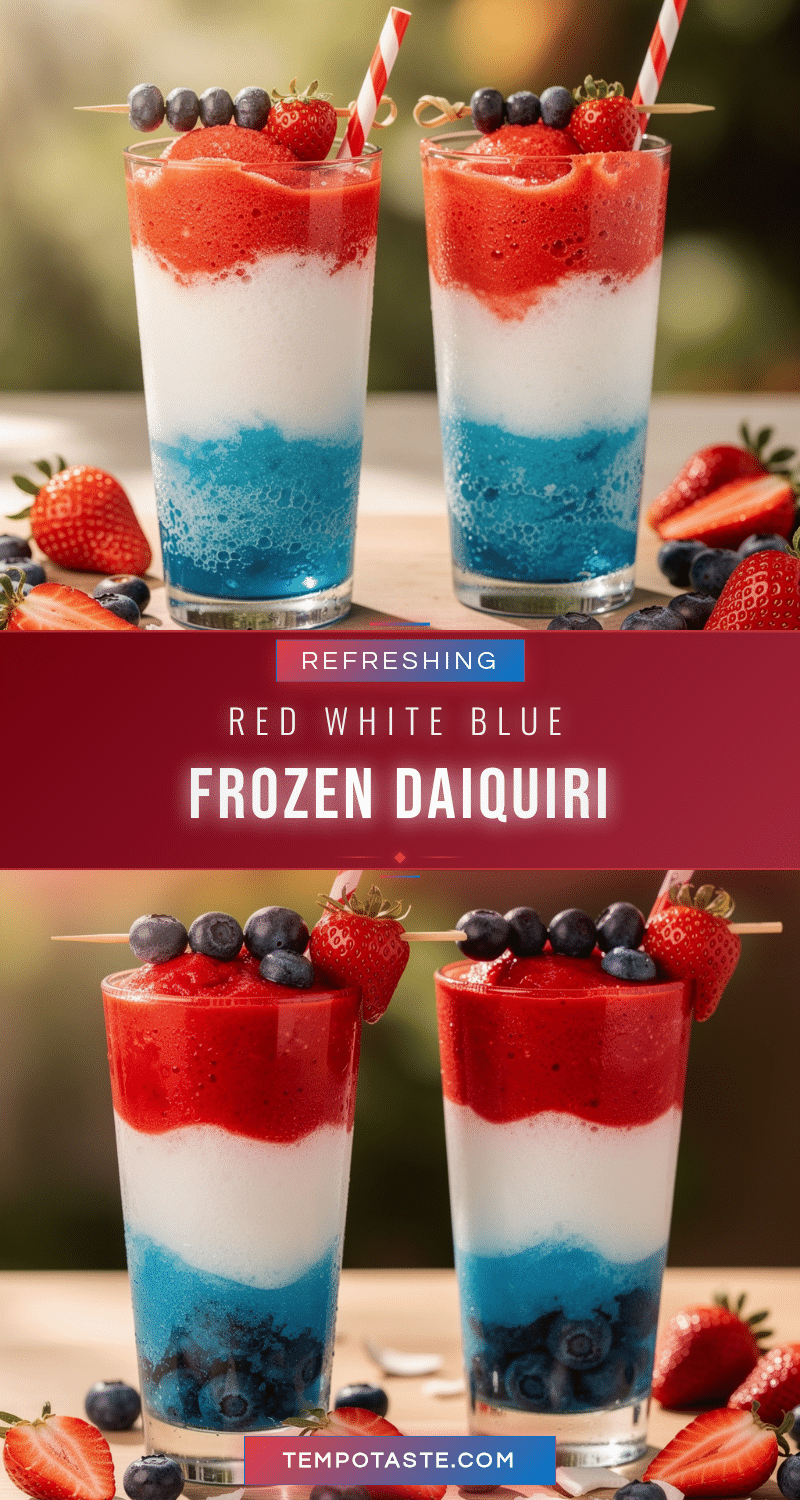
Refreshing Red White and Blue Frozen Daiquiri Recipe Easy Layered Fruit Drink

A vibrant, layered frozen daiquiri featuring red strawberries, creamy coconut milk, and blue blueberries, perfect for summer gatherings and festive occasions. This easy-to-make cocktail offers a refreshing burst of fruity flavors with a smooth, icy texture.
- Prep Time: 10 minutes
- Cook Time: 0 minutes
- Total Time: 10 minutes
- Yield: 2 servings 1x
- Category: Beverage
- Cuisine: American
Ingredients
- 1 cup fresh or frozen strawberries (about 150g)
- 1 tablespoon granulated sugar or honey (adjust to taste)
- Juice of half a lime
- 1/2 cup coconut milk (120ml)
- 1 tablespoon powdered sugar (or to taste)
- 1/4 cup white rum (60ml) – optional
- 1 cup fresh or frozen blueberries (about 150g)
- 1 tablespoon sugar or honey
- Juice of half a lime
- 3 cups crushed ice (about 450g)
- Optional garnishes: fresh mint leaves, strawberry slices or whole blueberries, lime wedges
Instructions
- Prepare the Red Strawberry Layer: In your blender, combine 1 cup strawberries, 1 tablespoon sugar, juice of half a lime, and 1 cup crushed ice (about 150g). Blend until smooth and slushy, about 30 seconds. Pour into your glass or jar, filling about one-third of the way. Set aside and chill in the freezer for 2-3 minutes to firm up slightly.
- Mix the White Coconut Layer: Rinse your blender or use a clean one. Blend 1/2 cup coconut milk, 1 tablespoon powdered sugar, 1/4 cup white rum (optional), and 1 cup crushed ice until creamy and smooth, about 30 seconds. Slowly pour this layer over the back of a spoon onto the strawberry layer to avoid mixing. Chill again for 2-3 minutes to help it set.
- Create the Blueberry Layer: Clean the blender again. Blend 1 cup blueberries, 1 tablespoon sugar, juice of half a lime, and 1 cup crushed ice until smooth and icy, about 30 seconds. Slowly pour over the white layer using the spoon technique.
- Garnish and Serve: Add a sprig of mint, a strawberry slice, or a few blueberries on top. Serve immediately with a straw or a festive stirrer.
Notes
Pour each layer slowly over the back of a spoon and chill the glass in the freezer for 2-3 minutes between layers to keep layers distinct. Use frozen fruit when possible for best icy texture. Adjust sweetness to taste. The rum is optional and can be omitted or replaced with non-alcoholic alternatives for a kid-friendly version. Prepare and freeze each fruit puree separately up to 24 hours ahead if needed. Serve immediately for best presentation.
Nutrition
- Serving Size: About 8 oz (240 ml)
- Calories: 180220
- Fat: 35
- Carbohydrates: 2025
- Protein: 12
Keywords: frozen daiquiri, layered cocktail, summer drink, red white and blue, patriotic drink, frozen fruit drink, easy cocktail, backyard party drink


