“Are you sure you want to make pop-tarts from scratch?” my friend asked with a raised eyebrow the first time I mentioned it. Honestly, I thought the same. I’d always bought those colorful, sugary little parcels from the grocery store, never imagining that homemade ones could be just as easy—or tastier. But one groggy Saturday morning, when the usual breakfast options felt uninspired and the cereal box was suspiciously near empty, I decided to give it a shot. I wasn’t expecting much, just a quick fix that might fill the kitchen with something warm and cozy.
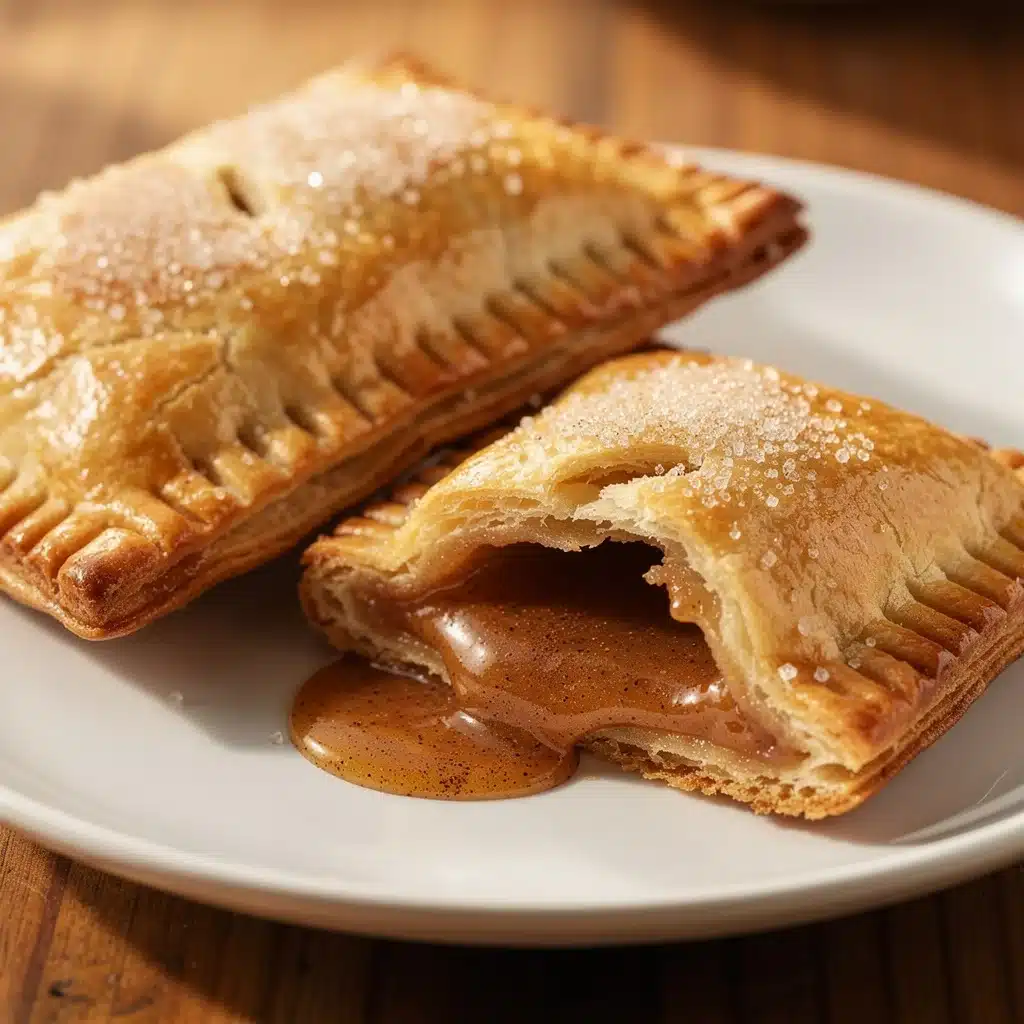
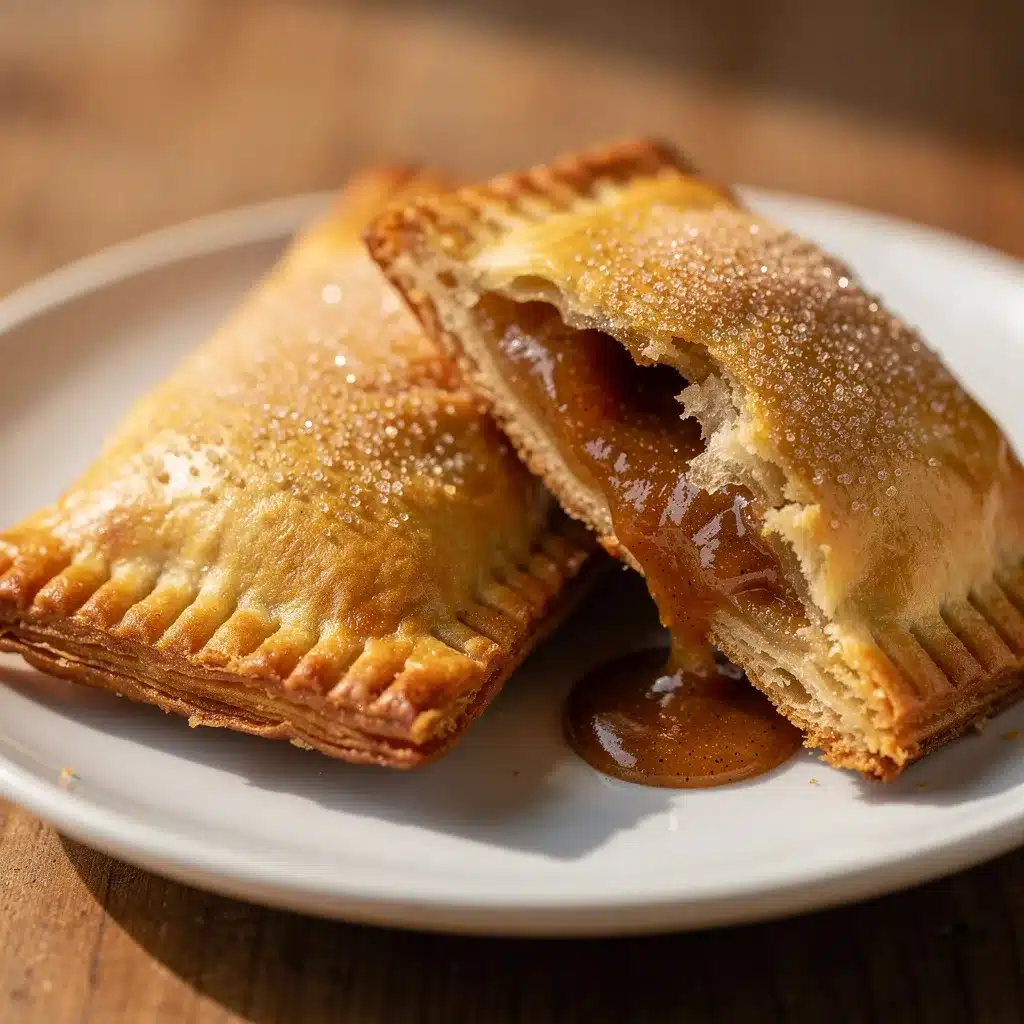
What happened next was a kind of quiet surprise. The smell of brown sugar and cinnamon melting into buttery pastry was almost addictive, pulling me back to childhood mornings but with a grown-up twist. It became that easy homemade pop-tarts recipe with brown sugar cinnamon filling that I found myself making again and again—not because I had to, but because it felt like a little treat that could make any morning better. This recipe stuck with me not just for its simplicity, but because it’s the kind of comfort food that’s homemade, honest, and just a bit nostalgic without being fussy.
It’s funny how sometimes the simplest things—like a warm pop-tart fresh from your own oven—can turn a meh morning into something quietly satisfying. And now, I’m sharing it here, hoping you’ll find that same little spark of everyday joy in your kitchen.
Why You’ll Love This Recipe
This easy homemade pop-tarts with brown sugar cinnamon filling recipe has quickly become a staple in my breakfast rotation—and here’s why you might feel the same:
- Quick & Easy: Ready in under 40 minutes from start to finish, perfect for those mornings when you want something special without the hassle.
- Simple Ingredients: No need for fancy or hard-to-find items; everything’s likely already in your pantry or fridge.
- Perfect for Breakfast or Snack: Whether it’s a cozy weekend treat or a quick grab-and-go option during busy weekdays, these pop-tarts hit the spot.
- Crowd-Pleaser: Kids, adults, and that one picky eater in your life all tend to ask for seconds.
- Unbelievably Delicious: The combination of buttery crust and that gooey brown sugar cinnamon filling is a little bit magical—comfort food that doesn’t feel heavy.
What sets this recipe apart is the filling—it’s not just cinnamon sugar tossed together; the brown sugar adds a deep caramel note that plays so well with the flaky pastry. Plus, I’ve kept the crust tender but sturdy enough to hold all that sweetness without getting soggy. It’s the kind of recipe that feels like a treat but doesn’t take all morning to make. Honestly, it’s the little win when you want homemade without all the fuss.
Also, if you’re into breakfast ideas that aren’t typical, you might enjoy pairing these pop-tarts with a creamy protein smoothie like the ones I shared in my healthy easy creamy protein smoothies for weight loss recipes—a nice way to balance indulgence with something nourishing.
What Ingredients You Will Need
This recipe uses simple, wholesome ingredients to deliver bold flavor and satisfying texture without the fuss. Most are pantry staples, and you can easily tweak a few based on what you have on hand.
- For the Pastry:
- All-purpose flour (2 ½ cups / 312 g) – I prefer King Arthur flour for consistent texture
- Unsalted butter (1 cup / 227 g), chilled and cubed – using cold butter is key for flaky layers
- Granulated sugar (2 tbsp) – just a touch to slightly sweeten the crust
- Salt (½ tsp) – balances the sweetness
- Ice water (6-8 tbsp) – add gradually to bring the dough together without it getting sticky
- For the Brown Sugar Cinnamon Filling:
- Brown sugar, packed (½ cup / 110 g) – light or dark, both work well; dark gives a richer flavor
- Ground cinnamon (1 tbsp) – fresh ground if you can, it makes a difference
- Ground nutmeg (¼ tsp) – optional but adds warmth
- Unsalted butter (2 tbsp), melted – helps bind the filling and adds richness
- For the Glaze (Optional):
- Powdered sugar (1 cup / 120 g)
- Milk or cream (2-3 tbsp) – more if needed for desired consistency
- Vanilla extract (½ tsp)
If you want to swap in almond flour for a gluten-free crust, that works too, but expect a slightly different texture. Also, feel free to use dairy-free butter and milk alternatives if needed to make this recipe vegan-friendly. I’ve found that using firm, unsalted butter really helps the crust hold up under the filling without getting soggy, so that’s my go-to recommendation.
Equipment Needed
Making homemade pop-tarts is surprisingly straightforward, and you don’t need anything too fancy in your kitchen to pull it off.
- Mixing bowls – a large one for the dough and a smaller one for the filling
- Rolling pin – if you don’t have one, a clean wine bottle works in a pinch
- Baking sheet – lined with parchment paper or a silicone mat to prevent sticking
- Sharp knife or pizza cutter – for cutting the dough into neat rectangles
- Fork – perfect for crimping the edges and adding that classic pop-tart look
- Measuring cups and spoons – accuracy makes a difference with pastry
If you don’t have a rolling pin or want to keep it low-budget, just press the dough into shape with your fingers, though rolling really helps get that thin, even crust. Also, I’ve found that a silicone baking mat makes cleanup easier and helps the pop-tarts bake evenly without burning the bottoms.
Preparation Method
- Make the dough: In a large bowl, whisk together 2 ½ cups (312 g) of all-purpose flour, 2 tablespoons sugar, and ½ teaspoon salt. Add 1 cup (227 g) of chilled, cubed unsalted butter. Using a pastry cutter or your fingers, cut the butter into the flour until the mixture resembles coarse crumbs with pea-sized bits. This step is key for flaky layers—don’t overmix or the dough will get tough. (About 5-7 minutes)
- Add ice water: Gradually drizzle in 6 to 8 tablespoons of ice-cold water, mixing gently with a fork until the dough just starts to hold together. You might not need all the water; stop once the dough forms a ball but isn’t sticky. Wrap in plastic wrap and chill in the fridge for at least 30 minutes. This resting period helps the gluten relax and makes rolling easier.
- Prepare the filling: While the dough chills, mix ½ cup (110 g) packed brown sugar, 1 tablespoon ground cinnamon, ¼ teaspoon nutmeg (optional), and 2 tablespoons melted butter in a bowl until well combined. The filling should be moist but not runny. Set aside.
- Roll out the dough: On a lightly floured surface, roll the chilled dough into a rectangle about ⅛ inch (3 mm) thick. Try to keep the edges straight for neat pop-tarts. Use a sharp knife or pizza cutter to cut out rectangles approximately 3 x 4 inches (7.5 x 10 cm). You should get about 8-10 rectangles.
- Assemble the pop-tarts: Place half of the rectangles on a parchment-lined baking sheet. Spoon about 1 tablespoon of the cinnamon filling onto the center of each, leaving a small border around the edges. Brush the edges lightly with water, then top with the remaining dough rectangles. Press the edges with a fork to seal, making sure no filling leaks out.
- Dock the tops: Use a fork to prick a few holes in the top layer of each pop-tart to prevent puffing during baking. This also gives that classic look everyone loves.
- Bake: Preheat your oven to 375°F (190°C). Bake the pop-tarts for 20-25 minutes or until golden brown and crisp. Keep an eye on the edges so they don’t burn.
- Optional glaze: While the pop-tarts cool for about 10 minutes, mix powdered sugar with 2-3 tablespoons milk and ½ teaspoon vanilla extract until smooth. Drizzle over the cooled pop-tarts for a sweet finish.
If the dough feels too soft while rolling, pop it back in the fridge for 10 minutes to firm up. Also, if the filling looks too wet, add a pinch more brown sugar to help it thicken. These little tweaks saved me a couple of times when I tried making this on busy mornings.
Cooking Tips & Techniques
Here are some tips I’ve learned through making this recipe multiple times:
- Keep everything cold: The butter and water should be ice-cold to prevent the dough from becoming greasy or tough. I keep my butter in the freezer for 10 minutes before cutting it in.
- Don’t overwork the dough: Mix just until combined. Over-kneading activates gluten and makes the crust chewy rather than flaky.
- Seal edges well: Use a fork and a bit of water to press edges firmly to avoid filling oozing out while baking.
- Dock the tops: Without poking holes, steam can build up and puff the pastry in uneven ways.
- Watch the oven closely: Every oven is different. Start checking pop-tarts at 20 minutes to avoid over-browning.
- Multitasking: While the dough chills, prep your filling and even make a quick batch of Scotcheroos for a sweet snack later in the day—trust me, it’s a good pairing!
One time, I rushed the chilling step and the dough was too crumbly to roll. Lesson learned: patience really pays off here.
Variations & Adaptations
This easy homemade pop-tarts recipe is super adaptable depending on what you’re craving or what’s in your pantry:
- Flavor Twist: Swap the brown sugar cinnamon filling for a mix of mashed berries and a little sugar for a fresh fruit version. In the summer, fresh raspberries or strawberries work beautifully.
- Gluten-Free Option: Use almond or oat flour blends for the crust, but expect a slightly denser texture.
- Vegan Friendly: Replace butter with coconut oil or vegan margarine and use a plant milk glaze.
- Savory Version: Try filling with soft cheese and herbs or a sprinkle of cooked bacon for a breakfast twist that’s less sweet.
- Personal Favorite: I once added a pinch of cardamom to the cinnamon filling for a subtle, spicy warmth that my family loved.
Serving & Storage Suggestions
These homemade pop-tarts are best enjoyed warm, fresh from the oven, when the filling is still delightfully gooey. Serve them with a cup of your favorite coffee or a creamy smoothie, like the ones in my protein smoothie recipes, for a balanced breakfast.
If you want to store them, place cooled pop-tarts in an airtight container and refrigerate for up to 3 days. Reheat in a toaster oven or regular oven at 350°F (175°C) for 5-7 minutes to restore crispness. Avoid microwaving if you want to keep that flaky crust texture intact.
For longer storage, freeze the unglazed pop-tarts in a single layer on a baking sheet. Once frozen, transfer to a freezer-safe bag and bake directly from frozen, adding a few extra minutes to the baking time.
Flavors actually mellow and deepen if you let the pop-tarts sit for a few hours after baking, so if you have patience, that’s a nice option too.
Nutritional Information & Benefits
Each pop-tart (makes about 8) contains approximately:
| Calories | 280 kcal |
|---|---|
| Carbohydrates | 40 g |
| Fat | 12 g |
| Protein | 3 g |
| Sugars | 15 g |
This recipe offers a comforting start to the day with the energy from complex carbs and a touch of protein from the butter and flour. The cinnamon adds antioxidants, and brown sugar, while still sugar, has a richer mineral profile than plain white sugar. If you want a lighter option, pairing a pop-tart with a fresh fruit bowl or a protein-rich smoothie can help balance your meal.
Conclusion
Making easy homemade pop-tarts with brown sugar cinnamon filling is one of those simple pleasures that feels like a little secret breakfast luxury. It’s approachable for cooks of all levels, quick enough so it doesn’t eat up your morning, and truly satisfying once you bite in. I love how flexible this recipe is—you can tweak the filling, try different crusts, or add a glaze to suit your mood.
So, whether you’re feeding a crowd or just treating yourself, this recipe offers a way to bring a homemade touch to a childhood favorite. I hope you enjoy making and sharing these as much as I have. If you try it, I’d love to hear how you made it your own!
FAQs
- Can I make the dough ahead of time? Yes! The dough can be wrapped and refrigerated for up to 2 days before rolling and assembling.
- What if my filling is too runny? Add a bit more brown sugar or a tiny sprinkle of cornstarch to thicken it up before filling the pop-tarts.
- How do I store leftover pop-tarts? Store in an airtight container in the fridge for up to 3 days or freeze before baking for longer storage.
- Can I freeze these pop-tarts? Absolutely! Freeze the assembled but unbaked pop-tarts on a baking sheet, then transfer to a freezer bag. Bake from frozen, adding extra bake time.
- Are these pop-tarts suitable for kids? Yes, they’re a fun and tasty treat that kids usually love. Just be mindful of sugar intake if serving frequently.
Pin This Recipe!

Easy Homemade Pop-Tarts with Brown Sugar Cinnamon Filling

A simple and quick recipe for homemade pop-tarts filled with a rich brown sugar cinnamon filling, perfect for a comforting breakfast or snack.
- Prep Time: 15 minutes
- Cook Time: 25 minutes
- Total Time: 40 minutes
- Yield: 8 pop-tarts 1x
- Category: Breakfast
- Cuisine: American
Ingredients
- 2 ½ cups (312 g) all-purpose flour
- 1 cup (227 g) unsalted butter, chilled and cubed
- 2 tablespoons granulated sugar
- ½ teaspoon salt
- 6–8 tablespoons ice water
- ½ cup (110 g) packed brown sugar
- 1 tablespoon ground cinnamon
- ¼ teaspoon ground nutmeg (optional)
- 2 tablespoons unsalted butter, melted
- 1 cup (120 g) powdered sugar (optional glaze)
- 2–3 tablespoons milk or cream (optional glaze)
- ½ teaspoon vanilla extract (optional glaze)
Instructions
- In a large bowl, whisk together 2 ½ cups (312 g) of all-purpose flour, 2 tablespoons sugar, and ½ teaspoon salt.
- Add 1 cup (227 g) of chilled, cubed unsalted butter. Using a pastry cutter or your fingers, cut the butter into the flour until the mixture resembles coarse crumbs with pea-sized bits.
- Gradually drizzle in 6 to 8 tablespoons of ice-cold water, mixing gently with a fork until the dough just starts to hold together. Wrap in plastic wrap and chill in the fridge for at least 30 minutes.
- While the dough chills, mix ½ cup (110 g) packed brown sugar, 1 tablespoon ground cinnamon, ¼ teaspoon nutmeg (optional), and 2 tablespoons melted butter in a bowl until well combined.
- On a lightly floured surface, roll the chilled dough into a rectangle about ⅛ inch (3 mm) thick. Cut out rectangles approximately 3 x 4 inches (7.5 x 10 cm), about 8-10 pieces.
- Place half of the rectangles on a parchment-lined baking sheet. Spoon about 1 tablespoon of the cinnamon filling onto the center of each, leaving a small border around the edges.
- Brush the edges lightly with water, then top with the remaining dough rectangles. Press the edges with a fork to seal, making sure no filling leaks out.
- Use a fork to prick a few holes in the top layer of each pop-tart to prevent puffing during baking.
- Preheat oven to 375°F (190°C). Bake the pop-tarts for 20-25 minutes or until golden brown and crisp.
- Optional: While the pop-tarts cool for about 10 minutes, mix powdered sugar with 2-3 tablespoons milk and ½ teaspoon vanilla extract until smooth. Drizzle over the cooled pop-tarts.
Notes
Keep butter and water ice-cold to ensure flaky layers. Do not overmix dough to avoid toughness. Seal edges well to prevent filling leakage. Dock tops to prevent puffing. Watch oven closely to avoid burning. Dough can be refrigerated up to 2 days before use. Freeze unbaked pop-tarts for longer storage.
Nutrition
- Serving Size: 1 pop-tart
- Calories: 280
- Sugar: 15
- Fat: 12
- Carbohydrates: 40
- Protein: 3
Keywords: pop-tarts, homemade pop-tarts, brown sugar cinnamon filling, breakfast treat, easy breakfast, pastry, cinnamon sugar


