“Wait, Oreo layers in a patriotic ice cream cake? That sounds like a weird combo,” my cousin said over the phone last Fourth of July. Honestly, I wasn’t sure either when I first tossed the idea around. But, you know, sometimes the best recipes come from those off-the-cuff moments when you’re juggling too many things and just want something festive with minimal fuss.
That morning, I found myself staring at a half-melted tub of vanilla ice cream and a crumbled pack of Oreos leftover from a summer barbecue. The red, white, and blue berries I had just picked up at the farmer’s market stared back at me, begging for a starring role. So, I threw together what felt like a last-minute, “let’s see what happens” dessert. And let’s just say, it quickly became a week-long obsession, showing up at every backyard gathering after that.
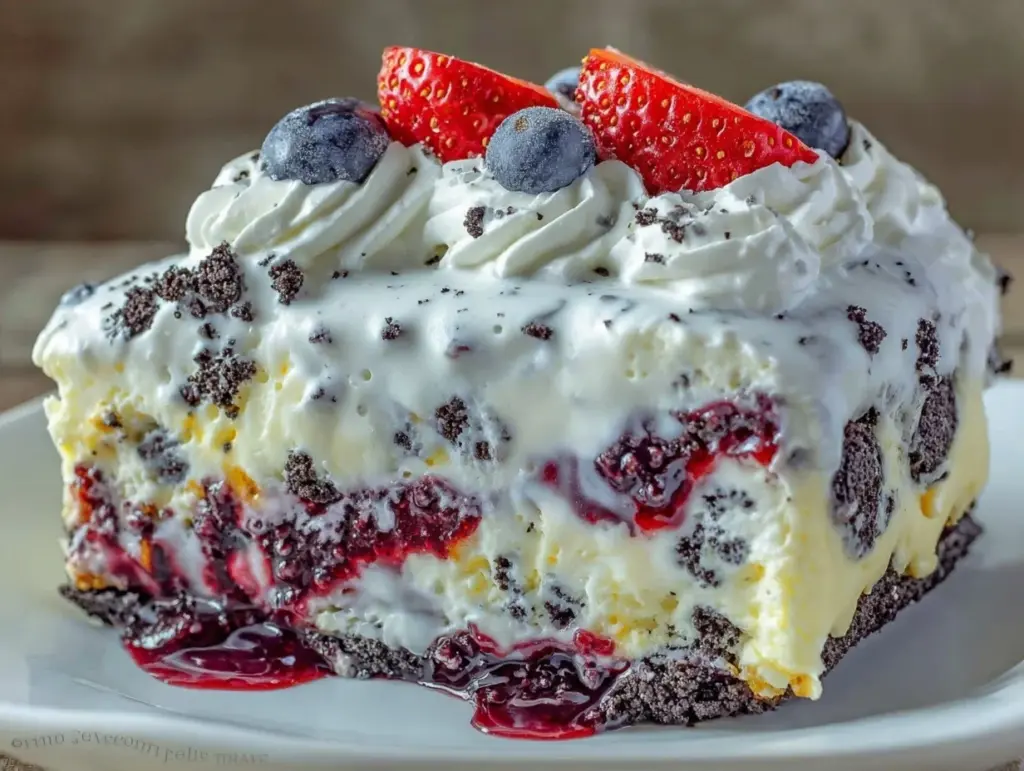
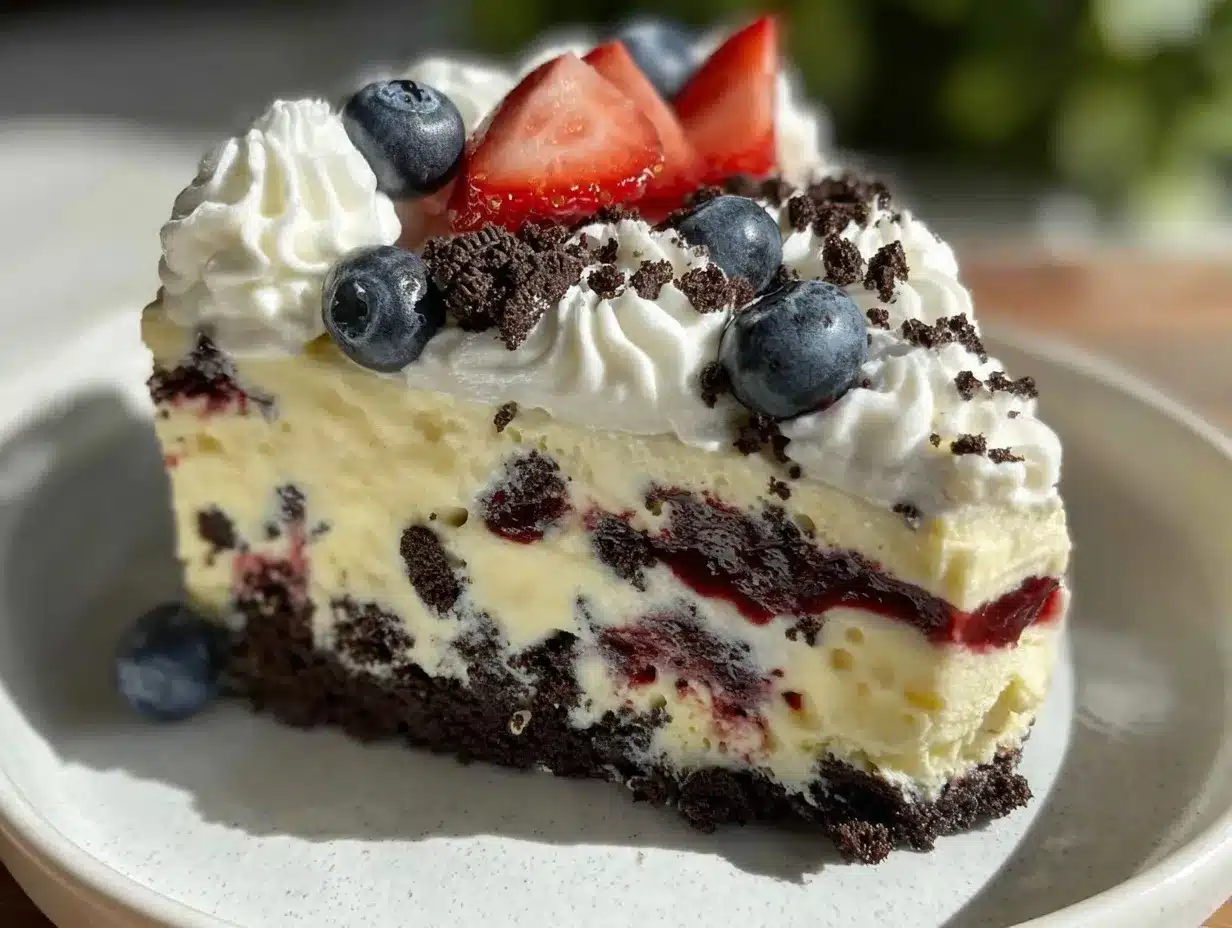
There’s something about the crisp Oreo layers sandwiched between creamy ice cream and the burst of fresh berries that just works. It’s not just about the look, though the flag-inspired colors definitely steal the show. It’s the way the textures play off each other — crunchy, silky, fruity, and sweet. This Flavorful Patriotic Ice Cream Cake with Oreo Layers somehow turned from a skeptical experiment into a recipe I trust to impress, satisfy, and comfort on those hot summer days when you want a little celebration in every bite.
It’s the kind of treat that’s simple enough for a solo late-night kitchen mission but fancy enough to serve when you’ve got guests hanging around. Plus, it’s a fun twist on classic summer desserts — not your average ice cream cake, and definitely not your standard Oreo stack. This one holds memories of lazy afternoons, impromptu parties, and that quiet moment when you realize a cake can be both festive and totally crave-worthy.
Why You’ll Love This Recipe
After perfecting this cake over several summers, I can say it’s a go-to for any patriotic occasion or when you just want a crowd-pleasing dessert that’s easy and fun. Here’s why this Flavorful Patriotic Ice Cream Cake with Oreo Layers stands out:
- Quick & Easy: It comes together in under 30 minutes, making it perfect for last-minute celebrations or when you’re juggling a million things.
- Simple Ingredients: No fancy or hard-to-find items here — just vanilla ice cream, Oreos, and fresh berries you can grab from any store or farmer’s market.
- Perfect for Summer Gatherings: Whether it’s a backyard BBQ, a 4th of July picnic, or a casual brunch, this cake fits right in with the festive vibe.
- Crowd-Pleaser: Kids love the Oreo crunch, adults appreciate the fresh berries, and everyone enjoys the creamy, cool texture.
- Unbelievably Delicious: The contrast between the creamy ice cream and crunchy Oreo layers is next-level comfort food that hits all the right notes.
What makes this recipe different is how the Oreo layers aren’t just crushed or mixed in; they’re stacked to create a perfect textural surprise in every bite. Plus, layering fresh strawberries and blueberries adds both a pop of color and a juicy freshness that you don’t usually get in a typical ice cream cake. The balance of sweet and slightly tart makes it far from just another sugary dessert.
Honestly, it’s the kind of recipe that makes you pause mid-bite, close your eyes, and savor that moment — the kind that turns a simple holiday into something a bit more memorable without any extra stress. And if you’re looking for other summer dessert ideas that bring fresh fruit and fun textures together, you might enjoy the easy layered strawberry shortcake trifle cups or the fresh star-shaped watermelon feta bites for a refreshing twist.
What Ingredients You Will Need
This recipe uses simple, wholesome ingredients to deliver bold flavor and satisfying texture without the fuss. The ingredients are mostly pantry staples and fresh summer picks, making assembly a breeze.
For the Ice Cream Layers:
- 1.5 quarts (1.4 liters) vanilla ice cream, slightly softened (I prefer Haagen-Dazs for its creamy texture)
- 1 cup (240 ml) fresh strawberries, hulled and sliced
- 1 cup (150 g) fresh blueberries
For the Oreo Layers:
- 2 cups (about 20) Oreo cookies, roughly crushed but still chunky (leave some big pieces for crunch!)
- 2 tablespoons (30 g) unsalted butter, melted (helps bind the Oreo crumbs for sturdier layers)
Additional Toppings:
- 1 cup (240 ml) heavy whipping cream, chilled
- 2 tablespoons powdered sugar
- 1 teaspoon vanilla extract
- Extra whole Oreos and berries for garnish (optional but makes a pretty presentation)
For the Oreo layers, I recommend using original Oreos for that classic chocolate sandwich cookie flavor, but feel free to swap in Golden Oreos for a lighter look if you prefer. If you want to try a gluten-free version, you can use gluten-free chocolate sandwich cookies and substitute the butter with coconut oil if needed.
For a dairy-free option, swap vanilla ice cream with a coconut milk-based ice cream and use dairy-free whipped topping instead of heavy cream. Fresh berries are best in season, but frozen works fine too—just thaw and drain any extra moisture before layering.
Equipment Needed
- 9×5 inch (23×13 cm) loaf pan or any similarly sized rectangular pan (glass or metal works)
- Mixing bowls (medium and small size)
- Electric mixer or whisk (for whipping the cream)
- Spatula or butter knife (for spreading and smoothing layers)
- Plastic wrap or aluminum foil (to cover the cake during freezing)
- Measuring cups and spoons
If you don’t have a loaf pan, a springform pan or any cake pan with similar volume will work fine. Just adjust the layering carefully. I once made this in a round pan for a picnic, and it looked just as festive.
For whipping cream, I find using an electric hand mixer saves time and effort, but a good old-fashioned whisk works if you’re patient. If you’re on a budget, look for loaf pans at thrift stores or discount kitchen stores—they do the job just as well.
Preparation Method
- Prepare the Oreo crust: Crush the Oreos roughly (about 20 cookies). Mix the crumbs with melted butter until the mixture holds together when pressed. Press half of this mixture firmly into the bottom of your loaf pan. This will be your crunchy base. Chill the crust in the freezer for 10 minutes to set.
- First ice cream layer: Scoop about half of the softened vanilla ice cream (approx. 3 cups or 720 ml) over the Oreo crust. Spread evenly with a spatula, making sure to cover the entire surface. Place sliced strawberries on top of the ice cream layer, distributing them evenly.
- Second Oreo layer: Sprinkle the remaining Oreo crumb mixture over the strawberries carefully. Press gently to form a layer but don’t compact it too much—you want some crunch!
- Second ice cream layer: Spread the remaining vanilla ice cream over the Oreo crumbs. Smooth the top with a spatula. Scatter fresh blueberries evenly over this layer.
- Freeze to set: Cover the entire pan tightly with plastic wrap or foil and freeze for at least 4 hours or overnight. This step is crucial so the layers hold together well.
- Whip the cream: Before serving, whip the heavy cream with powdered sugar and vanilla extract until soft peaks form.
- Decorate and serve: Remove the cake from the freezer 10-15 minutes before slicing to soften slightly. Spread the whipped cream over the top, garnish with whole Oreos and extra berries for that patriotic flair.
Pro tip: Use a warm knife to slice the cake cleanly. Run your knife under hot water, wipe dry, and slice through the frozen cake in smooth motions. This helps avoid crumbling or sticking.
Cooking Tips & Techniques
Getting the layering right is key for this ice cream cake. I learned the hard way that if your ice cream is too hard, it’s a nightmare to spread, and if it’s too soft, the layers merge into a mess. Aim for softened but still firm ice cream — about 5-10 minutes at room temperature usually does the trick.
Pressing the Oreo crumb layers firmly but gently helps give the cake structure without turning the texture into a dense Oreo brick. The melted butter acts as a binder, so don’t skip it. I’ve tried skipping the butter, and the crumbs just crumble apart when you slice.
Whipping cream to soft peaks is easy to mess up — too soft and it won’t hold, too stiff and it turns buttery. Stop whipping as soon as it holds its shape but still looks light and fluffy. This whipped topping adds the perfect light contrast to the denser ice cream and cookie layers.
Timing is everything; freezing overnight is best, but if you’re in a rush, 4 hours minimum will do. Just remember, the longer it freezes, the easier it is to slice thin, clean pieces.
For a fuss-free cleanup, line your pan with parchment paper before layering. It’ll make unmolding the cake less stressful, especially if you’re using a loaf pan without a removable bottom.
Variations & Adaptations
This recipe is versatile enough to suit different tastes and diets. Here are some ways you can make it your own:
- Flavor swaps: Use chocolate or strawberry ice cream instead of vanilla for a different twist. I once made a mint Oreo version that was surprisingly refreshing!
- Seasonal fruit: Try raspberries or blackberries if strawberries and blueberries aren’t in season. Or for a tropical touch, swap berries with diced mango and pineapple.
- Dietary tweaks: For a gluten-free cake, substitute Oreos with gluten-free chocolate sandwich cookies. Use coconut-based ice cream for dairy-free options.
- Cooking method: While this cake is no-bake, you can turn it into a semi-frozen layered dessert by baking a thin cookie crust base first, then layering ice cream and fruit.
Personally, I’ve tried adding a drizzle of homemade berry coulis between layers for extra zing. It turns the cake into a slightly more elegant dessert but keeps the casual summer vibe.
Serving & Storage Suggestions
This ice cream cake is best enjoyed straight from the freezer but let it sit at room temperature for about 10-15 minutes before slicing to make cutting easier. Serve on chilled plates to keep it from melting too fast.
Pair it with a light summer drink like sparkling water with fresh mint or a berry lemonade. It also complements savory dishes at summer cookouts — the cool sweetness balances smoky grilled meats beautifully.
Store leftovers tightly wrapped in plastic wrap or in an airtight container in the freezer. It keeps well for up to 5 days but is honestly so good fresh that it rarely lasts that long in my house.
To reheat slightly for easier slicing, place in the fridge for 20-30 minutes instead of leaving on the counter. This helps maintain the layered texture without melting it into a creamy puddle.
Over time, the flavors meld together — the berries soak into the ice cream and Oreos soften slightly, creating a luscious, almost trifle-like experience if you let it sit a day or two.
Nutritional Information & Benefits
This cake is a treat, but it does come with a few nutritional perks thanks to the fresh fruit and portion control through layering. Here’s an approximate breakdown per serving (based on 8 servings):
| Calories | 320 kcal |
|---|---|
| Fat | 18 g |
| Sugar | 28 g |
| Protein | 4 g |
The fresh strawberries and blueberries add antioxidants and vitamin C, which help support immunity. Using real cream and quality ice cream gives a richer mouthfeel but also provides calcium and some vitamin A.
If you want a lighter version, consider swapping some ice cream for frozen yogurt or a low-fat alternative, and reduce the whipped cream topping. Just remember, this cake is meant to be a celebratory treat — balance it with your overall meals.
Be mindful that Oreos contain gluten and dairy, so this is not suitable for those with allergies unless you use appropriate substitutes. For a healthier take, pairing the cake with a fresh fruit salad on the side can help balance flavors and nutrition.
Conclusion
The Flavorful Patriotic Ice Cream Cake with Oreo Layers is one of those recipes that sticks around because it’s just plain fun and reliable. It’s easy enough to whip up when you want something festive, yet it looks and tastes like you put in a lot more effort.
What I love most is how customizable it is — you can swap berries, change ice cream flavors, or even make it allergy-friendly without losing the spirit of the dessert. This cake brings a little celebration to the table, whether it’s the Fourth of July or just a warm weekend afternoon.
I hope you enjoy making this as much as I did. Feel free to personalize it, share your favorite tweaks, or tell me how it turned out. After all, recipes are best when they evolve with a little help from friends and family.
Here’s to sweet, cool bites of summer joy — made your way!
FAQs
Can I make the cake ahead of time?
Yes! It actually tastes better after freezing overnight, which helps the layers set firmly and the flavors meld.
What if I don’t have a loaf pan?
Any rectangular or round pan with similar volume works. Just adjust the layering accordingly. A springform pan is a great alternative for easy removal.
Can I use store-bought whipped topping instead of homemade whipped cream?
Absolutely! Store-bought whipped topping works fine if you’re short on time, though fresh whipped cream gives a lighter, fresher taste.
How do I prevent the Oreos from getting soggy?
Mixing Oreos with melted butter helps keep them crisp longer. Also, don’t crush them too finely — chunky pieces hold their texture better between ice cream layers.
Is this recipe suitable for children?
Yes, kids love the Oreo crunch and creamy ice cream. Just keep an eye on portion sizes since it’s a rich dessert.
Pin This Recipe!
Flavorful Patriotic Ice Cream Cake with Oreo Layers

A festive and easy-to-make ice cream cake featuring crunchy Oreo layers and fresh red, white, and blue berries, perfect for summer gatherings and patriotic celebrations.
- Prep Time: 15 minutes
- Cook Time: 4 hours
- Total Time: 4 hours 15 minutes
- Yield: 8 servings 1x
- Category: Dessert
- Cuisine: American
Ingredients
- 1.5 quarts (1.4 liters) vanilla ice cream, slightly softened
- 1 cup (240 ml) fresh strawberries, hulled and sliced
- 1 cup (150 g) fresh blueberries
- 2 cups (about 20) Oreo cookies, roughly crushed but still chunky
- 2 tablespoons (30 g) unsalted butter, melted
- 1 cup (240 ml) heavy whipping cream, chilled
- 2 tablespoons powdered sugar
- 1 teaspoon vanilla extract
- Extra whole Oreos and berries for garnish (optional)
Instructions
- Crush the Oreos roughly (about 20 cookies). Mix the crumbs with melted butter until the mixture holds together when pressed. Press half of this mixture firmly into the bottom of your loaf pan. Chill the crust in the freezer for 10 minutes to set.
- Scoop about half of the softened vanilla ice cream (approx. 3 cups or 720 ml) over the Oreo crust. Spread evenly with a spatula, making sure to cover the entire surface. Place sliced strawberries on top of the ice cream layer, distributing them evenly.
- Sprinkle the remaining Oreo crumb mixture over the strawberries carefully. Press gently to form a layer but don’t compact it too much.
- Spread the remaining vanilla ice cream over the Oreo crumbs. Smooth the top with a spatula. Scatter fresh blueberries evenly over this layer.
- Cover the entire pan tightly with plastic wrap or foil and freeze for at least 4 hours or overnight.
- Before serving, whip the heavy cream with powdered sugar and vanilla extract until soft peaks form.
- Remove the cake from the freezer 10-15 minutes before slicing to soften slightly. Spread the whipped cream over the top, garnish with whole Oreos and extra berries.
Notes
Use softened but still firm ice cream for easier layering. Press Oreo crumb layers gently to maintain crunch. Whip cream to soft peaks for best texture. Freeze overnight for best results. Use a warm knife to slice cleanly. Line pan with parchment paper for easier removal.
Nutrition
- Serving Size: 1 slice (1/8 of cake
- Calories: 320
- Sugar: 28
- Fat: 18
- Protein: 4
Keywords: ice cream cake, Oreo layers, patriotic dessert, Fourth of July, summer dessert, easy ice cream cake, berry dessert


