Rummaging through the fridge with one eye on the clock and the other on a too-hungry kiddo, I found exactly half a bag of cucumbers, some garlic cloves begging for attention, and a jar of dill that looked like it had seen better days. Twenty minutes before dinner, and no time for a long pickle marathon? That’s when this crispy garlic dill refrigerator pickles recipe was born — out of pure necessity and a bit of chaos.
Honestly, I wasn’t expecting much. I mean, who has time to wait days for pickles to soak in brine when everyone’s already buzzing for food? But this recipe surprised me — the pickles stayed satisfyingly crunchy, the garlic and dill bursts were bright and punchy, and best of all, they were ready in just about 24 hours. The tangy bite and fresh snap from the cucumbers made me realize sometimes, quick and simple beats fancy.
There was something almost comforting about the whole process — chopping garlic with one hand while stirring brine with the other, the smell of dill filling the kitchen as the cucumbers soaked it all in overnight. I came to trust these refrigerator pickles as my secret weapon for last-minute sides or snacking, no matter how hectic the day got. Plus, they pair so well with easy dishes like the crispy zucchini fritters I often make for dinner.
There’s a quiet satisfaction in knowing you can whip up something this flavorful and crunchy without fuss or fancy equipment. That’s why this recipe sticks with me. It’s simply real, quick, and reliable — the kind of thing you don’t just make once, but keep coming back to.
Why You’ll Love This Recipe
This crispy garlic dill refrigerator pickles recipe has been tested through countless rushed evenings and casual weekend snacking. It’s genuinely one of those effortless wins that every cook, especially busy parents or time-starved home chefs, need in their arsenal. Here’s why it stands out:
- Quick & Easy: Ready to enjoy in under 24 hours, perfect for last-minute cravings or when you forgot to prep ahead.
- Simple Ingredients: No unusual spices or hard-to-find items; you probably already have garlic, dill, cucumbers, and a few pantry staples.
- Perfect for Any Occasion: Whether it’s a casual snack, picnic side, or an easy addition to grilled meats like honey sriracha glazed salmon, these pickles shine.
- Crowd-Pleaser: Kids and adults both love the crisp bite and garlicky punch — a rare pickle that makes everyone smile.
- Unbelievably Delicious: The garlic flavor isn’t overpowering but perfectly balanced with fresh dill and a touch of tang from the vinegar.
What really sets this recipe apart is the way the cucumbers stay crisp without needing any fancy soaking or special techniques. I find that giving them a quick salt soak before the brine and using fresh dill makes all the difference. The garlic is sliced thin, releasing flavor steadily, so the pickles taste fresh and bright rather than harsh.
Honestly, this recipe isn’t just about making pickles fast — it’s about creating something that feels homemade and satisfying even when life’s moving too fast. That’s why I keep jars of these ready in the fridge, making dinner feel a little less chaotic, and a lot more tasty.
What Ingredients You Will Need
This recipe uses simple, wholesome ingredients to deliver bold flavor and a satisfying crunch without any fuss. Most are pantry staples or fresh produce you can easily swap depending on what’s on hand.
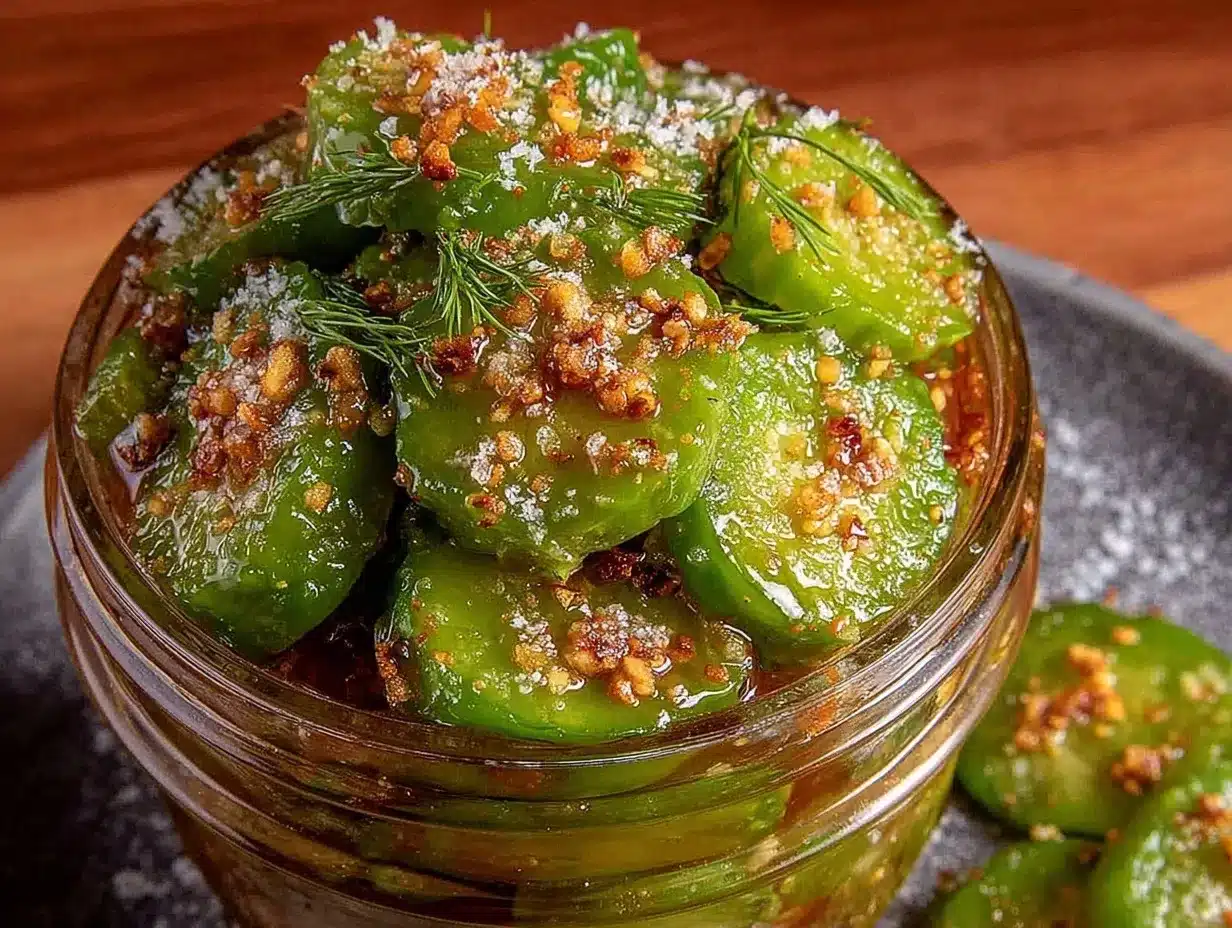
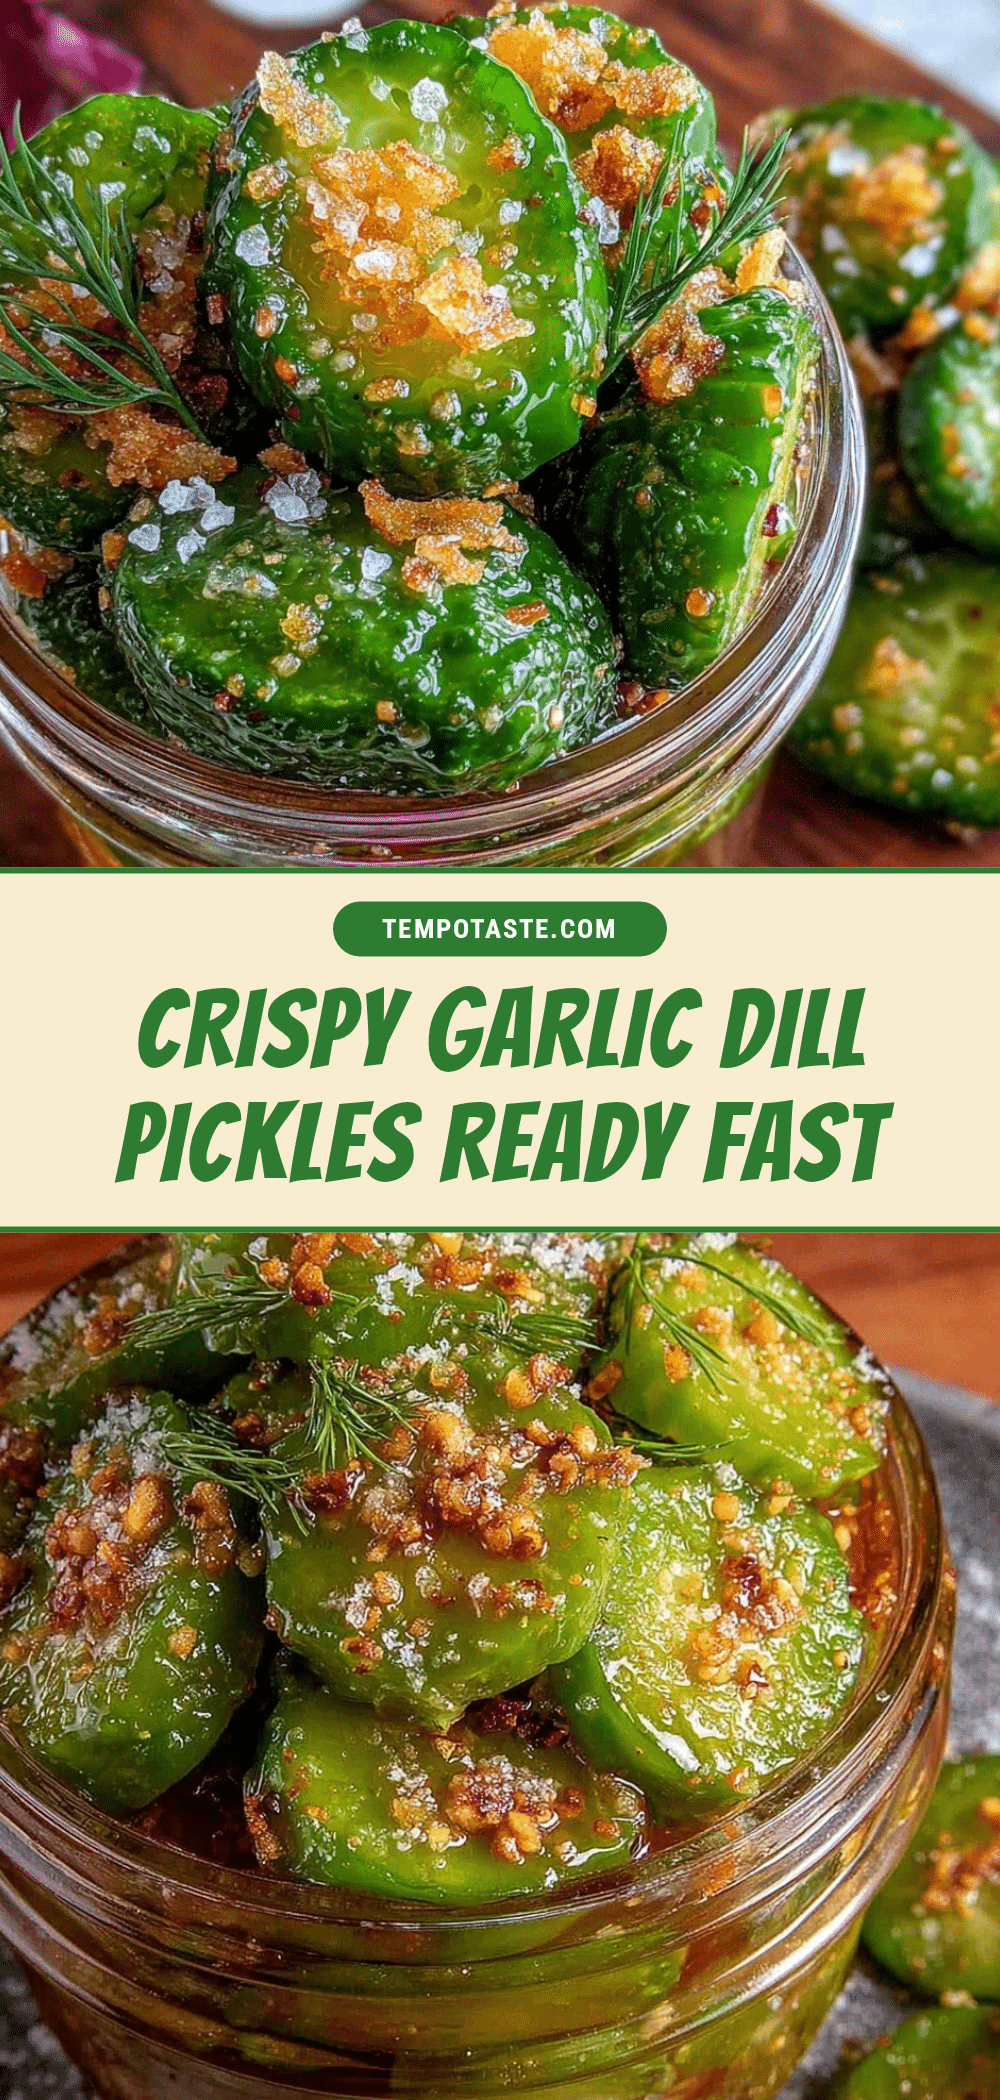
- Cucumbers – 4-5 medium Kirby cucumbers or pickling cucumbers, sliced into spears or rounds (Kirby cucumbers hold their crunch best)
- Fresh Dill – 1/2 cup fresh dill sprigs (the star herb for that classic dill pickle flavor; if you don’t have fresh, you can use 2 tbsp dried dill)
- Garlic – 4-5 cloves, thinly sliced (adds the signature garlicky punch; fresh is best)
- White Vinegar – 1 cup (5% acidity, standard distilled white vinegar works perfectly)
- Water – 1 cup (preferably filtered or boiled and cooled for best taste)
- Salt – 1 tbsp kosher salt (or pickling salt if you have it; avoid iodized salt to keep flavor clean)
- Granulated Sugar – 1 tsp (balances the acidity just right)
- Black Peppercorns – 1 tsp whole peppercorns (adds mild spice and complexity)
- Red Pepper Flakes – Optional, 1/4 tsp for a little heat (skip if you prefer classic flavor)
Quick tip: I like to use a trusted brand like Morton’s kosher salt for consistent seasoning. Also, if you’re looking for a gluten-free version, this recipe naturally fits the bill.
Seasonal swap: In summer, you can add a few fresh sliced jalapeños or swap dill for fresh tarragon if you want a different herbal twist. If you don’t have white vinegar, apple cider vinegar works but will add a slightly fruity note.
Equipment Needed
- Large Mason Jar or Glass Container with Lid: For soaking and storing your pickles safely in the fridge. I prefer wide-mouth jars for easy packing and cleaning.
- Knife and Cutting Board: To slice cucumbers and garlic — a sharp chef’s knife makes the job quick and tidy.
- Measuring Cups and Spoons: For precise brine ratios — this keeps your pickles tasting consistent every time.
- Small Saucepan: To warm the brine ingredients, helping dissolve salt and sugar smoothly.
If you don’t have mason jars, any clean, airtight container will do — just be sure it seals well to keep flavors fresh. For those on a budget, repurposed glass jars from store-bought pickles or pasta sauces can work just fine after thorough cleaning.
Preparation Method
- Prepare the Cucumbers: Rinse and dry the cucumbers well. Slice them into spears about 3-4 inches long or into 1/4-inch thick rounds depending on your preference. I find spears hold their crunch better and pack nicely into jars. (Time: approx. 10 minutes)
- Salt Soak (Optional but Recommended): Place sliced cucumbers in a colander and sprinkle with 1 tsp kosher salt. Let them sit for 30 minutes to draw out excess water — this keeps the pickles extra crisp. Rinse quickly under cold water and pat dry. (Time: 30 minutes, hands-off)
- Make the Brine: In a small saucepan, combine white vinegar, water, 1 tbsp kosher salt, and 1 tsp sugar. Warm over medium heat, stirring until salt and sugar dissolve. Remove from heat and let cool slightly while prepping the jar. (Time: 5-7 minutes)
- Pack the Jar: Layer cucumbers, sliced garlic, fresh dill sprigs, black peppercorns, and red pepper flakes (if using) tightly into the jar. Don’t overfill — leave about 1 inch of headspace at the top for the brine. (Time: 5 minutes)
- Pour the Brine: Carefully pour the warm brine over the cucumbers, covering them completely. Use a utensil to gently press the cucumbers down if needed to submerge fully. Seal the jar with the lid. (Time: 3 minutes)
- Chill and Wait: Place the jar in the refrigerator for at least 24 hours before tasting. The flavors develop quickly but get more balanced after a couple of days. (Time: 24 hours minimum)
- Enjoy: Your crispy garlic dill refrigerator pickles are ready to be enjoyed! Store in the fridge and consume within 2-3 weeks for best texture and flavor.
Pro tip: If your pickles ever get a little soft, try adding a small fresh grape leaf or a pinch of calcium chloride next time — these traditional tricks help maintain crispness.
Cooking Tips & Techniques
Honestly, getting perfect crunchy pickles is about a few key techniques that I’ve learned the hard way. First, the salt soak is a game changer. I used to skip it and ended up with soggy pickles faster than I liked. The salt draws out moisture, which keeps cucumbers super crisp even after sitting in the brine.
Also, don’t skip the step of letting the brine cool before pouring over your cucumbers. Pouring hot brine can soften cucumbers too much, making them less crunchy. Warm is fine, but hot is a no-go.
Thinly slicing garlic instead of smashing or mincing lets the flavor infuse gently without overpowering the pickles. Plus, it looks pretty in the jar! I learned this after a batch that was way too garlicky for my taste.
When it comes to dill, fresh is best. If you only have dried, use less because it can be more intense and sometimes bitter. I once tried dried dill in a hurry and the pickles tasted flat — fresh dill really makes the difference.
Finally, keep the pickles submerged in the brine. If cucumbers peek above the liquid, they can spoil or get slimy. Use a small clean weight or utensil to press them down if needed.
Timing-wise, this recipe is forgiving — you can eat the pickles after 24 hours, but they keep improving in flavor for up to a week. Just don’t forget about them in the back of the fridge!
Variations & Adaptations
- Spicy Kick: Add sliced jalapeños or a pinch of cayenne pepper to the jar to give your pickles a fiery twist.
- Herbal Twist: Swap dill for fresh tarragon or add fresh thyme sprigs for a different flavor profile that still complements garlic beautifully.
- Low Sodium: Use less salt in the brine and extend the soaking time slightly to keep crispness while reducing sodium.
- Vinegar Alternatives: Try apple cider vinegar for a slightly sweeter, fruitier note or white wine vinegar for a more delicate tang.
- Allergen-Friendly: This recipe is naturally gluten-free and vegan, making it easy to fit into most diets.
One variation I tried recently was adding a splash of lemon juice and a few coriander seeds — it gave the pickles a bright citrusy snap that was unexpectedly fresh. It paired wonderfully with a summer salad like the fresh Asian cucumber salad I love.
Serving & Storage Suggestions
These crispy garlic dill refrigerator pickles are fantastic served chilled straight from the jar. They make a fantastic side for grilled dishes, sandwiches, or even as a zesty snack between meals. I often pair them with smoky meats like chimichurri flank steak or as a tangy complement to creamy dishes.
For presentation, a small bowl with a few spears alongside your meal looks inviting and rustic. They also jazz up a charcuterie board with their garlicky brightness.
Store pickles in the refrigerator in a sealed jar. They keep well for up to 3 weeks but are at their crispiest in the first week. When reheating isn’t really needed here, but if you want to warm them slightly, let them come to room temperature for 15 minutes.
Over time, the flavors deepen and mellow, so if you’re patient, you’ll enjoy a more balanced, slightly softer pickle — but honestly, I like them fresh and crisp, especially when paired with fresh summer meals or drinks like the watermelon mint agua fresca.
Nutritional Information & Benefits
These garlic dill refrigerator pickles are low in calories — roughly 10-15 calories per spear depending on size — making them a guilt-free snack. They’re naturally fat-free and gluten-free, which fits many dietary needs.
The cucumbers provide hydration and a small dose of vitamins K and C, while the garlic adds immune-supporting compounds and antioxidants. Dill is known for its digestive benefits and adds a fresh herbal boost.
Because the pickles are made without sugar-heavy brines or preservatives, they’re a healthier alternative to many store-bought versions. The vinegar also supports digestion and blood sugar regulation.
Just a heads-up: these pickles do contain garlic and salt, so if you’re watching sodium intake or have garlic sensitivities, adjust accordingly.
Conclusion
This crispy garlic dill refrigerator pickles recipe strikes the perfect balance between quick prep and satisfying crunch, making it a go-to for busy kitchens and last-minute cravings. It’s easy to make, uses simple ingredients, and delivers that fresh, garlicky dill flavor without the wait.
Feel free to tweak the garlic level, add some spice, or swap herbs to fit your taste — this recipe is forgiving and adaptable. I love having a jar ready in the fridge to brighten up any meal or snack moment, especially when paired with fresh, easy dishes like caprese pasta salad.
Give it a try when time’s tight but taste matters. And hey, if you experiment with your own twists, drop a comment below — I love hearing how you make these pickles your own!
FAQs about Crispy Garlic Dill Refrigerator Pickles
How long do refrigerator pickles last?
Stored properly in the fridge, these pickles stay fresh and crunchy for about 2-3 weeks. For best texture, consume within the first week.
Can I use regular cucumbers instead of Kirby or pickling cucumbers?
Yes, but regular slicing cucumbers have more water and may yield softer pickles. Kirby cucumbers are preferred for their firmness and crunch.
Do I have to use fresh dill?
Fresh dill is best for the bright, herbal flavor, but dried dill can be used in a pinch — just reduce the amount to avoid bitterness.
Can I make these pickles without garlic?
Absolutely! The recipe works well without garlic if you prefer a milder pickle. You can add other aromatics like mustard seeds or coriander for flavor instead.
Why are my pickles not crunchy?
Soft pickles often result from skipping the salt soak, using hot brine, or cucumbers not being fresh. Try soaking with salt before brining and ensure the brine is warm, not hot when poured.
Pin This Recipe!
Crispy Garlic Dill Refrigerator Pickles

A quick and easy refrigerator pickle recipe that delivers crunchy, garlicky dill pickles ready in about 24 hours. Perfect for last-minute snacking or as a flavorful side.
- Prep Time: 15 minutes
- Cook Time: 7 minutes
- Total Time: 24 hours 22 minutes
- Yield: 4-5 servings 1x
- Category: Side Dish
- Cuisine: American
Ingredients
- 4–5 medium Kirby cucumbers or pickling cucumbers, sliced into spears or rounds
- 1/2 cup fresh dill sprigs (or 2 tbsp dried dill)
- 4–5 garlic cloves, thinly sliced
- 1 cup white vinegar (5% acidity, distilled)
- 1 cup water (filtered or boiled and cooled)
- 1 tbsp kosher salt (or pickling salt)
- 1 tsp granulated sugar
- 1 tsp whole black peppercorns
- 1/4 tsp red pepper flakes (optional)
Instructions
- Rinse and dry the cucumbers well. Slice into 3-4 inch spears or 1/4-inch thick rounds.
- Optional but recommended: Place sliced cucumbers in a colander, sprinkle with 1 tsp kosher salt, and let sit for 30 minutes to draw out excess water. Rinse quickly under cold water and pat dry.
- In a small saucepan, combine white vinegar, water, 1 tbsp kosher salt, and 1 tsp sugar. Warm over medium heat, stirring until salt and sugar dissolve. Remove from heat and let cool slightly.
- Layer cucumbers, sliced garlic, fresh dill sprigs, black peppercorns, and red pepper flakes (if using) tightly into a large mason jar or glass container, leaving about 1 inch of headspace.
- Pour the warm brine over the cucumbers, covering them completely. Press down gently to submerge cucumbers fully. Seal the jar with a lid.
- Place the jar in the refrigerator for at least 24 hours before tasting. Flavors improve over a few days.
- Enjoy chilled. Store in the refrigerator and consume within 2-3 weeks for best texture and flavor.
Notes
Salt soak cucumbers for 30 minutes to keep pickles extra crisp. Let brine cool before pouring to avoid softening cucumbers. Use fresh dill for best flavor. Keep cucumbers fully submerged in brine to prevent spoilage. Add a grape leaf or calcium chloride to maintain crispness if needed. Variations include adding jalapeños for spice or swapping dill for tarragon or thyme.
Nutrition
- Serving Size: About 1/2 cup (appro
- Calories: 15
- Sugar: 1
- Sodium: 800
- Carbohydrates: 3
- Fiber: 0.5
- Protein: 0.3
Keywords: refrigerator pickles, garlic dill pickles, quick pickles, easy pickles, crunchy pickles, homemade pickles, dill pickles, garlic pickles