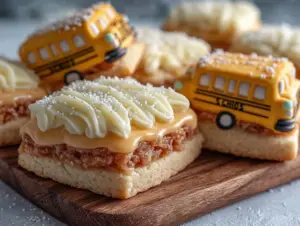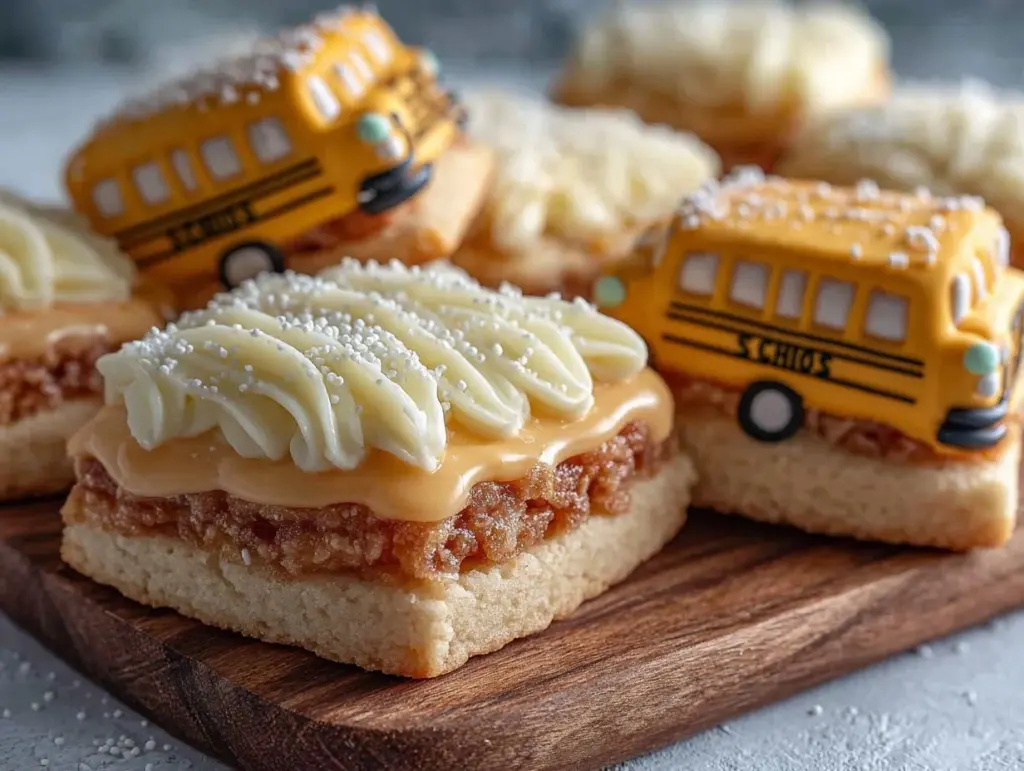
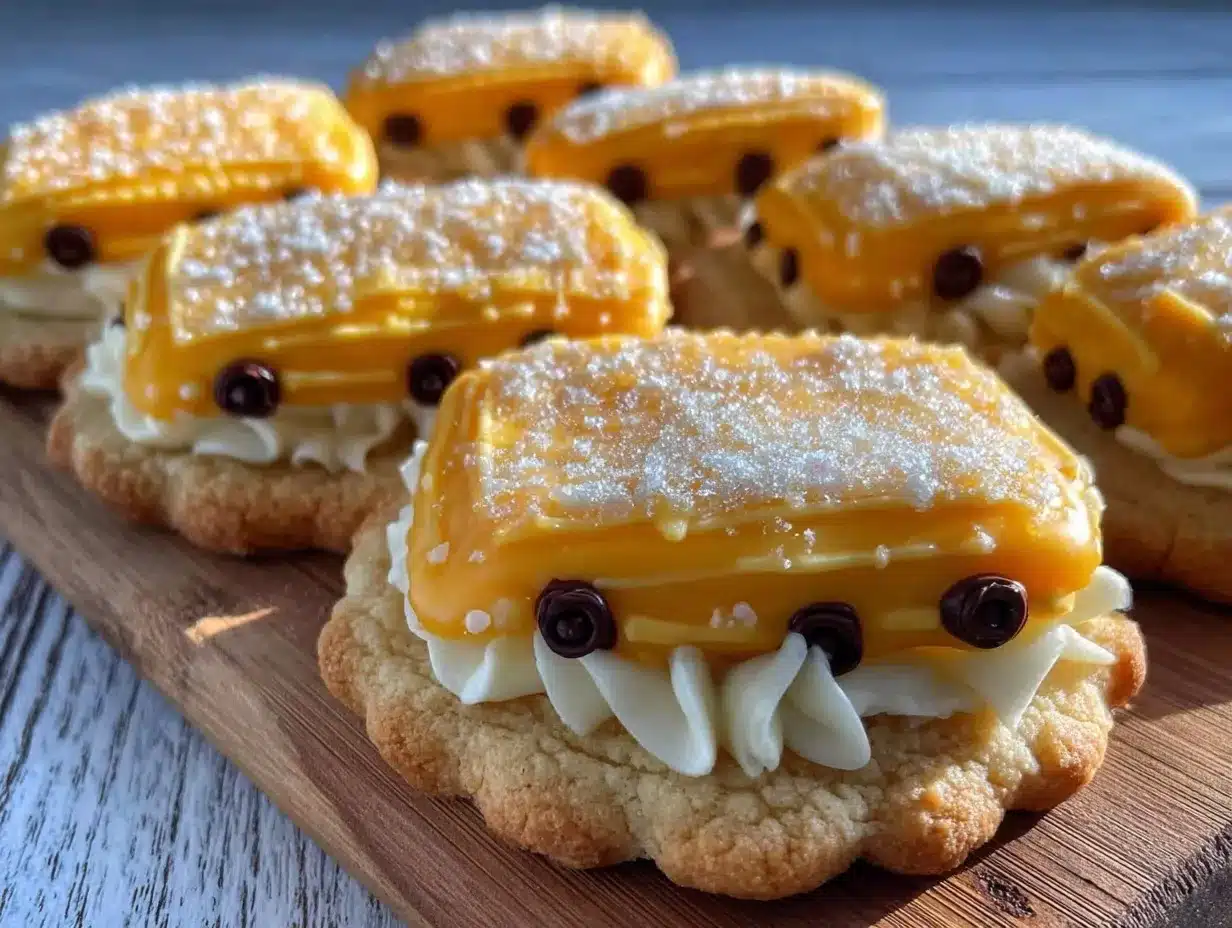
Glossy, smooth frosting that catches the light just right—it’s what I made these Perfect Soft Frosted Back to School Bus Sugar Cookies for. The slick, satin-like surface of those yellow bus shapes, outlined crisply in black and dotted with tiny wheels, is the kind of texture that pulls you in before you even think about taste. I remember the first batch I made, sitting at the kitchen table with little hands eagerly waiting, and all I could think about was how each cookie’s surface looked like a tiny canvas, begging for just the right touch of color and shine.
That smooth finish isn’t just for show—it’s the first thing that sets apart these back to school bus sugar cookies from the usual sugar cookie routine. The soft dough underneath is tender and delicate, the kind that melts just a bit when you bite into it. But honestly, it’s the contrast between the velvety icing and the pillowy cookie base that kept me coming back to this recipe year after year.
Let’s face it, back-to-school time can be a whirlwind, but these cookies offer a little quiet joy in their texture alone—the kind of treat that makes you pause and really appreciate the small things. I loved making them for a neighborhood school event; the kids admired the familiar bus shape, and the parents appreciated the soft, not-too-sweet balance that made these cookies feel homemade and special.
Some recipes get lost in complexity, but the real magic here is in the texture interplay—from the gentle crumb of the cookie to the perfectly smooth frosting that dries just enough to hold its shape but still yields under your finger. It’s a recipe that sticks around not just because it tastes good, but because it looks and feels like a little back-to-school celebration you can hold in your hand.
That quiet moment of realization—that simple textures can bring so much comfort—is why this recipe has stuck with me. No flash, no fuss, just soft, frosted sugar cookies shaped like a bus, ready to bring a smile to anyone facing the new school year.
Why You’ll Love This Recipe
After countless trials, tweaking every detail from dough softness to frosting consistency, I can say these Perfect Soft Frosted Back to School Bus Sugar Cookies are a winner—whether you’re a seasoned baker or just trying to make a special snack for your little ones. Here’s what makes this recipe stand out:
- Quick & Easy: You can have these cookies ready in under 90 minutes, perfect for last-minute school parties or spontaneous baking sessions.
- Simple Ingredients: No exotic items here—just pantry staples like flour, sugar, butter, and a few basics for the frosting. You probably already have everything on hand.
- Perfect for Back-to-School Celebrations: Whether it’s a classroom treat or a fun snack for an afternoon homework break, these cookies fit the occasion beautifully.
- Crowd-Pleaser: Kids love the fun bus shape, and adults appreciate the soft texture and balanced sweetness that isn’t overwhelming.
- Unbelievably Delicious: The soft, tender cookie paired with that creamy, smooth frosting creates a comforting flavor and texture combo that’s just… next-level.
- Unique Technique: I use a simple royal icing method with a touch of powdered sugar and meringue powder that dries to a smooth finish but stays soft enough to bite into—no cracking or crumbling.
- Emotionally Resonant: These cookies aren’t just tasty—they’re a small moment of joy wrapped in nostalgia for school days and childhood excitement.
This recipe isn’t just another cookie—it’s the one that makes you pause, smile, and maybe even remember your own first day of school. For a fun twist, you can check out my crispy zucchini fritters recipe if you want a savory side to go with your cookie party or pair these with a refreshing drink like my fresh watermelon mint agua fresca for a complete school snack-time spread.
What Ingredients You Will Need
This recipe uses simple, wholesome ingredients to deliver soft, tender sugar cookies with a smooth, glossy frosting finish. Most are pantry staples, and many have easy substitutes if needed.
- For the Cookies:
- All-purpose flour (2 ¾ cups / 345 grams) – I prefer King Arthur for consistent texture
- Baking powder (1 teaspoon) – helps keep cookies soft and light
- Salt (½ teaspoon)
- Unsalted butter, softened (1 cup / 227 grams) – room temperature for easy creaming
- Granulated sugar (1 ¼ cups / 250 grams) – provides sweetness without graininess
- Large eggs (2), room temperature – for moisture and structure
- Pure vanilla extract (2 teaspoons) – adds warmth and depth
- Milk (2 tablespoons) – helps keep dough soft and workable
- For the Frosting:
- Powdered sugar (4 cups / 480 grams), sifted – for that smooth frosting texture
- Unsalted butter, softened (½ cup / 113 grams)
- Milk (3-4 tablespoons), adjust for consistency
- Vanilla extract (1 teaspoon)
- Yellow gel food coloring – for the iconic school bus color
- Black gel food coloring – to outline and add details like wheels and windows
- Optional: Meringue powder (1 tablespoon) – helps frosting dry smooth and stable (especially if you want that clean finish)
- Mixing bowls – a large one for dough, a medium for frosting
- Electric mixer – handheld or stand mixer makes creaming butter and sugar super easy
- Measuring cups and spoons – precise measurements keep texture consistent
- Rolling pin – to roll out cookie dough evenly, look for a non-stick or lightly floured surface
- School bus-shaped cookie cutter – the star of the show! If you don’t have one, a rectangular cutter with rounded edges works fine too
- Baking sheets lined with parchment paper or silicone mats – prevents sticking and browning
- Cooling racks – let cookies cool completely before frosting
- Piping bags and small round tips – for outlining and filling the frosting
- Spatula or butter knife – for smoothing frosting if you prefer less piping
- Prep the dough: In a medium bowl, whisk together 2 ¾ cups (345 g) all-purpose flour, 1 teaspoon baking powder, and ½ teaspoon salt. Set aside.
- Cream butter and sugar: Using an electric mixer, beat 1 cup (227 g) softened unsalted butter with 1 ¼ cups (250 g) granulated sugar on medium speed until light and fluffy (about 3-4 minutes). This step is crucial for soft cookies.
- Add eggs and vanilla: Beat in 2 large eggs, one at a time, then mix in 2 teaspoons pure vanilla extract. The batter will look smooth and creamy.
- Combine dry and wet: Gradually add the flour mixture, alternating with 2 tablespoons milk, mixing on low speed. Scrape sides as needed. Dough should be soft but not sticky. If too sticky, add a tablespoon more flour; if too dry, a splash more milk.
- Chill the dough: Shape dough into a disk, wrap in plastic wrap, and refrigerate for at least 1 hour. This step helps the dough firm up for easier rolling and prevents spreading during baking.
- Preheat oven: Set to 350°F (175°C). Line baking sheets with parchment paper or silicone mats.
- Roll and cut: Lightly flour your surface and rolling pin. Roll dough to about ¼ inch (6 mm) thickness. Use your school bus-shaped cookie cutter to cut out shapes. Transfer cookies carefully to the baking sheet, spacing about 1 inch (2.5 cm) apart.
- Bake: Bake for 8-10 minutes until edges are just starting to turn golden. Do not overbake; cookies should be soft, not crisp.
- Cool: Let cookies cool on baking sheets for 5 minutes, then transfer to wire racks to cool completely before frosting.
- Prepare frosting: Beat ½ cup (113 g) softened butter until creamy. Gradually add 4 cups (480 g) sifted powdered sugar, alternating with 3-4 tablespoons milk and 1 teaspoon vanilla extract. Add yellow gel coloring until desired shade is reached. For outlining details, tint a small portion of frosting black.
- Decorate: Use piping bags fitted with small round tips to outline each bus cookie in black frosting, then flood the center with yellow frosting using a spatula or piping bag with a wider tip. Add wheels and windows with black frosting. Let the frosting set for at least 3 hours before stacking or packing.
- Gluten-Free Version: Substitute all-purpose flour with a 1:1 gluten-free baking flour blend. Add a teaspoon of xanthan gum if your blend doesn’t contain it for structure.
- Vegan Option: Use coconut oil or vegan butter instead of butter, and replace eggs with flax eggs (1 tablespoon ground flaxseed + 3 tablespoons water per egg). Use plant-based milk for frosting.
- Seasonal Twist: Swap yellow frosting for bright orange or red for fall-themed buses or festive colors for holidays.
- Flavor Boost: Add a teaspoon of almond extract to the dough or frosting for a nutty note that pairs beautifully with vanilla.
- Alternative Shapes: If you don’t have a bus cutter, try this dough with star shapes or classic round shapes for other school-themed treats.
For the frosting, I recommend using AmeriColor gel colors—they blend well without thinning the frosting, which is key for keeping the frosting smooth and vibrant. If you prefer a dairy-free option, swap butter for dairy-free margarine and use almond or oat milk instead. This recipe is forgiving and perfect for customizing.
Equipment Needed
I tried these with a basic dough scraper once instead of a rolling pin, but it was messier and harder to get uniform thickness. If you’re on a budget, silicone mats are a great investment (they last forever and make cleanup a breeze). For piping, if you don’t have fancy tips, just snip the end of a plastic sandwich bag and steady your hand for decent lines.
Preparation Method
Pro tip: If your frosting is too thick for flooding, add milk a drop at a time. If it’s too thin, add more powdered sugar. Also, warming your cookie cutter slightly before cutting dough can help clean edges. When piping, steady your hand by resting your elbow on the table.
Cooking Tips & Techniques
Soft sugar cookies with perfect frosting require a little finesse, but a few tricks can keep you on track. First, chilling the dough is non-negotiable; it stops spreading and keeps cookies soft and tender. I once skipped this step, and the cookies flattened into sad blobs—not cute buses at all.
When mixing frosting, start slow and build gradually; powdered sugar dust everywhere is a classic rookie move. Also, gel colors are your best friend here—they provide vibrant hues without watering down the frosting.
One common mistake is overbaking the cookies. They should look just set and slightly pale, not browned. They continue to firm up as they cool, so trust the timer and resist the urge to bake until golden.
For the frosting, if you want that crisp black outline, pipe it first and let it crust for 10-15 minutes before flooding with yellow. This keeps the colors from bleeding together. I learned this the hard way when my first batch looked like a yellow mess with black blobs everywhere.
Multitasking tip: While dough chills, prep your frosting and set up your decorating station. Having everything ready makes decorating less stressful.
Variations & Adaptations
Once, I tried a lemon zest frosting variation, which was a fresh take and surprisingly delightful. For a quicker method, you can skip piping and spread frosting with a knife, though you lose the crisp edges. These cookies are forgiving and fun to play with!
Serving & Storage Suggestions
Serve these cookies at room temperature to enjoy the full softness of the dough and creamy frosting. They make a cheerful addition to any back-to-school lunchbox or party platter. Pairing them with a cold glass of milk or a bright, refreshing drink like my strawberry lemonade slushies creates a fun, balanced snack-time experience.
Store cookies in an airtight container at room temperature for up to 3 days. To keep the frosting from sticking together, place parchment paper between layers. For longer storage, freeze unfrosted cookies in a single layer, then thaw and frost when ready. Frosted cookies can also be frozen but wrap tightly to prevent freezer burn.
Reheat frozen cookies by letting them come to room temperature naturally. Avoid microwaving, as frosting may melt unevenly. Over time, flavors meld wonderfully, and the cookie softens even more—a real treat when you revisit leftovers.
Nutritional Information & Benefits
Each cookie (approx. 1 medium-sized bus cookie) contains roughly 150-180 calories, 3-5 grams of fat, 25 grams of carbohydrates, and 1-2 grams of protein. While these are treats, the recipe uses simple, recognizable ingredients without artificial additives.
Butter offers some fat-soluble vitamins, and the eggs provide protein and essential nutrients. Using real vanilla extract brings a natural flavor without extra sugars or chemicals. For those mindful of allergens, this recipe contains dairy and eggs but can be adapted to be gluten-free and vegan with the substitutions mentioned earlier.
From a wellness perspective, homemade treats like these avoid the preservatives and excess sugars found in many store-bought cookies. Plus, baking from scratch encourages mindful eating and sharing moments, which is just as nourishing as the food itself.
Conclusion
Soft, frosted, and shaped just right—these Perfect Soft Frosted Back to School Bus Sugar Cookies are a simple delight that turns an ordinary snack into a small celebration. The care in texture, the creamy frosting, and the nostalgic shape make them a recipe worth keeping in your back-to-school rotation.
Feel free to customize the colors, flavors, and shapes to match your family’s style or dietary needs. I love how this recipe brings a little joy and calm to a hectic time of year, and I’m sure you will, too.
If you give this recipe a try, I’d love to hear how your cookies turned out or what fun variations you created. Baking is always better when shared!
Frequently Asked Questions
How long do these sugar cookies stay fresh?
Stored in an airtight container at room temperature, these cookies stay fresh for about 3 days. For longer storage, freeze unfrosted cookies for up to 3 months.
Can I make the dough ahead of time?
Yes! The dough can be made and refrigerated up to 2 days before baking. Just wrap tightly in plastic wrap to prevent drying out.
What’s the best way to get smooth frosting?
Sift your powdered sugar before mixing and beat the frosting well until creamy. Use gel food coloring to avoid thinning the frosting and add milk gradually for the right consistency.
Can I use a different cookie cutter shape?
Absolutely! This dough works well with any shape, so feel free to use stars, hearts, or classic circles for different occasions.
How do I prevent frosting colors from bleeding?
Pipe the outline in black frosting first and let it crust for 10-15 minutes before flooding with yellow. This creates a barrier that keeps colors sharp.
Pin This Recipe!
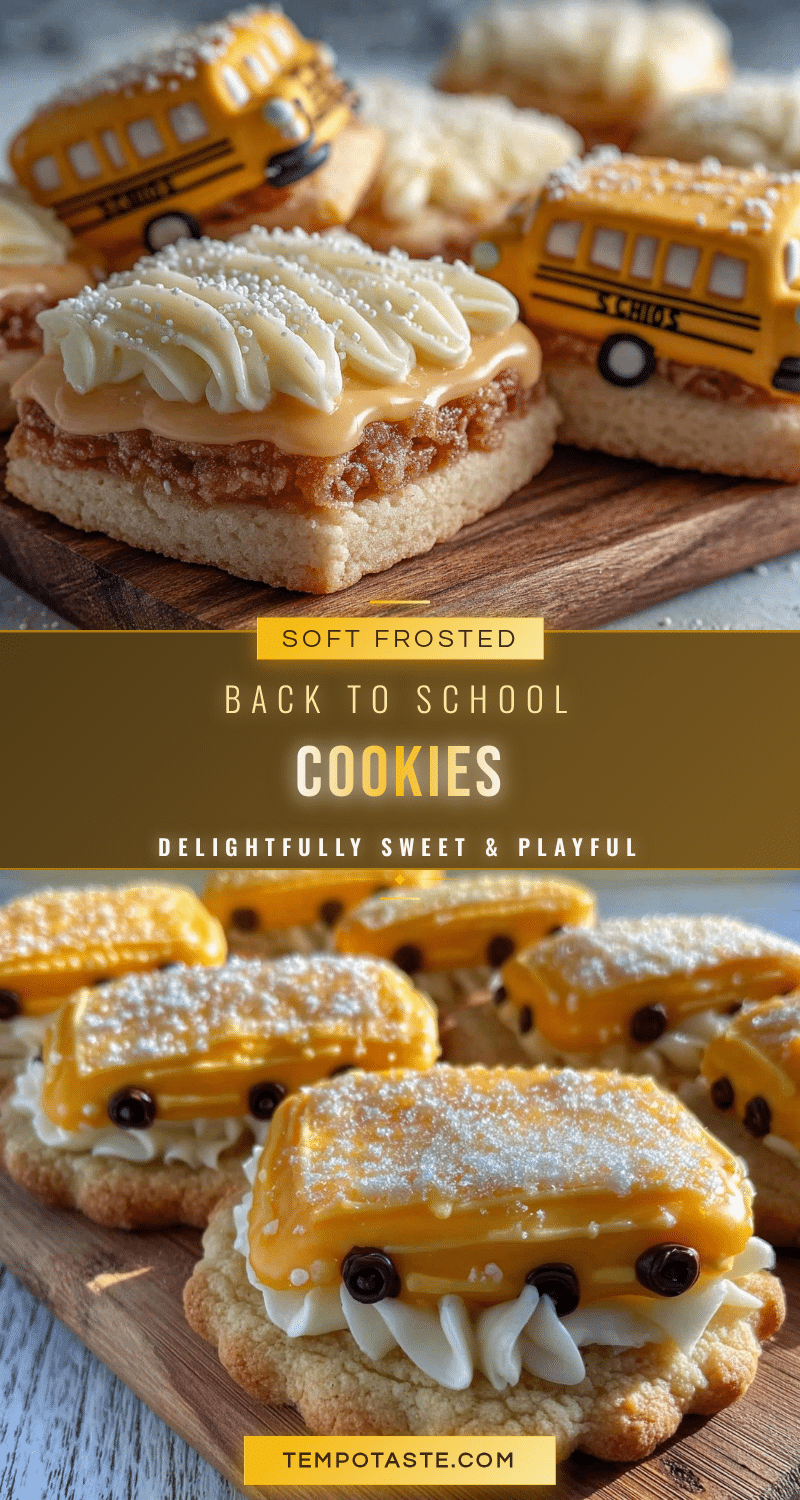
Perfect Soft Frosted Back to School Bus Sugar Cookies

Soft, tender sugar cookies shaped like school buses with a smooth, glossy frosting finish. These cookies feature a velvety icing that dries just enough to hold its shape but remains soft to bite into, perfect for back-to-school celebrations.
- Prep Time: 20 minutes
- Cook Time: 10 minutes
- Total Time: 1 hour 30 minutes
- Yield: 24 cookies 1x
- Category: Dessert
- Cuisine: American
Ingredients
- 2 ¾ cups (345 grams) all-purpose flour
- 1 teaspoon baking powder
- ½ teaspoon salt
- 1 cup (227 grams) unsalted butter, softened
- 1 ¼ cups (250 grams) granulated sugar
- 2 large eggs, room temperature
- 2 teaspoons pure vanilla extract
- 2 tablespoons milk
- 4 cups (480 grams) powdered sugar, sifted
- ½ cup (113 grams) unsalted butter, softened (for frosting)
- 3–4 tablespoons milk (for frosting)
- 1 teaspoon vanilla extract (for frosting)
- Yellow gel food coloring
- Black gel food coloring
- Optional: 1 tablespoon meringue powder
Instructions
- In a medium bowl, whisk together flour, baking powder, and salt. Set aside.
- Using an electric mixer, beat softened butter and granulated sugar on medium speed until light and fluffy, about 3-4 minutes.
- Beat in eggs one at a time, then mix in vanilla extract until smooth and creamy.
- Gradually add the flour mixture, alternating with milk, mixing on low speed. Scrape sides as needed. Dough should be soft but not sticky. Adjust with more flour or milk if needed.
- Shape dough into a disk, wrap in plastic wrap, and refrigerate for at least 1 hour.
- Preheat oven to 350°F (175°C). Line baking sheets with parchment paper or silicone mats.
- Lightly flour surface and rolling pin. Roll dough to about ¼ inch (6 mm) thickness. Cut out shapes with school bus cookie cutter and transfer to baking sheet, spacing 1 inch apart.
- Bake for 8-10 minutes until edges just start to turn golden. Do not overbake; cookies should be soft.
- Cool cookies on baking sheets for 5 minutes, then transfer to wire racks to cool completely.
- For frosting, beat softened butter until creamy. Gradually add sifted powdered sugar, alternating with milk and vanilla extract. Add yellow gel coloring until desired shade is reached. Tint a small portion black for outlining.
- Use piping bags with small round tips to outline each bus cookie in black frosting, then flood centers with yellow frosting using a spatula or wider tip piping bag. Add wheels and windows with black frosting.
- Let frosting set for at least 3 hours before stacking or packing.
Notes
Chill dough for at least 1 hour to prevent spreading and keep cookies soft. Use gel food coloring to maintain frosting consistency. Pipe black outlines first and let crust before flooding with yellow to prevent color bleeding. Adjust frosting thickness with milk or powdered sugar as needed. Warm cookie cutter slightly before cutting for clean edges.
Nutrition
- Serving Size: 1 medium-sized bus c
- Calories: 165
- Sugar: 15
- Sodium: 90
- Fat: 4
- Saturated Fat: 2.5
- Carbohydrates: 25
- Protein: 2
Keywords: sugar cookies, back to school, soft cookies, frosted cookies, school bus cookies, easy cookie recipe, royal icing, kid-friendly cookies