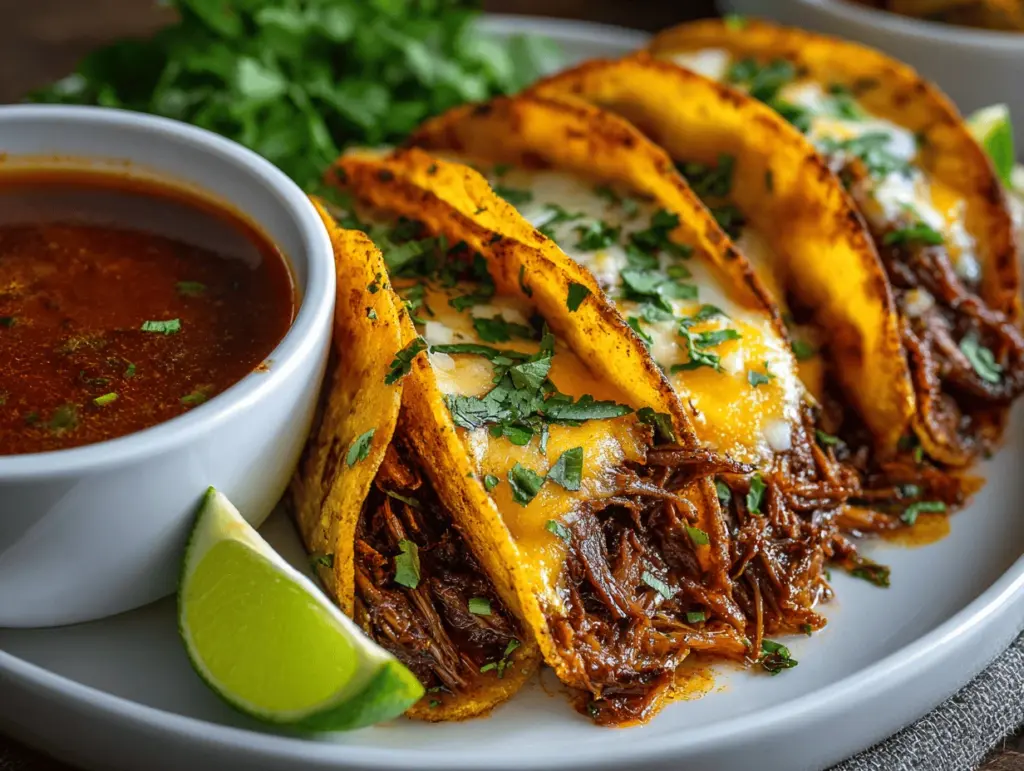
The first bite into a birria taco—crackling shell, juicy shredded beef, a rush of smoky, spicy consommé dripping down your hand—is honestly kind of life-changing. I still remember my first homemade birria taco: the kitchen filled with the scent of toasted chiles and warm spices, and that glossy beef simmering for hours. It’s the kind of smell that pulls everyone to the table, no matter what they’re doing. Let’s face it, these aren’t just tacos—they’re an experience.
My obsession with birria tacos started when my friend from Guadalajara introduced me to her family’s recipe. It was love at first dunk. The best birria tacos recipe is one you make your own, but I’ve spent years testing, tweaking, and taste-testing (tough job, right?) to land on this version. It’s juicy, crispy, and totally packed with flavor, but the steps are straightforward and the ingredients are easily found at most supermarkets. If you’re looking to wow your family, impress your friends, or just treat yourself to something special, this birria tacos recipe is for you.
I make these birria tacos for celebrations, lazy Sundays, and even meal prep—they freeze like a dream! Whether you’re a seasoned home cook or just taco-curious, you’ll find this recipe friendly and forgiving. All that’s left is to gather your ingredients, put on your favorite playlist, and get ready to create a flavor-packed feast that’ll earn you taco hero status. Let’s jump right in and make the best birria tacos you’ve ever had!
Why You’ll Love This Birria Tacos Recipe
- Juicy, Flavor-Packed Beef: The beef simmers until it’s melt-in-your-mouth tender, soaking up every bit of smoky chile and spice. Every taco is bursting with richness and depth.
- Crispy, Cheesy Shells: Pan-frying the tortillas in birria fat gives you that iconic golden crunch on the outside—seriously addictive! I always add a sprinkle of cheese for extra meltiness. You can skip it, but you might regret it.
- Restaurant-Quality at Home: No need for takeout or food trucks. This recipe delivers street food magic right from your kitchen, with ingredients you can find at your local store.
- Simple Ingredients, Big Results: No wild-goose chases for obscure chiles—everything is pantry-friendly or has an easy swap. I’ve tested and streamlined every step for maximum flavor with minimum fuss.
- Customizable Heat: Want it spicier? Toss in extra chile de árbol! Prefer mild? Use fewer dried chiles. You’re in control, always.
- Perfect for Gatherings: Birria tacos are a total crowd-pleaser. Every time I make a batch, there’s a line in my kitchen! They’re fun for taco nights, birthdays, or just making a Tuesday feel special.
- Dippable Consommé Goodness: The rich, aromatic broth for dunking is what sets these apart. It’s savory, smoky, and makes every bite unforgettable.
This isn’t just another birria tacos recipe. I blend the chiles and spices super-smooth, then simmer the meat low and slow for hours (or in the Instant Pot if I’m short on time). The result? Juicy beef that’s never dry, tortillas that crisp up perfectly, and a dipping broth that’s addictive. The first time I nailed this process, my husband said, “Can we have these every week?” It’s comfort food with a twist—deep Mexican flavor, but easy enough for a weeknight if you start ahead. If you love tacos, rich stews, or just crave something next-level, these birria tacos will totally win you over.
What Ingredients You Will Need
This birria tacos recipe calls for simple, accessible ingredients that come together for an explosion of flavor. Most are pantry staples, and I include swaps when I can. Here’s what you’ll need:
- For the Birria:
- Beef Chuck Roast, 2.5 lbs (1.1 kg), cut into large chunks (marbled for juicy texture; brisket or short ribs work too)
- Beef Shank or Oxtail, 1 lb (450 g), bone-in (adds richness; optional, but highly recommended for the best broth)
- Dried Guajillo Chiles, 4-5, stems and seeds removed (mild, earthy flavor)
- Dried Ancho Chiles, 2, stems and seeds removed (deep, smoky undertone)
- Dried Chile de Árbol, 2-3, stems and seeds removed (use more for extra heat, less for mild)
- Roma Tomatoes, 2 medium (fresh or canned, adds a bright note)
- Yellow Onion, 1 large, quartered
- Garlic Cloves, 6, peeled
- Whole Cloves, 3-4 (optional, for warmth)
- Bay Leaves, 2
- Cinnamon Stick, 1 small (Mexican canela preferred)
- Black Peppercorns, 1 teaspoon (freshly cracked if possible)
- Dried Oregano, 1 teaspoon (Mexican oregano if you have it)
- Ground Cumin, 1 teaspoon
- Apple Cider Vinegar, 2 tablespoons (for brightness)
- Beef Broth or Water, 4 cups (950 ml; broth gives more flavor)
- Kosher Salt, to taste
- For the Tacos:
- Corn Tortillas, 18-20 (soft, 6-inch; flour tortillas work in a pinch but corn is classic)
- Shredded Oaxaca or Mozzarella Cheese, 2 cups (225 g; optional, but makes them extra gooey!)
- Chopped White Onion, 1/2 cup (for serving)
- Fresh Cilantro, 1/2 cup, chopped (for sprinkling)
- Lime Wedges (for squeezing over the top, brightens every bite)
Ingredient notes: I’ve tried this with brisket, short ribs, and even lamb—each one has its charm. For the dried chiles, you can find them in most Latin markets or the international aisle. If you want to cut corners, swap fresh tomatoes for canned, but roasted is always best. No apple cider vinegar? White vinegar works. For a gluten-free option, stick with corn tortillas and double-check your broth label.
Equipment Needed
- Large Dutch Oven or Stockpot – My go-to for slow simmering the birria. If you don’t have one, a heavy-bottomed soup pot works, but keep an eye on sticking.
- Blender – For pureeing the chiles, tomatoes, and spices into a silky paste. I use a high-speed blender, but a decent standard one does the trick. In a pinch, an immersion blender will work—just strain well.
- Mesh Strainer – To get the consommé nice and smooth. If you skip this, you’ll have tiny chile bits that can be a little gritty.
- Large Skillet or Griddle – For crisping the tacos. I love using a well-seasoned cast-iron pan, but any non-stick skillet will do.
- Tongs – Essential for flipping tacos and shredding beef (I’ve dropped a taco or two with a spatula—tongs are safer!).
- Cutting Board & Sharp Knife – For prepping your garnishes and slicing beef.
- Serving Bowls – For the consommé; individual ramekins are fun for dipping.
Budget tip: If you don’t own a Dutch oven, check thrift stores or use a slow cooker for the braise (just sauté the veggies/chiles on the stove first). Keep your blender in good shape by rinsing immediately after blending chiles—dried chile residue can stain if left too long.
Preparation Method
- Prep and Toast the Chiles (10 min): Remove stems and seeds from guajillo, ancho, and chile de árbol. Heat a dry skillet over medium. Toast chiles for 30-60 seconds per side, just until fragrant (don’t burn them—bitter chiles are no fun). Set aside.
- Soak Chiles and Prep Veggies (5 min): Place toasted chiles in a bowl, cover with hot water, and soak for 10 minutes to soften. Meanwhile, quarter the onion, peel garlic, and halve the tomatoes.
- Blend the Sauce (5 min): Add soaked chiles (drained), tomatoes, onion, garlic, cloves, cinnamon, peppercorns, oregano, cumin, and vinegar to your blender. Pour in 1 cup (240 ml) beef broth. Blend on high until super smooth. If needed, add a splash more broth. Strain the sauce through a mesh sieve into a bowl; press to extract all the flavor.
- Brown the Beef (10 min): In your Dutch oven, add a drizzle of oil over medium-high. Season beef chunks with salt and brown on all sides (work in batches if needed). This step builds deep flavor. Remove and set aside.
- Simmer the Birria (2.5-3 hours stovetop, or 1 hour Instant Pot): Return all beef to the pot. Pour in the chile sauce, remaining beef broth, bay leaves, and more salt to taste. Bring to a simmer, then cover and cook low and slow for 2.5 to 3 hours. Stir occasionally and check that the beef is always mostly submerged (add water if needed). For Instant Pot: Set to “Meat/Stew” for 60 min with natural release.
- Shred the Beef (10 min): Once the meat is fall-apart tender, remove it from the pot. Let cool slightly, then shred with two forks. Skim excess fat from the top of the broth, but save it—this is liquid gold for frying tacos!
- Strain and Reserve Consommé (5 min): Strain the braising liquid into a bowl for dipping. Taste and adjust seasoning (salt, vinegar, or a pinch of sugar if too acidic).
- Assemble and Fry Tacos (20 min): Heat a skillet over medium. Brush or dip each tortilla into the reserved birria fat, then place on the hot skillet. Sprinkle cheese on one side, then add a scoop of shredded beef. Fold and press gently. Cook until crispy and golden, about 2 minutes per side. Repeat until you run out of filling (or tortillas!).
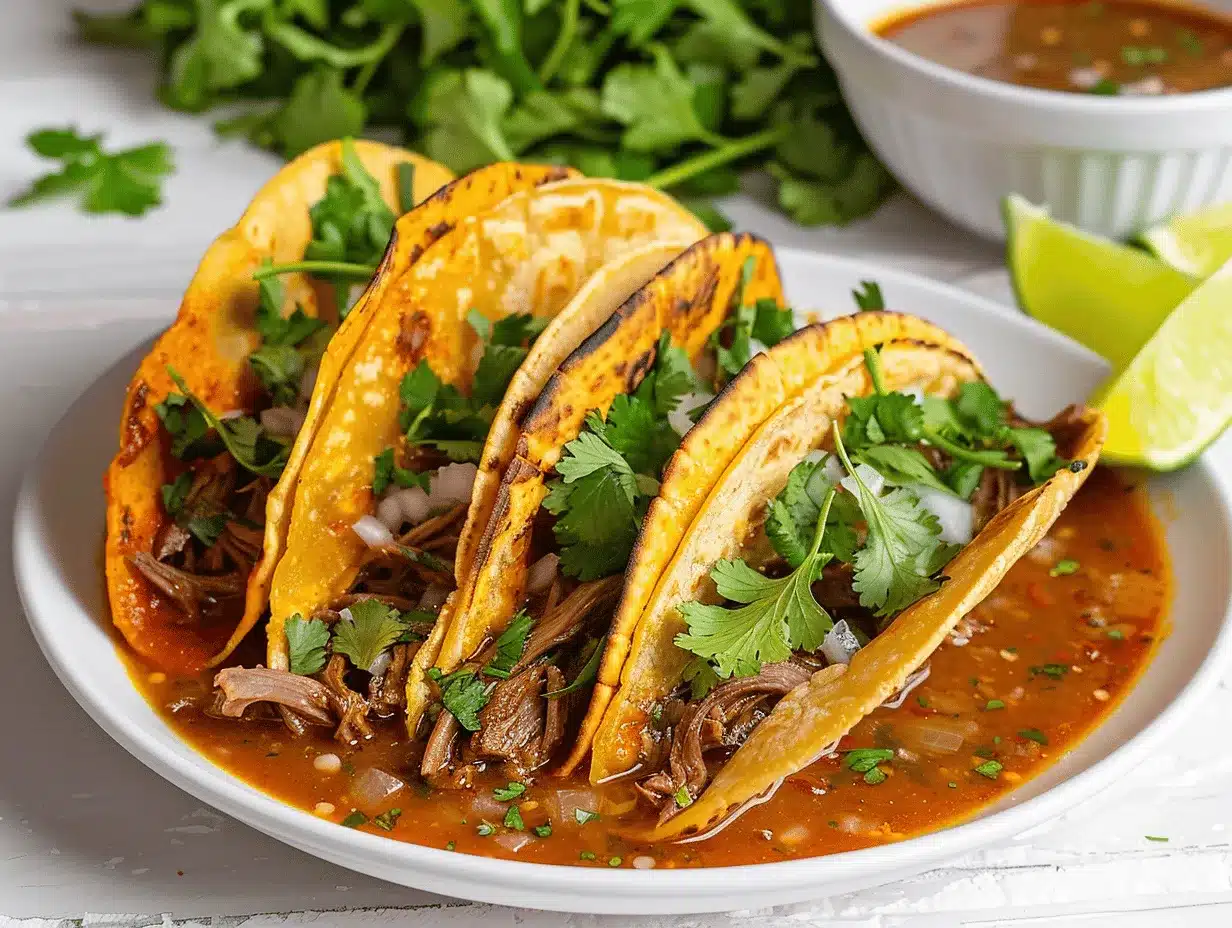
- Serve (5 min): Serve tacos hot, garnished with onion, cilantro, and lime wedges. Pour consommé into bowls and dunk away!
Troubleshooting: If your sauce is too thick, thin with more broth. If the beef is tough, keep simmering—time is your friend here. If your tortillas tear, try warming them first or use a different brand (some are sturdier than others).
Personal tip: Double the batch and freeze half the birria for next time—future you will be very grateful.
Cooking Tips & Techniques
- Don’t Rush the Braise: The magic of birria is in slow cooking. If you try to shortcut this step, the beef just won’t get as tender or flavorful. Even with the Instant Pot, let it rest in the broth for a bit before shredding.
- Use the Fat for Frying: Skimming some fat from the top of the broth and using it to fry the tortillas is the secret to those iconic crispy, orange-stained shells. Don’t skip this—it’s what makes birria tacos irresistible.
- Keep the Consommé Hot: Warm consommé makes for the best dipping. If it cools, just reheat gently on the stove before serving. Cold consommé is just…sad, trust me.
- Multitasking Strategy: While the beef simmers, prep your garnishes and shred your cheese. I always line up the tortillas and lay out the toppings so assembly is a breeze.
- Cheese Melting Tip: For that perfect cheese pull, sprinkle cheese on the tortilla as soon as it hits the pan, then add the beef. Cover the pan for 30 seconds to help the cheese melt faster.
- Common Mistakes: Burning the chiles is a classic rookie move—keep them moving in the pan. If you oversalt early, the broth will concentrate and get saltier. Season gradually and taste at the end.
- Learned the Hard Way: One time I skipped straining the sauce and ended up with gritty tacos. Always strain for the smoothest, most luxurious consommé.
- Consistency for Success: Use the same size tortilla, fill each with the same amount of beef, and don’t overcrowd your pan. You’ll get even, crispy, and picture-perfect tacos every time.
Variations & Adaptations
- Lamb Birria Tacos: Swap the beef for lamb shoulder or leg. The flavor gets even richer, and it’s a nod to birria’s roots in Jalisco. My husband actually prefers lamb—try it if you’re feeling adventurous!
- Chicken Birria (Pollo Birria): Use boneless chicken thighs for a lighter but still flavorful version. Reduce simmering time to about 45 minutes to 1 hour, or until the chicken shreds easily.
- Vegetarian Birria Tacos: Sub in jackfruit (canned, drained, and rinsed) or a mix of mushrooms and lentils. Simmer in the chile sauce for 30-40 minutes. You’ll still get that bold, birria-inspired flavor.
- Spice Level Adjustments: For mild birria tacos, omit chile de árbol. For fire-lovers, double them or add chipotles in adobo for smoky heat.
- Different Cooking Methods: You can make the birria in a slow cooker (8 hours on low after browning the beef and blending the sauce) or Instant Pot (1 hour, high pressure). Both work beautifully.
- Allergen Notes: For gluten-free birria tacos, always use certified gluten-free corn tortillas and check that your broth is safe. For dairy-free, skip the cheese or use a plant-based shredded cheese (I’ve tried it—melts well enough!).
- Personal Favorite: Sometimes I add a pickled jalapeño or a slice of avocado on top. It’s not traditional, but it adds a creamy, tangy kick that I love.
Serving & Storage Suggestions
Birria tacos are best served fresh and hot, straight from the skillet. The crispy shell, gooey cheese, and juicy beef are at their peak when piping hot. I love to pile them on a big platter, garnish with fresh cilantro and onion, and wedge in lots of lime for squeezing. For a real treat, serve with bowls of consommé for dipping—don’t be shy, get messy!
Pair these birria tacos with Mexican rice, refried beans, or a crisp slaw. They also go great with aguas frescas, Mexican Coke, or a cold cerveza. If you’re feeling fancy, a tangy margarita pairs perfectly with all those bold spices.
For storage, keep leftover beef and consommé in separate airtight containers in the fridge for up to 4 days. Reheat beef gently in a pan with a splash of broth. Tacos can be assembled and crisped up again in a hot skillet. To freeze, store shredded birria and consommé in freezer-safe bags for up to 2 months. Thaw overnight and reheat as usual. The flavors get even richer after a day or two—honestly, leftovers might be even better!
Nutritional Information & Benefits
Each birria taco (with cheese, beef, and consommé for dipping) is about 320 calories, 18g protein, 16g fat, and 28g carbs. Using leaner cuts or chicken will lower the fat content. The chiles and spices are packed with antioxidants, and beef provides iron, zinc, and B vitamins for energy and immune support.
For gluten-free diets, stick with corn tortillas. Dairy-free? Just skip the cheese or use a substitute. The recipe does contain alliums (onion, garlic) and potential allergens with cheese and tortillas, so swap as needed for your needs. Personally, I love that birria tacos satisfy cravings for comfort food while delivering a good protein punch—perfect for post-workout or just fueling up for a busy day.
Conclusion
If you’ve made it this far, you’re clearly ready for a flavor adventure! This birria tacos recipe is more than just a meal—it’s a celebration on a plate. The juicy, crispy, flavor-packed results are worth every minute, and the process itself is honestly a blast (especially if you have good music and hungry helpers).
Don’t be afraid to tweak the heat, add your favorite toppings, or try different fillings. That’s the beauty of birria tacos—they’re endlessly customizable, but always delicious. I love making these for family gatherings, but even on a random weeknight, they make everything feel just a little more festive.
Give it a try, then let me know how it goes! Leave a comment with your favorite variation, share your taco triumphs, or tag me on social if you make them. Your kitchen, your rules—and trust me, you’ll want to make this birria tacos recipe again and again. Happy taco making!
Frequently Asked Questions
What is birria, and where do birria tacos come from?
Birria is a traditional Mexican stew, usually made with beef, lamb, or goat, slow-cooked in a rich, spicy chile broth. Birria tacos (or “quesabirria”) are a street food twist where the juicy meat is tucked into tortillas, fried until crispy, and dipped in the flavorful consommé. They originated in the Mexican state of Jalisco but have taken the world by storm!
Can I make birria tacos ahead of time?
Absolutely! The beef and consommé can be made up to 3 days ahead and stored in the fridge. Assemble and fry the tacos just before serving for the crispiest results. The flavors get even better with time.
Are birria tacos spicy?
They can be, but you control the heat! The base recipe is flavorful but not fiery. Add more chile de árbol for extra spice or use fewer for a milder version. You can also serve with hot sauce on the side for spice-lovers.
Can I use a different type of meat?
Definitely. Beef chuck is classic, but brisket, short ribs, or even lamb work great. For chicken birria tacos, use boneless thighs and reduce the simmer time. There are even vegetarian versions with jackfruit or mushrooms if you want to go meatless.
How do I keep the tacos from getting soggy?
Fry the tortillas in birria fat until crispy, fill and fold them in the pan, and serve right away. If you’re making a big batch, keep them warm in a low oven (about 200°F/95°C) on a wire rack so they stay crisp.
Pin This Recipe!

Birria Tacos Recipe – Best Juicy & Crispy Homemade Birria Tacos

These birria tacos feature juicy, slow-cooked beef tucked into crispy, cheesy corn tortillas, served with a rich consommé for dipping. Packed with smoky, spicy flavors, they’re perfect for gatherings or a special weeknight meal.
- Prep Time: 30 minutes
- Cook Time: 2 hours 45 minutes
- Total Time: 3 hours 15 minutes
- Yield: 18-20 tacos (about 6 servings) 1x
- Category: Main Course
- Cuisine: Mexican
Ingredients
- 2.5 lbs beef chuck roast, cut into large chunks
- 1 lb beef shank or oxtail, bone-in (optional, for richness)
- 4–5 dried guajillo chiles, stems and seeds removed
- 2 dried ancho chiles, stems and seeds removed
- 2–3 dried chile de árbol, stems and seeds removed (adjust for heat)
- 2 medium Roma tomatoes (fresh or canned)
- 1 large yellow onion, quartered
- 6 garlic cloves, peeled
- 3–4 whole cloves (optional)
- 2 bay leaves
- 1 small cinnamon stick (Mexican canela preferred)
- 1 teaspoon black peppercorns
- 1 teaspoon dried oregano (Mexican oregano preferred)
- 1 teaspoon ground cumin
- 2 tablespoons apple cider vinegar
- 4 cups beef broth or water
- Kosher salt, to taste
- 18–20 corn tortillas (6-inch, soft)
- 2 cups shredded Oaxaca or mozzarella cheese (optional)
- 1/2 cup chopped white onion (for serving)
- 1/2 cup fresh cilantro, chopped (for serving)
- Lime wedges (for serving)
Instructions
- Remove stems and seeds from guajillo, ancho, and chile de árbol chiles. Toast chiles in a dry skillet over medium heat for 30-60 seconds per side until fragrant. Set aside.
- Place toasted chiles in a bowl, cover with hot water, and soak for 10 minutes to soften. Meanwhile, quarter the onion, peel garlic, and halve the tomatoes.
- Add soaked chiles (drained), tomatoes, onion, garlic, cloves, cinnamon, peppercorns, oregano, cumin, and vinegar to a blender. Pour in 1 cup beef broth. Blend on high until super smooth. Strain the sauce through a mesh sieve into a bowl.
- In a large Dutch oven, add a drizzle of oil over medium-high heat. Season beef chunks with salt and brown on all sides. Remove and set aside.
- Return all beef to the pot. Pour in the chile sauce, remaining beef broth, bay leaves, and more salt to taste. Bring to a simmer, then cover and cook low and slow for 2.5 to 3 hours (or 1 hour in Instant Pot). Stir occasionally and add water if needed.
- Once the meat is fall-apart tender, remove it from the pot. Let cool slightly, then shred with two forks. Skim excess fat from the top of the broth and reserve for frying tacos.
- Strain the braising liquid into a bowl for dipping. Taste and adjust seasoning.
- Heat a skillet over medium. Brush or dip each tortilla into reserved birria fat, then place on the hot skillet. Sprinkle cheese on one side, add shredded beef, fold, and press gently. Cook until crispy and golden, about 2 minutes per side.
- Serve tacos hot, garnished with onion, cilantro, and lime wedges. Pour consommé into bowls for dipping.
Notes
For extra crispy tacos, use the reserved birria fat for frying. Adjust spice level by varying the amount of chile de árbol. Birria and consommé can be made ahead and freeze well. For gluten-free, use certified corn tortillas and check broth labels. Cheese is optional for dairy-free diets. Strain the sauce for a smooth consommé. If tortillas tear, warm them first.
Nutrition
- Serving Size: 1 taco with beef, cheese, and consommé
- Calories: 320
- Sugar: 3
- Sodium: 550
- Fat: 16
- Saturated Fat: 7
- Carbohydrates: 28
- Fiber: 3
- Protein: 18
Keywords: birria tacos, beef birria, Mexican tacos, crispy tacos, cheesy tacos, street food, consommé, party food, authentic birria, easy birria tacos


