There’s something about the aroma of maple and brown sugar baking in the oven that instantly makes a house feel like home. The first time I whipped up these maple brown sugar cookie bars was on a chilly autumn afternoon, windows fogged up, and my kids sprawled on the kitchen floor, impatiently waiting for a taste. I’ll be honest—I’d planned on making classic cookies, but the idea of a thick, chewy bar topped with silky maple cream cheese frosting just sounded too good to pass up. And let’s face it, bars are way easier when you don’t want to scoop endless dough!
These maple brown sugar cookie bars have quickly become my go-to recipe for every occasion—cozy movie nights, potlucks, and even last-minute bake sales. You know, the kind of treat that disappears before you even have a chance to sneak a second piece? There’s just something magical about the way deep brown sugar and pure maple syrup combine, creating a gooey, almost caramel-like texture. And the frosting? Oh boy, it’s like a rich, creamy cloud, bursting with real maple flavor. Honestly, I’ve tested this recipe more times than I can count, tweaking ingredient ratios and frosting thickness until it was just right—soft, thick, and totally irresistible.
What I love most is how these bars strike a perfect balance between comfort and a little indulgence. They’re sweet, but not cloying, with a hint of salt and that unmistakable maple warmth. Whether you’re baking for a crowd or just craving a little something extra after dinner, these maple brown sugar cookie bars with maple cream cheese frosting are about to become your new favorite treat. Trust me, once you try them, you’ll wonder how you ever lived without them!
Why You’ll Love This Maple Brown Sugar Cookie Bars Recipe
- Quick & Easy: No rolling, no chilling, no fuss. These bars come together in under an hour, making them perfect for busy evenings or spontaneous cravings.
- Simple Ingredients: You probably have everything you need in your pantry and fridge right now—no need to hunt down anything fancy or hard to find.
- Perfect for Sharing: Whether it’s a family get-together, a holiday party, or a cozy night in, these bars are always a hit with kids and adults alike.
- Crowd-Pleaser: I’ve brought these to bake sales, office parties, and even gifted them to neighbors. I always get requests for the recipe (and I never mind sharing!).
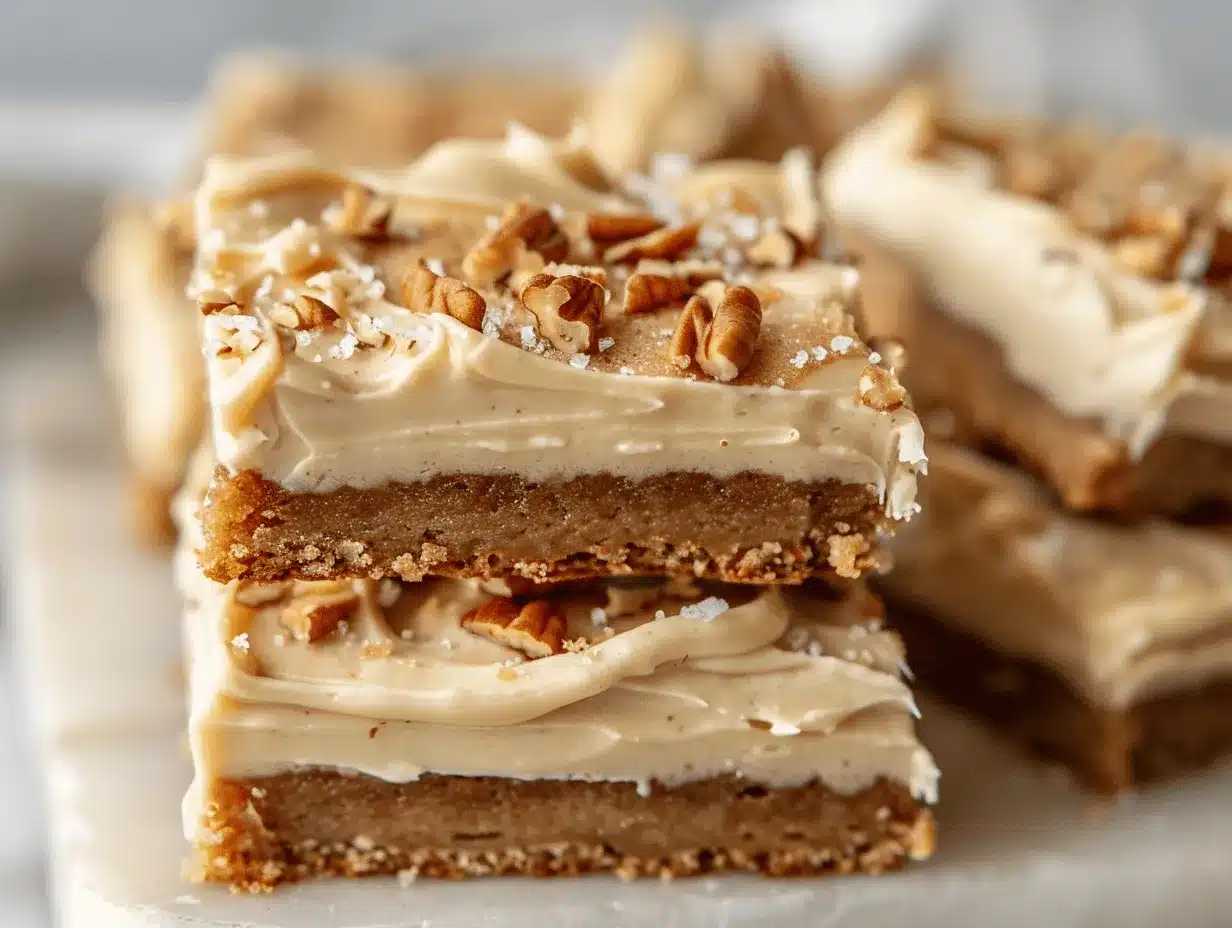
- Unbelievably Delicious: Imagine a soft, chewy cookie with rich brown sugar flavor, topped with a creamy, dreamy maple frosting—that’s what you get in every bite.
What really sets these maple brown sugar cookie bars apart is the way the brown sugar and maple syrup work together. Most recipes lean heavily on one or the other, but here, they blend for a deep, caramelized flavor that’s just… wow. The frosting is another story—it’s not overly sweet, and the tang from the cream cheese balances everything out. I love blending the maple syrup directly into the frosting (pro tip: use pure maple syrup for the real deal).
After baking dozens of bars and cookies over the years, I can say without a doubt this recipe is my favorite for its simplicity and versatility. It’s comfort food, for sure, but with a little extra flair. These bars are the kind you make when you want to impress someone—or just treat yourself. And hey, if you sneak a bite straight from the fridge? I won’t judge. Promise.
What Ingredients You Will Need
This recipe uses wholesome, straightforward ingredients to create that craveable, chewy texture and layered maple flavor. Most are pantry staples, and you can swap or adjust a few if needed. Here’s what you’ll need for both the maple brown sugar cookie bars and the irresistible maple cream cheese frosting:
- For the Cookie Bars:
- Unsalted butter, softened (1 cup/226g): Adds rich flavor and moisture. I like to let mine sit out for an hour before baking.
- Light brown sugar (1 1/2 cups/330g): The hero ingredient for chewy, caramelized bars. Dark brown sugar works too, for an even deeper flavor.
- Granulated sugar (1/4 cup/50g): Balances sweetness and helps with the classic cookie bar texture.
- Pure maple syrup (1/4 cup/60ml): Use 100% pure—no pancake syrup! It infuses each bite with real maple richness.
- Large eggs (2), room temperature: Eggs help bind everything and keep the bars soft.
- Vanilla extract (2 teaspoons): For extra warmth and depth.
- All-purpose flour (2 1/4 cups/280g): Regular or spooned and leveled for best results. Gluten-free blends work well if you need a swap (I like King Arthur’s).
- Baking powder (1 teaspoon): Gives the bars a gentle lift.
- Salt (1/2 teaspoon): A touch of salt brings out the buttery, maple flavors.
- Cinnamon (1/2 teaspoon): Optional, but I love the extra warmth it brings. You can leave it out for a pure maple profile.
- For the Maple Cream Cheese Frosting:
- Cream cheese, softened (8oz/226g): Full-fat is best for creaminess. Let it sit out while the bars bake.
- Unsalted butter, softened (1/4 cup/57g): Blends with the cream cheese for a spreadable, luscious frosting.
- Powdered sugar (2 cups/240g): Sift if lumpy, for a smooth finish.
- Pure maple syrup (2-3 tablespoons/30-45ml): Taste as you go—add more for stronger maple flavor.
- Vanilla extract (1/2 teaspoon): Rounds out the flavor and keeps it classic.
- Pinch of salt: Just a little to balance the sweetness (don’t skip!).
Ingredient Tips: For the best maple flavor, always use real maple syrup—Grade A dark or amber is my top pick. If you’re out of cream cheese, mascarpone works in a pinch. And if you want a nutty crunch, toss in a handful of chopped pecans or walnuts before baking.
Looking for swaps? Try a 1:1 gluten-free flour blend for wheat-free bars, or use dairy-free cream cheese and butter for a vegan-friendly version. Just keep an eye on the texture when making substitutions!
Equipment Needed
- 9×13-inch baking pan: The classic size for cookie bars. I’ve used metal and glass pans—metal gives a slightly crisper edge, but both work well.
- Parchment paper: For easy removal and less mess. You can butter the pan if you’re out, but parchment makes things so much simpler.
- Electric mixer (handheld or stand): For creaming the butter and sugars. If you don’t have one, a sturdy whisk and some elbow grease will do!
- Mixing bowls: One large for the batter, one medium for the frosting.
- Measuring cups and spoons: For accuracy—baking is part science, after all!
- Rubber spatula: For scraping the sides of your bowl and evenly spreading the batter and frosting.
- Wire rack: Helps the bars cool quickly and evenly. No rack? Just let them cool in the pan.
If you’re a frequent baker, investing in a quality 9×13-inch pan is a game changer (I’ve had mine for years and it’s still going strong). For those just starting out, most discount stores carry affordable options that work great. To keep pans in top shape, line with parchment and avoid metal utensils—trust me, it keeps sticking and scratches to a minimum!
How to Make Maple Brown Sugar Cookie Bars with Maple Cream Cheese Frosting
-
Preheat and prep:
Set your oven to 350°F (175°C). Line a 9×13-inch baking pan with parchment paper, letting it hang over the sides for easy lifting. This little trick saves you from messy bar breakage later! -
Cream the butter and sugars:
In a large bowl, beat 1 cup (226g) softened unsalted butter with 1 1/2 cups (330g) light brown sugar and 1/4 cup (50g) granulated sugar. Use an electric mixer on medium for 2-3 minutes until light and fluffy. If you’re mixing by hand, go for at least 4-5 minutes—it’ll feel like a workout, but it makes a difference! -
Add wet ingredients:
Beat in 2 large eggs, one at a time, then add 1/4 cup (60ml) pure maple syrup and 2 teaspoons vanilla extract. Mix until smooth and fully incorporated. The batter will be thick and glossy—don’t worry if it looks a little sticky. -
Combine dry ingredients:
In a separate bowl, whisk together 2 1/4 cups (280g) all-purpose flour, 1 teaspoon baking powder, 1/2 teaspoon salt, and 1/2 teaspoon cinnamon (if using). Gradually add dry ingredients to the wet mixture, mixing just until no streaks remain. Overmixing can make bars tough, so stop as soon as it’s all blended. -
Spread and bake:
Spoon the dough into your lined pan. Use a spatula to smooth the surface—dampening your hands helps if the dough sticks. Bake for 25-30 minutes, or until the edges are golden and the center is just set. A toothpick should come out with a few moist crumbs, not wet batter. If your oven runs hot, check at 22 minutes. -
Cool completely:
Remove the pan and let the bars cool on a wire rack for at least 1 hour. Warm bars will melt the frosting, so patience is key here (I know, it’s tough!). -
Make the maple cream cheese frosting:
In a medium bowl, beat together 8oz (226g) softened cream cheese and 1/4 cup (57g) unsalted butter until smooth and creamy, about 2 minutes. Add 2 cups (240g) powdered sugar, 2-3 tablespoons (30-45ml) pure maple syrup, 1/2 teaspoon vanilla extract, and a pinch of salt. Beat until fluffy and spreadable. Taste and add more maple syrup if you want an extra burst of flavor. -
Frost and slice:
Spread the frosting evenly over the cooled bars. For clean slices, run a sharp knife under hot water, wipe dry, and cut into 24 squares. Wipe the blade between cuts for perfect edges.
Troubleshooting: If your bars come out too dry, check your oven temp—an oven thermometer is a lifesaver. Bars sinking in the middle? They might need a few more minutes to set. And if your frosting is runny, chill it in the fridge for 10-15 minutes before spreading.
I’ve learned to let the bars cool fully—once, I frosted them too soon and ended up with a sticky mess (lesson learned). If you’re pressed for time, pop the pan in the fridge for faster cooling.
Cooking Tips & Techniques
- Measure flour carefully: Too much flour makes bars dense and dry. Spoon it into your measuring cup and level off with a knife for the best texture.
- Use real maple syrup: The flavor difference is huge! Pancake syrup just doesn’t do these bars justice.
- Don’t overbake: Pull the bars when the center just sets—overbaking leads to dry, crumbly bars instead of chewy perfection. My oven usually hits the sweet spot at 27 minutes.
- Room temperature ingredients: Softened butter and cream cheese blend much more smoothly, preventing lumps in both batter and frosting.
- Multitasking: While the bars bake, let your cream cheese and butter soften for the frosting. That way, you’re ready to go when they’re cool!
One mistake I made early on was using cold butter—it just doesn’t cream well, and you’ll end up with uneven bars. My other tip? Parchment overhang is a must; it’s the easiest way to lift bars out for neat slicing. If you’re making these for a party, chill briefly before cutting for ultra-clean squares.
For extra flair, try sprinkling chopped pecans or a dusting of cinnamon-sugar on top before serving. It’s a little touch that takes them from tasty to totally irresistible.
Variations & Adaptations
- Gluten-free: Swap the all-purpose flour for a 1:1 gluten-free baking blend. I’ve tested this with King Arthur and Bob’s Red Mill—both worked perfectly!
- Dairy-free/vegan: Use vegan butter and dairy-free cream cheese in both the bars and frosting. Substitute eggs with flax eggs (2 tablespoons ground flax + 5 tablespoons water, mixed and rested for 5 minutes).
- Nutty twist: Fold in 1/2 cup (60g) chopped toasted pecans or walnuts into the batter for crunch and extra flavor. I love this version for fall gatherings!
You can also add a pinch of nutmeg or a handful of white chocolate chips to the batter for a fun spin. For an autumn-inspired version, stir in a bit of pumpkin pie spice and top with candied pecans. If you’re baking for kiddos, toss in some mini chocolate chips—my youngest swears by this combo.
One personal favorite? Swapping half the cream cheese for apple butter in the frosting. It’s a little tangy, a little fruity, and super seasonal.
Serving & Storage Suggestions
These maple brown sugar cookie bars are best enjoyed at room temperature, but they’re also delicious straight from the fridge (extra chewy!). For a pretty presentation, cut into neat squares and arrange on a platter lined with parchment or dusted with a little cinnamon.
Pair with hot coffee, chai, or even a pumpkin spice latte for the coziest treat. I’ve served them alongside a simple vanilla ice cream for dessert—total crowd-pleaser!
To store, cover bars tightly and refrigerate for up to 5 days. The flavors actually deepen overnight. For longer storage, freeze bars (frosted or unfrosted) in an airtight container for up to 2 months. Thaw in the fridge, then bring to room temp before serving. If you like your frosting extra creamy, let bars sit out for 20 minutes before eating.
Reheating isn’t really needed, but if you want a warm bar, just pop one in the microwave for 10 seconds (frosting will get a little soft and gooey—yum!).
Nutritional Information & Benefits
Each maple brown sugar cookie bar (based on 24 servings) has roughly 210 calories, 10g fat, 29g carbohydrates, and 2g protein. They’re not exactly health food, but they are made with real, wholesome ingredients—no artificial flavors or colors here!
Maple syrup is a natural sweetener, bringing minerals like zinc and manganese, while cream cheese adds a bit of protein and calcium. If you use whole wheat or gluten-free flour, you’ll up the fiber content, too. The bars are naturally nut-free (unless you add nuts), so they’re great for sharing at parties with various dietary needs.
From a wellness perspective, I love treats that feel like a true indulgence but are made with care and quality ingredients. Sometimes, that’s all the balance you need.
Conclusion
These maple brown sugar cookie bars with maple cream cheese frosting are one of those recipes you’ll come back to again and again. They’re easy, reliable, and always a hit—whether you’re feeding a crowd or just treating yourself. The deep brown sugar, real maple syrup, and luscious frosting combine for a treat that’s comforting and a little bit special.
Feel free to get creative—swap in nuts, go gluten-free, or try new frosting flavors. I love how forgiving the recipe is, and honestly, I never get tired of making (or eating) these bars. They’re a staple in my kitchen, especially during cooler months when that maple aroma is just irresistible.
If you give this maple brown sugar cookie bars recipe a try, drop a comment below and let me know how it turned out! Share your adaptations, tips, or even a photo—I love seeing your kitchen creations. Happy baking, and remember: sometimes the best treats are the ones you share.
FAQs
Can I make maple brown sugar cookie bars ahead of time?
Absolutely! They actually taste even better after a day as the flavors meld together. Just store them covered in the fridge and frost before serving if you like.
Can I freeze these cookie bars?
Yes! Slice the bars, wrap tightly, and freeze for up to 2 months. Thaw overnight in the fridge, then bring to room temp before enjoying.
What if I don’t have real maple syrup?
You can use maple-flavored syrup in a pinch, but the flavor won’t be as rich or authentic. For the best results, stick with pure maple syrup if possible.
How do I make these gluten-free?
Just use a 1:1 gluten-free baking flour blend in place of the all-purpose flour. Check the texture as you go, but it works beautifully!
Can I double this recipe for a crowd?
Definitely! Bake in two pans or a larger sheet pan. Keep an eye on the baking time, as thicker bars may need a few extra minutes.
Pin This Recipe!
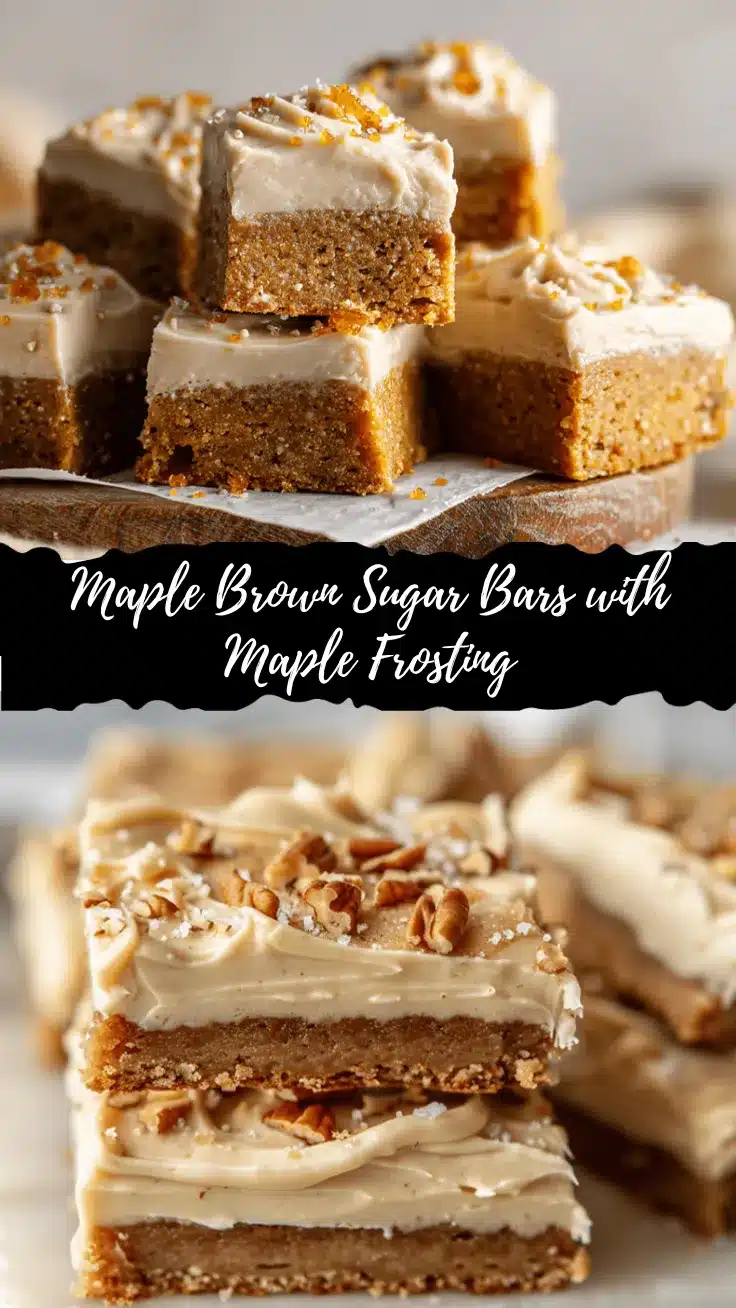
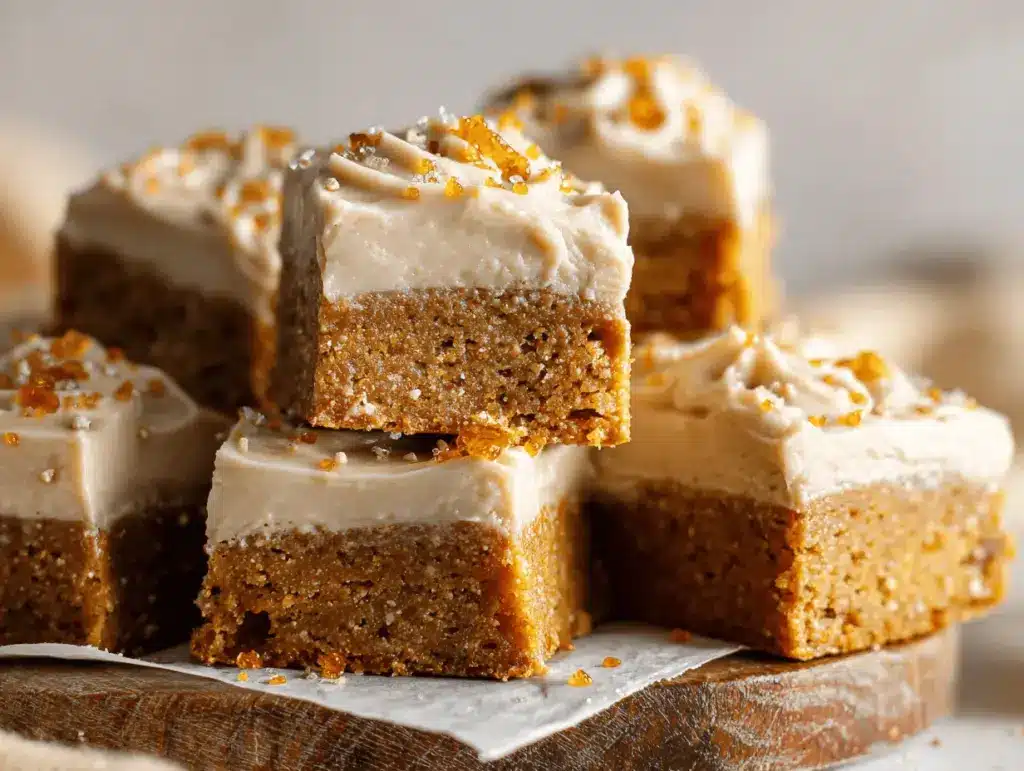
Maple Brown Sugar Cookie Bars

These chewy cookie bars are packed with deep brown sugar and pure maple syrup flavor, then topped with a silky maple cream cheese frosting. Perfect for cozy gatherings, bake sales, or a comforting treat at home.
- Prep Time: 20 minutes
- Cook Time: 25-30 minutes
- Total Time: 1 hour 10 minutes
- Yield: 24 bars 1x
- Category: Dessert
- Cuisine: American
Ingredients
- 1 cup unsalted butter, softened
- 1 1/2 cups light brown sugar
- 1/4 cup granulated sugar
- 1/4 cup pure maple syrup
- 2 large eggs, room temperature
- 2 teaspoons vanilla extract
- 2 1/4 cups all-purpose flour
- 1 teaspoon baking powder
- 1/2 teaspoon salt
- 1/2 teaspoon cinnamon (optional)
- 8 oz cream cheese, softened
- 1/4 cup unsalted butter, softened
- 2 cups powdered sugar
- 2–3 tablespoons pure maple syrup
- 1/2 teaspoon vanilla extract
- Pinch of salt
Instructions
- Preheat oven to 350°F (175°C). Line a 9×13-inch baking pan with parchment paper, letting it hang over the sides.
- In a large bowl, beat 1 cup softened unsalted butter with 1 1/2 cups light brown sugar and 1/4 cup granulated sugar using an electric mixer on medium for 2-3 minutes until light and fluffy.
- Beat in 2 large eggs, one at a time, then add 1/4 cup pure maple syrup and 2 teaspoons vanilla extract. Mix until smooth.
- In a separate bowl, whisk together 2 1/4 cups all-purpose flour, 1 teaspoon baking powder, 1/2 teaspoon salt, and 1/2 teaspoon cinnamon (if using).
- Gradually add dry ingredients to the wet mixture, mixing just until no streaks remain.
- Spoon the dough into the lined pan and smooth the surface with a spatula. Bake for 25-30 minutes, or until edges are golden and center is just set. A toothpick should come out with a few moist crumbs.
- Let bars cool completely in the pan on a wire rack for at least 1 hour.
- For the frosting: In a medium bowl, beat together 8 oz softened cream cheese and 1/4 cup unsalted butter until smooth and creamy, about 2 minutes.
- Add 2 cups powdered sugar, 2-3 tablespoons pure maple syrup, 1/2 teaspoon vanilla extract, and a pinch of salt. Beat until fluffy and spreadable.
- Spread frosting evenly over cooled bars. Slice into 24 squares for serving.
Notes
Use real maple syrup for best flavor. For gluten-free bars, substitute a 1:1 gluten-free flour blend. Let bars cool completely before frosting to avoid melting. For clean slices, chill briefly before cutting and wipe the knife between cuts. Add chopped pecans or walnuts for a nutty twist.
Nutrition
- Serving Size: 1 bar
- Calories: 210
- Sugar: 20
- Sodium: 110
- Fat: 10
- Saturated Fat: 6
- Carbohydrates: 29
- Protein: 2
Keywords: maple, brown sugar, cookie bars, cream cheese frosting, dessert, easy, autumn, baking, chewy bars, maple syrup