
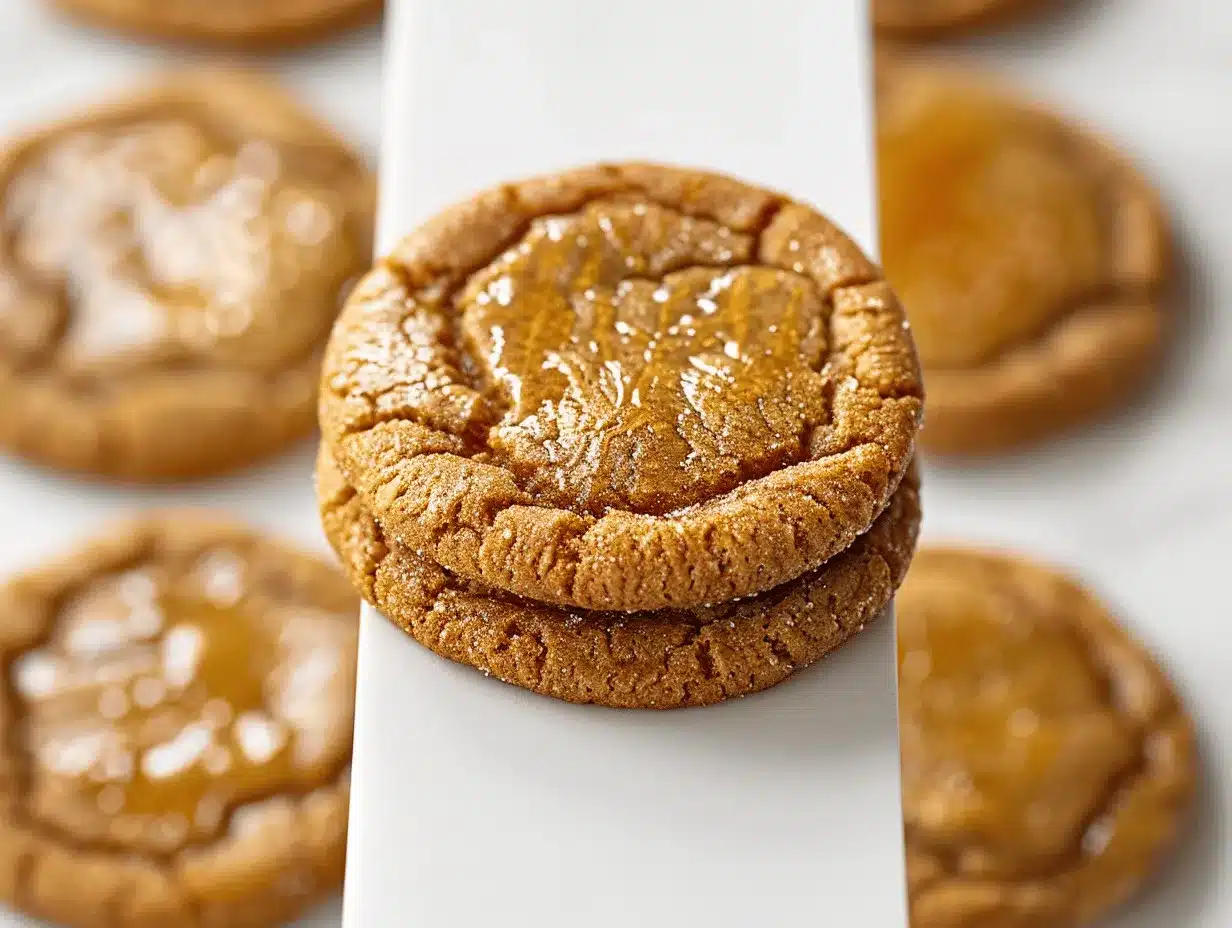
The aroma that fills the kitchen when these brown sugar maple glazed cookies are baking? Honestly, it’s like autumn and a cozy hug rolled into one. The first time I whipped up a batch, I was craving something sweet but not too fussy—just that perfect combo of soft, chewy, and a little bit fancy. So I dug through my pantry, found some brown sugar and pure maple syrup, and thought, “Why not make cookies that taste like the best weekend pancake stack?”
I’ve tried dozens of cookie recipes, but these brown sugar maple glazed cookies have a special place in my heart. Maybe it’s the way the maple glaze sets with a glossy finish, or how the brown sugar gives the cookies that deep, caramel-like flavor. These cookies have rescued me on busy weeknights, won over picky eaters at family gatherings, and—no joke—helped me survive a few rough days when only soft, chewy sweetness would do.
This recipe doesn’t require anything fancy or expensive. Just honest ingredients and a little time. It’s perfect for anyone who wants to impress without stress—great for beginners, busy parents, weekend bakers, or anyone who believes cookies should be soft enough to bend but sturdy enough to dunk. I’ve tested these cookies (probably too many times), tried a few twists, and now I’m sharing my favorite version with you. If you love maple, brown sugar, and that bakery-style chew, you’re in for a treat!
Trust me, these brown sugar maple glazed cookies will become your go-to recipe for potlucks, holiday tins, or just those nights when you need something sweet and homemade. Let’s get started!
Why You’ll Love This Recipe
- Quick & Easy: Ready in under 35 minutes, so you can satisfy a cookie craving fast—no chilling required.
- Simple Ingredients: You probably have everything you need in your pantry already. No running to specialty stores for obscure items!
- Perfect for Any Occasion: These cookies shine at parties, cozy nights in, or even as a sweet surprise in lunchboxes.
- Crowd-Pleaser: Everyone from kids to adults raves about these. My family gobbles them up before they even cool!
- Unbelievably Delicious: The deep, caramel notes from brown sugar and the sweet, earthy glaze create a flavor combo that’s pure comfort.
What really sets these brown sugar maple glazed cookies apart is the texture—they’re soft in the center, with just enough chew to make each bite memorable. The maple glaze isn’t just an afterthought; it’s the finishing touch that makes these cookies stand out from the usual chocolate chip crowd. I blend the glaze until it’s silky, and it hardens just enough for that gorgeous shine (no sticky mess, I promise).
I’ve baked these for holiday cookie swaps and casual get-togethers, and every time, people ask for the recipe. They’re easy enough for beginners, but impressive enough for seasoned bakers. If you love classic flavors with a twist, these cookies are about to become your new favorite. And let’s face it—sometimes you just need a cookie that feels like a hug and tastes like a Saturday morning breakfast.
Whether you’re baking for loved ones or treating yourself, this recipe delivers. It’s reliable, forgiving, and every batch comes out soft, chewy, and loaded with maple goodness. Trust me, you’ll want to make a double batch!
What Ingredients You Will Need
This recipe uses simple, wholesome ingredients to deliver bold flavor and a super satisfying texture—no fuss, no frills. You don’t need anything fancy, and most items are pantry staples. Here’s what you’ll need for the perfect batch of brown sugar maple glazed cookies:
- For the Cookies:
- 2 1/4 cups (280g) all-purpose flour
- 1/2 teaspoon baking soda
- 1/2 teaspoon salt (I use fine sea salt for an even flavor)
- 3/4 cup (170g) unsalted butter, softened (if using salted, reduce added salt by half)
- 1 cup (220g) packed light brown sugar (dark brown sugar works for deeper flavor)
- 1/4 cup (50g) granulated sugar
- 1 large egg, room temperature
- 2 teaspoons pure vanilla extract
- 2 tablespoons pure maple syrup (Grade A for best taste)
- For the Maple Glaze:
- 1 cup (120g) powdered sugar, sifted
- 2 tablespoons pure maple syrup
- 2-3 teaspoons milk (dairy or non-dairy, as preferred)
- 1/8 teaspoon maple extract (optional, boosts maple flavor)
Ingredient Notes & Tips:
- Butter: I prefer European-style for richer flavor, but any unsalted butter works. If you need dairy-free, try Earth Balance sticks.
- Maple Syrup: Go for real maple syrup—not pancake syrup. It really makes a difference in taste and aroma.
- Flour: For gluten-free, substitute a 1-to-1 gluten-free baking flour (Bob’s Red Mill works well).
- Egg: No eggs? Use 3 tablespoons unsweetened applesauce for a slightly cakier cookie.
- Powdered Sugar: Sifting avoids lumps in the glaze—trust me, it’s worth the extra minute.
- Milk: I’ve used almond milk and oat milk with good results. Don’t use water—it thins the glaze too much.
If you want a nutty twist, toss in 1/2 cup chopped pecans or walnuts to the dough. For extra decadence, drizzle a little more maple syrup over the finished cookies. This recipe is flexible, so don’t be afraid to swap things based on what you have!
Equipment Needed
- Baking Sheets: Heavy-duty, nonstick works best. If you only have thin sheets, use two stacked together to prevent burning.
- Parchment Paper or Silicone Baking Mats: For easy cleanup and no sticking. I’ve tried both, but silicone mats give the most even bake.
- Mixing Bowls: You’ll need a large one for dough and a small one for the glaze.
- Hand Mixer or Stand Mixer: Either works. I used a sturdy wooden spoon once in a pinch—it’s a workout, but doable!
- Measuring Cups and Spoons: Accurate measurements make a big difference, especially with flour and syrup.
- Cookie Scoop (optional): For even-sized cookies. A regular spoon works, but the scoop gives that bakery look.
- Wire Cooling Rack: For quick cooling and glaze setting. If you don’t have one, a clean oven rack does the trick.
- Spatula: For transferring cookies and mixing glaze.
If you’re just starting out, don’t stress about fancy gadgets. I’ve made these with thrift store pans and a whisk, and they still turned out chewy and soft. For silicone mats, I recommend washing immediately after use—maple glaze can get sticky! And if you’re worried about budget, parchment paper is a great alternative for nonstick baking.
Preparation Method
- Preheat and Prep:
- Preheat oven to 350°F (175°C). Line baking sheets with parchment paper or silicone mats.
- Mix Dry Ingredients:
- In a medium bowl, whisk together 2 1/4 cups (280g) flour, 1/2 teaspoon baking soda, and 1/2 teaspoon salt. Set aside.
- Tip: Sift flour if you want extra soft cookies, but it’s not strictly necessary.
- Cream Butter & Sugars:
- In a large bowl, beat 3/4 cup (170g) softened butter, 1 cup (220g) brown sugar, and 1/4 cup (50g) granulated sugar until light and fluffy (about 2-3 minutes with a hand mixer).
- Watch for pale color and creamy texture—don’t rush this step!
- Add Wet Ingredients:
- Beat in 1 large egg, 2 teaspoons vanilla, and 2 tablespoons maple syrup until fully combined.
- If mixture looks curdled, just keep beating—it’ll smooth out.
- Combine Dry & Wet:
- Gradually add flour mixture to wet ingredients, mixing on low speed or by hand until just combined.
- Don’t overmix—stop when you see no dry streaks. Dough will be soft and a bit sticky.
- Shape Cookies:
- Use a cookie scoop or spoon to drop rounded tablespoons (about 30g each) of dough onto the prepared sheets, spaced 2 inches (5cm) apart.
- If dough feels too sticky, chill for 10 minutes—optional but helpful.
- Bake:
- Bake for 10-12 minutes, until edges are set and centers look slightly underdone but puffed.
- Tip: Cookies will continue to set as they cool. Don’t wait for them to brown!
- Cool:
- Let cookies cool on baking sheet for 5 minutes, then transfer to wire rack. They’re fragile while hot—use a spatula and be gentle.
- Make Maple Glaze:
- In a small bowl, whisk 1 cup (120g) powdered sugar, 2 tablespoons maple syrup, 2-3 teaspoons milk, and 1/8 teaspoon maple extract (if using) until smooth and pourable.
- If too thick, add milk 1/2 teaspoon at a time. If too thin, add extra powdered sugar.
- Glaze & Set:
- Once cookies are cool, drizzle or spread glaze over each cookie. Let set for at least 15 minutes.
- The glaze hardens as it dries—don’t stack cookies until fully set.
Personal Tips: I usually bake one sheet at a time for even cooking. If making a double batch, rotate pans halfway through. If you like a thicker glaze, double the glaze recipe—extra never hurts!
Troubleshooting: If cookies spread too much, chill dough an extra 15 minutes. If glaze is dull, sift powdered sugar before mixing. And if you’re ever in doubt, eat a warm cookie straight from the rack—you’ll know you did it right!
Cooking Tips & Techniques
Here’s where a little experience really pays off. I’ve had cookies turn out flat, glazes that ran everywhere, and dough that just wouldn’t cooperate. Let me share what I’ve learned so your brown sugar maple glazed cookies come out just right:
- Don’t Overmix: As soon as the flour disappears, stop mixing. Overworking makes cookies tough instead of chewy.
- Butter Temperature: Use butter that’s soft but still cool to the touch. If it’s melty, your cookies might spread too thin.
- Baking Sheet Rotation: Midway through baking, rotate sheets for even browning—especially if your oven has hot spots (mine definitely does!).
- Glaze Consistency: Start with less milk and add more slowly. Glaze should be thick enough to set but still pourable. If it runs off, add more powdered sugar.
- Cookie Size: Use a cookie scoop for uniform cookies. If you don’t have one, just eyeball it—the rustic look is charming!
- Chilling Dough: Chilling gives a thicker, chewier cookie. If you’re short on time, even 10 minutes helps.
- Maple Flavor Boost: Maple extract gives extra oomph. A tiny splash goes a long way, but don’t overdo it—too much can taste artificial.
I’ve burned cookies by using dark, thin pans (double up if you have to). Once, I forgot to rotate the pan and had half raw, half crispy cookies. Lesson learned—set a timer and check halfway. The glaze can be tricky; if you rush, it’ll be lumpy or too thin. Whisk slowly and you’ll get that perfect shine. If dough feels dry, add a teaspoon of milk before baking.
Variations & Adaptations
Everyone has their own cookie style, right? Here are some easy ways to make these brown sugar maple glazed cookies suit your tastes and needs:
- Gluten-Free: Swap all-purpose flour for a 1-to-1 gluten-free blend. I’ve tried Bob’s Red Mill and King Arthur—both work well.
- Nutty Twist: Add 1/2 cup chopped toasted pecans, walnuts, or even hazelnuts to the dough. Maple + nuts is a classic combo!
- Spiced Variation: Stir in 1/2 teaspoon ground cinnamon or pumpkin pie spice for a warm, cozy flavor.
- Dairy-Free: Use vegan butter and non-dairy milk in both the dough and glaze. Cookies stay soft and rich.
- Double Maple: Mix 1 tablespoon extra maple syrup into the glaze for a bolder taste. I’ve tried this—makes the glaze super flavorful!
If you prefer crisp cookies, flatten dough balls slightly before baking. For a festive twist, sprinkle glazed cookies with crushed maple candies or colored sprinkles. To avoid common allergens, skip nuts and use dairy-free alternatives.
One of my favorite adaptations? Adding orange zest to the glaze—it’s bright and unexpected. Don’t be afraid to experiment; this recipe is forgiving and fun to personalize!
Serving & Storage Suggestions
These brown sugar maple glazed cookies are best served at room temperature, when the glaze has set and the centers are perfectly chewy. For a Pinterest-worthy look, drizzle glaze back and forth and top with a sprinkle of flaky sea salt or chopped nuts.
- Pairings: Enjoy with a hot mug of coffee, chai, or cold milk. They’re also lovely with vanilla ice cream or sandwiched with whipped cream.
- Storage: Store cookies in an airtight container at room temperature for up to 4 days. Separate layers with parchment to keep the glaze intact.
- Freezing: Freeze unglazed cookies for up to 2 months. Thaw at room temp, then glaze before serving.
- Reheating: Warm cookies in the microwave for 10 seconds to soften, but avoid reheating glazed cookies—they get sticky.
Flavor deepens after a day, so these are extra good the next morning. If making ahead, glaze right before serving for the prettiest finish. These cookies travel well, making them ideal for bake sales or gifting!
Nutritional Information & Benefits
Each brown sugar maple glazed cookie contains approximately:
- Calories: 120
- Protein: 1g
- Fat: 5g
- Carbs: 18g
- Sugar: 11g
Health Benefits: Maple syrup offers antioxidants and minerals like zinc and manganese. Brown sugar’s molasses adds trace minerals, too. If you use nuts, you’ll get some healthy fats and protein. This recipe can be adapted for gluten-free or dairy-free diets without losing flavor. Watch out for allergens—egg, dairy, and nuts are all optional here.
Personally, I love that these cookies aren’t overly sweet and have a bit more nutrition than your average sugar cookie. They’re a treat that feels comforting but not heavy. Enjoy in moderation, and don’t forget to savor every chewy bite!
Conclusion
If you’re looking for a soft, chewy, and absolutely delicious cookie, these brown sugar maple glazed cookies are a must-try. They’re easy to make, endlessly adaptable, and guaranteed to make your kitchen smell like a dream. I love how the maple glaze adds just the right amount of sweetness and a glossy finish that looks gorgeous in photos (and real life!).
Feel free to tweak the recipe—add nuts, switch out the flour, or boost the spice. The recipe is forgiving and fun to experiment with. Honestly, these cookies have become a family favorite, and I hope they’ll become yours, too.
If you bake them, let me know how they turn out! Drop a comment, share your photos, or tell me your favorite variation. Happy baking—and enjoy every sweet, chewy bite!
FAQs
Can I make brown sugar maple glazed cookies without eggs?
Yes! Substitute the egg with 3 tablespoons unsweetened applesauce. The cookies will be a bit cakier but still soft and chewy.
How do I prevent the glaze from running off the cookies?
Make sure cookies are completely cool before glazing. If the glaze is too thin, add more powdered sugar until it’s thick yet pourable.
Can I freeze these cookies?
Absolutely. Freeze unglazed cookies in an airtight container for up to 2 months. Thaw and glaze before serving for best texture.
What’s the best maple syrup for this recipe?
Always use pure maple syrup (Grade A is my go-to). Avoid pancake syrup—real maple gives the best flavor and aroma.
Can I make these cookies gluten-free?
Yes! Swap the all-purpose flour for a 1-to-1 gluten-free blend. The cookies stay soft and chewy, just like the classic version.
Pin This Recipe!
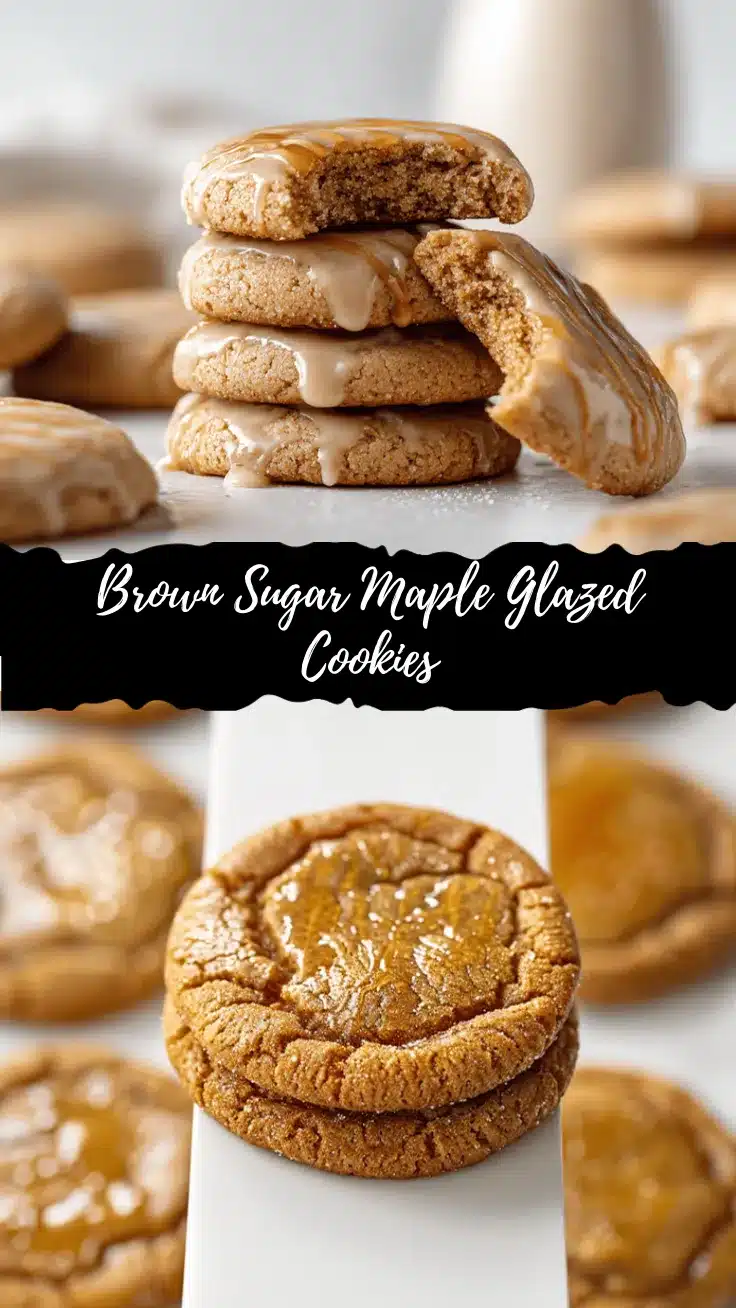
Brown Sugar Maple Glazed Cookies

These soft and chewy brown sugar maple glazed cookies combine the deep caramel flavor of brown sugar with a sweet, glossy maple glaze. Easy to make and endlessly adaptable, they’re perfect for cozy nights, potlucks, or holiday tins.
- Prep Time: 15 minutes
- Cook Time: 12 minutes
- Total Time: 35 minutes
- Yield: 24 cookies 1x
- Category: Dessert
- Cuisine: American
Ingredients
- 2 1/4 cups (280g) all-purpose flour
- 1/2 teaspoon baking soda
- 1/2 teaspoon salt (fine sea salt preferred)
- 3/4 cup (170g) unsalted butter, softened
- 1 cup (220g) packed light brown sugar (or dark brown sugar for deeper flavor)
- 1/4 cup (50g) granulated sugar
- 1 large egg, room temperature
- 2 teaspoons pure vanilla extract
- 2 tablespoons pure maple syrup (Grade A)
- 1 cup (120g) powdered sugar, sifted
- 2 tablespoons pure maple syrup (for glaze)
- 2–3 teaspoons milk (dairy or non-dairy, for glaze)
- 1/8 teaspoon maple extract (optional, for glaze)
Instructions
- Preheat oven to 350°F (175°C). Line baking sheets with parchment paper or silicone mats.
- In a medium bowl, whisk together flour, baking soda, and salt. Set aside.
- In a large bowl, beat softened butter, brown sugar, and granulated sugar until light and fluffy (about 2-3 minutes).
- Beat in egg, vanilla extract, and maple syrup until fully combined.
- Gradually add the dry ingredients to the wet mixture, mixing on low speed or by hand until just combined. Do not overmix.
- Use a cookie scoop or spoon to drop rounded tablespoons of dough onto prepared sheets, spaced 2 inches apart. If dough is too sticky, chill for 10 minutes.
- Bake for 10-12 minutes, until edges are set and centers look slightly underdone but puffed.
- Let cookies cool on the baking sheet for 5 minutes, then transfer to a wire rack to cool completely.
- For the glaze: In a small bowl, whisk powdered sugar, maple syrup, milk, and maple extract (if using) until smooth and pourable. Adjust consistency with more milk or powdered sugar as needed.
- Once cookies are cool, drizzle or spread glaze over each cookie. Let set for at least 15 minutes before serving.
Notes
For gluten-free cookies, use a 1-to-1 gluten-free flour blend. For dairy-free, substitute vegan butter and non-dairy milk. Add 1/2 cup chopped nuts or 1/2 teaspoon cinnamon for variations. Chill dough for thicker cookies. Let glaze set fully before stacking or storing.
Nutrition
- Serving Size: 1 cookie
- Calories: 120
- Sugar: 11
- Sodium: 60
- Fat: 5
- Saturated Fat: 3
- Carbohydrates: 18
- Protein: 1
Keywords: brown sugar cookies, maple glaze, soft cookies, chewy cookies, easy cookie recipe, fall dessert, holiday cookies, maple syrup cookies, glazed cookies


