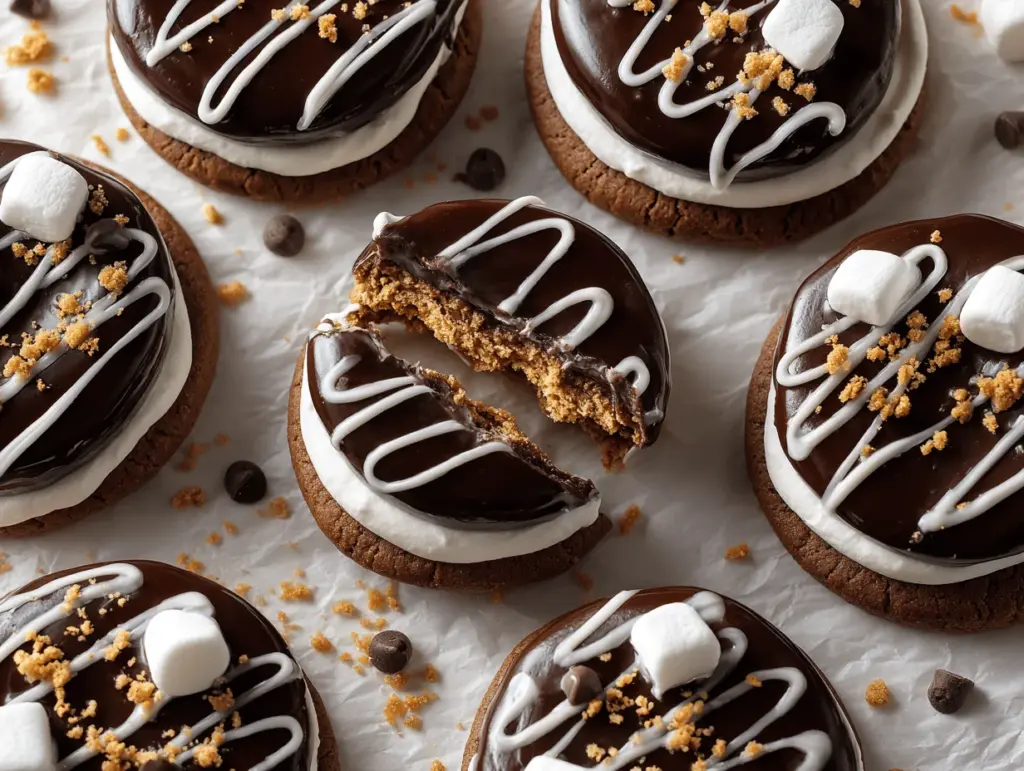
The first time I sank my teeth into a smores hostess cupcake cookie, I felt like a kid at summer camp again—sticky fingers, gooey marshmallows, and all. Imagine the classic campfire s’mores, but with a bakery twist: a soft, chewy cookie stuffed with marshmallow filling, draped in rich chocolate, and finished with that iconic squiggle on top. Honestly, these cookies are pure nostalgia and indulgence in every bite.
I stumbled across the idea for smores hostess cupcake cookies on a rainy afternoon, when my usual cupcake recipe felt a little too ordinary. We were craving something a bit more fun—something that’d remind us of toasty marshmallows and chocolate melting between crisp graham crackers. I’ve baked these cookies for birthday parties, bake sales, and even just a Tuesday night pick-me-up. They never last long.
What makes this recipe special is how it combines all the best parts of a childhood favorite with the bakery-style presentation that wows both kids and adults. Plus, you can whip these up at home—no campfire required, and definitely no store-bought shortcuts. If you love the marshmallow-chocolate-graham combo, you’ll want to bookmark this one. Smores hostess cupcake cookies are perfect for celebrations, lazy weekends, or whenever you need a sweet treat that’ll make you smile. After testing these cookies more times than I care to admit (all in the name of research, of course), I can promise you this recipe is foolproof, drool-worthy, and a guaranteed crowd-pleaser.
Why You’ll Love This Recipe
- Quick & Easy: These smores hostess cupcake cookies come together in under an hour, so you don’t have to wait long for bakery-level deliciousness. No fussy techniques, just straightforward steps.
- Simple Ingredients: You probably have everything you need in your pantry—flour, cocoa, marshmallows, chocolate chips, and graham crackers. No weird stuff, just the classics.
- Perfect for Any Occasion: Whether you’re hosting a backyard bonfire, packing lunchbox treats, or looking for a showstopper for the dessert table, these cookies fit right in.
- Crowd-Pleaser: I’ve made these for family gatherings and classroom parties, and I’ve yet to see a single cookie left behind. They’re a hit with kids and grownups alike (hello, nostalgia!).
- Unbelievably Delicious: The combination of chewy cookie, gooey marshmallow, and rich chocolate glaze is just unbeatable. Each bite is a little adventure—sweet, melty, and perfectly balanced.
What sets this recipe apart from others is the attention to texture and presentation. I blend just enough graham cracker into the dough for that unmistakable s’mores flavor, and I don’t skimp on the marshmallow filling. My secret? A quick freeze on the marshmallow centers so they stay gooey without running everywhere. Plus, the glossy chocolate glaze and signature squiggle make these look straight out of a bakery display case.
Honestly, these smores hostess cupcake cookies are more than just a treat—they’re a memory in cookie form. They bring back campfire stories, sticky hands, and that magical feeling of biting into something warm and chocolatey. If you’re searching for a recipe that’s easy enough for a weeknight but impressive enough for a party, this one’s for you. Trust me, you’ll want to make a double batch (they disappear fast!).
What Ingredients You Will Need
This recipe uses familiar, trusty ingredients to create that classic s’mores-meets-hostess-cupcake experience. The best part? No hard-to-find items, just wholesome, delicious stuff you probably already have on hand. Here’s what you’ll need:
- For the Cookie Dough:
- 1 1/4 cups (160g) all-purpose flour
- 1/2 cup (60g) finely crushed graham cracker crumbs (about 4 sheets; gives that s’mores base flavor)
- 1/3 cup (30g) unsweetened cocoa powder (Dutch-process preferred for rich color and taste)
- 1/2 teaspoon baking soda
- 1/2 teaspoon salt
- 1/2 cup (115g) unsalted butter, softened (room temperature is key for creaming)
- 1/2 cup (100g) granulated sugar
- 1/2 cup (110g) packed light brown sugar
- 1 large egg, room temperature
- 1 teaspoon pure vanilla extract (I love Nielsen-Massey for extra flavor)
- 1/2 cup (90g) semi-sweet chocolate chips or chunks
- For the Marshmallow Filling:
- 1 cup (80g) mini marshmallows (or 8 large marshmallows, cut in half; the minis melt more evenly)
- 2 tablespoons marshmallow creme/fluff (optional, for extra gooey centers)
- For the Chocolate Glaze:
- 3/4 cup (130g) semi-sweet or dark chocolate chips
- 2 tablespoons (28g) unsalted butter
- 1 tablespoon light corn syrup (for shine; honey works in a pinch)
- For the Signature Squiggle:
- 1/4 cup (30g) powdered sugar
- 1-2 teaspoons milk (dairy or non-dairy), as needed
- 1/8 teaspoon vanilla extract
Ingredient Tips: For best results, use fresh, soft marshmallows—old ones won’t melt as well. I’ve tried this recipe with both regular and gluten-free graham crackers, and both versions work! If you’re out of mini marshmallows, use a spoonful of marshmallow fluff in the center instead (it’s a little messier but gets extra gooey). Want a darker chocolate flavor? Swap in bittersweet chips for the glaze. These cookies are pretty forgiving, so feel free to get creative with what’s in your pantry.
Equipment Needed
- Stand Mixer or Hand Mixer: Makes creaming butter and sugar so much easier (though you can do it by hand with some muscle!).
- Mixing Bowls: At least two—one for dry and one for wet ingredients. I love using glass so I can see if everything’s mixed.
- Baking Sheets: Line with parchment paper for easy cleanup and to prevent sticking.
- Cookie Scoop or Tablespoon: For portioning dough evenly. A medium cookie scoop (about 1.5 tablespoons) gives you bakery-size cookies.
- Wire Cooling Rack: Helps cookies cool evenly and keeps the texture just right.
- Microwave-Safe Bowl: For melting chocolate glaze. If you don’t have a microwave, a small saucepan works too.
- Small Zip-Top Bag or Piping Bag: For the classic white squiggle on top. Don’t have one? Snip the corner off a sandwich bag—it works in a pinch.
- Spatula and Whisk: For mixing and scraping every last bit of dough from the bowl!
If you’re baking on a budget, skip the fancy gadgets—hand-mixing and a regular spoon will get the job done. Just remember, parchment paper is a lifesaver for sticky marshmallow messes (trust me, I’ve learned the hard way). If your baking sheet is older and a bit warped, double up for even heat and fewer burnt bottoms.
Preparation Method

- Prep the Marshmallow Centers: If using mini marshmallows, place 4-5 in small clusters on a parchment-lined plate. If using marshmallow creme, dollop 1-2 teaspoons onto the plate. Freeze for at least 15-20 minutes. This keeps the filling gooey inside the cookies.
- Make the Cookie Dough: In a medium bowl, whisk together 1 1/4 cups (160g) flour, 1/2 cup (60g) crushed graham crackers, 1/3 cup (30g) cocoa powder, 1/2 teaspoon baking soda, and 1/2 teaspoon salt. Set aside.
- In a large bowl (or stand mixer), beat 1/2 cup (115g) softened butter, 1/2 cup (100g) granulated sugar, and 1/2 cup (110g) brown sugar on medium speed for 2-3 minutes, until light and fluffy. Scrape down the sides as needed.
- Add 1 large egg and 1 teaspoon vanilla extract. Beat until just combined.
- Add the dry ingredients to the wet in two batches, mixing on low until incorporated. Don’t overmix—just until you see no dry spots.
- Fold in 1/2 cup (90g) chocolate chips. The dough will be thick and sticky (that’s what you want!).
- Shape and Fill the Cookies: Scoop about 1.5 tablespoons of dough and flatten into a disk in your palm. Place a frozen marshmallow cluster or dollop of marshmallow creme in the center. Top with a second flattened disk of dough and pinch the edges to seal completely. Roll gently into a ball and place on the prepared baking sheet. Repeat with remaining dough, spacing cookies about 2 inches (5cm) apart.
- Chill the Dough: Pop the tray in the fridge or freezer for 10-15 minutes. This helps the cookies hold their shape and prevents marshmallow blowouts.
- Bake: Preheat oven to 350°F (175°C). Bake cookies for 10-12 minutes, or until edges are set and tops look slightly crackled. The centers may look underbaked—don’t worry, they’ll firm up as they cool. If any marshmallow leaks out, use a spoon to nudge it back in while still warm.
- Cool: Let cookies cool on the sheet for 5 minutes, then transfer to a wire rack. They’re fragile when hot (that gooey center!), so handle with care.
- Make the Chocolate Glaze: In a microwave-safe bowl, combine 3/4 cup (130g) chocolate chips, 2 tablespoons (28g) butter, and 1 tablespoon corn syrup. Microwave in 30-second bursts, stirring between each, until smooth. (Or melt everything gently in a small saucepan over low heat.)
- Glaze the Cookies: Spoon or dip cooled cookies into the chocolate glaze, covering the tops. Place back on the rack and let set for 20-30 minutes, or until the glaze is firm to the touch.
- Add the Squiggle: Mix 1/4 cup (30g) powdered sugar, 1-2 teaspoons milk, and 1/8 teaspoon vanilla until smooth. Fill a zip-top bag or piping bag, snip a tiny corner, and pipe a thin squiggle across each cookie. Let set.
Prep Notes: If your kitchen runs warm, freezing the marshmallow centers longer helps. Don’t panic if some marshmallow peeks out—it adds to the charm! Cookies store best once fully cooled and set.
Cooking Tips & Techniques
- Chill is Key: Chilling the dough with marshmallow filling prevents spreading and keeps that gooey pocket inside. I’ve skipped this step before, and let’s just say, marshmallow lava everywhere—still tasty but messy.
- Seal the Edges: Pinch the dough tightly around the marshmallow. If you leave gaps, the filling can leak out. If that happens, you can gently press it back in with a spoon right after baking.
- Watch the Bake Time: Overbaking dries out the cookie and hardens the marshmallow. Take them out when the edges are set but the middle looks a little soft—they’ll finish setting on the rack.
- Glossy Glaze: For that bakery shine, the corn syrup in the glaze is clutch. Honey works if you’re out, but the finish will be slightly different.
- Clean Squiggle: If you don’t have a piping bag, use a zip-top bag and cut just the very tip. Practice a few squiggles on parchment first for steady hands.
- Batch Baking: You can double the recipe, but only bake one tray at a time for even cooking. Rotating halfway through helps if your oven has hot spots.
Honestly, I’ve made every mistake—underbaking, overfilling, not sealing enough—but these smores hostess cupcake cookies still turn out delicious even when they look a little “rustic.” Embrace the imperfections, and don’t stress if the first batch isn’t picture-perfect. Just keep an eye on that marshmallow!
Variations & Adaptations
- Gluten-Free: Swap in your favorite 1:1 gluten-free flour blend and gluten-free graham crackers. The dough comes out just as chewy (I’ve made it for my GF friends, and they raved!).
- Peanut Butter S’mores: Add 1/3 cup (80g) creamy peanut butter to the dough and replace half the chocolate chips with peanut butter chips. You get that Reese’s vibe—so good!
- Double Chocolate: Use dark cocoa powder and mix in white chocolate chips for a deeper, richer cookie.
- Seasonal Twist: In fall, stir in a pinch of cinnamon and use pumpkin-flavored marshmallows. For winter, add peppermint extract to the glaze and sprinkle crushed candy canes on top.
- Vegan Option: Substitute vegan butter, egg replacer (like flax egg), dairy-free chocolate, and vegan marshmallows. The texture is still spot-on, though the chocolate glaze might set a little softer.
- Allergen Swap: Nut allergy? This recipe is naturally nut-free, but always check chocolate chips for cross-contamination if you’re baking for someone with sensitivities.
One of my favorite personal spins was swirling a tablespoon of caramel into the marshmallow center—hello, gooey caramel s’mores! Honestly, the possibilities are endless. Feel free to mix and match based on what you crave or what’s in your pantry.
Serving & Storage Suggestions
These smores hostess cupcake cookies are best served at room temperature or slightly warm (10 seconds in the microwave is magic for that molten marshmallow center). For a Pinterest-perfect presentation, arrange them on a rustic wooden board and scatter a few mini marshmallows and chocolate pieces around—so cute for parties!
Pair with a tall glass of cold milk, hot cocoa, or coffee. They’re also outrageously good alongside fresh berries or a scoop of vanilla ice cream. If you’re packing for a picnic or lunchbox, wrap each cookie in parchment; they hold up well through a day’s adventure.
Storage: Store fully cooled cookies in an airtight container at room temperature for up to 4 days. For longer storage, freeze individually wrapped cookies for up to 2 months. To reheat, zap in the microwave for 10–15 seconds until just warm and gooey again. The flavors actually deepen after a day or two (if you can resist eating them all at once!).
Nutritional Information & Benefits
Each smores hostess cupcake cookie (based on a batch of 14) has roughly 210 calories, with 4g protein, 28g carbs, and 9g fat. The marshmallow and chocolate mean these are definitely a treat, but the graham cracker adds a bit of whole grain, and using dark chocolate can give you a dash of antioxidants.
These cookies are nut-free by default and can be made gluten-free or vegan with simple swaps. They do contain wheat, eggs, and dairy, so those with allergies should take note. Personally, I love that you can sneak a little fiber in with whole wheat graham crackers and keep the portion size just right for a satisfying sweet fix. Like all good desserts, moderation is key, but hey—sometimes you just need a little joy (and chocolate) in your day!
Conclusion
If you’re looking for a cookie that brings big bakery energy and classic s’mores nostalgia, these smores hostess cupcake cookies are it. They’re easy to make, ridiculously delicious, and pretty much guaranteed to steal the spotlight at any gathering—trust me, I’ve seen it happen more than once.
I love how customizable this recipe is. Whether you want to go gluten-free, add a nutty twist, or make them vegan, you can put your own spin on it. My favorite part? That magical moment when you bite in and hit the gooey marshmallow center—pure happiness.
Ready to bake your own batch? Give it a try and let me know how yours turn out! Share your photos on Pinterest, leave a comment below with your favorite variation, or tell me your best s’mores memory. I can’t wait to see what you create. Happy baking!
Frequently Asked Questions
Can I make smores hostess cupcake cookies ahead of time?
Yes! You can bake and glaze the cookies a day or two ahead. Wait to add the white squiggle until just before serving for the freshest look.
What’s the best way to keep the marshmallow filling gooey?
Freeze the marshmallow centers before wrapping with dough, and don’t overbake the cookies. This helps the inside stay soft and melty.
Can I use marshmallow creme instead of marshmallows?
Absolutely. Marshmallow creme works for a gooier center—just be careful sealing the dough, as it’s a bit stickier than using mini marshmallows.
How do I make these cookies gluten-free?
Use a 1:1 gluten-free flour blend and gluten-free graham crackers. The rest of the ingredients are naturally gluten-free or easy to substitute.
Can I freeze these cookies?
Yes, they freeze well! Cool completely, wrap individually, and store in a freezer-safe bag for up to 2 months. Warm in the microwave before serving for that just-baked taste.
Pin This Recipe!
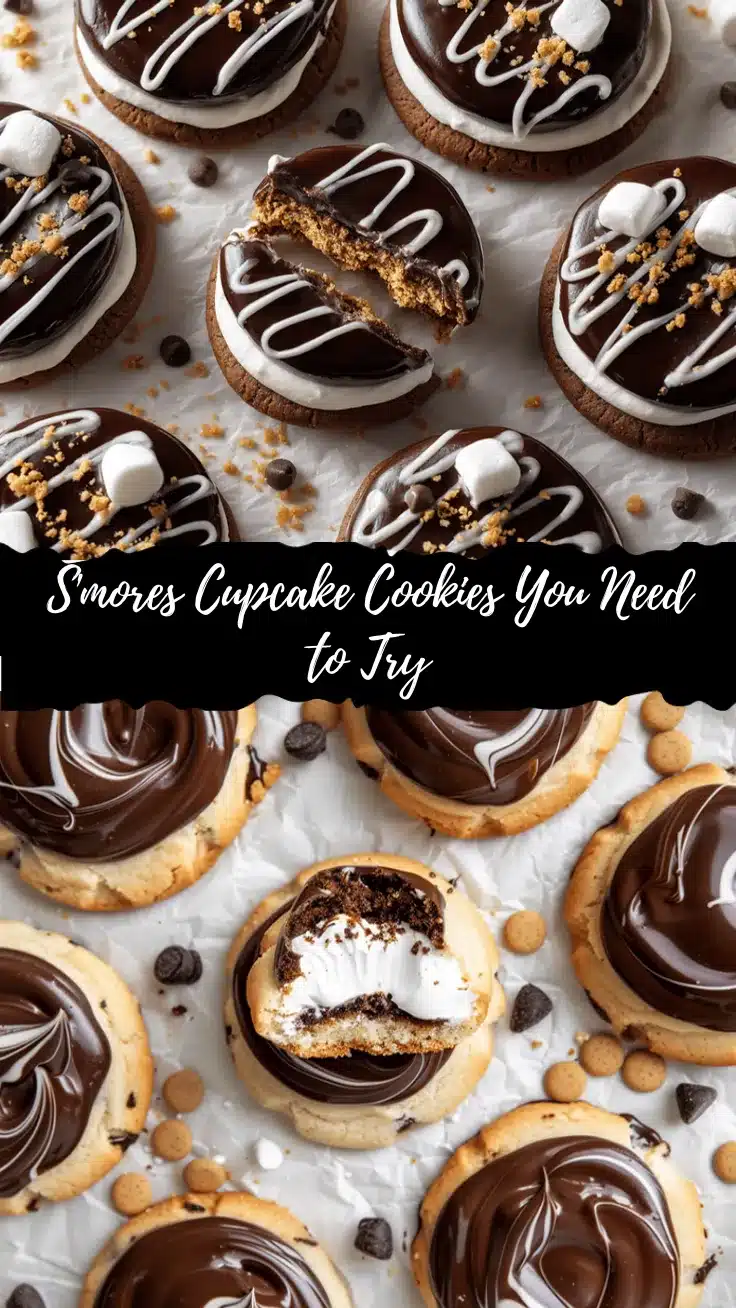
Smores Hostess Cupcake Cookies

These bakery-style cookies combine the nostalgic flavors of classic s’mores with the look and gooey center of a Hostess cupcake. Soft chocolate-graham cookies are stuffed with marshmallow, glazed in chocolate, and finished with a signature white squiggle for a fun, crowd-pleasing treat.
- Prep Time: 25 minutes
- Cook Time: 12 minutes
- Total Time: 50 minutes
- Yield: 14 cookies 1x
- Category: Dessert
- Cuisine: American
Ingredients
- 1 1/4 cups all-purpose flour
- 1/2 cup finely crushed graham cracker crumbs (about 4 sheets)
- 1/3 cup unsweetened cocoa powder (Dutch-process preferred)
- 1/2 teaspoon baking soda
- 1/2 teaspoon salt
- 1/2 cup unsalted butter, softened
- 1/2 cup granulated sugar
- 1/2 cup packed light brown sugar
- 1 large egg, room temperature
- 1 teaspoon pure vanilla extract
- 1/2 cup semi-sweet chocolate chips or chunks
- 1 cup mini marshmallows (or 8 large marshmallows, cut in half)
- 2 tablespoons marshmallow creme/fluff (optional)
- 3/4 cup semi-sweet or dark chocolate chips (for glaze)
- 2 tablespoons unsalted butter (for glaze)
- 1 tablespoon light corn syrup or honey (for glaze)
- 1/4 cup powdered sugar (for squiggle)
- 1–2 teaspoons milk (dairy or non-dairy, for squiggle)
- 1/8 teaspoon vanilla extract (for squiggle)
Instructions
- Prep the marshmallow centers: Place mini marshmallows (or dollops of marshmallow creme) in small clusters on a parchment-lined plate. Freeze for 15-20 minutes.
- In a medium bowl, whisk together flour, graham cracker crumbs, cocoa powder, baking soda, and salt.
- In a large bowl or stand mixer, beat softened butter, granulated sugar, and brown sugar on medium speed for 2-3 minutes until light and fluffy.
- Add egg and vanilla extract; beat until just combined.
- Add dry ingredients to wet in two batches, mixing on low until just incorporated.
- Fold in chocolate chips. Dough will be thick and sticky.
- Scoop about 1.5 tablespoons of dough, flatten into a disk, and place a frozen marshmallow cluster or marshmallow creme in the center. Top with a second flattened disk, pinch edges to seal, and roll gently into a ball. Place on a parchment-lined baking sheet. Repeat with remaining dough.
- Chill the shaped cookies in the fridge or freezer for 10-15 minutes.
- Preheat oven to 350°F (175°C). Bake cookies for 10-12 minutes, until edges are set and tops look slightly crackled. Centers may look underbaked.
- Cool cookies on the sheet for 5 minutes, then transfer to a wire rack.
- For the glaze: In a microwave-safe bowl, combine chocolate chips, butter, and corn syrup. Microwave in 30-second bursts, stirring between each, until smooth. (Or melt gently in a saucepan.)
- Spoon or dip cooled cookies into the chocolate glaze, covering the tops. Let set for 20-30 minutes until glaze is firm.
- For the squiggle: Mix powdered sugar, milk, and vanilla until smooth. Fill a zip-top or piping bag, snip a tiny corner, and pipe a thin squiggle across each cookie. Let set.
- Serve at room temperature or slightly warm. Store in an airtight container.
Notes
Chilling the dough with marshmallow filling prevents spreading and keeps the center gooey. Seal the dough tightly around the marshmallow to prevent leaks. Don’t overbake; cookies should look slightly underdone in the center. For gluten-free, use a 1:1 gluten-free flour blend and gluten-free graham crackers. Cookies freeze well and can be reheated for a molten center.
Nutrition
- Serving Size: 1 cookie
- Calories: 210
- Sugar: 17
- Sodium: 120
- Fat: 9
- Saturated Fat: 5
- Carbohydrates: 28
- Fiber: 1
- Protein: 4
Keywords: smores cookies, hostess cupcake cookies, bakery-style cookies, marshmallow stuffed cookies, chocolate glaze cookies, summer dessert, nostalgic dessert, easy cookie recipe


