Introduction
The first time I made this Peanut Butter Cup S’mores Dip, the gooey marshmallows and molten chocolate had everyone hovering around my cast iron skillet before it even hit the table—no joke! The smell alone, with warm peanut butter cups melting into creamy rivers under toasted marshmallows, is enough to make anyone weak in the knees. I whipped it up on a whim for a game night, and honestly, we barely even bothered with plates. Fingers, spoons, graham crackers—anything was fair game for scooping up that oozy goodness.
If your idea of a perfect dessert involves minimal effort and maximum wow-factor, this s’mores dip is going to be your new best friend. It’s the ultimate party treat that’s nostalgic yet just a little bit extra thanks to those peanut butter cups. The recipe came about when I was craving s’mores but didn’t want to fuss with the grill or campfire. After some trial and error (including one batch that was, let’s just say, a little too “toasty”), this version became my go-to for gatherings, lazy movie nights, and even the occasional “just because” treat.
What I love most is how adaptable it is—seriously, you can make this in less than 20 minutes, and the ingredient list is short and sweet (pun intended). Plus, it’s a surefire crowd-pleaser for both kids and adults. I’ve made this Peanut Butter Cup S’mores Dip more times than I can count, and every time it disappears in a flash. If you want a dessert that’s fun, shareable, and impossible to resist, you’ve just found it!
Why You’ll Love This Recipe
- Quick & Easy: This Peanut Butter Cup S’mores Dip comes together in under 20 minutes—perfect for last-minute parties or when you’re just craving something sweet right now.
- Simple Ingredients: You probably already have everything you need—just chocolate chips, peanut butter cups, marshmallows, and graham crackers. No fancy shopping trips required.
- Perfect for Parties: This dip was made for sharing. Everyone gathers around, dipping and laughing—honestly, it’s as fun to eat as it is to make.
- Crowd-Pleaser: Every age loves this. I’ve served it at birthday parties, sleepovers, and grown-up wine nights. There are never leftovers.
- Unbelievably Delicious: The combo of gooey marshmallow, melty chocolate, and creamy peanut butter is next-level comfort food. It’s rich, sweet, and totally over the top (in the best way).
If you’ve ever made a classic s’mores dip but wanted to take it up a notch, the addition of peanut butter cups makes all the difference. I blend regular chocolate chips with chopped peanut butter cups for a mix of flavors and textures—trust me, you’ll appreciate the extra peanutty hits. Instead of just tossing everything in, I use a layering technique: chocolate and peanut butter cups on the bottom, marshmallows on top. That way, every scoop gets a bit of everything.
This isn’t just a treat; it’s an experience. There’s something about the way the marshmallows toast up—crackly on top, stretchy underneath—that just makes people happy. Whether you’re hosting a backyard cookout or just cozying up on the couch, it’s the kind of dessert that brings everyone together. And let’s face it, we could all use more of those moments.
After dozens of batches, I’ve picked up a few tricks (like broiling at the end for that perfect marshmallow crust). If you want a party dessert that wows every time, this Peanut Butter Cup S’mores Dip is it.
What Ingredients You Will Need
This recipe uses simple, classic ingredients you probably have on hand, but the combination delivers a decadent, melty s’mores experience with a peanut butter twist. Here’s what you’ll need to make the ultimate Peanut Butter Cup S’mores Dip:
- Chocolate Chips (semi-sweet or milk, 1 1/2 cups / 255g) – The base of your dip. I like Ghirardelli or Guittard for rich chocolatey flavor.
- Mini Peanut Butter Cups (1 cup / about 180g, chopped) – The star of the show. Reese’s minis work perfectly, but store-brand is fine too. Chop them in half for easier scooping.
- Large Marshmallows (about 24-28 pieces, enough to cover your skillet) – You want a single, even layer. Jet-Puffed is classic, but any brand does the trick. For extra goo factor, use a mix of regular and mini marshmallows.
- Graham Crackers (for dipping) – Traditional, but you can swap in vanilla wafers, pretzels, or even apple slices for a fun twist.
- Butter (1 tablespoon / 14g, for greasing) – Helps prevent sticking and adds a touch of richness.
If you want to get a little creative, here are some easy swaps:
- Chocolate Chips: Use dark chocolate for a less-sweet dip, or white chocolate for a different vibe.
- Peanut Butter Cups: Allergic to peanuts? Try almond butter cups or sunflower seed butter cups instead.
- Marshmallows: Vegan marshmallows work great if you want a dairy-free version (I’ve made it for a vegan friend—nobody noticed the difference).
These ingredients are easy to find year-round. If you’re feeling adventurous, toss in a handful of mini pretzels or sprinkle some chopped nuts over the top before baking for extra crunch. I’ve even tried a layer of caramel bits—so good, especially in the fall!
Equipment Needed
Good news—no fancy gear required for this Peanut Butter Cup S’mores Dip! Here’s what you’ll need to make it happen:
- 8-inch Cast Iron Skillet or Oven-Safe Baking Dish – Cast iron gives the best heat and keeps the dip warm longer, but a pie plate or any oven-safe dish works too.
- Sharp Knife – For chopping up those peanut butter cups. I use a small chef’s knife—it makes quick work of the job.
- Measuring Cups – For accuracy (and so you don’t accidentally overload on chocolate… unless you want to, I won’t judge).
- Oven Mitts – That skillet gets hot! Don’t skip this.
- Serving Spoons (optional) – For scooping, though honestly, graham crackers do the job just fine.
If you don’t own a cast iron skillet, a ceramic pie plate or even a glass baking dish will work. For a smaller crowd, halve the recipe and use a mini skillet or ramekins for individual servings—so cute for date night! Just remember, if you’re using nonstick or glass, grease it well to avoid sticky messes. I wipe my cast iron down with a little oil before baking to keep it in top shape. If you’re looking for budget-friendly gear, check thrift stores for secondhand cast iron—you can season it at home and it’ll last forever.
Preparation Method
- Preheat the Oven: Set your oven to 350°F (175°C). Let it heat up while you prep—no need to wait around. If you want a deeply toasted marshmallow top, you’ll use the broiler for the last minute, so make sure that’s working, too.
- Grease the Skillet: Use the 1 tablespoon (14g) butter to grease the bottom and sides of your 8-inch cast iron skillet or baking dish. This helps prevent sticking and adds a little extra flavor.
- Layer the Chocolate Base: Sprinkle 1 1/2 cups (255g) of chocolate chips evenly in the bottom of the skillet. Make sure the chocolate covers the whole surface—this will be the gooey foundation of your dip.
- Add the Peanut Butter Cups: Scatter 1 cup (180g) chopped mini peanut butter cups over the chocolate chips. Try to get an even layer so every scoop gets some peanut butter magic.
- Top with Marshmallows: Arrange the large marshmallows in a single layer on top, covering the chocolate and peanut butter cups. For a prettier look, stand the marshmallows upright—this makes for a golden, puffy top. You can fill in gaps with minis if you like.
- Bake: Place the skillet in the oven and bake for 8-10 minutes, or until the marshmallows are puffed and just starting to turn golden. Keep an eye out—marshmallows go from perfect to burnt fast!
- Broil (Optional): For that classic s’mores look, switch your oven to broil and toast the marshmallows for 1-2 minutes. Watch closely—the marshmallows can burn in seconds. When they’re golden brown and crackly, it’s ready.
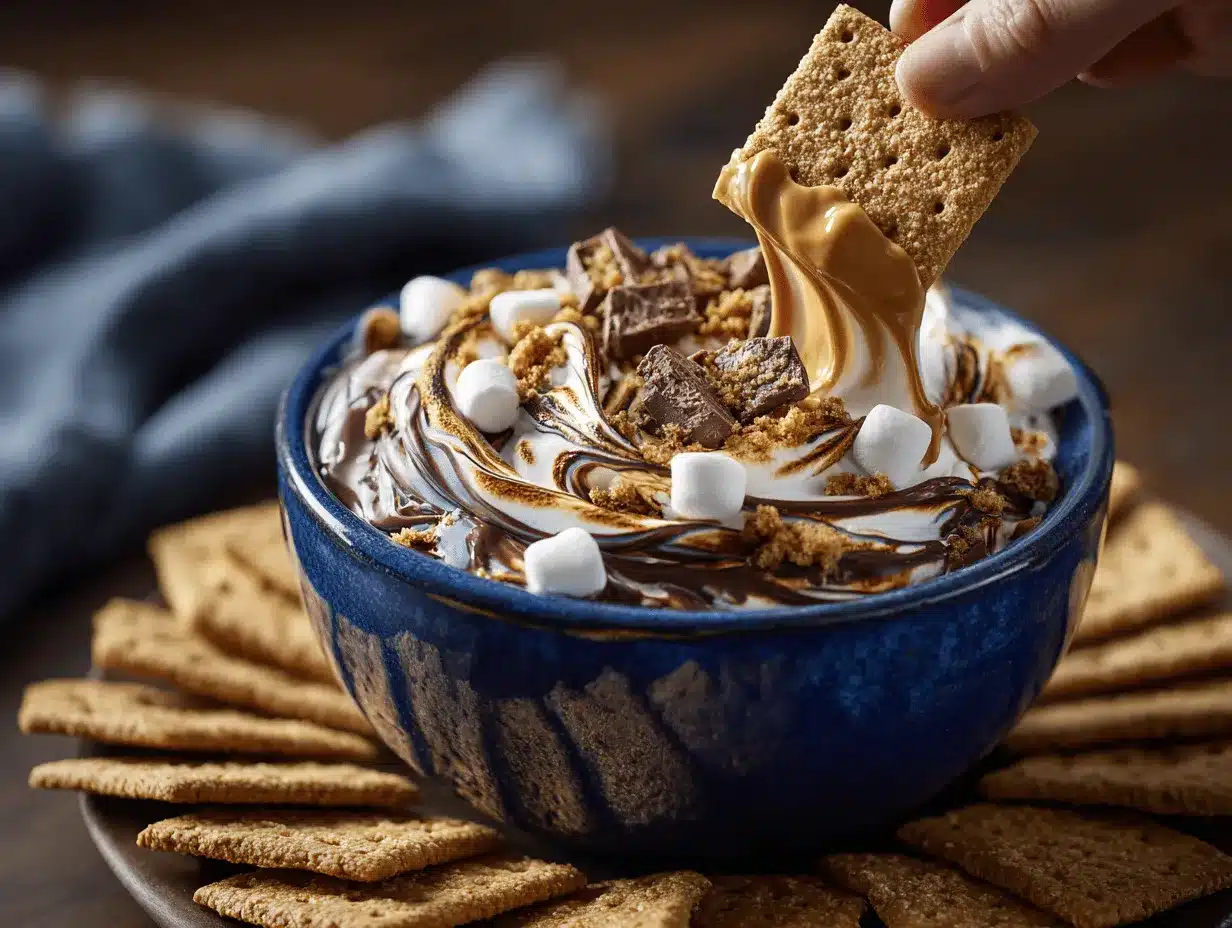
- Serve Immediately: Let the dip sit for 2-3 minutes (it’s molten hot!), then dive in with graham crackers, pretzels, or fresh fruit. The chocolate will be perfectly melty underneath, with that dreamy toasted marshmallow layer on top.
Troubleshooting Tips: If your chocolate isn’t fully melted, tent the skillet with foil and pop it back in the oven for another 2-3 minutes. If the marshmallows start browning too quickly, move the skillet to a lower oven rack. For a firmer dip, let it cool a few extra minutes before serving—though, honestly, nobody ever wants to wait that long!
Personal Tip: I like to prep everything ahead, then pop the skillet in the oven just before guests arrive. The smell alone is enough to get everyone excited. And don’t worry if the marshmallows look lopsided or uneven—they’ll puff up beautifully, and that rustic look is half the charm.
Cooking Tips & Techniques
Over the years, I’ve picked up a handful of tricks to make this Peanut Butter Cup S’mores Dip foolproof (and totally drool-worthy):
- Layering is key: Always start with chocolate chips on the bottom, then peanut butter cups, then marshmallows. This keeps the chocolate from burning and ensures the peanut butter gets warm and melty without drying out.
- Watch the broiler: Marshmallows can go from golden brown to scorched in a flash. The first time I broiled this dip, I looked away for “just a second” and ended up with a smoky kitchen and blackened marshmallows. Now, I keep the oven door cracked and never leave the stove’s side.
- Use fresh marshmallows: Stale marshmallows don’t puff or melt the same way. If you’re using a bag that’s been open for a while, pick the squishiest ones or nuke them for 5 seconds to soften up.
- Multi-tasking tip: While the dip bakes, get your dippers ready—break up graham crackers, slice apples, or pour drinks. The dip is best served hot, so you don’t want to be scrambling when it’s time to eat.
- Consistency for success: Let the skillet cool for a minute or two after baking. If you dig in right away, the chocolate can be almost soupy (still delicious, but messier). After a few minutes, it thickens just enough for perfect dipping.
One mistake I made early on was overfilling the skillet—too many marshmallows on top means the middle ones don’t toast. Less is more! And if you’re worried about sticking, a well-greased pan or parchment round on the bottom is your friend. Just don’t use wax paper (trust me, it melts and makes a mess).
Variations & Adaptations
One of my favorite things about this Peanut Butter Cup S’mores Dip is how easy it is to customize. Here are a few ideas I’ve tried (and loved):
- Gluten-Free Option: Use gluten-free graham crackers and double-check your chocolate chips and marshmallows for hidden gluten.
- Nut-Free Version: Swap peanut butter cups for sunflower seed butter cups or just use extra chocolate chips with a swirl of seed butter. I made this for a friend’s kiddo with allergies—no one missed the peanut butter!
- Seasonal Flavors: In fall, try adding a sprinkle of pumpkin pie spice to the chocolate, or stir in a handful of caramel bits. Around the holidays, crush peppermint candies over the top just before serving.
- Different Cooking Methods: No oven? Use an air fryer-safe dish and cook at 350°F (175°C) for 5-7 minutes, or make mini versions in a toaster oven.
- Personal Twist: Sometimes, I toss in a handful of mini pretzels with the chocolate layer for a salty crunch. It’s so good with the sweet, gooey topping.
Don’t be afraid to riff on the classic—use what you love and what’s in your pantry. That’s the beauty of this dip!
Serving & Storage Suggestions
This Peanut Butter Cup S’mores Dip is best served hot and fresh, straight from the oven. The marshmallows should be golden and gooey, with chocolate and peanut butter bubbling underneath. For the prettiest presentation, serve it right in the cast iron skillet (just be careful—it’s hot!).
Pair with plenty of graham crackers, pretzels, or apple slices for dipping. If you want to get fancy, drizzle a little caramel sauce over the top or sprinkle with flaky sea salt. This dip pairs perfectly with coffee, hot chocolate, or even a glass of cold milk.
Leftovers (if you’re lucky enough to have any!) can be covered and stored in the refrigerator for up to 3 days. To reheat, pop the skillet back in a 350°F (175°C) oven for 5-7 minutes, or microwave individual portions for 15-20 seconds. The flavors get even richer after a day, though the marshmallows will lose their toastiness. For that fresh-from-the-oven vibe, add a few new marshmallows on top before reheating and broil for a minute or two.
Nutritional Information & Benefits
Each serving (about 1/8 of the dip) contains approximately:
- Calories: 320
- Fat: 16g
- Sugar: 27g
- Protein: 4g
- Carbohydrates: 38g
This dessert is definitely on the indulgent side, but it’s also easy to adapt. Use dark chocolate for more antioxidants, or swap in fruit dippers for a lighter twist. Marshmallows and chocolate chips are naturally gluten-free (just check labels), and you can make it nut-free with simple swaps. As someone who tries to balance treats and nutrition, I see this as a fun occasional splurge—totally worth every bite!
Conclusion
This Peanut Butter Cup S’mores Dip is the kind of dessert that turns any gathering into a party. It’s ridiculously easy, totally customizable, and just plain fun to eat. Every time I make it, I’m reminded why it’s become a staple in my kitchen—there’s nothing like seeing friends and family light up at the sight (and smell) of gooey, toasty marshmallow and chocolate.
Feel free to make this recipe your own—switch up the dippers, try new add-ins, or adjust the sweetness to suit your taste. For me, it’s about the memories as much as the flavor. If you give it a try, let me know how it goes! Drop a comment with your favorite variation, or tag me on social media—I love seeing your creations. Happy dipping, friends!
Frequently Asked Questions
Can I make Peanut Butter Cup S’mores Dip ahead of time?
You can assemble the chocolate and peanut butter layers a few hours ahead and cover them tightly. Add marshmallows and bake just before serving for the best texture.
What are the best dippers besides graham crackers?
Pretzels, vanilla wafers, shortbread cookies, and apple slices all work great. Try a mix for variety and crunch!
Can I make this recipe in the microwave?
Yes! Layer the ingredients in a microwave-safe dish and heat in 30-second bursts until the chocolate is melted and marshmallows puff up. Keep a close eye so nothing overcooks.
Is this dip gluten-free?
The dip itself is gluten-free if you double-check your chocolate and marshmallows. Just use gluten-free crackers or dippers.
How do I store leftovers?
Keep leftovers covered in the fridge for up to 3 days. Reheat in the oven or microwave before serving for the best gooey results.
Pin This Recipe!

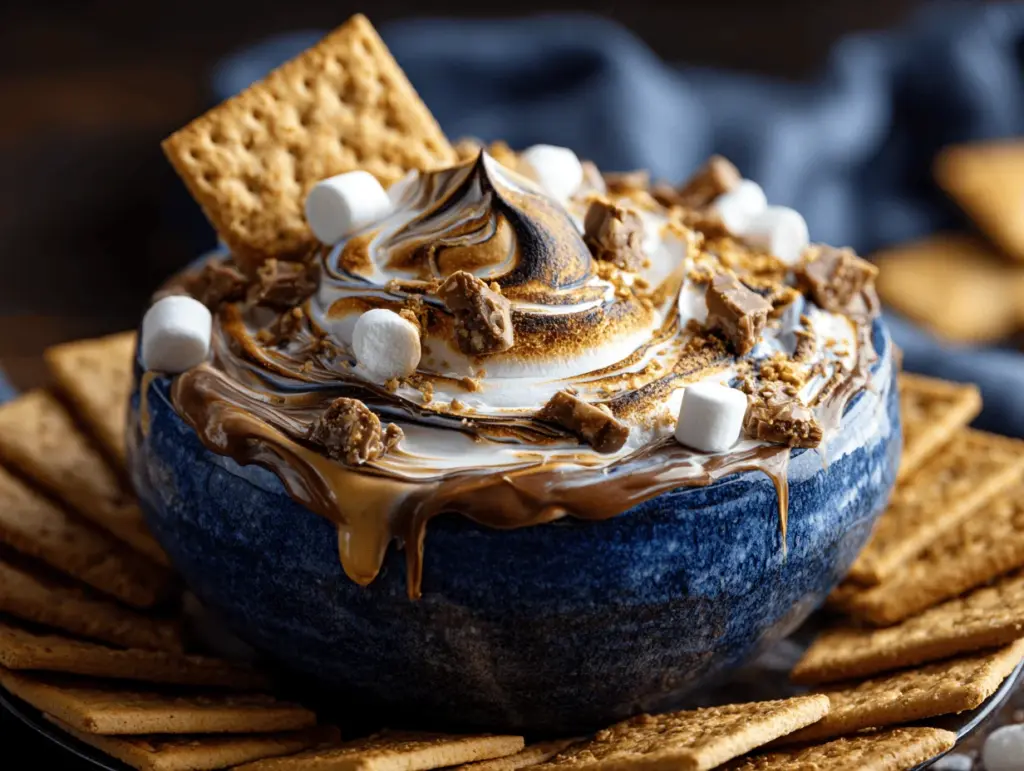
Peanut Butter Cup S’mores Dip

This easy Peanut Butter Cup S’mores Dip is the ultimate party dessert, featuring gooey marshmallows, melty chocolate chips, and creamy peanut butter cups baked together for a nostalgic, crowd-pleasing treat. Ready in under 20 minutes, it’s perfect for gatherings, game nights, or whenever you need a quick, shareable sweet fix.
- Prep Time: 5 minutes
- Cook Time: 10-12 minutes
- Total Time: 17 minutes
- Yield: 8 servings 1x
- Category: Dessert
- Cuisine: American
Ingredients
- 1 1/2 cups (9 oz) semi-sweet or milk chocolate chips
- 1 cup (about 6 oz) mini peanut butter cups, chopped
- 24–28 large marshmallows (enough to cover an 8-inch skillet)
- 1 tablespoon (14g) butter, for greasing
- Graham crackers, for dipping
Instructions
- Preheat the oven to 350°F (175°C).
- Grease the bottom and sides of an 8-inch cast iron skillet or oven-safe baking dish with butter.
- Sprinkle chocolate chips evenly over the bottom of the skillet.
- Scatter chopped mini peanut butter cups over the chocolate chips in an even layer.
- Arrange large marshmallows in a single layer on top, covering the chocolate and peanut butter cups.
- Bake for 8-10 minutes, until marshmallows are puffed and just starting to turn golden.
- Optional: Switch oven to broil and toast marshmallows for 1-2 minutes until golden brown and crackly. Watch closely to prevent burning.
- Let the dip sit for 2-3 minutes (it will be very hot), then serve immediately with graham crackers or other dippers.
Notes
For best results, use fresh marshmallows and layer chocolate chips on the bottom, followed by peanut butter cups, then marshmallows. Watch the broiler closely to avoid burning. Customize with gluten-free or nut-free options, or add caramel bits or pretzels for extra flavor. Serve hot and fresh for the ultimate gooey experience.
Nutrition
- Serving Size: About 1/8 of the dip
- Calories: 320
- Sugar: 27
- Fat: 16
- Carbohydrates: 38
- Protein: 4
Keywords: s'mores dip, peanut butter cup dessert, party dessert, easy s'mores, skillet dessert, chocolate marshmallow dip, peanut butter chocolate, summer dessert, oven s'mores, crowd-pleaser