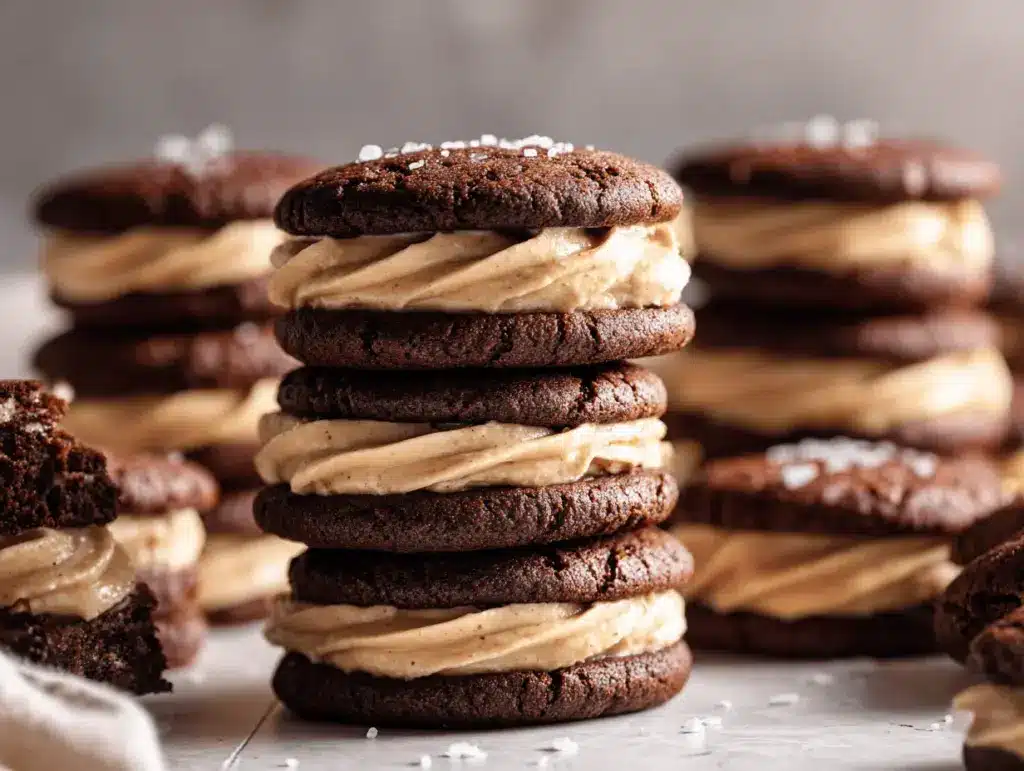
It hits like a chocolate thunderbolt the moment you bite in—the crinkly top of a brownie cookie, yielding to a cloud of peanut butter cup buttercream. The first time I made these brownie cookie sandwiches, the kitchen smelled like pure happiness and my family hovered like hawks, waiting for a taste. I mean, who could blame them? These brownie cookie sandwiches with peanut butter cup buttercream are the kind of treat that turns a regular Tuesday into a celebration.
I’m not kidding when I say these cookies are the ultimate dessert mashup. I first dreamed them up during a late-night sweet craving—I wanted something gooey and rich, but still with that classic cookie snap. Toss in a creamy peanut butter cup filling, and, well, magic happens. If you love brownies for their fudgy centers and cookies for their crisp edges, you’ll find these sandwich cookies irresistible.
Honestly, I’ve tested this recipe more times than I care to admit (my jeans can confirm). You’ll get the best of both worlds: a thick, chewy brownie-like cookie, plus a fluffy peanut butter cup buttercream that’s basically spoon-licking material. Whether you want to impress friends at a party, treat your kids, or just give yourself a much-deserved chocolate fix, these brownie cookie sandwiches deliver big time. For busy bakers, they’re a breeze—no fancy gadgets or hard-to-find ingredients, just classic pantry staples and a few pro tips for success. Let’s jump into the chocolatey goodness!
Why You’ll Love This Recipe
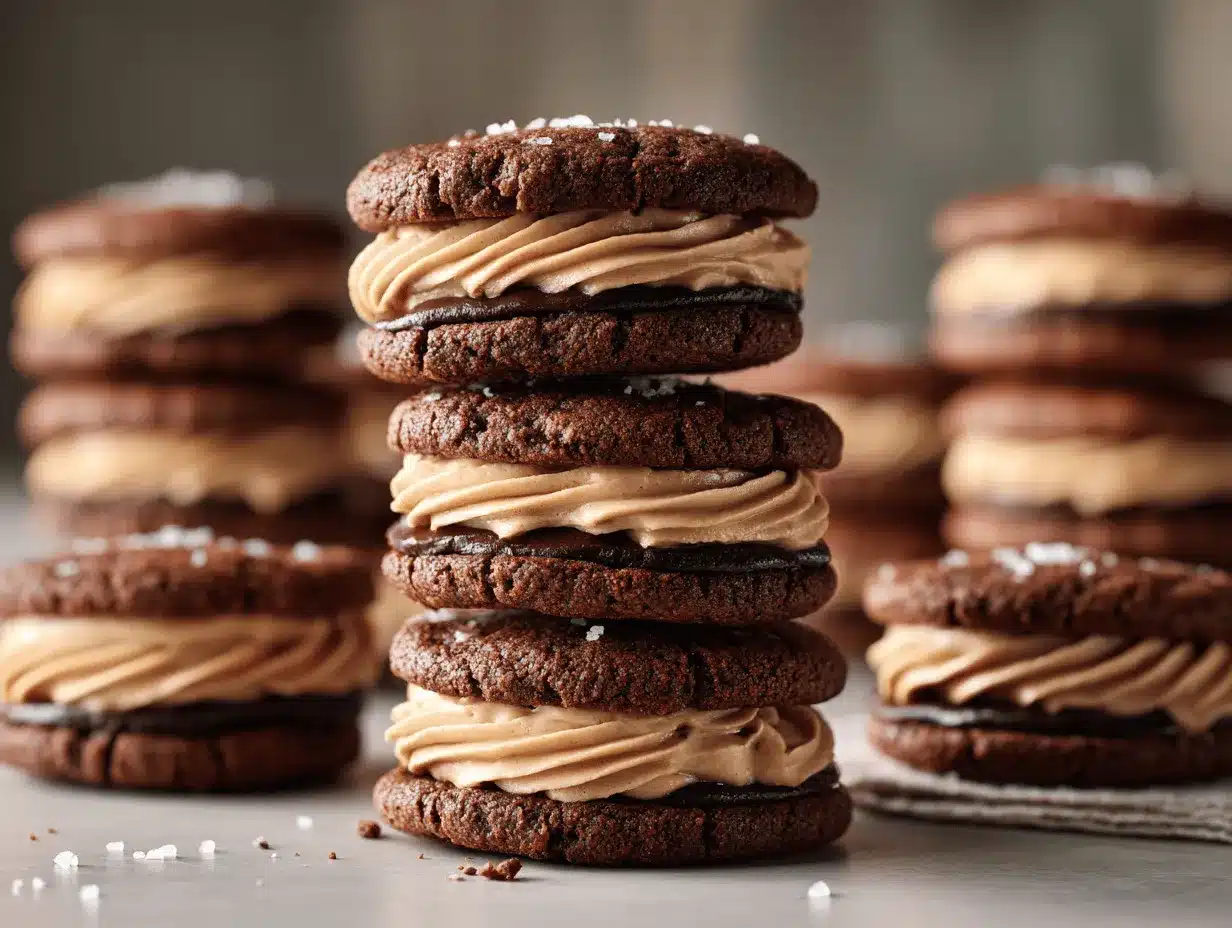
- Rich, Fudgy Goodness: These brownie cookie sandwiches are packed with deep chocolate flavor and have that perfect chewy center—like a brownie and a cookie had the best baby.
- Peanut Butter Cup Buttercream: The filling is whipped, creamy, and loaded with real peanut butter cups. It’s not just frosting—it’s a reason to sneak extra spoonfuls when no one’s watching.
- Easy to Make: No stand mixer required, and no chilling the dough for hours. You can whip these up in under an hour, start to finish.
- Perfect for Sharing: I’ve brought these to potlucks and parties—kids and adults both light up when they see that thick layer of buttercream sandwiched between brownie cookies.
- Freezer-Friendly: Make ahead, freeze, and enjoy whenever the craving strikes. (Trust me, a stash in the freezer is never a bad idea.)
What sets this brownie cookie sandwiches recipe apart? I blend melted chocolate and cocoa powder for an intense flavor and use brown sugar to keep every bite soft and chewy. The real magic, though, is in the buttercream—chopped peanut butter cups folded into a fluffy, salty-sweet frosting. It’s the kind of treat that makes you close your eyes after the first bite.
It’s not just another cookie sandwich—it’s my go-to for bake sales, birthdays, and those “I need chocolate now!” moments. When you want a dessert that looks impressive but doesn’t require pastry school skills, this is it. These brownie cookie sandwiches are pure comfort—the kind of baked good that brings people together and makes ordinary days extraordinary.
What Ingredients You Will Need
This recipe uses everyday ingredients to create brownie cookie sandwiches with a peanut butter cup buttercream that feels totally decadent. Most of these are pantry staples, but I’ll share some of my favorite brands and tips for making swaps if you need to.
-
For the Brownie Cookies:
- 1 cup (170g) semisweet chocolate chips or chopped chocolate (I love Ghirardelli or Guittard)
- 1/2 cup (113g) unsalted butter, cubed
- 1 cup (200g) granulated sugar
- 1/2 cup (100g) packed light brown sugar
- 2 large eggs, room temperature
- 1 tsp pure vanilla extract
- 1 cup (125g) all-purpose flour
- 1/3 cup (35g) unsweetened cocoa powder (Dutch-process for deeper flavor, but natural works too)
- 1/2 tsp baking powder
- 1/2 tsp fine sea salt
- 1/2 cup (90g) mini chocolate chips (optional, for extra gooeyness)
-
For the Peanut Butter Cup Buttercream:
- 1/2 cup (113g) unsalted butter, softened
- 1/2 cup (120g) creamy peanut butter (I use Skippy or Jif—avoid natural styles for best texture)
- 1 1/2 cups (180g) powdered sugar, sifted
- 2 tbsp (30ml) milk or cream (dairy-free works fine)
- 1/4 tsp salt
- 1 cup (130g) mini peanut butter cups, chopped (Reese’s or Trader Joe’s minis are perfect)
Ingredient Notes & Substitutions:
- Chocolate Chips: You can use dark chocolate if you want a less sweet, more intense flavor. Milk chocolate works too, but the cookies will be a little softer.
- Butter: Salted butter is fine—just reduce added salt by half.
- Flour: Swap in a 1:1 gluten-free baking blend for a gluten-free version (I’ve used King Arthur with great results).
- Peanut Butter: Sunflower seed butter or almond butter can be used for nut allergies, but the flavor will change a bit.
- Mini Peanut Butter Cups: If you can’t find minis, chop up regular peanut butter cups or use chocolate chips in a pinch.
In summer, I’ve even swapped in chopped chocolate-covered strawberries for the peanut butter cups—so fun! Feel free to get creative with what you have on hand.
Equipment Needed
- Baking Sheets: At least two half-sheet pans (lined with parchment for easy cleanup).
- Mixing Bowls: One large, one medium—sturdy glass or stainless steel work best.
- Hand Mixer or Whisk: A stand mixer is nice, but I usually just use my trusty hand mixer.
- Small Saucepan or Microwave-Safe Bowl: For melting chocolate and butter.
- Cookie Scoop: A medium cookie scoop (1.5 tbsp size) gives uniform cookies. You can use two spoons instead.
- Spatula: For folding in chocolate chips and scraping every last bit of batter.
- Wire Rack: For cooling the cookies evenly.
- Piping Bag or Zip-Top Bag: Optional, for neat buttercream filling, but spreading with a knife works too.
If you don’t have a cookie scoop, just use a tablespoon and roll the dough—no sweat. I’ve made these with just a whisk and some elbow grease, so don’t feel pressured to buy fancy tools. After years of baking, I swear by parchment paper for zero sticking and super easy cleanup.
How to Make Brownie Cookie Sandwiches with Peanut Butter Cup Buttercream
-
Prep and Preheat (5 minutes):
Preheat your oven to 350°F (175°C). Line two baking sheets with parchment paper. Set out your butter and eggs to come to room temp if you haven’t already. -
Melt Chocolate and Butter (5 minutes):
In a small saucepan or microwave-safe bowl, melt 1 cup (170g) chocolate chips and 1/2 cup (113g) unsalted butter together, stirring every 30 seconds if microwaving. The mixture should be silky and just barely warm—don’t let it get too hot or it might seize. -
Mix Wet Ingredients (3 minutes):
In a large mixing bowl, whisk together 1 cup (200g) granulated sugar and 1/2 cup (100g) brown sugar. Add the melted chocolate-butter mixture and whisk until smooth. Beat in 2 large eggs and 1 tsp vanilla extract. The batter will look shiny and thick. -
Combine Dry Ingredients (2 minutes):
In a separate bowl, sift together 1 cup (125g) flour, 1/3 cup (35g) cocoa powder, 1/2 tsp baking powder, and 1/2 tsp salt. -
Mix It All Together (2 minutes):
Gently fold the dry ingredients into the wet mixture using a spatula—don’t overmix! If using, fold in 1/2 cup (90g) mini chocolate chips. The dough will be sticky and thick, kind of like brownie batter. -
Shape and Bake (10–12 minutes per batch):
Scoop 1.5-tablespoon mounds of dough onto the prepared sheets, spacing 2 inches apart. Bake 10–12 minutes until cookies look crackly and just set at the edges. The centers should still be a little soft. If using two pans, rotate halfway through for even baking.
Note: Don’t overbake! They’ll firm up as they cool. -
Cool Completely (20 minutes):
Let cookies cool on the pan for 5 minutes, then transfer to a wire rack. They need to be fully cool before filling or the buttercream will melt. -
Make the Peanut Butter Cup Buttercream (5 minutes):
In a bowl, beat 1/2 cup (113g) softened butter and 1/2 cup (120g) creamy peanut butter until fluffy (about 2 minutes). Gradually add 1.5 cups (180g) powdered sugar and 1/4 tsp salt. Add 2 tbsp (30ml) milk or cream, beating until light and spreadable. Fold in 1 cup (130g) chopped mini peanut butter cups.
Troubleshooting: If your frosting is too stiff, add a splash more milk. Too loose? Add a little more sugar. -
Assemble the Sandwiches (5–10 minutes):
Pair cookies by size. Pipe or spread a tablespoon of buttercream onto the flat side of one cookie. Gently press a second cookie on top to make a sandwich. -
Chill or Serve (Optional, 10 minutes):
For the neatest sandwiches, pop them in the fridge for 10 minutes before serving—this helps the buttercream set, especially on warm days.
Personal Tip: If your kitchen is warm, chill the cookies before filling. Buttercream can get a little melty if it’s a hot day!
Cooking Tips & Techniques
- Don’t Overbake: The secret to fudgy brownie cookie sandwiches is pulling them out while the centers are just barely set. If you wait until they look totally firm, they’ll turn cakey instead of chewy.
- Room Temperature Ingredients: Using room temp butter and eggs helps the batter come together smoothly. Cold butter can cause the dough to seize up and make the cookies dense.
- Even Sizing: Use a cookie scoop for uniform cookies so your sandwiches stack up perfectly. If you don’t have one, just eyeball it and trim any lopsided edges with a small knife (no shame!).
- Let Them Cool: I’ve learned the hard way—if you fill the cookies while warm, the buttercream just slides right off. Patience is key here.
- Chill the Buttercream: If your buttercream feels too soft to spread, chill it in the fridge for 10 minutes. It’ll firm up and be easier to dollop.
- Batch Baking: If you’re making a double batch, bake one tray at a time for the most even texture.
I once rushed the cooling process—big mistake. The buttercream got everywhere! Now, I always cool the cookies completely and sometimes refrigerate the assembled sandwiches for a crisp, clean bite. If multitasking, start the buttercream while the cookies cool to save time.
Variations & Adaptations
- Gluten-Free: Use a cup-for-cup gluten-free baking blend instead of regular flour. I’ve tested it with King Arthur Measure-for-Measure and it works beautifully.
- Nut-Free: Swap peanut butter for sunflower seed butter and use chocolate chips instead of peanut butter cups. The flavor changes, but you still get a rich, creamy filling.
- Seasonal Flavors: In winter, add 1/2 tsp cinnamon or espresso powder to the cookies for warmth. In summer, try folding in chopped freeze-dried strawberries to the buttercream.
- Double Chocolate: For extra chocolatey sandwiches, add 1/4 cup mini chocolate chips to the buttercream.
- Different Fillings: Swap in marshmallow fluff, Nutella, or a simple vanilla buttercream for a new twist.
My personal favorite? I love swirling a bit of homemade raspberry jam into the peanut butter cup buttercream for a PB&J vibe. If you’re feeling adventurous, try a dash of flaky sea salt on top for a sweet-salty finish.
Serving & Storage Suggestions
Serve these brownie cookie sandwiches slightly chilled or at room temperature—they cut cleanly and the buttercream holds its shape best when cool. Stack them on a platter with a dusting of cocoa powder if you’re feeling fancy, or just pile them up for a casual get-together.
They pair perfectly with cold milk, hot coffee, or even a scoop of vanilla ice cream for a dessert-overload moment. For parties, I sometimes serve mini versions as bite-sized treats.
- Storage: Store in an airtight container at room temperature for up to 2 days, or in the fridge for 4–5 days. Layer with parchment to prevent sticking.
- Freezer Friendly: Freeze assembled sandwiches, wrapped tightly, for up to 2 months. Thaw in the fridge before serving.
- Reheating: No need to reheat, but if you want them slightly warm, a 10-second zap in the microwave softens the buttercream (watch closely!).
- Flavor Over Time: The chocolate flavor deepens by day two, making leftovers even more irresistible—if you have any!
Nutritional Information & Benefits
Each brownie cookie sandwich (based on a batch of 16 sandwiches) contains approximately:
- Calories: 350
- Fat: 18g
- Carbohydrates: 45g
- Protein: 5g
- Sugar: 32g
These brownie cookie sandwiches offer a little boost of protein from the peanut butter and a bit of iron from the cocoa. While they’re definitely a treat, they’re perfect for sharing and portioning. If you’re gluten-free or need to avoid nuts, swaps are easy to make. Just watch out for dairy and peanuts if you have allergies.
From a wellness perspective, I love that a homemade treat lets you control the quality of ingredients. I use real butter, good chocolate, and skip artificial stuff. If you cut them smaller, they’re also great for portion control—though I can’t promise you’ll stop at one!
Conclusion
These brownie cookie sandwiches with peanut butter cup buttercream are the kind of treat that makes every day feel special. They’re rich, chocolatey, and just the right amount of gooey—basically, cookie dreams come true. I love how easy they are to make, yet they always impress anyone who tries them.
Don’t be afraid to make these your own! Try a different filling, swap in a seasonal twist, or keep a batch in the freezer for when your sweet tooth strikes. Honestly, nothing beats the combo of fudgy brownie cookies and creamy peanut butter cup buttercream in my book.
If you give this brownie cookie sandwiches recipe a try, I’d love to hear how it went! Drop a comment, share your favorite variation, or tag me in your baking pics. Happy baking—and don’t forget to treat yourself!
Frequently Asked Questions (FAQs)
Can I make brownie cookie sandwiches ahead of time?
Absolutely! You can make both the cookies and buttercream a day or two in advance. Assemble right before serving, or keep filled sandwiches in the fridge for up to 5 days.
What if I don’t have mini peanut butter cups for the filling?
No problem—just chop up regular peanut butter cups, or use chocolate chips or peanut butter chips for a similar effect. Even swirls of Nutella work in a pinch.
How do I keep my cookies soft and chewy?
Don’t overbake! Pull the cookies out when the edges are set but the centers still look a little soft. They’ll continue to set as they cool.
Can I freeze these brownie cookie sandwiches?
Yes! Freeze assembled sandwiches tightly wrapped for up to 2 months. Let them thaw in the fridge overnight before enjoying.
Are there any nut-free options for this recipe?
Definitely. Use sunflower seed butter in the buttercream and skip peanut butter cups or use nut-free chocolate candies instead. Always double-check ingredient labels if allergies are a concern.
Pin This Recipe!
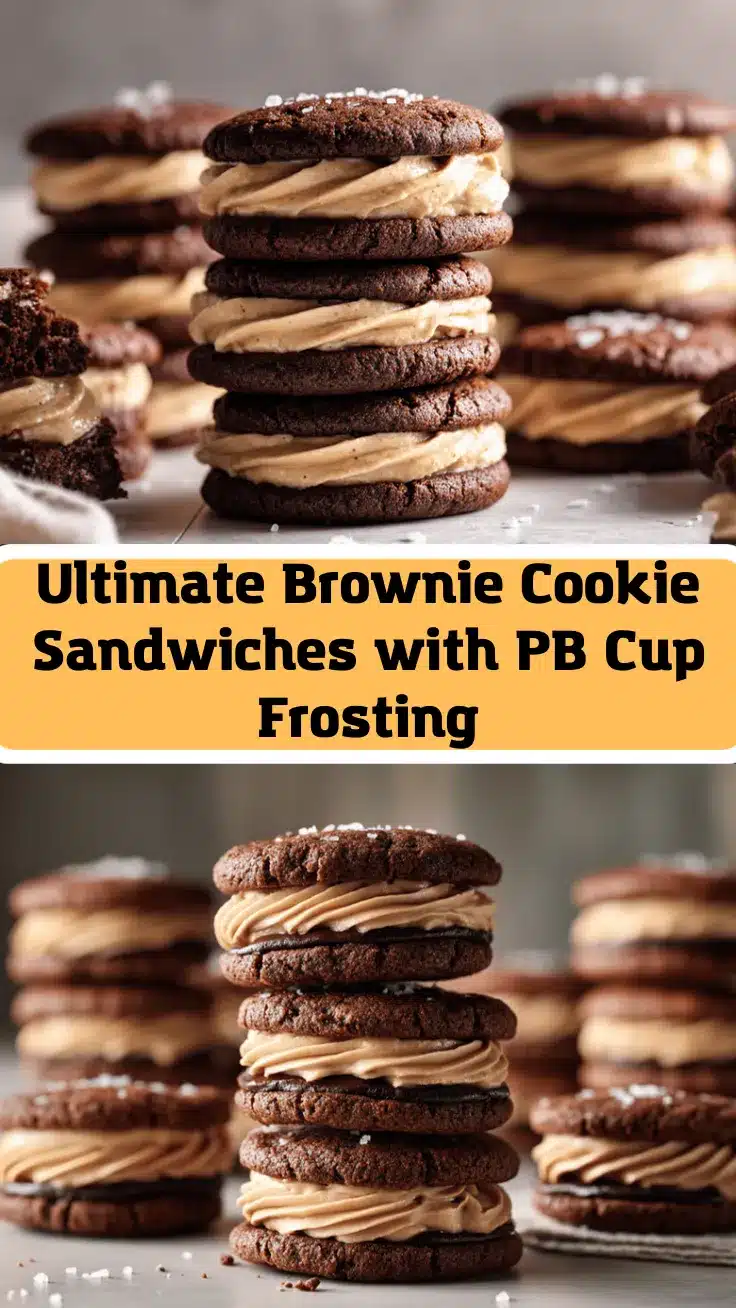
Brownie Cookie Sandwiches with Peanut Butter Cup Buttercream

These brownie cookie sandwiches combine fudgy, chewy brownie-like cookies with a creamy peanut butter cup buttercream filling. Easy to make and freezer-friendly, they’re the ultimate dessert mashup for chocolate and peanut butter lovers.
- Prep Time: 25 minutes
- Cook Time: 12 minutes per batch
- Total Time: 45 minutes
- Yield: 16 sandwiches 1x
- Category: Dessert
- Cuisine: American
Ingredients
- 1 cup (170g) semisweet chocolate chips or chopped chocolate
- 1/2 cup (113g) unsalted butter, cubed
- 1 cup (200g) granulated sugar
- 1/2 cup (100g) packed light brown sugar
- 2 large eggs, room temperature
- 1 tsp pure vanilla extract
- 1 cup (125g) all-purpose flour
- 1/3 cup (35g) unsweetened cocoa powder (Dutch-process or natural)
- 1/2 tsp baking powder
- 1/2 tsp fine sea salt
- 1/2 cup (90g) mini chocolate chips (optional)
- 1/2 cup (113g) unsalted butter, softened
- 1/2 cup (120g) creamy peanut butter (not natural style)
- 1 1/2 cups (180g) powdered sugar, sifted
- 2 tbsp (30ml) milk or cream
- 1/4 tsp salt
- 1 cup (130g) mini peanut butter cups, chopped
Instructions
- Preheat oven to 350°F (175°C). Line two baking sheets with parchment paper. Set out butter and eggs to come to room temperature.
- In a small saucepan or microwave-safe bowl, melt 1 cup chocolate chips and 1/2 cup unsalted butter together, stirring every 30 seconds if microwaving. The mixture should be silky and just barely warm.
- In a large mixing bowl, whisk together granulated sugar and brown sugar. Add the melted chocolate-butter mixture and whisk until smooth. Beat in eggs and vanilla extract until shiny and thick.
- In a separate bowl, sift together flour, cocoa powder, baking powder, and salt.
- Gently fold the dry ingredients into the wet mixture using a spatula. If using, fold in mini chocolate chips. The dough will be sticky and thick.
- Scoop 1.5-tablespoon mounds of dough onto prepared sheets, spacing 2 inches apart. Bake 10–12 minutes until cookies look crackly and just set at the edges. Centers should still be a little soft. Rotate pans halfway through if baking two at once.
- Let cookies cool on the pan for 5 minutes, then transfer to a wire rack. Cool completely before filling.
- For the buttercream: In a bowl, beat softened butter and creamy peanut butter until fluffy (about 2 minutes). Gradually add powdered sugar and salt. Add milk or cream, beating until light and spreadable. Fold in chopped mini peanut butter cups.
- Pair cookies by size. Pipe or spread a tablespoon of buttercream onto the flat side of one cookie. Gently press a second cookie on top to make a sandwich.
- Optional: Chill assembled sandwiches in the fridge for 10 minutes before serving to help the buttercream set.
Notes
For best results, do not overbake the cookies—pull them when the centers are just set for a fudgy texture. Use room temperature butter and eggs for smooth batter. Chill cookies before filling if your kitchen is warm. Cookies and buttercream can be made ahead and assembled later. For gluten-free, use a 1:1 gluten-free flour blend. For nut-free, use sunflower seed butter and chocolate chips instead of peanut butter cups.
Nutrition
- Serving Size: 1 sandwich cookie
- Calories: 350
- Sugar: 32
- Sodium: 180
- Fat: 18
- Saturated Fat: 8
- Carbohydrates: 45
- Fiber: 2
- Protein: 5
Keywords: brownie cookie sandwiches, peanut butter cup filling, chocolate cookies, sandwich cookies, easy dessert, fudgy cookies, peanut butter buttercream, freezer friendly, bake sale, party dessert