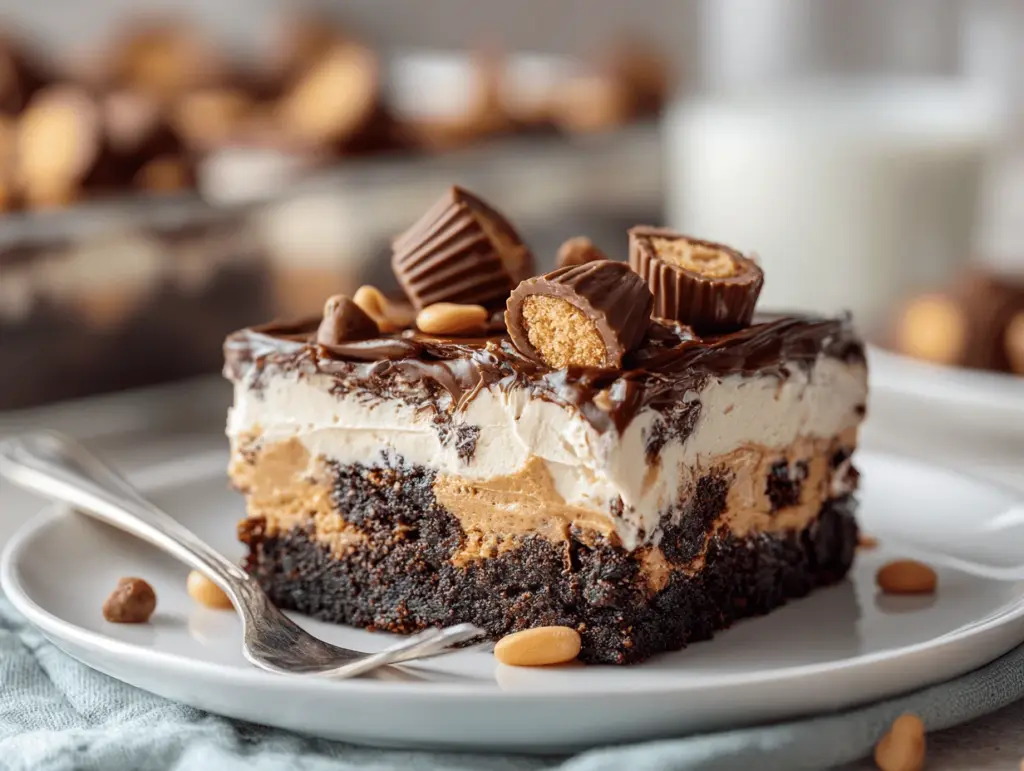
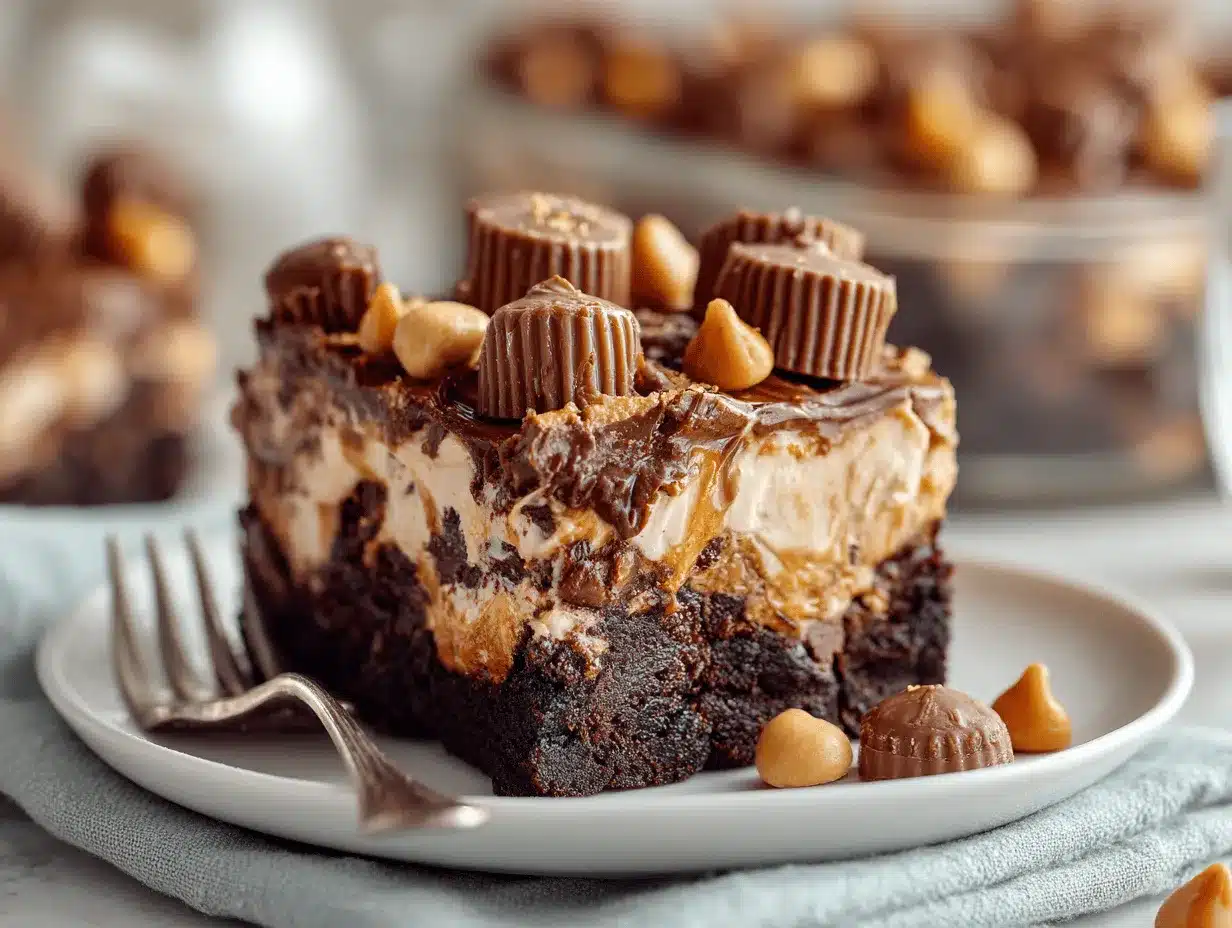
Imagine biting into layers of fudgy brownie, creamy peanut butter mousse, and a generous sprinkle of chopped Reese’s peanut butter cups, all chilled to perfect sliceable bliss. That’s the magic of this Peanut Butter Cup Brownie Icebox Cake. The first time I whipped up this dessert, it was for a summer birthday bash when turning on the oven just felt wrong. Let’s just say, not a single crumb survived the party. The cool, decadent taste of every bite is basically a love letter to peanut butter and chocolate fans everywhere.
There’s something about peanut butter and chocolate that just works—like, dangerously well. I grew up obsessed with Reese’s, so folding them into a no bake dessert was inevitable. This icebox cake has become my go-to for potlucks, birthday celebrations, and honestly, those “treat yourself” moments. Whether it’s the silky peanut butter mousse or the chewy, chocolatey brownie base, there’s a comfort in every forkful. Plus, you don’t have to fuss with the oven or worry about melting icing. Just layer, chill, and slice!
What I love about this peanut butter cup brownie icebox cake is how forgiving and fun it is. You can make it ahead, dress it up with extra toppings, or sneak in an extra layer of peanut butter cups (no one’s judging!). And if you’re a parent, you’ll appreciate how much kids and adults both go wild for this. So, if you’re looking for a show-stopping, easy no bake Reese’s dessert that brings smiles every time, you’re in the right place. Let’s get layering!
Why You’ll Love This Recipe
After making this peanut butter cup brownie icebox cake more times than I can count (including a couple late-night kitchen sessions), I can promise you it’s a keeper. Here’s why this recipe stands out, not just as a treat, but as a total crowd-pleaser that you’ll find yourself craving again and again.
- Quick & Easy: No oven required! This easy no bake Reese’s dessert comes together in about 30 minutes (plus chilling), making it perfect for those last-minute gatherings or when the baking bug bites but you want to keep the kitchen cool.
- Simple Ingredients: Nothing fancy here—just pantry staples and a bag of peanut butter cups. If you’ve got brownie mix, cream cheese, and peanut butter, you’re halfway there.
- Perfect for Parties: Whether it’s a summer BBQ, birthday, or movie night, this cake slices beautifully and feeds a crowd. I’ve taken it to plenty of picnics, and it always disappears fast.
- Crowd-Pleaser: Kids, teens, adults—seriously, everyone loves it. The combination of chewy brownie and creamy peanut butter mousse is irresistible.
- Unbelievably Delicious: Each bite balances chocolate richness with salty-sweet peanut butter. It’s like eating a giant, chilled Reese’s cup (but better, somehow!).
What really sets this peanut butter cup brownie icebox cake apart is the layering technique. By starting with a chewy brownie base (homemade or boxed, your call), then layering on a lush peanut butter cream cheese mousse, and finishing with lots of chopped Reese’s, every forkful is a texture adventure. You don’t just get a peanut butter cup flavor—you get it in every creamy, chewy, chocolatey layer.
And let’s face it: sometimes you want a dessert that feels a little over-the-top, but still super easy to pull off. This is that recipe. It’s indulgent but never fussy, and it’s just as good on day two (if there’s any left). If you’ve ever wanted to make a dessert that’s both familiar and a little show-stopping, this is the one. Trust me, you’ll find yourself making it for every occasion—or just because it’s Tuesday.
What Ingredients You Will Need
This peanut butter cup brownie icebox cake keeps things simple but delivers big flavor. You probably have most of these ingredients on hand, and if not, your local grocery store will. Here’s what you’ll need for each delicious layer:
- For the Brownie Layer:
- 1 box brownie mix (about 18 oz/510g) (plus eggs, oil, and water as called for on the box)
- OR homemade brownies (your favorite fudgy recipe—go for a chewy texture)
- For the Peanut Butter Mousse:
- 8 oz (225g) cream cheese, softened (full-fat for the creamiest texture)
- 1 cup (250g) creamy peanut butter (I like Skippy or Jif, but natural works if it’s smooth)
- 1 cup (120g) powdered sugar (sifted—makes the mousse super smooth)
- 1 teaspoon vanilla extract
- 1 1/2 cups (360ml) heavy whipping cream, cold
- For the Whipped Cream Topping:
- 1 cup (240ml) heavy whipping cream, cold
- 2 tablespoons powdered sugar
- 1/2 teaspoon vanilla extract
- For Assembly:
- 18-20 mini Reese’s peanut butter cups, chopped (plus a few extra for decorating—totally optional, but highly recommended!)
- Chocolate syrup or hot fudge sauce (for drizzling, if you’re feeling fancy)
Ingredient Notes & Tips:
- Brownies: I usually go with a boxed mix for convenience, but homemade brownies are amazing here if you have the time. If you need gluten-free, use a GF brownie mix like King Arthur or Betty Crocker.
- Cream Cheese: Make sure it’s at room temperature, or you’ll get lumps in your mousse. I’ve tried both store-brand and Philadelphia—both work, but Philly gives a slightly richer result.
- Peanut Butter: Stick with creamy for the mousse. If you’re using natural, stir it well so there’s no oil separation.
- Whipping Cream: Cold cream whips up fluffier and holds better in the fridge. Don’t swap with canned whipped topping—it won’t be as stable.
- Reese’s Cups: Mini cups work best for chopping and layering, but you can use regular-sized cups cut into quarters. I’ve even thrown in a handful of Reese’s Pieces for extra crunch!
Feel free to swap in almond or sunflower butter if you have allergies, and dairy-free cream cheese/whipping cream substitutes do work, but the texture might be a touch softer. Honestly, this is a recipe that loves a little improvisation—as long as you keep the main layers, you’re golden.
Equipment Needed
You don’t need a fancy kitchen to pull off this peanut butter cup brownie icebox cake. Here’s what I use every time (and a couple budget-friendly swaps):
- 9×9-inch (23×23 cm) square baking pan (for brownies—use an 8×8-inch pan for thicker brownies if you like)
- 8×8-inch (20×20 cm) square or loaf pan (for assembling the icebox cake—I’ve even used a deep glass dish in a pinch)
- Electric mixer or stand mixer (hand mixer works perfectly; whisking by hand is an arm workout but doable!)
- Mixing bowls (at least two—one for mousse, one for whipped cream)
- Offset spatula or butter knife (for spreading mousse and whipped cream evenly)
- Sharp knife or bench scraper (for chopping those peanut butter cups and slicing the cake)
- Parchment paper (makes lifting the finished cake so much easier, especially for neat slices)
I’ve used everything from glass Pyrex dishes to old-school metal pans—just line them with parchment, and you’re good. If you don’t have an electric mixer, a sturdy whisk and some elbow grease will do the trick for the mousse. And don’t forget, a chilled bowl helps the whipped cream whip up fluffier!
For cleaning up sticky peanut butter, a little warm water and dish soap goes a long way. I’ve made this recipe at friends’ houses using dollar store bowls and hand mixers—it always works. Don’t let missing gadgets stop you!
Preparation Method
-
Bake the Brownie Layer:
- Preheat your oven to the temperature specified on your brownie mix box (usually 350°F/175°C).
- Line a 9×9-inch (23×23 cm) pan with parchment paper, letting the edges overhang for easy removal.
- Prepare the brownie batter according to package instructions (or your favorite homemade recipe). Pour into the prepared pan and bake until a toothpick inserted comes out with moist crumbs—usually 22-26 minutes for box mix. Don’t overbake!
- Cool completely in the pan on a wire rack (about 1 hour). Warm brownies will melt the mousse, so patience is key.
-
Make the Peanut Butter Mousse:
- In a large bowl, beat 8 oz (225g) softened cream cheese on medium speed until smooth and creamy (1-2 minutes).
- Add 1 cup (250g) creamy peanut butter, 1 cup (120g) powdered sugar, and 1 tsp vanilla. Beat until fluffy and well combined—scrape down the sides once or twice.
- In a separate chilled bowl, pour 1.5 cups (360ml) heavy whipping cream. Beat on medium-high until stiff peaks form (about 3-5 minutes). Don’t overbeat or it’ll turn grainy.
- Gently fold the whipped cream into the peanut butter mixture in two additions, using a spatula. Go slow—this keeps the mousse light!
-
Prepare the Whipped Cream Topping:
- In a clean, chilled bowl, beat 1 cup (240ml) heavy whipping cream with 2 tbsp powdered sugar and 1/2 tsp vanilla until soft peaks form.
- Set aside in the fridge until ready to use.
-
Assemble the Icebox Cake:
- Once brownies have cooled, carefully lift them from the pan using the parchment. Trim the edges if needed to fit your assembly dish (I usually use an 8×8-inch pan for taller layers).
- Place the brownie layer at the bottom of your assembly pan.
- Spread half the peanut butter mousse evenly over the brownies with an offset spatula.
- Scatter half the chopped mini Reese’s cups over the mousse.
- Repeat with remaining mousse and Reese’s cups, pressing slightly so they stick. You can reserve a few for the top, if you want it extra pretty.
- Finish by smoothing the whipped cream topping over everything. Swirl with the back of a spoon for a fun look.
- If desired, drizzle with chocolate syrup or warm fudge sauce, and sprinkle with more chopped Reese’s cups.
-
Chill (the hardest part):
- Cover loosely with foil or plastic wrap and refrigerate for at least 4 hours (overnight is even better for neat slices and the best flavor meld).
-
Slice and Serve:
- Use the parchment edges to lift the cake out for easy slicing. If it sticks, run a thin knife around the edge first.
- Cut into squares with a sharp, hot knife (run under warm water and wipe between cuts for the cleanest slices).
- Enjoy right from the fridge!
Troubleshooting: If your mousse seems runny, check that your cream was whipped to stiff peaks. If brownies are sticking, line with parchment and chill well before slicing. Don’t stress—it’ll taste amazing even if it’s a little messy!
Cooking Tips & Techniques
Honestly, this peanut butter cup brownie icebox cake is pretty forgiving, but over the years, I’ve picked up some tricks for the best results:
- Chill Your Bowls: When whipping cream, a cold bowl makes all the difference. I pop mine in the freezer for 10 minutes before starting—makes the whipped cream sturdy and fluffy.
- Don’t Overbake Brownies: Slightly underbaked is better than dry. The brownies will firm up as they chill, so don’t worry if they look soft coming out of the oven.
- Room Temperature Cream Cheese: Cold cream cheese leads to lumpy mousse. If you forget to take it out ahead, cut into cubes and microwave in 10-second bursts (just until soft, not melted).
- Gentle Folding: When combining whipped cream with the peanut butter mixture, use a spatula and a light hand. Overmixing knocks out the air and makes the mousse dense.
- Neat Layers: For sharp layers, use an offset spatula and chill for at least 4 hours before slicing. Overnight is even better.
- Slice with a Hot Knife: Run your knife under hot water, dry it, and slice. Wipe between cuts. This keeps those layers looking bakery-worthy (or at least Instagram-ready!).
- Don’t Rush the Chill: The hardest part is waiting, but trust me, flavors meld and texture improves with a good chill. If you’re in a hurry, pop it in the freezer for 1-2 hours, but check so it doesn’t freeze solid.
I once tried to shortcut the chilling time, and the cake was more of a delicious mess than neat squares. Lesson learned! The extra wait is worth every second. If you’re multitasking, make the mousse while the brownies bake and cool. And if you’re prepping for a party, make the whole thing a day ahead—it’s even better the next day!
Variations & Adaptations
One of my favorite things about this peanut butter cup brownie icebox cake is how easy it is to tweak. Here are some tried-and-true variations for different tastes and needs:
- Gluten-Free: Use your favorite gluten-free brownie mix (King Arthur is my go-to). Everything else in the recipe is naturally gluten-free—just double-check your labels.
- Dairy-Free: Swap in dairy-free cream cheese (like Kite Hill or Tofutti) and coconut whipped cream. Use a plant-based milk in your brownie mix. The mousse will be a little softer, but still delicious.
- Chocolate Lovers’ Version: Layer in a handful of mini chocolate chips between the mousse and brownies, or drizzle melted semi-sweet chocolate over each layer as you assemble.
- Salted Caramel Twist: Swirl in store-bought or homemade salted caramel sauce with the peanut butter mousse, and sprinkle a bit of flaky sea salt on top before serving. Game-changer!
- Nut-Free: Use sunflower seed butter and swap in nut-free chocolate candies. I’ve made this for my nephew with severe allergies, and it was a huge hit.
Personally, I love adding a layer of sliced bananas between the brownie and mousse for a peanut butter banana vibe. Or, in the fall, I’ll toss in some crushed pretzels for a salty crunch. The base recipe is super flexible—don’t be afraid to make it your own!
Serving & Storage Suggestions
This peanut butter cup brownie icebox cake is best served chilled straight from the fridge. The texture is creamy and set, and the flavors are perfectly melded. For a cute presentation, sprinkle extra chopped Reese’s cups on top and drizzle with chocolate syrup just before serving (seriously, it looks so Pinterest-worthy!).
Pair with a tall glass of cold milk, a scoop of vanilla ice cream, or even a piping hot mug of coffee for grownups. If you’re serving at a party, cut into small squares for finger-friendly portions—these are rich, so a little goes a long way.
Storage: Cover leftovers tightly with plastic wrap or transfer to an airtight container. The icebox cake keeps well in the fridge for up to 5 days (if it lasts that long!). For longer storage, wrap slices individually and freeze for up to 2 months. To thaw, leave in the fridge overnight. The whipped cream might lose a little volume after freezing, but the flavor will still be awesome.
I’ve noticed the chocolate and peanut butter flavors get even more intense after a day or two, so don’t be shy about making this ahead. Just hold off on any syrup drizzle until right before serving for the prettiest results.
Nutritional Information & Benefits
Let’s be real: this peanut butter cup brownie icebox cake is pure dessert indulgence. Each generous square (about 1/12 of the pan) has roughly 420 calories, with 24g fat, 45g carbs, and 7g protein. If you use low-fat dairy or sugar-free brownie mix, you can shave off a few calories but, hey, sometimes you just want the real thing.
Peanut butter brings a little plant-based protein, healthy fats, and some fiber to the party. If you’re gluten-free or nut-free, the recipe is flexible enough to accommodate. The main allergens are peanuts, milk, and eggs (from the brownies), so swap in your favorite alternatives as needed.
From a wellness perspective, I like to think of this as comfort food for the soul. It’s not an everyday snack, but it’s the perfect sweet treat for sharing and celebrating life’s little wins—or just making a random Tuesday feel special.
Conclusion
If you’re craving a dessert that’s rich, creamy, and unapologetically over-the-top, this peanut butter cup brownie icebox cake is calling your name. With layers of chewy brownie, fluffy peanut butter mousse, and plenty of Reese’s cups, it’s the easy no bake Reese’s dessert you’ll be making on repeat.
Don’t be afraid to put your own spin on it—swap in different candies, try a new nut butter, or make it gluten-free. I love this recipe because it brings people together and always leaves everyone asking for seconds (and the recipe!).
So, go ahead—whip up a batch, snap a photo for Pinterest, and let me know how you served yours. Drop a comment below if you try it, share your favorite variations, or tag me in your creations. Life’s too short for boring desserts—let’s make every bite count!
FAQs
How long does the peanut butter cup brownie icebox cake need to chill?
For best results, chill the assembled cake for at least 4 hours, but overnight is even better. This helps the layers set for perfect, neat slices.
Can I use store-bought brownies instead of baking my own?
Absolutely! Store-bought brownies work great—just slice them to fit your pan. This shortcut makes the recipe even quicker for busy days.
Can I make this peanut butter cup brownie icebox cake ahead of time?
Yes! In fact, the flavors get better as it sits. Make it up to 2 days in advance and keep it covered in the fridge until you’re ready to serve.
What can I use instead of Reese’s peanut butter cups?
You can swap in other peanut butter candies, chopped peanut butter-filled cookies, or even chocolate chips. For nut allergies, use sunflower seed butter cups or nut-free chocolate candies.
Is it possible to freeze this dessert?
Definitely. Slice individual portions, wrap tightly, and freeze for up to 2 months. Thaw overnight in the fridge before serving—still delicious and easy for future cravings!
Pin This Recipe!
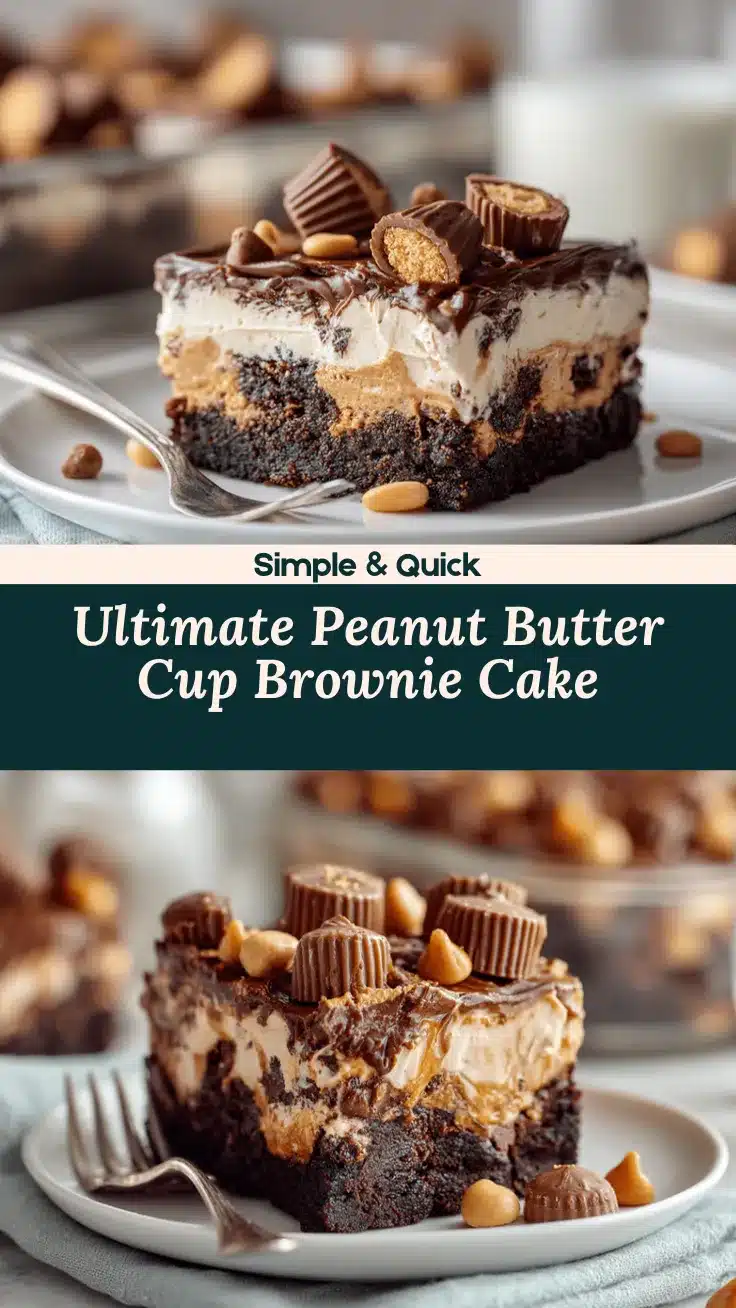
Peanut Butter Cup Brownie Icebox Cake

This easy no-bake dessert features layers of fudgy brownie, creamy peanut butter mousse, and chopped Reese’s peanut butter cups, all chilled to sliceable perfection. It’s a decadent, crowd-pleasing treat perfect for parties, potlucks, or any time you crave a peanut butter and chocolate fix.
- Prep Time: 30 minutes
- Cook Time: 25 minutes
- Total Time: 5 hours (includes chilling time)
- Yield: 12 servings 1x
- Category: Dessert
- Cuisine: American
Ingredients
- 1 box brownie mix (about 18 oz/510g), plus eggs, oil, and water as called for on the box OR homemade brownies (your favorite fudgy recipe)
- 8 oz (225g) cream cheese, softened
- 1 cup (250g) creamy peanut butter
- 1 cup (120g) powdered sugar, sifted
- 1 teaspoon vanilla extract
- 1 1/2 cups (360ml) heavy whipping cream, cold
- 1 cup (240ml) heavy whipping cream, cold (for whipped cream topping)
- 2 tablespoons powdered sugar (for whipped cream topping)
- 1/2 teaspoon vanilla extract (for whipped cream topping)
- 18–20 mini Reese’s peanut butter cups, chopped (plus extra for decorating, optional)
- Chocolate syrup or hot fudge sauce (for drizzling, optional)
Instructions
- Preheat oven to temperature specified on brownie mix box (usually 350°F/175°C). Line a 9×9-inch pan with parchment paper.
- Prepare brownie batter according to package or recipe instructions. Pour into prepared pan and bake until a toothpick comes out with moist crumbs (22-26 minutes for box mix). Cool completely in the pan on a wire rack (about 1 hour).
- In a large bowl, beat softened cream cheese until smooth and creamy (1-2 minutes). Add peanut butter, powdered sugar, and vanilla; beat until fluffy and well combined.
- In a separate chilled bowl, beat 1.5 cups heavy whipping cream until stiff peaks form (3-5 minutes). Gently fold whipped cream into peanut butter mixture in two additions.
- In another chilled bowl, beat 1 cup heavy whipping cream with 2 tablespoons powdered sugar and 1/2 teaspoon vanilla until soft peaks form. Set aside in fridge.
- Once brownies are cool, lift from pan using parchment. Trim edges if needed to fit an 8×8-inch assembly pan.
- Place brownie layer at the bottom of assembly pan. Spread half the peanut butter mousse evenly over brownies. Scatter half the chopped Reese’s cups over mousse.
- Repeat with remaining mousse and Reese’s cups. Finish with whipped cream topping, smoothing over the top.
- If desired, drizzle with chocolate syrup or fudge sauce and sprinkle with extra chopped Reese’s cups.
- Cover loosely and refrigerate at least 4 hours (overnight is best).
- To serve, lift cake out using parchment, slice with a hot, sharp knife, and enjoy chilled.
Notes
Chill your bowls before whipping cream for best results. Don’t overbake brownies; slightly underbaked is better. Use room temperature cream cheese for a smooth mousse. For neat slices, chill overnight and slice with a hot knife. Recipe is flexible—swap in gluten-free or dairy-free ingredients as needed. Store leftovers tightly covered in the fridge for up to 5 days or freeze slices for up to 2 months.
Nutrition
- Serving Size: 1/12 of cake (about a 2-inch square)
- Calories: 420
- Sugar: 32
- Sodium: 260
- Fat: 24
- Saturated Fat: 11
- Carbohydrates: 45
- Fiber: 2
- Protein: 7
Keywords: peanut butter cup brownie icebox cake, no bake Reese's dessert, peanut butter mousse cake, easy party dessert, chocolate peanut butter cake, summer dessert, potluck dessert, icebox cake, brownie dessert, Reese's cake