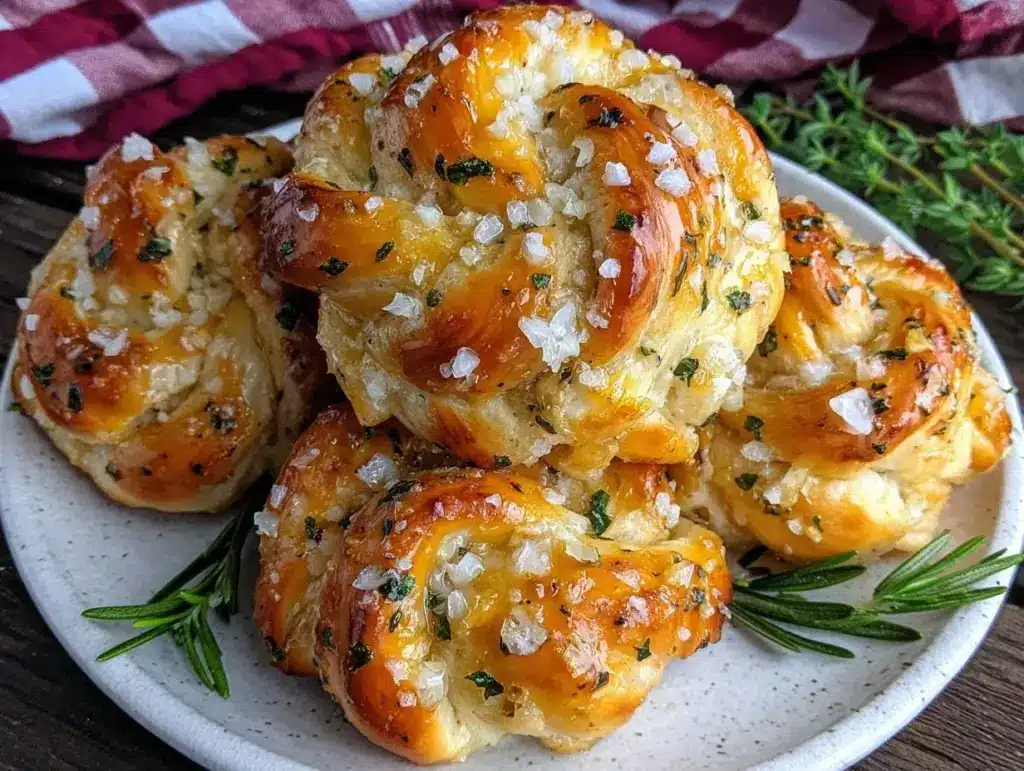
The smell of warm garlic knots fresh from the oven, brushed with a fragrant herb butter, is honestly one of those simple pleasures that makes any day better. I remember the first time I tried making garlic knots at home—it was a bit of an experiment, with dough sticking everywhere and butter spilling over, but the end result was pure magic. These irresistible garlic knots with herb butter quickly became a favorite in my kitchen, especially for those cozy weekend dinners or last-minute guests who show up hungry.
Garlic knots aren’t just your average bread treat; they bring that perfect balance of soft, chewy dough and punchy, buttery garlic flavor that you can’t resist. Plus, they’re surprisingly easy to whip up, even if you’re not a seasoned baker. After making these garlic knots with herb butter dozens of times, I can confidently say they’re a total crowd-pleaser that’s well worth the few extra minutes in the kitchen.
Whether you’re serving them as a side for pasta night, a snack during game day, or just because you crave that garlicky goodness, this recipe fits right in. And hey, if you’re someone who loves baking but hates complicated recipes, you’ll appreciate how straightforward these homemade garlic knots are. So, let’s get those ovens warm and fingers ready for some delicious, buttery, herby goodness!
Why You’ll Love This Recipe
- Quick & Easy: Ready in just about 30 minutes, perfect for whipping up a snack or side dish on a whim.
- Simple Ingredients: No fancy or hard-to-find items here—just pantry staples like flour, yeast, garlic, and fresh herbs.
- Perfect for Any Occasion: Great for family dinners, parties, or even as a thoughtful homemade gift for friends.
- Crowd-Pleaser: Kids love them, adults can’t get enough, and they disappear fast from the serving plate.
- Unbelievably Delicious: The herb butter adds a fresh, vibrant twist that makes these garlic knots stand out from the typical garlic bread.
This recipe stands out because of the way I blend fresh herbs into the butter, giving each bite that extra pop of flavor without overwhelming the soft, pillowy dough. Plus, the technique of tying the knots just right ensures they bake evenly with a beautiful golden crust. Honestly, it’s the kind of recipe you’ll want to keep coming back to, especially when you want that homemade touch without a ton of fuss.
After testing this recipe multiple times, I tweaked the herb butter ratio and knot-tying method to get the best texture and flavor combo. This isn’t just garlic knots—it’s garlic knots that make you close your eyes and savor every bite. Trust me, once you try these, you’ll wonder why you ever settled for store-bought!
What Ingredients You Will Need
This recipe uses simple, wholesome ingredients to deliver bold flavor and that satisfying, soft texture you expect from perfect garlic knots. Most of these are pantry staples, so no last-minute grocery runs required. Here’s what you’ll need:
- For the Dough:
- All-purpose flour – 3 cups (360g), preferably unbleached for better texture
- Active dry yeast – 2 ¼ tsp (one packet)
- Sugar – 1 tbsp (helps activate yeast and adds slight sweetness)
- Warm water – 1 cup (240ml), about 110°F (43°C), not too hot to avoid killing the yeast
- Olive oil – 2 tbsp, plus extra for brushing (adds moisture and flavor)
- Salt – 1 tsp (balances the flavors)
- For the Herb Butter:
- Unsalted butter – ¼ cup (56g), softened (I like using KerryGold for creaminess)
- Fresh garlic – 3 cloves, finely minced (for that punchy garlic flavor)
- Fresh parsley – 2 tbsp, finely chopped (adds a bright, fresh note)
- Fresh basil – 1 tbsp, chopped (optional, but highly recommended)
- Fresh oregano – 1 tsp, chopped (optional)
- Salt – a pinch
- Ground black pepper – a pinch
- Optional for Garnish:
- Grated Parmesan cheese – 2 tbsp (adds a savory salty finish)
- Red pepper flakes – a pinch, if you like a little heat
If you want to keep it dairy-free, you can swap the butter for a plant-based alternative that melts well. For gluten-free baking, almond or a gluten-free flour blend can work, but the texture will be a bit different. Also, when choosing your herbs, fresher is always better here—you want that bright, earthy flavor to shine through.
Equipment Needed
- Large mixing bowl – for proofing the dough (I prefer glass or stainless steel for easy cleanup)
- Measuring cups and spoons – accuracy is key for yeast recipes
- Wooden spoon or dough hook attachment (if using a stand mixer) – for mixing and kneading
- Baking sheet or pizza stone – lined with parchment paper or lightly greased
- Pastry brush – to generously coat the knots with herb butter
- Kitchen towel or plastic wrap – to cover dough while it rises
- Sharp knife or kitchen scissors – for cutting dough into strips
If you don’t have a stand mixer, no worries. I usually knead by hand—it’s a bit messy but totally doable and satisfying. For a budget-friendly option, a simple bowl and wooden spoon work just fine, and parchment paper on your baking sheet helps with easy cleanup and prevents sticking. Also, keeping a good pastry brush in your kitchen really helps for buttery finishes like this.
Detailed Preparation Method
- Activate the Yeast: In your large mixing bowl, combine the warm water (1 cup / 240ml) with sugar (1 tbsp) and active dry yeast (2 ¼ tsp). Give it a gentle stir and let it sit for about 5-7 minutes until it becomes frothy and bubbly. If it doesn’t foam, your yeast might be dead—start over with fresh yeast.
- Make the Dough: Add the all-purpose flour (3 cups / 360g), salt (1 tsp), and olive oil (2 tbsp) to the yeast mixture. Stir with a wooden spoon or use a stand mixer with a dough hook to combine. The dough should start coming together but still be a bit sticky.
- Knead the Dough: Transfer the dough onto a lightly floured surface and knead for about 8-10 minutes until it’s smooth and elastic. If using a mixer, knead on medium speed for about 6-7 minutes. Avoid adding too much flour; a slightly tacky dough makes softer knots.
- Let it Rise: Lightly oil the bowl and place the dough back inside. Cover with a kitchen towel or plastic wrap and let it rise in a warm spot for about 1 hour, or until doubled in size. You’ll notice the dough puff up and feel airy when gently pressed.
- Shape the Knots: Once risen, punch down the dough gently to release air. Divide it into 12 equal pieces (about 2 oz / 57g each). Roll each piece into a 6-inch (15 cm) rope. Tie the rope into a loose knot, tucking the ends underneath.
- Second Rise: Place the knots on a lined baking sheet about 1 inch (2.5 cm) apart. Cover loosely and let them rest for 20-30 minutes to puff a bit more.
- Prepare Herb Butter: While the knots rest, mix softened butter (¼ cup / 56g) with minced garlic (3 cloves), chopped parsley (2 tbsp), basil (1 tbsp), oregano (1 tsp), salt, and pepper until well combined.
- Bake: Preheat your oven to 400°F (200°C). Bake the knots for 12-15 minutes until golden brown and cooked through.
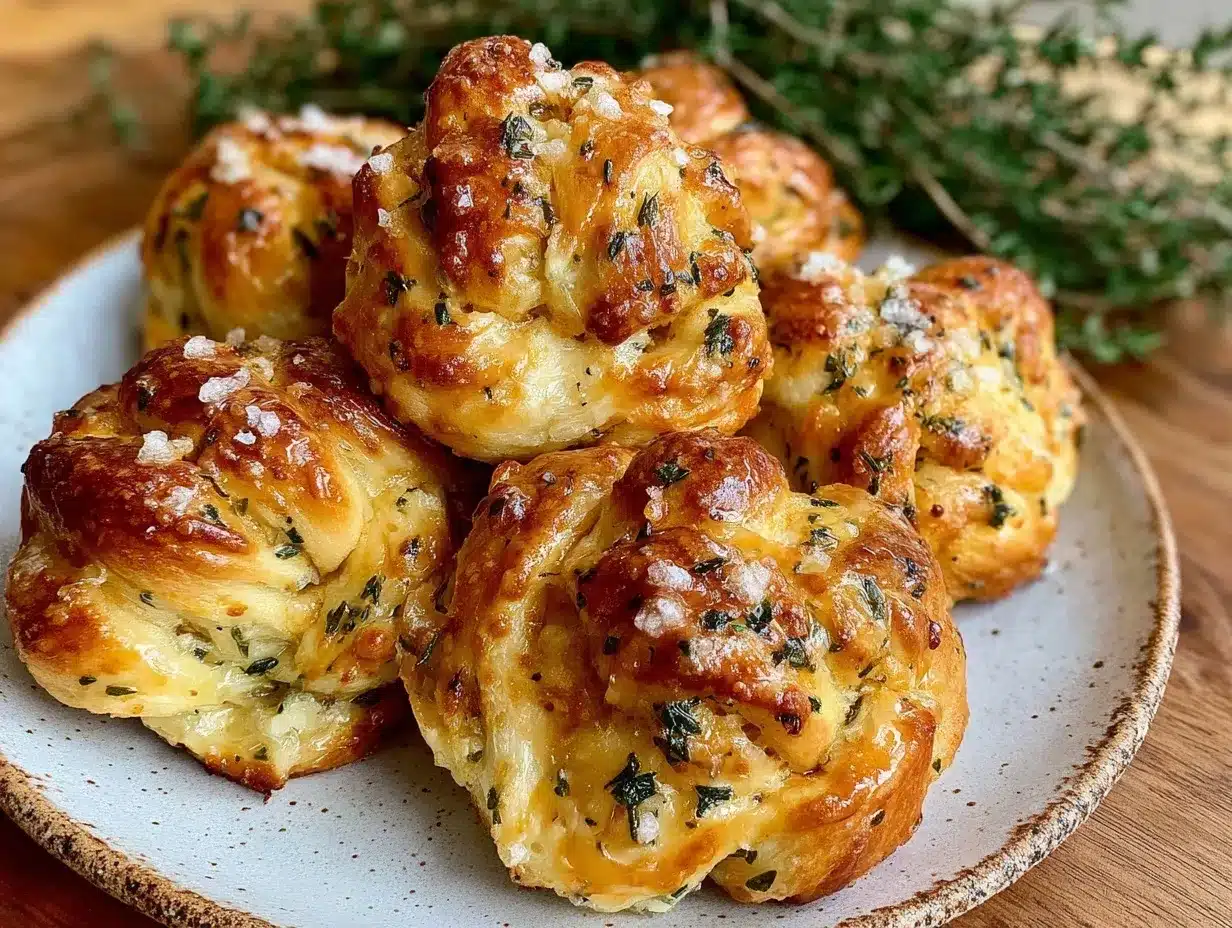
- Brush with Herb Butter: Right after baking, brush the hot garlic knots generously with the herb butter mixture. For an extra touch, sprinkle with Parmesan cheese or red pepper flakes if desired.
- Serve Warm: Serve immediately and enjoy the irresistible aroma and flavor!
Pro tip: If your knots feel dense, your dough might not have risen long enough. Patience here really pays off. Also, don’t skip brushing with herb butter right after baking—that’s where the magic really happens!
Cooking Tips & Techniques
- Use Warm Water, Not Hot: Too hot water kills the yeast, and too cold slows down the rising. Aim for around 110°F (43°C) for perfect activation.
- Knead Until Elastic: Test the dough by gently stretching a small piece—if it stretches without tearing, you’re good to go.
- Don’t Overcrowd Your Baking Sheet: Give each knot space to expand, so they bake evenly and don’t stick together.
- Brush Butter Immediately: Hot knots soak up the herb butter better, locking in flavor and creating a glossy finish.
- Watch Baking Times Closely: Ovens vary, so start checking at 12 minutes. Golden brown edges signal they’re done.
- Multitask: Mix your herb butter while the knots rise or bake to save time.
- Common Mistake—Skipping the Second Rise: This rest period lets the dough relax and results in lighter, fluffier knots.
One time, I rushed the rising and ended up with dense knots—lesson learned! Taking your time with the yeast and dough makes all the difference. Also, using fresh herbs over dried really bumps up the flavor, so don’t skimp there if you can help it.
Variations & Adaptations
- Cheesy Garlic Knots: Add shredded mozzarella or cheddar inside the knots before tying for a gooey surprise.
- Spicy Herb Butter: Mix in a dash of cayenne pepper or red pepper flakes to the butter for a little kick.
- Whole Wheat Version: Substitute half or all of the all-purpose flour with whole wheat flour for a nuttier, heartier flavor.
- Vegan Adaptation: Use a plant-based butter spread and swap honey or sugar with maple syrup to keep it vegan-friendly.
- Different Herbs: Try rosemary, thyme, or chives if you want to switch up the herb profile.
Personally, I love slipping some fresh grated Parmesan into the dough sometimes—it adds a subtle cheesy note that’s just irresistible. Also, if you’re short on time, you can shape and bake smaller knots for faster cooking and snack-sized bites.
Serving & Storage Suggestions
Serve these garlic knots warm, fresh out of the oven, brushed with extra herb butter if you like. They pair beautifully with pasta dishes, soups, or even just a simple salad. For drinks, a chilled glass of white wine or a refreshing iced tea balances the richness well.
To store, place cooled garlic knots in an airtight container at room temperature for up to 2 days. For longer storage, freeze them in a zip-top bag for up to 3 months. When ready to eat, thaw at room temperature and reheat in a 350°F (175°C) oven for about 5-7 minutes to regain softness and warmth.
Fun fact: letting the knots sit overnight actually deepens the garlic and herb flavors, making leftovers surprisingly delicious if you don’t mind a firmer texture.
Nutritional Information & Benefits
Each garlic knot contains approximately 150-180 calories, depending on the size and exact butter usage. These knots offer a good source of carbohydrates from the flour, with a modest amount of fat from the olive oil and butter.
The fresh garlic and herbs add antioxidants and anti-inflammatory properties, which is a nice bonus for such a tasty treat. While not low-calorie, this recipe uses real ingredients without preservatives or additives, making it a better choice than many store-bought options.
For those with dietary needs, the recipe can be adapted for gluten-free or vegan diets as noted earlier, making these garlic knots fairly versatile.
Conclusion
These irresistible garlic knots with herb butter have become a staple in my kitchen for good reason—they’re simple, fast, and utterly delicious. Whether you’re a beginner baker or a seasoned home cook, this recipe delivers that fresh-from-the-oven magic every time. I love how easy it is to customize the flavors and how it brings everyone to the table with smiles.
Give it a try, and don’t be shy to tweak the herbs or add a cheesy twist. I’d love to hear how you make these your own! Drop a comment below or share your photos if you try this recipe—you know I’m always excited to see your creations.
Happy baking and enjoy every buttery, garlicky bite!
FAQs
Can I use store-bought pizza dough for this recipe?
Yes, store-bought pizza dough works well and can save time. Just roll it out and cut into strips before tying knots. Adjust baking time accordingly since pre-made dough may cook faster.
How do I know if the yeast is still good?
If your yeast mixture doesn’t bubble and foam within 5-7 minutes of activation, it’s likely expired or the water was too hot/cold. Always check the expiration date and water temperature.
Can I prepare the dough ahead of time?
Absolutely! You can prepare the dough, let it rise, then refrigerate it overnight. Bring it back to room temperature before shaping and baking for best results.
What’s the best way to reheat leftover garlic knots?
Reheat in a preheated oven at 350°F (175°C) for 5-7 minutes to restore softness and warmth. Avoid microwaving as it can make them rubbery.
Are garlic knots gluten-free?
Traditional garlic knots use wheat flour, so they’re not gluten-free. However, you can use gluten-free flour blends designed for yeast baking, but texture may vary.
Pin This Recipe!
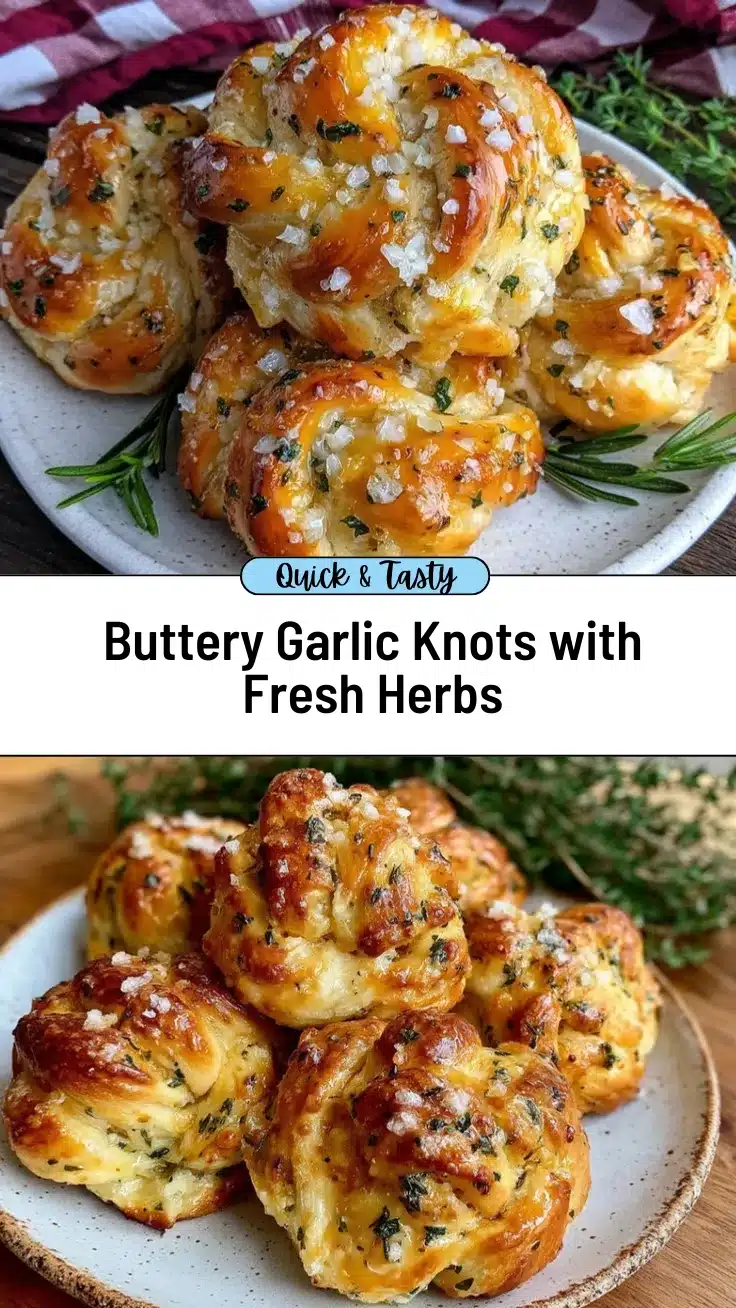
Garlic Knots with Herb Butter

Soft, chewy garlic knots brushed with a fragrant herb butter, perfect as a snack or side dish. Easy to make with simple pantry ingredients and fresh herbs.
- Prep Time: 15 minutes
- Cook Time: 15 minutes
- Total Time: 1 hour 30 minutes
- Yield: 12 knots 1x
- Category: Side Dish
- Cuisine: Italian-American
Ingredients
- 3 cups all-purpose flour (360g), preferably unbleached
- 2 ¼ tsp active dry yeast (one packet)
- 1 tbsp sugar
- 1 cup warm water (240ml), about 110°F (43°C)
- 2 tbsp olive oil, plus extra for brushing
- 1 tsp salt
- ¼ cup unsalted butter (56g), softened
- 3 cloves fresh garlic, finely minced
- 2 tbsp fresh parsley, finely chopped
- 1 tbsp fresh basil, chopped (optional)
- 1 tsp fresh oregano, chopped (optional)
- Pinch of salt
- Pinch of ground black pepper
- 2 tbsp grated Parmesan cheese (optional, for garnish)
- Pinch of red pepper flakes (optional, for garnish)
Instructions
- Activate the yeast: In a large mixing bowl, combine warm water, sugar, and active dry yeast. Stir gently and let sit for 5-7 minutes until frothy.
- Make the dough: Add flour, salt, and olive oil to the yeast mixture. Stir with a wooden spoon or use a stand mixer with dough hook until combined.
- Knead the dough: Transfer dough to a floured surface and knead for 8-10 minutes until smooth and elastic. If using a mixer, knead on medium speed for 6-7 minutes.
- Let it rise: Lightly oil the bowl, place dough inside, cover with towel or plastic wrap, and let rise in a warm spot for about 1 hour until doubled in size.
- Shape the knots: Punch down dough, divide into 12 equal pieces (~2 oz each). Roll each into a 6-inch rope and tie into a loose knot, tucking ends underneath.
- Second rise: Place knots on lined baking sheet 1 inch apart, cover loosely, and let rest for 20-30 minutes.
- Prepare herb butter: Mix softened butter with minced garlic, parsley, basil, oregano, salt, and pepper until combined.
- Bake: Preheat oven to 400°F (200°C). Bake knots for 12-15 minutes until golden brown.
- Brush with herb butter: Immediately brush hot knots generously with herb butter. Optionally sprinkle with Parmesan cheese or red pepper flakes.
- Serve warm and enjoy.
Notes
Use warm water around 110°F to activate yeast properly. Knead dough until elastic but slightly tacky for softer knots. Allow both first and second rises for best texture. Brush herb butter immediately after baking for best flavor and glossy finish. Fresh herbs are preferred over dried for vibrant flavor. Store cooled knots in airtight container at room temperature for up to 2 days or freeze for up to 3 months. Reheat in oven at 350°F for 5-7 minutes.
Nutrition
- Serving Size: 1 garlic knot
- Calories: 165
- Sugar: 2
- Sodium: 210
- Fat: 7
- Saturated Fat: 4
- Carbohydrates: 22
- Fiber: 1
- Protein: 4
Keywords: garlic knots, herb butter, garlic bread, homemade bread, easy snack, party food, bread knots


