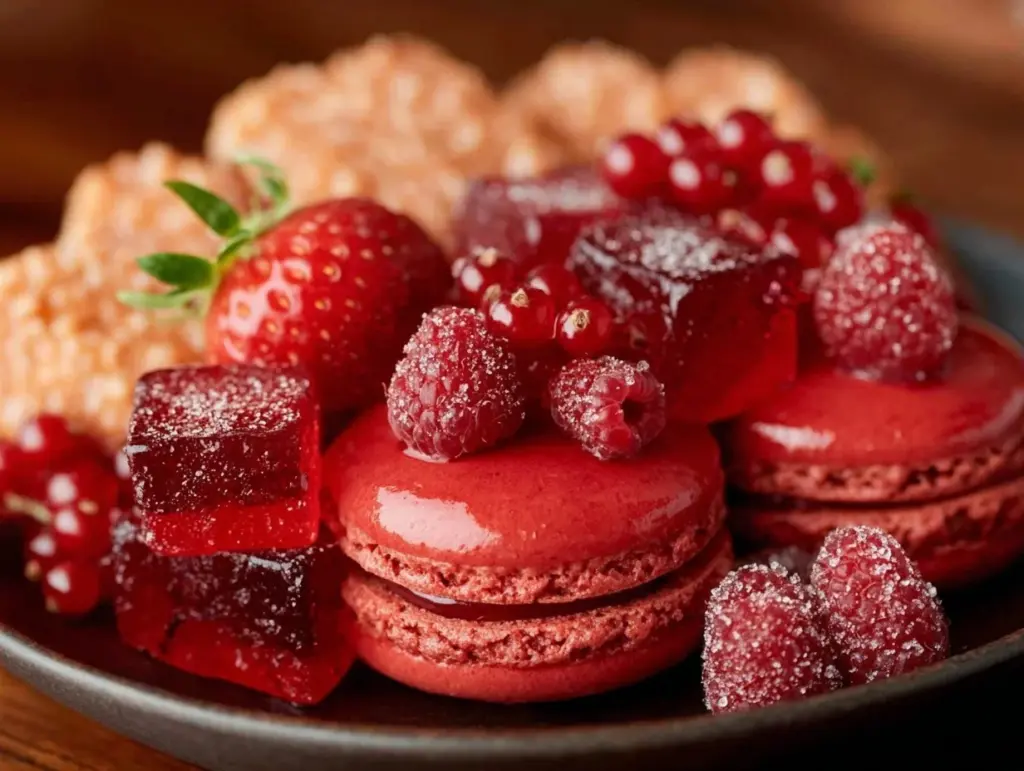
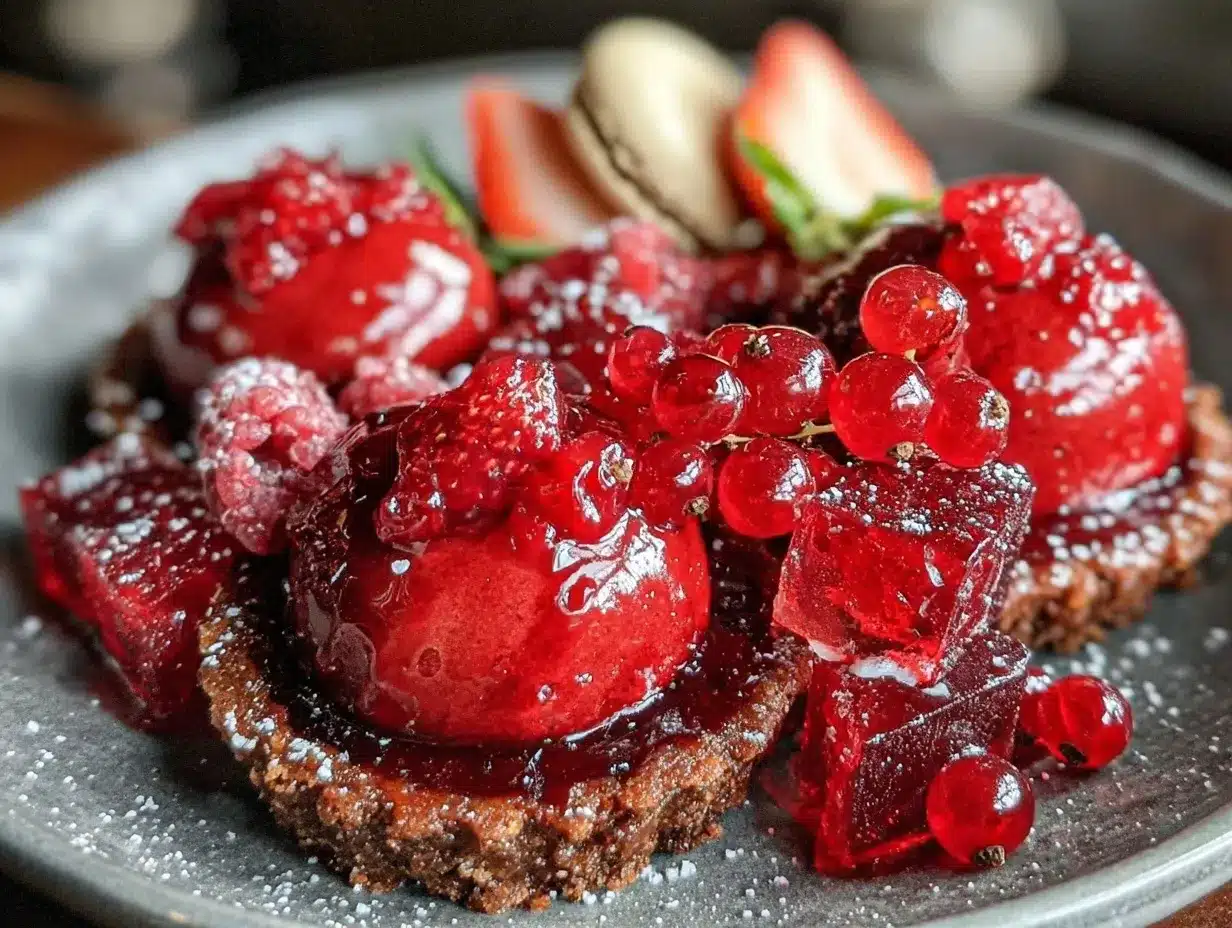
Let me tell you, the sight of a perfectly curated monochrome red dessert board is enough to make anyone’s heart skip a beat. The rich crimson hues of strawberries, cherries, raspberries, and ruby chocolates all laid out on a sleek board—it’s like a feast for your eyes before your taste buds even get a chance. The first time I put together my perfect monochrome red dessert board, I was instantly hooked. It was one of those rare moments where you pause, take a deep breath, and just smile because you know you’re onto something truly special.
Years ago, when I was knee-high to a grasshopper, dessert boards weren’t really a thing in my family. But stumbling upon this idea during a rainy weekend baking session changed everything. I wished I’d known about the magic of monochrome dessert boards years ago—it’s dangerously easy and offers pure, nostalgic comfort wrapped in a modern presentation. Honestly, my family couldn’t stop sneaking bites off the board before the guests even arrived (and I can’t really blame them!).
This perfect monochrome red dessert board is perfect for potlucks, romantic dinners, or brightening up your Pinterest cookie board. I’ve tested this recipe multiple times (in the name of research, of course), and it’s become a staple for family gatherings, gifting, and those moments when you need a warm hug on a plate. Trust me, you’re going to want to bookmark this one.
Why You’ll Love This Recipe
Honestly, this perfect monochrome red dessert board isn’t just another pretty face on your dessert table. It’s a thoughtful, chef-tested creation that blends simplicity with elegance and flavor with flair. Here’s why you’ll be smitten:
- Quick & Easy: Comes together in under 30 minutes, perfect for last-minute entertaining or spontaneous celebrations.
- Simple Ingredients: No scavenger hunts at specialty stores—most items are pantry staples or easy-to-find fresh produce.
- Perfect for Entertaining: Ideal for holiday parties, bridal showers, or cozy dinners where you want to impress without the fuss.
- Crowd-Pleaser: Kids and adults alike rave about the variety and balance of sweet and tart flavors.
- Unbelievably Delicious: The texture and flavor combos—from juicy berries to creamy red velvet bites—offer next-level comfort food vibes.
What makes this board different? It’s all about the perfect balance of hues and textures, with a bit of creative flair. For instance, blending soft red velvet cake crumbs with sharp raspberry coulis for dipping adds that wow factor. This isn’t just a dessert board; it’s your best version of elegant entertaining—simple, stylish, and seriously tasty.
With every bite, it feels like comfort food reimagined—healthier, faster, but with that soul-soothing satisfaction you crave. Whether you’re impressing guests or treating yourself, this monochrome red dessert board hits all the right notes.
What Ingredients You Will Need
This perfect monochrome red dessert board uses simple, wholesome ingredients to deliver bold flavor and satisfying texture without the fuss. Most of these are pantry staples or fresh finds from your local market, making it easy to assemble quickly.
- Fresh Red Fruits: Strawberries (hulled and halved), raspberries, cherries (pitted), and red grapes (washed) – these provide juicy, vibrant pops of flavor and color.
- Red Velvet Cake Bites: Homemade or store-bought red velvet cake, cut into small cubes (I recommend a moist, cream cheese frosting version for richness).
- Ruby Chocolate: Ruby chocolate bars or chips (adds a tangy, fruity twist distinct from regular chocolate).
- Red Candy & Sweets: Red licorice twists, red jelly beans, or cinnamon candy hearts – great for adding playful texture and sweetness.
- Red Sauces & Dips: Raspberry coulis or strawberry jam (use homemade or high-quality store-bought for best flavor).
- Cheeses: Mild cheeses with red accents like a red waxed gouda or a cranberry goat cheese log – balances the sweetness with creamy savory notes.
- Nuts & Extras: Candied pecans or dried cranberries to add crunch and depth of flavor.
- Garnishes: Fresh mint leaves or edible red flowers for a pop of green that complements the reds beautifully.
For substitutions, use almond flour-based red velvet for gluten-free options or swap dairy cream cheese frosting for coconut cream cheese if you need a dairy-free version. In summer, consider fresh red cherries instead of frozen berries for an extra juicy touch.
Equipment Needed
- Large Serving Board or Platter: Wood or slate boards work beautifully; I personally love a rustic wooden board for warmth.
- Small Bowls or Ramekins: For sauces, dips, and small candies—helps with neat presentation.
- Sharp Knife: For cutting cake bites and fruit.
- Tongs or Small Serving Spoons: Helpful for guests to pick up tidbits without sticky fingers.
- Mixing Bowls: To prep sauces or toss nuts.
- Optional: Small offset spatula for spreading frosting or smoothing jams.
If you don’t have a fancy serving board, no worries—use a clean cutting board or even a colorful tray. I’ve used budget-friendly bamboo boards that clean up easily and look great. Just make sure the surface is sturdy and easy to clean, because things will get deliciously messy!
Preparation Method
- Prep the Fruits (10 minutes): Wash all fresh fruits thoroughly. Hull and halve strawberries, pit cherries carefully, and dry grapes with a paper towel to avoid sogginess. Set aside on a plate to air dry slightly—this helps them stay fresh longer on the board.
- Cut the Cake Bites (5 minutes): Slice your red velvet cake into roughly 1-inch (2.5 cm) cubes. If you’re using store-bought cake, trim off any uneven edges for uniformity. Place the cubes on a plate lined with parchment to keep them fresh.
- Prepare Sauces and Dips (10 minutes): Spoon raspberry coulis or strawberry jam into small ramekins. If you want to get fancy, mix a bit of lemon juice into the jam to brighten the flavor. Place these ramekins near the center of your serving board for easy dipping access.
- Arrange Cheeses and Nuts (5 minutes): Slice the cranberry goat cheese log or red waxed gouda into bite-sized pieces. Scatter candied pecans or dried cranberries into small clusters around the cheeses for texture contrast.
- Build the Board (10 minutes): Start by placing your bowls of sauce and cheese pieces on the board. Then, artfully arrange fruits, cake bites, ruby chocolates, and candies in groups by type and size. Don’t be afraid to overlap slightly—it looks more abundant that way. Add a few fresh mint leaves or edible flowers in gaps for a fresh pop of green.
- Final Touches (2 minutes): Step back and check your color balance. If some reds look dull or sparse, toss in a few extra berries or candies. Remember, the goal is a lush, inviting red palette with varied textures.
Tip: Keep the board chilled until 15 minutes before serving, especially if you’re using cream cheese frosting or fresh berries. This keeps everything fresh without losing flavor or texture.
Cooking Tips & Techniques
Crafting the perfect monochrome red dessert board is as much about technique as it is about ingredients. Here are some tips I’ve learned the hard way:
- Keep It Fresh: Prep fruits last to avoid sogginess. Pat dry well, especially grapes and berries, to prevent moisture pooling on the board.
- Uniform Sizes: Cutting cake and cheese into consistent bites not only looks better but makes serving easier and neater. No one wants a giant cube messing up their delicate berry bites!
- Balance Sweet and Savory: Don’t skip the cheese and nuts. They cut through the sweetness, making the whole experience more sophisticated and less cloying.
- Layer Textures: Mix soft cake with crunchy nuts and chewy candies to keep things interesting on the palate.
- Multitask Efficiently: While the cake is cooling (if homemade), prep your fruits and sauces. It saves time and keeps the workflow smooth.
- Be Creative with Garnishes: Mint leaves and edible flowers aren’t just for looks—they add fresh aroma and subtle flavor pops.
One time, I learned the hard way that placing wet fruit directly on wooden boards can stain or warp the surface. Now, I always use parchment or small dishes as barriers. It’s a small step that saves heartache (and expensive boards) down the line.
Variations & Adaptations
This perfect monochrome red dessert board is versatile and easy to customize. Here are a few ways to switch it up:
- Dietary Variation: For gluten-free, swap the red velvet cake with gluten-free red velvet cupcakes or red fruit jellies. Use nut-based cheeses or dairy-free cream cheese.
- Seasonal Twist: In winter, add dried cranberries and pomegranate seeds for festive flair. Summer calls for fresh cherries and strawberries at their peak.
- Flavor Boost: Add a drizzle of balsamic glaze over strawberries or sprinkle chili flakes on ruby chocolate pieces for a surprising kick.
- Cooking Method: If you want to warm the dessert board elements, lightly toast nuts or serve warm red velvet cake bites with a side of vanilla cream.
- Personal Variation: I once swapped raspberry coulis for a homemade hibiscus syrup—it gave the board a floral, tart twist that guests loved.
Serving & Storage Suggestions
Serve your perfect monochrome red dessert board slightly chilled or at room temperature for the best flavor and texture. Present it with small plates and cocktail forks or toothpicks for easy picking. Pair this board with a chilled rosé or sparkling water with lemon slices for a refreshing contrast.
Store leftovers covered tightly in the refrigerator for up to 2 days. To keep the cake moist, wrap it separately in plastic wrap. Reheat cake bites gently in a microwave for 10-15 seconds if desired, but fresh is always best. Note that fruits are best eaten fresh, as they lose texture and flavor over time. The flavors deepen beautifully on the first day, so serving within a few hours guarantees that “just-picked” vibe.
Nutritional Information & Benefits
This dessert board offers a surprisingly balanced nutritional profile. Fresh fruits like strawberries and cherries provide antioxidants, vitamin C, and fiber, which support immune health and digestion. The ruby chocolate adds antioxidants too, while nuts contribute heart-healthy fats and protein.
For those mindful of calories, portion control is easy here—grab a berry or a small cake bite rather than a full slice. The cheeses add calcium and protein, rounding out the board’s offerings. Gluten-free and dairy-free adaptations make this board accessible for many dietary needs. Just watch out for allergies to nuts or dairy when serving guests.
From a wellness perspective, this board feels indulgent without going overboard, making it a guilt-light treat you can actually feel good about sharing.
Conclusion
This perfect monochrome red dessert board is a showstopper that’s surprisingly easy to pull together. Whether you’re hosting an elegant soirée or just want a sweet treat that feels like a warm hug, this board fits the bill. You can customize it endlessly, making it your own little masterpiece.
Personally, I love how this board brings people together—there’s something about sharing bites of vibrant red fruits and decadent cake that sparks joy and conversation. So go ahead, try it out, tweak it to your taste, and don’t forget to let me know how yours turns out! Your comments and shares help keep these tasty ideas flowing.
Remember: life’s sweeter when you share a little red magic on a board!
FAQs
What fruits work best on a monochrome red dessert board?
Strawberries, raspberries, cherries, and red grapes are perfect choices. They offer a variety of textures and shades of red that make the board visually stunning and delicious.
Can I prepare the dessert board ahead of time?
Yes, but it’s best to prep fruits and assemble the board no more than a few hours before serving to keep everything fresh and vibrant.
What’s a good substitute for red velvet cake if I want a lighter option?
Try red velvet cupcakes or even red fruit-flavored jelly cubes. Both maintain the theme but offer different textures and lighter bites.
How do I keep the fruits from getting soggy on the board?
Pat dry the fruits well and avoid cutting them until just before assembly. Using small bowls or parchment paper under juicy fruits also helps protect the board.
Can I make this dessert board vegan?
Absolutely! Use dairy-free red velvet cake or vegan cupcakes, replace cream cheese with coconut-based alternatives, and choose plant-based chocolates and candies.
Pin This Recipe!
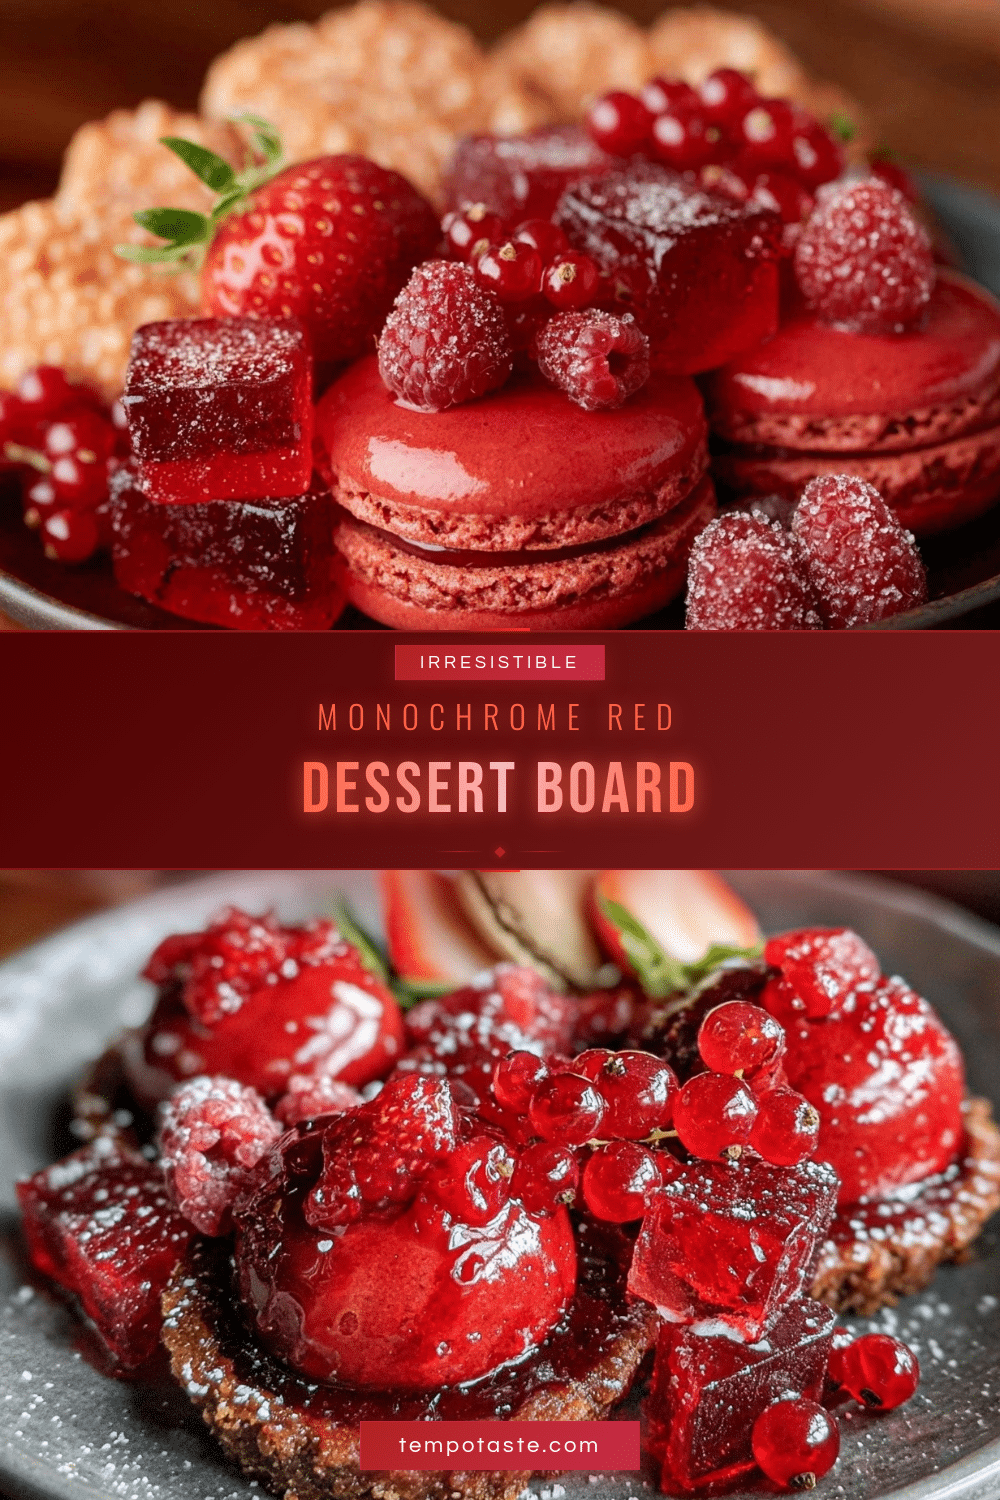
Perfect Monochrome Red Dessert Board

A beautifully curated monochrome red dessert board featuring fresh red fruits, red velvet cake bites, ruby chocolate, and complementary sweets and cheeses, perfect for elegant entertaining and quick assembly.
- Prep Time: 20 minutes
- Cook Time: 0 minutes
- Total Time: 20 minutes
- Yield: 8 servings
- Category: Dessert
- Cuisine: American
Ingredients
- Strawberries (hulled and halved)
- Raspberries
- Cherries (pitted)
- Red grapes (washed)
- Red velvet cake bites (homemade or store-bought, cut into 1-inch cubes, preferably with cream cheese frosting)
- Ruby chocolate bars or chips
- Red licorice twists, red jelly beans, or cinnamon candy hearts
- Raspberry coulis or strawberry jam
- Mild cheeses with red accents (e.g., red waxed gouda or cranberry goat cheese log)
- Candied pecans or dried cranberries
- Fresh mint leaves or edible red flowers
Instructions
- Wash all fresh fruits thoroughly. Hull and halve strawberries, pit cherries carefully, and dry grapes with a paper towel to avoid sogginess. Set aside on a plate to air dry slightly.
- Slice red velvet cake into roughly 1-inch cubes. Trim uneven edges if using store-bought cake. Place cubes on a plate lined with parchment.
- Spoon raspberry coulis or strawberry jam into small ramekins. Optionally mix a bit of lemon juice into the jam to brighten flavor. Place ramekins near the center of the serving board.
- Slice cranberry goat cheese log or red waxed gouda into bite-sized pieces. Scatter candied pecans or dried cranberries into small clusters around the cheeses.
- Start by placing bowls of sauce and cheese pieces on the board. Arrange fruits, cake bites, ruby chocolates, and candies in groups by type and size, overlapping slightly for abundance. Add fresh mint leaves or edible flowers in gaps for a pop of green.
- Step back and check color balance. Add extra berries or candies if some reds look dull or sparse.
- Keep the board chilled until 15 minutes before serving to maintain freshness.
Notes
Keep fruits dry to avoid sogginess. Use parchment or small dishes as barriers on wooden boards to prevent staining. Prep fruits last and pat dry well. For gluten-free, use almond flour-based red velvet and nut-based cheeses. For dairy-free, substitute cream cheese frosting with coconut cream cheese and use plant-based chocolates and candies. Serve slightly chilled or at room temperature. Store leftovers covered in refrigerator up to 2 days; wrap cake separately to keep moist.
Nutrition
- Serving Size: Approximately 1/8th
- Calories: 0.25
- Sugar: 22
- Sodium: 150
- Fat: 12
- Saturated Fat: 5
- Carbohydrates: 30
- Fiber: 3
- Protein: 4
Keywords: monochrome dessert board, red dessert board, red velvet cake bites, ruby chocolate, elegant entertaining, fruit dessert board, easy dessert ideas


