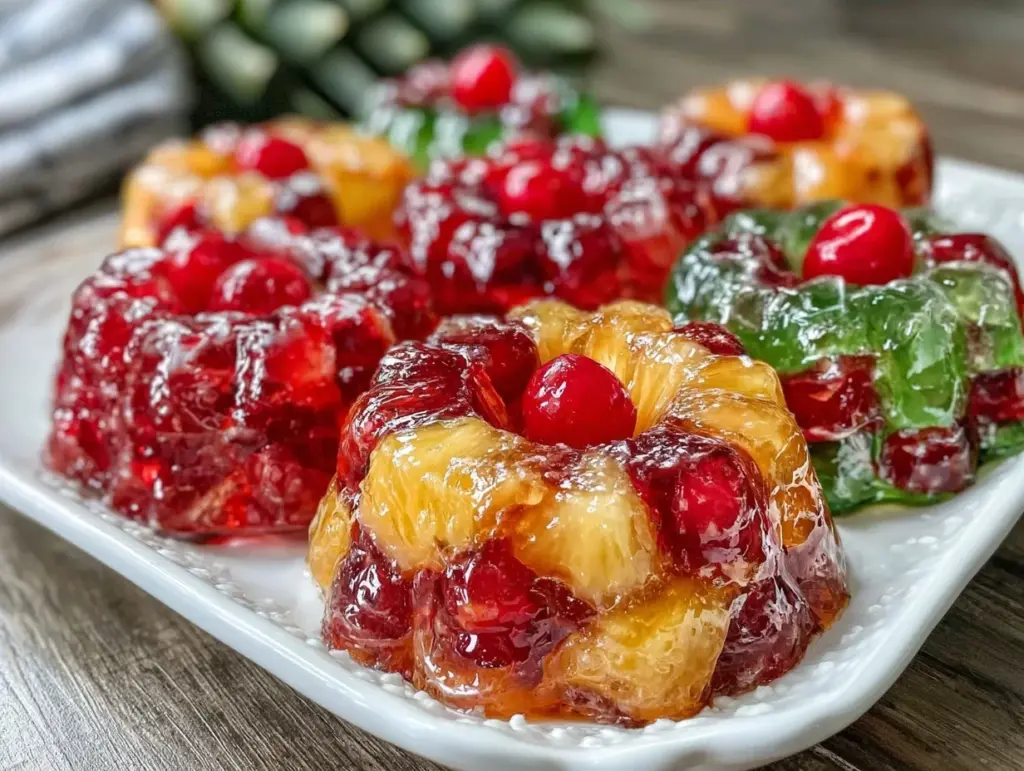
Let me tell you, the sight of a shimmering, colorful 1980s Jello mold dessert sitting proudly on the table instantly whisks me back to those carefree days of neon leg warmers and cassette tapes. There’s something about the wobbly, translucent layers dancing in the light that just makes your mouth water—honestly, it’s pure, nostalgic comfort on a plate. The first time I made one of these retro Jello mold desserts, I was knee-high to a grasshopper, helping my grandma at a family potluck. I was instantly hooked. I still remember that moment perfectly—the kind where you pause, take a deep breath, and just smile because you know you’re onto something truly special.
Years ago, I stumbled upon a stash of vintage cookbooks while cleaning out my parents’ attic on a rainy weekend. Flipping through, I found all these quirky, colorful Jello molds—fruits suspended in gelatin, creamy layers, and whimsical shapes that screamed “party time.” I wish I’d discovered these recipes years ago because my family couldn’t stop sneaking them off the cooling rack (and I can’t really blame them). Whether it was at birthday parties, holiday dinners, or those last-minute potlucks, these desserts brought everyone together with their cheerful vibe and irresistible flavor.
Let’s face it, 1980s Jello mold desserts might seem a little retro, but they’re dangerously easy to make and perfect for brightening up your Pinterest cookie board or your next gathering. If you’re looking for a sweet treat that’s equal parts fun and flavorful, you’re going to want to bookmark this one. I’ve tested these recipes more times than I care to admit—in the name of research, of course—and they’ve become a staple for family gatherings, potlucks, and gifting. Trust me, this is one throwback that’s worth every jiggle and spoonful.
Why You’ll Love This Recipe
After years of experimenting with 1980s Jello mold desserts, I can honestly say these recipes bring a unique charm that’s hard to beat. They’re not just a blast from the past, but also practical and downright delicious. Here’s why you’ll find yourself making these time and again:
- Quick & Easy: Most recipes come together in under 30 minutes, making them perfect for busy weeknights or last-minute cravings.
- Simple Ingredients: No need for fancy grocery runs—you probably have everything needed right in your pantry or fridge.
- Perfect for Any Occasion: Whether it’s brunch, potlucks, or holiday dinners, these molds bring fun and flavor to the table.
- Crowd-Pleaser: Kids and adults alike rave about the playful textures and vibrant colors.
- Unbelievably Delicious: The combo of fruity, creamy, and slightly tangy layers hits that comfort food spot every time.
What sets my version apart is a few personal twists I’ve added over the years—like blending cottage cheese for a super smooth creamy layer or balancing the sweetness with a hint of citrus zest. It’s not just another Jello mold recipe; it’s a lovingly tested, family-approved classic that feels like a warm hug in dessert form. You’ll close your eyes after the first bite, I promise. Plus, these retro treats impress guests without any fuss, turning simple ingredients into something memorable.
What Ingredients You Will Need
This recipe uses simple, wholesome ingredients to deliver bold flavor and satisfying texture without the fuss. Most are pantry staples, and substitutions are easy to make if you’re catering to dietary needs or ingredient availability.
- Jello Gelatin Mix: Choose your favorite flavors like lime, cherry, or orange (classic brands like Knox or Kraft work well).
- Boiling Water: To dissolve the gelatin thoroughly.
- Cold Water or Fruit Juice: To add flavor and help set the mold.
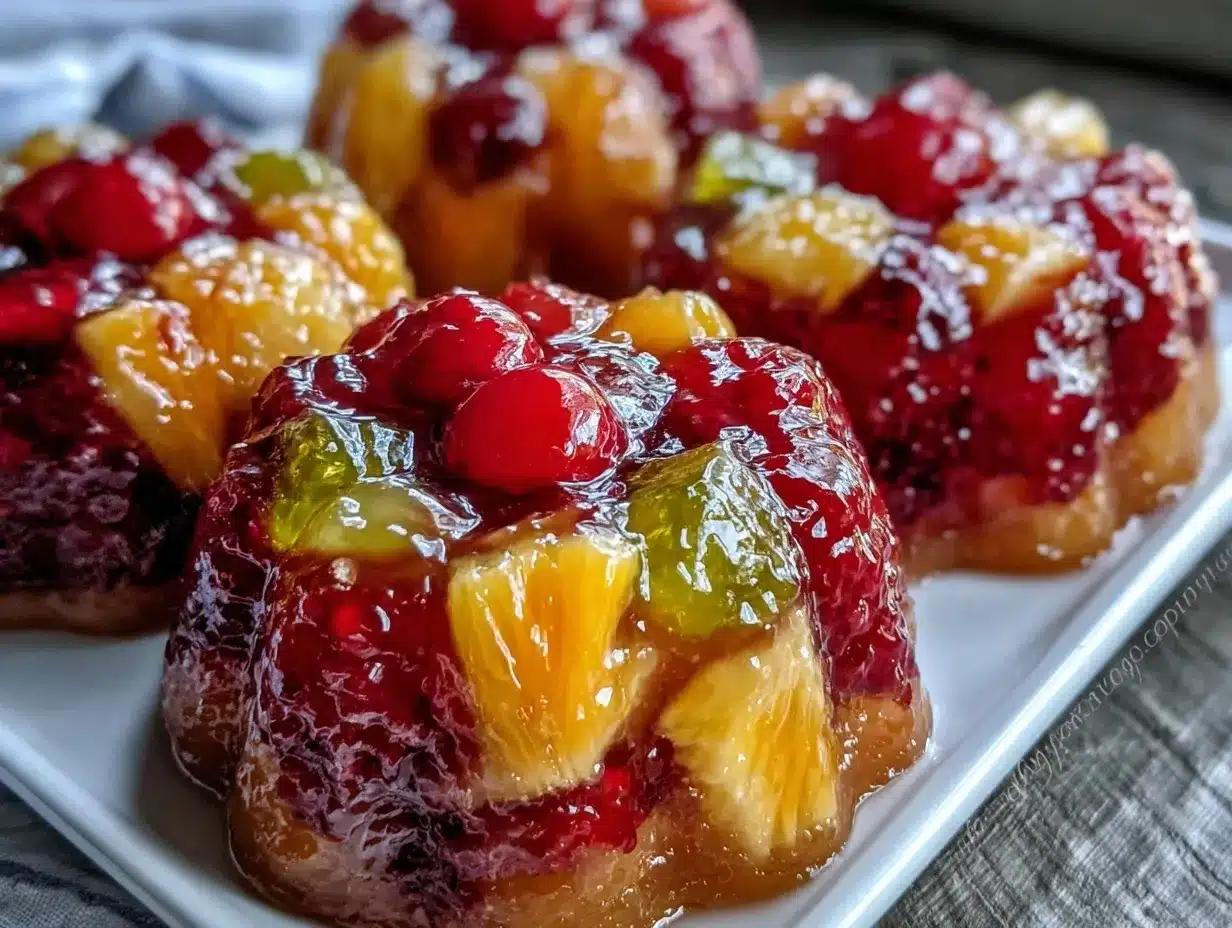
- Canned Fruit: Pineapple tidbits, mandarin oranges, or cherries (drained well to avoid sogginess).
- Cream Cheese or Cottage Cheese: Cream cheese, softened, or small-curd cottage cheese for that creamy layer (I recommend using full-fat for best texture).
- Whipped Topping: Cool Whip or homemade whipped cream (for a light, fluffy contrast).
- Sugar: Granulated sugar or powdered sugar to sweeten the creamy layers.
- Gelatin for Cream Layer (Optional): Plain gelatin to stabilize the creamy part if you prefer a firmer set.
- Lemon Juice or Zest: Adds brightness and balances sweetness.
- Optional Add-ins: Chopped nuts, shredded coconut, or chopped marshmallows for texture variety.
For substitutions, use almond milk or coconut milk instead of water for a dairy-free twist. You can swap gelatin with agar-agar for a vegetarian-friendly option, but note the setting times differ.
Equipment Needed
- Large Mixing Bowls: For dissolving gelatin and mixing layers. Glass or heatproof plastic works best.
- Measuring Cups and Spoons: Precision helps with gelatin consistency.
- Whisk or Hand Mixer: To blend cream cheese smoothly and whip toppings.
- Loaf Pan or Decorative Mold: Classic Jello molds work well, but loaf pans or bundt pans add a fun shape.
- Rubber Spatula: For scraping bowls and folding ingredients gently.
- Refrigerator Space: Essential for setting your mold overnight or at least for a few hours.
If you don’t have a fancy mold, no worries! A simple glass dish or even individual ramekins work beautifully. I’ve used everything from vintage Tupperware to modern silicone molds — all get the job done with a bit of patience when unmolding. For budget-friendly options, thrift stores often have classic molds that add authentic charm.
Preparation Method
- Dissolve Gelatin: In a large mixing bowl, pour one 3-ounce (85 g) package of your chosen Jello gelatin flavor. Add 1 cup (240 ml) boiling water and stir for about 2 minutes until completely dissolved. You want the mixture smooth with no granules lingering.
- Add Cold Liquid: Stir in 1 cup (240 ml) cold water or fruit juice to the gelatin mixture. This cools it down and starts the setting process. Pour about half into your prepared mold or loaf pan. Refrigerate for 30–45 minutes until the layer is slightly firm but still tacky to the touch (this helps the next layer stick).
- Prepare Creamy Layer: While the gelatin sets, beat 8 ounces (225 g) softened cream cheese with 1/2 cup (60 g) powdered sugar until smooth and fluffy. Gently fold in 1 cup (240 ml) whipped topping and 1 tsp lemon juice for brightness. If you want a firmer creamy layer, sprinkle 1 tsp plain gelatin over 2 tbsp cold water, let bloom 5 minutes, then microwave 10 seconds until melted and fold it in quickly.
- Layer Fruit: Drain canned fruit well. When the first gelatin layer is tacky, spread half the fruit evenly over it. Pour half the creamy layer gently on top, smoothing with a spatula. Return to fridge for another 30 minutes.
- Repeat Layers: Pour the remaining gelatin mixture over the creamy layer, chill again until tacky. Add the rest of the fruit and creamy layer in the same way. Top with whipped topping if desired.
- Chill Until Firm: Refrigerate the entire mold for at least 4 hours or overnight. The longer, the better for flavors to meld.
- Unmold and Serve: To unmold, dip the mold briefly in warm water (5-10 seconds) to loosen edges, then invert onto a serving plate. Slice and enjoy the colorful, wobbly layers!
Pro tip: If your gelatin isn’t setting, check the expiration date and avoid stirring once it starts to thicken—too much agitation can prevent firm gel formation. Also, be patient during chilling; rushing leads to messy layers.
Cooking Tips & Techniques
When it comes to mastering these retro 1980s Jello mold desserts, a few insider tricks make all the difference. First off, always use boiling water to dissolve gelatin to avoid grainy textures. I learned this the hard way after one batch had stubborn lumps that refused to melt.
Another tip is layering at the right time. You want each layer to be “tacky,” not fully set, so the layers stick together without bleeding colors. If you wait too long, they’ll separate; too soon, and they’ll mix into a muddled mess.
Whipping the cream cheese until ultra-smooth prevents lumps in the creamy layer—using a hand mixer really saves time here. I once tried folding it in by hand and ended up with a chunky surprise nobody wanted to eat.
Timing is key. Prepare all ingredients before starting, so you can move quickly between steps and avoid gelatin setting too soon. Multitasking by chilling layers in the fridge while prepping the creamy layer helps speed things up.
Finally, unmolding can be tricky. Warm water dips soften the edges nicely, but don’t soak the mold or it’ll leak. Silicone molds are more forgiving, but classic plastic or glass molds need a bit of TLC.
Variations & Adaptations
One of the best parts about 1980s Jello mold desserts is their versatility. Here are a few ways I’ve changed things up over the years:
- Dietary Twist: Swap gelatin with agar-agar for a vegetarian-friendly version, but follow package instructions carefully since setting times and textures vary.
- Seasonal Flavors: Use fresh berries or stone fruits in summer instead of canned fruit for a fresher taste. Try cranberry or pomegranate seeds in winter for a festive touch.
- Flavor Swaps: Replace the cream cheese layer with Greek yogurt whipped with honey and vanilla for a tangy, lighter option. You can also add a splash of liqueur like Grand Marnier for adults-only gatherings.
- Texture Variation: Add mini marshmallows, chopped nuts, or shredded coconut to the creamy layer for extra bite and nostalgia.
- Personal Experiment: I once tried layering different Jello flavors in rainbow order—turns out it’s a showstopper at kids’ parties and a great way to sneak in some fruit juice instead of plain water.
Serving & Storage Suggestions
Serve your 1980s Jello mold desserts chilled, straight from the fridge. The gelatin jiggle shines brightest when cold, and the creamy layers taste freshest this way. For presentation, garnish with fresh mint leaves or thin slices of fruit matching your Jello flavor.
Pair these molds with light dishes like grilled chicken or a crisp green salad to balance the sweet richness. For beverages, iced tea or sparkling lemonade complements the retro vibe perfectly.
Store leftovers covered tightly in the refrigerator for up to 3 days. While Jello molds are best fresh, flavors mellow and layers firm up nicely overnight. Avoid freezing—the texture won’t survive the thaw.
To reheat, gently bring to room temperature (about 15 minutes out of the fridge); microwaving is not recommended as it melts the gelatin.
Nutritional Information & Benefits
A typical serving of this retro Jello mold dessert clocks in around 150-200 calories, depending on the fruit and creamy layer choices. Gelatin itself is low in calories and provides a small protein boost, while the fruit adds vitamins and natural sweetness.
Using full-fat cream cheese or whipped topping ups the richness but also the calorie count, so for a lighter version, try substituting with Greek yogurt or reduced-fat options. These desserts are naturally gluten-free, which is great for those with sensitivities.
Keep in mind, gelatin is generally safe but contains no fiber or significant nutrients beyond protein. The real star is the nostalgic joy and social connection these treats bring—sometimes that feels like the best kind of nourishment!
Conclusion
In the end, 1980s Jello mold desserts offer a fun, colorful, and surprisingly easy way to bring a bit of retro magic to your table. Whether you’re looking to impress at a potluck, treat your kids to something special, or just indulge in a nostalgic favorite, these recipes deliver on all fronts.
Feel free to customize the flavors, fruits, and creamy layers to match your tastes or dietary needs. Honestly, there’s no wrong way to make a Jello mold—it’s all about the fun and memories it sparks. I love how these desserts bring people together, making every bite a little celebration.
Give these recipes a try, share your favorite variations, and let me know how it goes! I’m always excited to hear your stories and see your colorful creations. Happy molding!
FAQs
What is the best way to unmold a Jello mold without breaking it?
Dip the mold briefly (5-10 seconds) in warm water to loosen the edges, then invert it onto a plate. Avoid soaking the mold too long to prevent leaking.
Can I use fresh fruit instead of canned fruit in these recipes?
Yes! Fresh fruit works great, but choose firm varieties and drain any excess juice to keep your mold from getting soggy.
How long does it take for a Jello mold to set completely?
Typically, 4 hours or overnight in the refrigerator is best for firm setting and flavor melding.
Can I prepare a Jello mold dessert ahead of time?
Absolutely! These molds actually taste better after resting overnight, making them perfect for prepping a day in advance.
Are there vegetarian alternatives to gelatin for these molds?
Yes, agar-agar is a popular plant-based substitute, but note the setting properties differ, so follow package instructions closely.
Pin This Recipe!
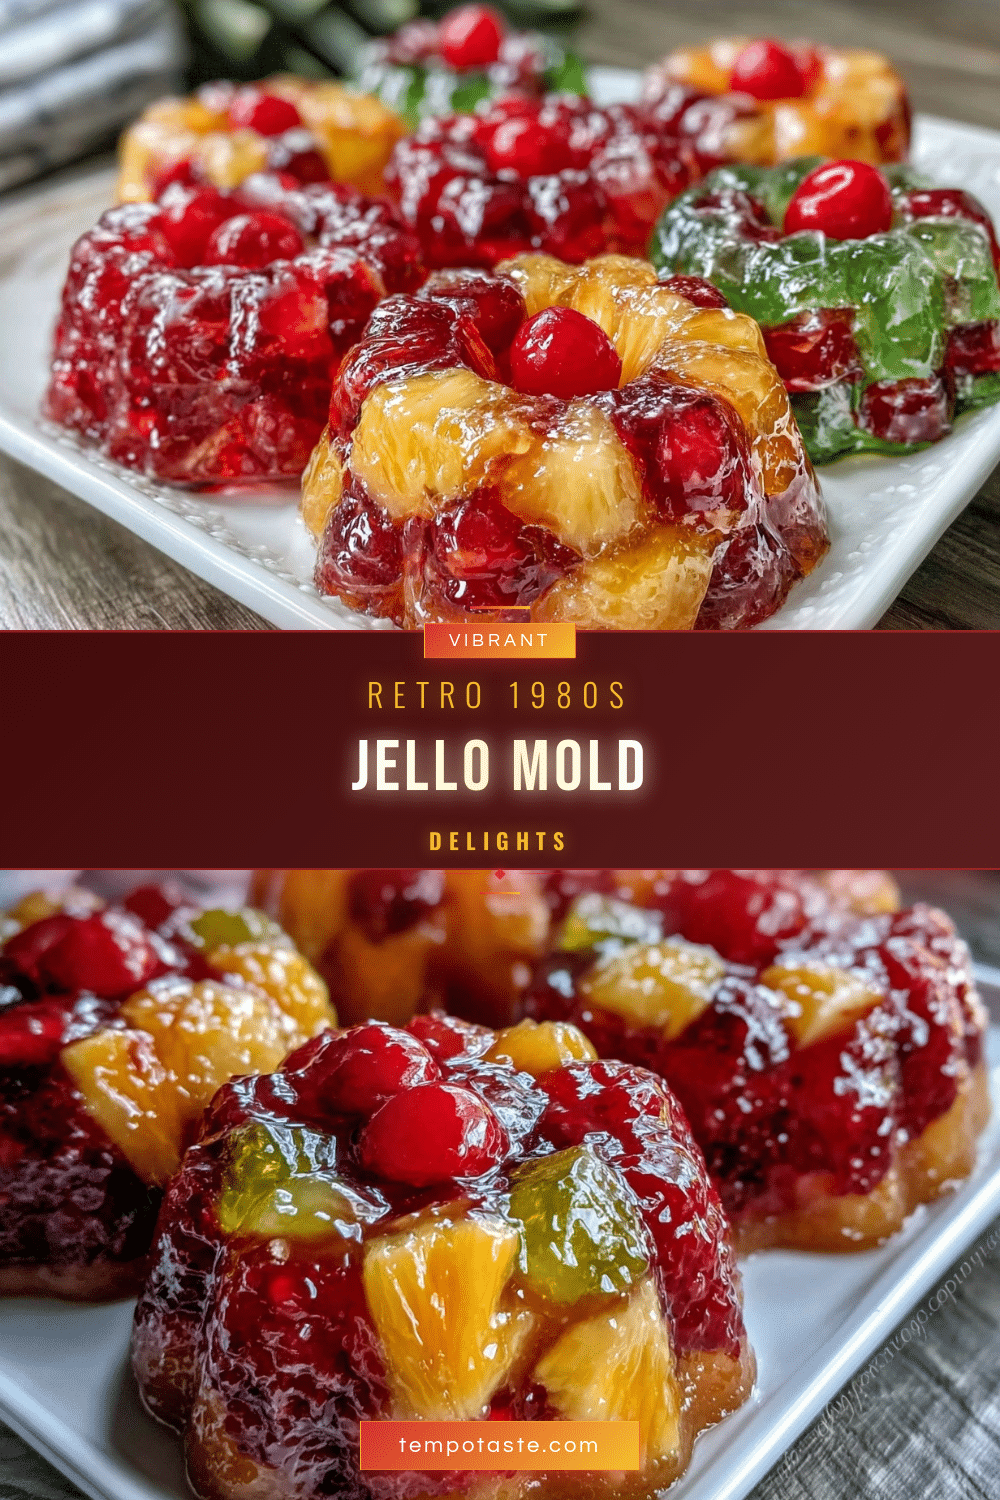
1980s Jello Mold Desserts Easy Retro Recipes for Nostalgic Treats

A fun, colorful, and easy-to-make retro dessert featuring layered gelatin, creamy cheese, and fruit that brings nostalgic charm and crowd-pleasing flavor to any occasion.
- Prep Time: 15 minutes
- Cook Time: 4 hours 30 minutes
- Total Time: 4 hours 45 minutes
- Yield: 8 servings 1x
- Category: Dessert
- Cuisine: American
Ingredients
- 1 package (3 ounces) Jello gelatin mix (lime, cherry, or orange)
- 1 cup boiling water
- 1 cup cold water or fruit juice
- Canned fruit (pineapple tidbits, mandarin oranges, or cherries), drained
- 8 ounces cream cheese or small-curd cottage cheese, softened
- 1/2 cup powdered sugar
- 1 cup whipped topping (Cool Whip or homemade whipped cream)
- 1 teaspoon lemon juice or zest
- 1 teaspoon plain gelatin (optional, for creamy layer)
- 2 tablespoons cold water (for blooming gelatin)
- Optional add-ins: chopped nuts, shredded coconut, chopped marshmallows
Instructions
- Dissolve one 3-ounce package of Jello gelatin in 1 cup boiling water, stirring for about 2 minutes until completely dissolved.
- Stir in 1 cup cold water or fruit juice to the gelatin mixture. Pour about half into a prepared mold or loaf pan. Refrigerate for 30–45 minutes until slightly firm but tacky.
- Beat 8 ounces softened cream cheese with 1/2 cup powdered sugar until smooth and fluffy. Fold in 1 cup whipped topping and 1 teaspoon lemon juice. If a firmer creamy layer is desired, bloom 1 teaspoon plain gelatin in 2 tablespoons cold water for 5 minutes, microwave 10 seconds until melted, then fold in quickly.
- Drain canned fruit well. When the first gelatin layer is tacky, spread half the fruit evenly over it. Pour half the creamy layer on top and smooth with a spatula. Refrigerate for another 30 minutes.
- Pour the remaining gelatin mixture over the creamy layer and chill until tacky. Add the rest of the fruit and creamy layer in the same way. Top with whipped topping if desired.
- Refrigerate the entire mold for at least 4 hours or overnight to set firmly and meld flavors.
- To unmold, dip the mold briefly (5-10 seconds) in warm water to loosen edges, then invert onto a serving plate. Slice and serve.
Notes
Use boiling water to dissolve gelatin to avoid grainy texture. Layer when gelatin is tacky, not fully set, to ensure layers stick without bleeding colors. Whip cream cheese smoothly with a hand mixer to avoid lumps. Dip mold briefly in warm water to unmold without breaking. Agar-agar can be used as a vegetarian substitute but follow package instructions for setting times.
Nutrition
- Serving Size: 1 slice (approximate
- Calories: 175
- Sugar: 18
- Sodium: 150
- Fat: 9
- Saturated Fat: 5
- Carbohydrates: 20
- Protein: 3
Keywords: 1980s, Jello mold, retro dessert, gelatin dessert, creamy layers, nostalgic treats, easy dessert, party dessert, layered Jello


