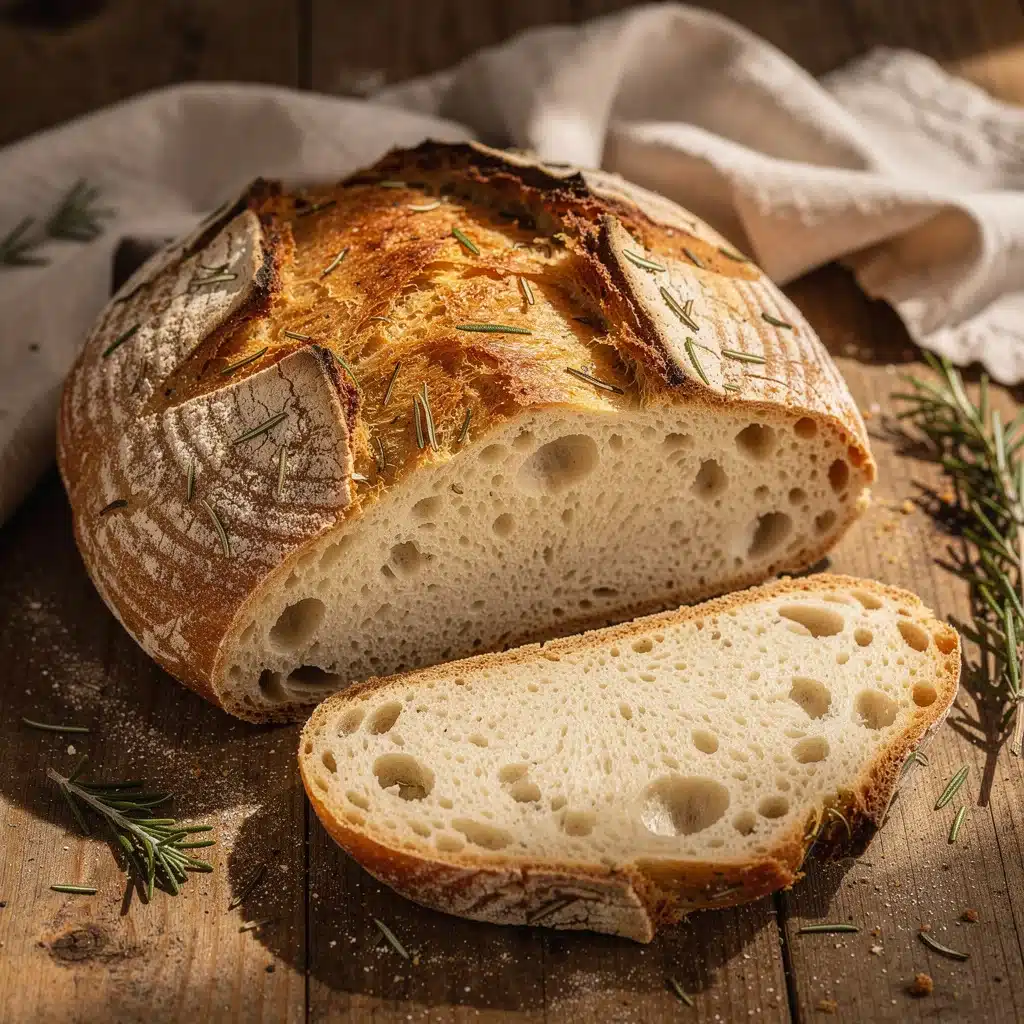
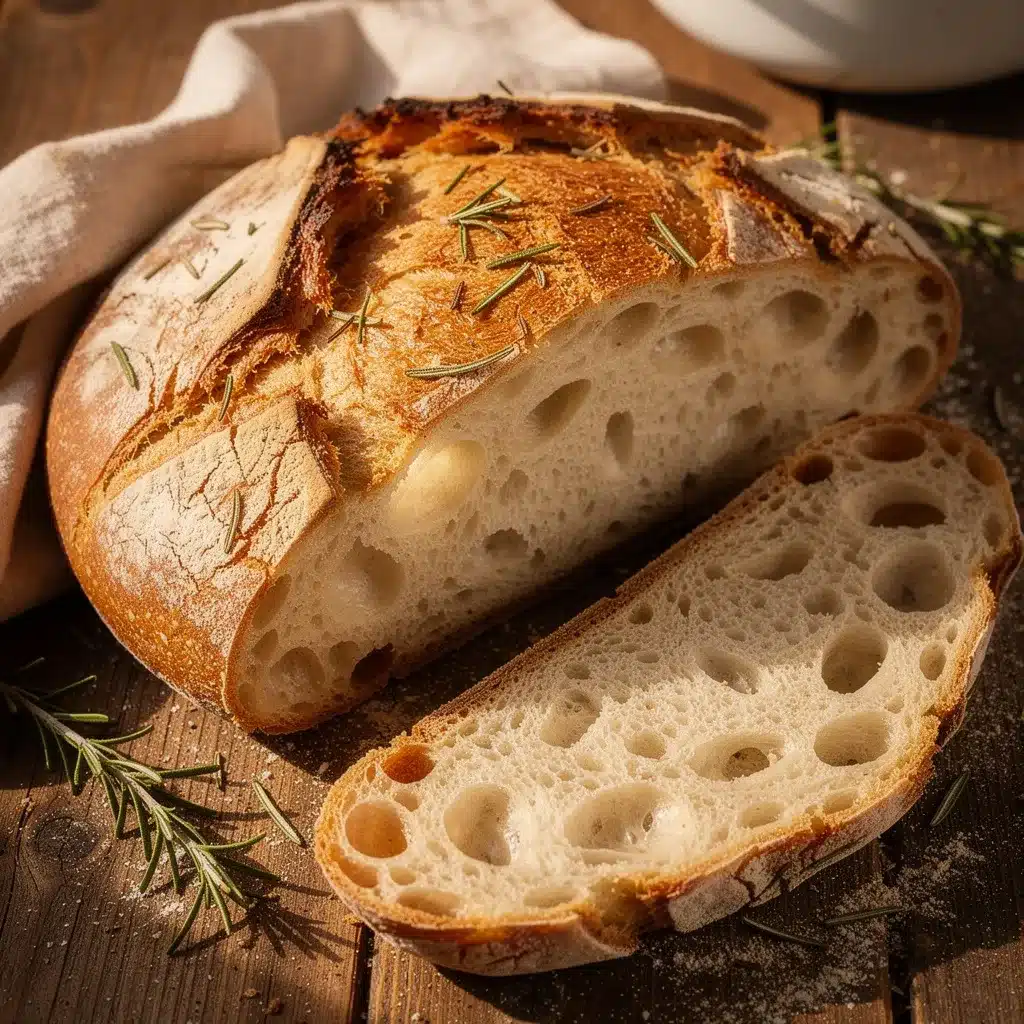
“You’re kidding me — no kneading?” That’s exactly what my neighbor said the first time I mentioned making this easy no-knead Dutch oven rosemary bread with crispy crust. Honestly, I was skeptical too. Baking bread has always felt like a bit of a production, with all that kneading, proofing, and waiting. But one rainy afternoon, I found myself short on energy and time, yet craving something warm, fragrant, and comforting. I tossed some basic ingredients together in a bowl, stirred it up, and let it rest overnight. The next day, I slid the dough into my trusty Dutch oven, sprinkled fresh rosemary on top, and waited anxiously. What came out was this golden, crusty loaf that smelled like a bakery had moved into my kitchen. The crust had that perfect crackle, and the crumb was soft and tender — honestly, better than many loaves I’d paid top dollar for.
This recipe stuck with me because it’s so forgiving and straightforward. Plus, that rosemary aroma — it’s subtle but unforgettable, like a gentle nudge reminding you that simple pleasures are the best. I still make this bread on lazy weekends or when I want to impress guests without fussing in the kitchen. And let me tell you, it pairs wonderfully with everything from a cozy bowl of soup to a vibrant Mediterranean quinoa salad I recently made (fresh Mediterranean quinoa salad with feta). No fancy skills, no fancy tools — just good bread that feels like home.
Why You’ll Love This Recipe
From my many experiments and happy accidents with bread baking, this easy no-knead Dutch oven rosemary bread recipe has become a go-to for good reason. Here’s why you’ll want to keep it in your regular rotation:
- Quick & Easy: The active prep time is just about 10 minutes. The dough does the heavy lifting by resting, so it’s perfect for busy days when you want fresh bread without babysitting the process.
- Simple Ingredients: Flour, water, salt, yeast, and fresh rosemary — all pantry staples. You probably have everything on hand already, so no last-minute grocery runs.
- Perfect for Cozy Meals: Whether you’re serving up a comforting chicken alfredo bake (creamy chicken alfredo bake) or a casual brunch, this bread fits right in.
- Crowd-Pleaser: It’s a hit with both kids and adults. The crispy crust makes it feel fancy, but the tender inside keeps everyone coming back for more.
- Unbelievably Delicious: The rosemary adds just the right herbal note without overpowering, and the Dutch oven creates a bakery-quality crust that’s crunchy and crackly.
What sets this recipe apart is the no-knead technique combined with the magic of baking in a Dutch oven. You don’t have to worry about shaping the dough perfectly or using any special mixers. The long fermentation overnight develops flavor deeply, and the hot Dutch oven traps steam that creates that irresistible crust. This bread doesn’t just fill you up — it invites a moment to pause, savor, and maybe even close your eyes after that first bite.
What Ingredients You Will Need
This recipe uses simple, wholesome ingredients to deliver bold flavor and satisfying texture without the fuss. Most are pantry staples, with fresh rosemary bringing the aroma and subtle earthiness to the loaf.
- All-purpose flour (3 cups / 360g) – I prefer King Arthur brand for consistent results.
- Instant yeast (1/4 teaspoon) – This small amount is enough for a slow rise; you can also use active dry yeast but dissolve it in water first.
- Salt (1 1/2 teaspoons) – Essential for flavor balance; use fine sea salt or kosher salt.
- Warm water (1 1/2 cups / 360ml) – Around 75°F (24°C) to activate the yeast gently but not kill it.
- Fresh rosemary (2 tablespoons, finely chopped) – Adds that fragrant, piney note; if unavailable, dried rosemary works but use less.
- Olive oil (1 tablespoon, optional) – For brushing the crust if you want a softer finish and a bit of sheen.
If you want to switch things up, you can swap all-purpose flour for bread flour to get a chewier texture, or use almond flour in part for a gluten-free twist (though it won’t rise the same). In summer, fresh herbs like thyme or oregano can replace rosemary for a different herbal profile. For a dairy-free loaf, just stick to the basic ingredients as this recipe doesn’t call for milk or butter.
Equipment Needed
- Dutch oven (5-6 quart / 4.7-5.7 liters) – The key tool here. It creates a steamy environment for that crispy crust. If you don’t have one, a heavy oven-safe pot with a lid works, or a cast iron skillet paired with a metal bowl as a cover.
- Mixing bowl – Large enough to hold the dough as it rises.
- Kitchen scale (optional) – For precise measuring of flour and water, but measuring cups work just fine.
- Wooden spoon or spatula – For mixing the wet and dry ingredients.
- Clean kitchen towel or plastic wrap – To cover the dough during proofing.
I’ve tried baking this bread in various pots, and the cast iron Dutch oven delivers the best crust every time. Just be mindful to preheat it in the oven before adding the dough — that’s the secret to the perfect crust. Don’t forget oven mitts; the pot gets seriously hot! If you’re on a budget, some ceramic Dutch ovens are affordable and do a great job, just check they’re oven-safe up to 450°F (230°C).
Preparation Method
- Combine dry ingredients: In a large mixing bowl, whisk together 3 cups (360g) of all-purpose flour, 1/4 teaspoon instant yeast, and 1 1/2 teaspoons salt. This ensures even distribution of the yeast and salt. (About 2 minutes)
- Add water: Pour in 1 1/2 cups (360ml) warm water. Using a wooden spoon or spatula, stir the mixture until a shaggy, wet dough forms. It will be sticky and rough — that’s exactly what you want. Don’t worry about kneading. (About 3 minutes)
- Fold in rosemary: Gently mix in 2 tablespoons finely chopped fresh rosemary. This keeps the aromatic herb evenly spread throughout the dough. (1 minute)
- Cover and rest: Cover the bowl tightly with plastic wrap or a clean kitchen towel. Leave it at room temperature for 12 to 18 hours. The dough will rise and bubble, developing flavor and structure while you relax or do other things. (Passive time)
- Preheat oven and Dutch oven: About 30 minutes before baking, place your empty Dutch oven with its lid into the oven and preheat to 450°F (230°C). This step is crucial for a crispy crust. (30 minutes)
- Shape dough: Lightly flour a work surface. Carefully scrape the dough onto it. Using floured hands, fold the dough gently over itself a few times to shape into a round boule. Let it rest for 30 minutes while the oven heats. (30 minutes)
- Bake: Carefully remove the hot Dutch oven from the oven. Transfer the dough into it (handle with care!). Optionally, brush the top with olive oil for a softer crust. Cover with the lid and bake for 30 minutes.
- Finish baking: Remove the lid and bake for an additional 10-15 minutes to deepen the crust color and crispiness. The loaf should sound hollow when tapped. (Total bake time 40-45 minutes)
- Cool: Transfer the bread to a wire rack and let cool completely before slicing. This resting time allows the crumb to set fully and prevents a gummy texture. (At least 1 hour)
If your dough feels too sticky when shaping, sprinkle more flour on your hands — but avoid adding too much or the bread will be dense. The dough will be loose and wet initially, which is normal. The long fermentation is what makes it manageable and flavorful.
Cooking Tips & Techniques
One of the trickiest parts of bread baking is getting that perfect crust without drying out the inside. Using a Dutch oven creates a mini steam oven, which locks in moisture early on and then crisps the crust once the lid is removed. Preheating the Dutch oven is essential — don’t skip it, or your bread won’t blister and crackle as it should.
Another tip: resist the urge to cut into your bread right away. I know it’s tempting (been there!), but the crumb needs time to set. Cutting too soon leads to a gummy texture. Patience really pays off.
Sometimes, the dough might rise unevenly or look a bit sloppy after the long rest. That’s okay! The shaping step smooths things out. The loose, wet dough is part of the no-knead magic — it ferments gently and develops flavor without elbow grease.
For an extra flavor kick, try adding a pinch of garlic powder or a sprinkle of coarse sea salt on top before baking. It’s a simple twist that amps up the savory notes.
Variations & Adaptations
- Herb swaps: Use fresh thyme, oregano, or a mix of herbs instead of rosemary for different flavor profiles.
- Cheese addition: Fold in 1/2 cup of shredded sharp cheddar or Parmesan right before the final shaping for a cheesy twist.
- Gluten-free option: Use a gluten-free all-purpose flour blend designed for baking, but reduce water slightly as gluten-free flours absorb liquid differently.
- Whole wheat version: Replace half the all-purpose flour with whole wheat flour for a nuttier taste and denser crumb.
- Cooking method: If you don’t have a Dutch oven, bake the dough on a preheated baking stone or sheet and place a pan of hot water below the oven rack to create steam.
I once tried folding in some caramelized onions and fresh rosemary — it was a savory hit that disappeared faster than I expected! Feel free to experiment with add-ins that fit your taste.
Serving & Storage Suggestions
This rosemary bread is best served warm or at room temperature. Try slicing it thick and toasting it lightly with a drizzle of olive oil or butter. It pairs beautifully with soups, stews, or even as the base for bruschetta. When I made it alongside a creamy Greek lemon chicken soup (creamy Greek lemon chicken soup), it soaked up the broth perfectly.
Store leftover bread in a paper bag or loosely wrapped in a kitchen towel to keep the crust crisp for up to two days. For longer storage, slice and freeze it in a zip-top bag. Toast slices directly from the freezer for fresh-from-the-oven flavor.
Reheating in the oven at 350°F (175°C) for 5-7 minutes refreshes the crust nicely. Over time, the flavors mellow and become even more harmonious, especially that subtle rosemary note.
Nutritional Information & Benefits
This bread offers a wholesome source of carbohydrates with a modest amount of protein from the flour. Rosemary isn’t just for flavor — it contains antioxidants and may have anti-inflammatory properties, adding a small health boost to your loaf.
Per slice (approximate): 150 calories, 30g carbs, 5g protein, 1g fat, 2g fiber.
This recipe is naturally vegetarian and can be adapted for gluten-free diets with the right flour blend. It contains no dairy or eggs, making it suitable for many dietary preferences. Personally, I like that it feels indulgent without being heavy, pairing well with a healthy, balanced meal.
Conclusion
This easy no-knead Dutch oven rosemary bread with crispy crust is the kind of recipe that quietly earns a permanent spot on your list. It’s approachable, forgiving, and delivers that satisfying crunch and aromatic flavor that make bread baking feel like a triumph — even if you’re not a baker. What I love most is how it brings a little calm and joy to my kitchen, whether I’m making a simple sandwich or pairing it with a creamy chicken alfredo bake (creamy chicken alfredo bake) for a cozy night in. Give it a try, tweak it to your taste, and let me know how it turns out. There’s nothing quite like the smell of fresh bread to make a house feel like home.
FAQs
Can I make this bread without a Dutch oven?
Yes! You can bake the dough on a preheated baking stone or sheet and place a pan of hot water in the oven to create steam. This helps develop a crispy crust.
How long can I store the bread after baking?
Store it at room temperature wrapped in a paper bag or kitchen towel for up to two days. For longer storage, slice and freeze it, then toast slices when needed.
Is it possible to add other flavors to this bread?
Definitely! Try folding in cheese, garlic, or other fresh herbs like thyme or oregano for a unique twist.
Why is the dough so sticky? Is that normal?
Yes, the dough is meant to be wet and sticky — that’s part of the no-knead method. It helps develop gluten slowly and results in a tender crumb.
Can I use dried rosemary instead of fresh?
You can, but use less (about 1 teaspoon) because dried herbs are more concentrated. Fresh rosemary provides the best aroma and flavor.
Pin This Recipe!

Easy No-Knead Dutch Oven Rosemary Bread Recipe with Crispy Crust

A simple, no-knead bread recipe baked in a Dutch oven that yields a golden, crusty loaf with a soft, tender crumb and subtle rosemary aroma.
- Prep Time: 10 minutes
- Cook Time: 40-45 minutes
- Total Time: 13 hours (including 12-18 hours resting and 1 hour cooling)
- Yield: 1 loaf (about 8-10 slices) 1x
- Category: Bread
- Cuisine: American
Ingredients
- 3 cups (360g) all-purpose flour
- 1/4 teaspoon instant yeast
- 1 1/2 teaspoons salt
- 1 1/2 cups (360ml) warm water (around 75°F / 24°C)
- 2 tablespoons fresh rosemary, finely chopped
- 1 tablespoon olive oil (optional, for brushing crust)
Instructions
- In a large mixing bowl, whisk together flour, instant yeast, and salt until evenly combined.
- Pour in warm water and stir with a wooden spoon or spatula until a shaggy, wet dough forms; do not knead.
- Fold in the finely chopped fresh rosemary gently to distribute evenly.
- Cover the bowl tightly with plastic wrap or a clean kitchen towel and let rest at room temperature for 12 to 18 hours.
- About 30 minutes before baking, preheat the oven to 450°F (230°C) with the Dutch oven and lid inside.
- Lightly flour a work surface and scrape the dough onto it. Fold the dough over itself a few times to shape into a round boule. Let rest for 30 minutes.
- Carefully remove the hot Dutch oven from the oven. Transfer the dough into it, optionally brush the top with olive oil, cover with the lid, and bake for 30 minutes.
- Remove the lid and bake for an additional 10-15 minutes until the crust is deeply colored and crisp. The loaf should sound hollow when tapped.
- Transfer the bread to a wire rack and let cool completely for at least 1 hour before slicing.
Notes
Preheat the Dutch oven before adding dough to ensure a crispy crust. Do not cut the bread immediately after baking; let it cool completely to avoid gummy texture. If dough is too sticky when shaping, sprinkle flour on hands but avoid adding too much. Optional olive oil brushing softens crust and adds sheen. Can substitute herbs or add cheese for variations.
Nutrition
- Serving Size: 1 slice
- Calories: 150
- Fat: 1
- Carbohydrates: 30
- Fiber: 2
- Protein: 5
Keywords: no-knead bread, Dutch oven bread, rosemary bread, crispy crust bread, easy bread recipe, homemade bread


