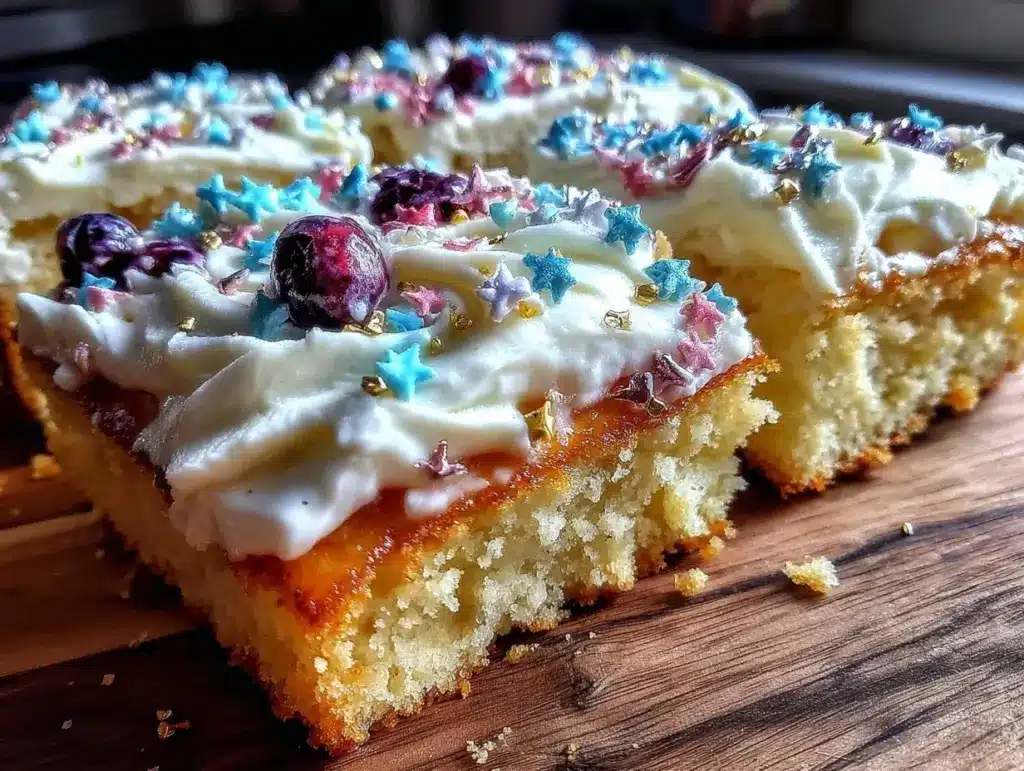
“Is it really going to look like a flag?” I remember asking myself that while carefully spreading that last stripe of red frosting on this cake. It was one of those rushed afternoons when I’d promised to bring something festive to a neighborhood barbecue, and honestly, my mind was on a million other things. But this flag sheet cake with creamy vanilla buttercream turned out to be the kind of unexpected win you don’t forget.
The first time I made this cake, the kitchen smelled like a cozy bakery, even though I was juggling making dinner and calming down a cranky toddler. Somehow, the simple vanilla buttercream whipped up into this silky, cloud-like frosting that made the whole cake feel special. The cake layers themselves were moist, tender, and held together beautifully under the vibrant red, white, and blue decorations.
What really stuck with me was how people kept asking for the recipe — a casual request at first, then more insistent as the night went on. That’s when I realized this wasn’t just a pretty cake for a summer party; it was a recipe that brought smiles and little moments of pride. I’ve made it several times since, tweaking the frosting just a bit here and there, but the core of that creamy vanilla buttercream and perfect flag design never changes.
There’s something quietly satisfying about a dessert that feels festive without trying too hard. It’s not about fancy piping or complicated techniques, but about the joy of sharing a colorful, charming cake that tastes as good as it looks. So if you’re looking for a way to celebrate with a dessert that truly delivers on flavor and fun, this flag sheet cake might just become your new go-to.
And honestly, after the first bite, you’ll see why it’s stuck with me — it’s comfort and celebration all rolled into one.
Why You’ll Love This Recipe
From my experience with this perfect flag sheet cake, I can tell you it’s much more than just a pretty face. This recipe was tested multiple times during busy summer weekends, and it consistently impressed everyone — from neighbors to my own picky eaters. Here’s why it deserves a spot in your kitchen playbook:
- Quick & Easy: The whole cake comes together in under 90 minutes, which is perfect for last-minute plans or when you’re juggling a million things (trust me, I’ve been there!).
- Simple Ingredients: No need to hunt for fancy items — basic pantry staples and common baking ingredients make this recipe super accessible.
- Perfect for Patriotic Occasions: Whether it’s the Fourth of July, Memorial Day, or any summer gathering, this cake fits right in with the festive spirit.
- Crowd-Pleaser: Kids love the bright colors, and adults appreciate the balanced, not-too-sweet vanilla buttercream that complements the moist cake layers.
- Unbelievably Delicious: The texture is spot-on — tender but sturdy enough to hold the layers and designs without crumbling or getting soggy.
What sets this apart from other flag cakes is the creamy vanilla buttercream frosting. I like to whip it just enough so it’s silky, not stiff, which makes spreading the stripes and stars a breeze. Plus, the cake itself isn’t overly sweet or dense. It’s like the kind of dessert that makes you pause for just a second after the first bite — you know the one where you close your eyes and savor the moment.
If you’ve ever found yourself overwhelmed by complicated layered cakes or frosting disasters, this recipe offers a friendly alternative that still wows visually and tastes incredible. It’s the kind of recipe you can count on to impress guests without stress, and still feel proud bringing to a potluck or family dinner.
What Ingredients You Will Need
This perfect flag sheet cake relies on straightforward, wholesome ingredients that combine for a moist, flavorful cake and a smooth, creamy vanilla buttercream. Most of these are pantry staples, so you can likely get started right away without a special grocery run.
- For the Cake:
- All-purpose flour (2 ½ cups / 315 g) — I prefer King Arthur for consistent results
- Baking powder (2 ½ tsp) — fresh is key for proper rise
- Salt (½ tsp)
- Unsalted butter (1 cup / 227 g), softened — brings richness and tenderness
- Granulated sugar (1 ¾ cups / 350 g) — balances sweetness without overpowering
- Large eggs (4), room temperature — essential for structure and moisture
- Pure vanilla extract (2 tsp) — quality vanilla makes all the difference
- Whole milk (1 cup / 240 ml), room temperature — gives the batter a smooth texture
- For the Creamy Vanilla Buttercream:
- Unsalted butter (1 cup / 227 g), softened — use good quality for the best creaminess
- Powdered sugar (4 cups / 480 g), sifted — for that silky smooth finish
- Pure vanilla extract (2 tsp)
- Heavy cream (2-4 tbsp / 30-60 ml) — adjusts consistency, add slowly
- Pinch of salt — balances the sweetness
- For Decorating:
- Red food coloring gel — gives a vibrant, true red stripe
- Blue food coloring gel — deep blue for the stars section
- White buttercream reserved — for stars and stripes
When picking butter, I always go for unsalted to control salt levels better. For the milk, whole milk gives a richer crumb, but you can substitute with almond milk if you want a dairy-free twist. If you’re into allergy-friendly baking, swapping all-purpose flour with a gluten-free blend works well, just keep an eye on moisture levels.
Equipment Needed
- 9×13-inch baking sheet or pan — the perfect size for this sheet cake; nonstick or lined with parchment paper works best
- Mixing bowls — one large for the batter, one medium for the buttercream
- Electric mixer or stand mixer — makes whipping the buttercream so much easier, though a hand mixer will do in a pinch
- Rubber spatulas — essential for scraping the bowl and folding ingredients gently
- Measuring cups and spoons — precise measurements help keep the cake consistent
- Offset spatula or butter knife — for spreading frosting evenly and cleanly
- Small piping bag or plastic sandwich bag with corner snipped — handy for piping stars or fine details in the blue section
- Sifter or fine mesh strainer — to sift powdered sugar for smooth buttercream (optional but recommended)
If you don’t have an electric mixer, whipping the buttercream by hand is possible but takes some muscle and patience! For those on a budget, a simple rubber spatula and a sturdy bowl can get you through the cake batter steps, but the texture might not be quite as fluffy.
Preparation Method
- Preheat and Prep (10 minutes): Preheat your oven to 350°F (175°C). Grease your 9×13-inch pan with butter or nonstick spray and line it with parchment paper if you want an easy release. Set aside.
- Mix Dry Ingredients (5 minutes): In a medium bowl, whisk together the all-purpose flour, baking powder, and salt until evenly combined. This helps distribute the leavening agents so your cake rises evenly.
- Cream Butter and Sugar (5-7 minutes): In a large bowl, beat the softened unsalted butter with the granulated sugar until the mixture is light, fluffy, and pale in color. This step is crucial — it traps air that makes the cake tender.
- Add Eggs and Vanilla (3 minutes): Add the eggs one at a time, beating well after each addition. Then pour in the pure vanilla extract and mix until combined.
- Alternate Adding Dry Ingredients and Milk (5 minutes): Gradually add the dry ingredients in three parts, alternating with the milk in two parts. Start and end with the flour mixture. Mix gently after each addition until just combined — don’t overmix or the cake could get tough.
- Pour and Smooth Batter (2 minutes): Transfer the batter to your prepared pan. Use a spatula to spread it evenly, smooth the top.
- Bake (30-35 minutes): Place the pan in the preheated oven. Bake for 30-35 minutes or until a toothpick inserted in the center comes out clean or with a few moist crumbs. The edges should pull away slightly from the pan.
- Cool Completely (at least 1 hour): Let the cake cool in the pan for 15 minutes, then transfer to a wire rack to cool completely. Frosting warm cake will cause melting, so patience here pays off.
- Prepare Buttercream (10 minutes): Beat the softened butter in a large bowl until creamy. Gradually add powdered sugar, mixing on low speed to avoid a sugar cloud. Add vanilla extract and a pinch of salt. Slowly add heavy cream, one tablespoon at a time, until you reach a smooth, spreadable consistency.
- Divide and Color Buttercream (5 minutes): Scoop about 1/3 of the buttercream into a separate bowl and tint it blue with food coloring gel. Leave the remaining buttercream white. For the red stripes, add red food coloring gel to another portion of white buttercream.
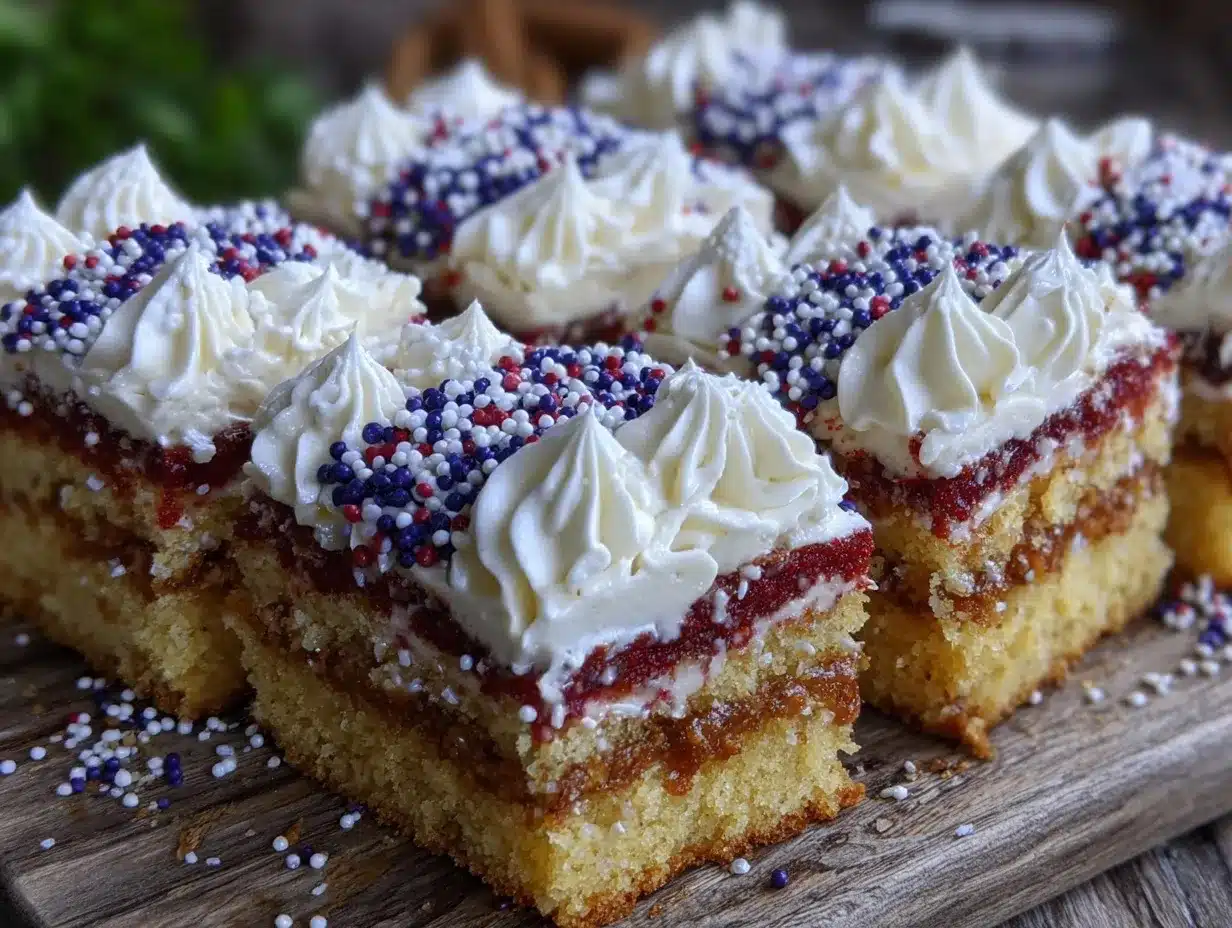
- Decorate the Cake (15-20 minutes): Spread the white buttercream over the entire cake as a base layer. On one corner, carefully spread the blue buttercream to create the star field. Use a piping bag or small spoon to pipe small white stars on the blue section. Finally, pipe or spread alternating red and white stripes across the rest of the cake. Don’t worry about perfection — the charm is in the homemade look!
Pro tip: If your buttercream feels too stiff, add a tiny splash more cream and beat again. Too runny? Toss in a bit more powdered sugar. I’ve learned the hard way that frosting consistency can make or break the look. Also, keep your cake cool if you’re decorating ahead of time, so the buttercream stays firm but spreadable.
Cooking Tips & Techniques
One of the biggest lessons I’ve learned baking this flag sheet cake is not to rush the butter and sugar creaming step. It’s tempting to speed through it, but taking a good 5-7 minutes here results in a lighter cake crumb and more tender texture.
Also, when mixing the batter, folding the dry ingredients into the wet gently is key. Overmixing toughens the cake — so stop once you don’t see streaks of flour. I always scrape down the sides of the bowl mid-mix to keep everything evenly combined.
When coloring the buttercream, gel food colors work best because they don’t water down the frosting. I’ve experimented with liquid colors before and ended up with runny frosting — not fun! Adding colors gradually, especially the blue, helps you get the perfect shade without going overboard.
Another tip: if you want sharp stripes, chill the cake briefly after the base layer of white buttercream before adding colored stripes. It helps prevent colors bleeding into one another.
And here’s a little personal confession — I once tried piping the stars freehand without a guide and ended up with blobs. Now I use a toothpick to lightly mark star positions. Small things like that make a big difference in results and confidence.
Variations & Adaptations
- Flavor Twist: Add a teaspoon of almond extract to the buttercream for a subtle nutty note that complements the vanilla beautifully.
- Seasonal Variation: Swap the blue and red food coloring for pastel shades and decorate with edible flowers for a springtime version that’s just as charming.
- Dietary Adaptation: Use gluten-free all-purpose flour and dairy-free butter and milk substitutes to make this cake friendly for gluten and dairy intolerances. The texture will be slightly different but still delicious.
- Chocolate Flag Cake: Replace ½ cup of flour with unsweetened cocoa powder and add a tablespoon of instant coffee granules to the batter for a subtle mocha flavor. Pair with a chocolate frosting base layer under your vanilla buttercream stripes.
- Personal Favorite: I once sprinkled mini white chocolate chips between the frosting layers for a surprise texture that guests loved. It’s an easy way to add a bit of fun inside the cake without extra fuss.
Serving & Storage Suggestions
This flag sheet cake is best served at room temperature for the creamiest buttercream experience. Let it sit out for about 20 minutes before slicing to soften the frosting just enough without losing its shape.
For presentation, slice into neat squares or rectangles to showcase the flag pattern clearly. It pairs wonderfully with fresh summer berries or a light sparkling lemonade for a festive spread. If you’re after more patriotic treats, the red, white, and blue Rice Krispie treats make a fun companion dessert.
Store leftover cake in an airtight container in the refrigerator for up to 4 days. Before serving leftovers, let the pieces come to room temperature to bring back that soft, creamy texture. You can also freeze slices for up to 3 months; thaw overnight in the fridge, then warm slightly before enjoying.
Over time, the flavors meld beautifully — the vanilla deepens and the cake becomes even more tender. It’s perfect for making ahead of a celebration and savoring over a couple days.
Nutritional Information & Benefits
This perfect flag sheet cake is a treat worth savoring, with an estimated serving size of one slice (about 1/12th of the cake) containing roughly:
| Calories | 350-400 kcal |
|---|---|
| Fat | 18 g (mostly from butter) |
| Carbohydrates | 50 g |
| Protein | 4 g |
Key ingredients like butter and eggs provide essential fats and protein, while the vanilla extract offers antioxidant properties. Using whole milk adds some calcium and vitamins. For those mindful of sugar intake, you can reduce powdered sugar slightly in the buttercream or swap to a powdered sugar alternative, though flavor and texture will change.
This cake is naturally gluten-containing unless you substitute with gluten-free flour, and contains dairy and eggs, so keep that in mind for dietary restrictions. I appreciate that this recipe balances indulgence with familiar ingredients, making it a realistic treat for celebrations without feeling overwhelming.
Conclusion
This perfect flag sheet cake with creamy vanilla buttercream has become a favorite in my recipe rotation — not just because it looks cheerful and bright, but because it genuinely tastes like a celebration in every bite. Its simplicity and reliability make it approachable even for bakers who aren’t usually confident with frosting, and the design adds that extra wow factor without fuss.
Feel free to tweak the colors, add your own flavor twists, or pair it with fresh fruit for a summery touch. I love how adaptable this cake is while still delivering that classic, crowd-pleasing flavor that brings people together.
If you try this recipe, I’d love to hear how you made it your own. Sharing a dessert like this always feels like sharing a little joy — and honestly, that’s what cooking is all about.
FAQs
Can I make this flag sheet cake ahead of time?
Yes! Bake the cake a day ahead and refrigerate it uniced. Make the buttercream and assemble the cake a few hours before serving for the freshest look and taste.
What if I don’t have gel food coloring?
Gel colors give vibrant hues without thinning the frosting, but if you only have liquid food coloring, add it sparingly to avoid runny buttercream. You might need extra powdered sugar to thicken it back up.
How do I store leftover cake?
Store in an airtight container in the fridge for up to 4 days. Bring to room temperature before serving for best texture. You can also freeze slices for up to 3 months.
Can I use this buttercream recipe for other cakes?
Absolutely! This creamy vanilla buttercream works well on layer cakes, cupcakes, or other sheet cakes. Adjust the consistency with cream or powdered sugar as needed.
Is there a way to make this cake gluten-free?
Yes, substitute the all-purpose flour with a gluten-free baking blend that includes xanthan gum, and check that all other ingredients are gluten-free. The texture may be slightly different but still tasty.
For a different kind of summer dessert that still captures that festive vibe, the layered strawberry shortcake trifle cups are a bright, fresh option worth trying next.
Pin This Recipe!
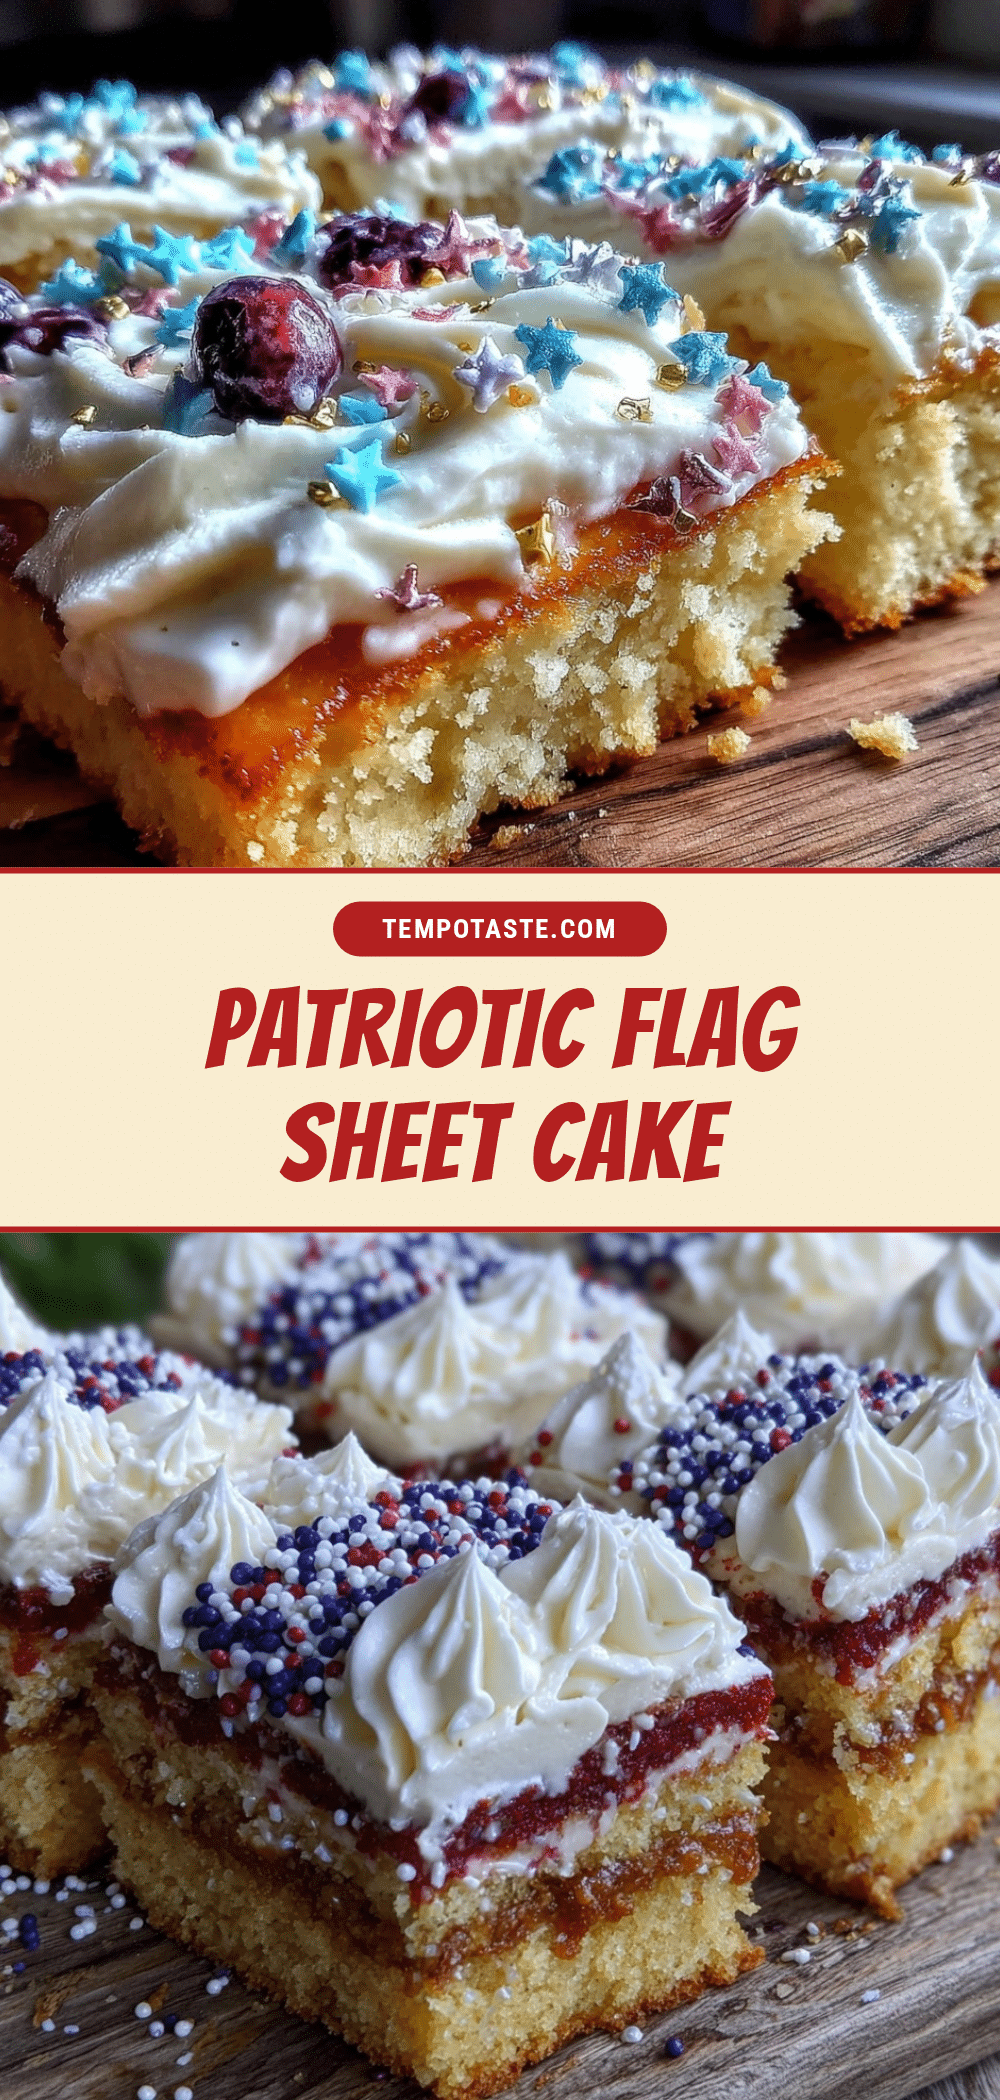
Perfect Flag Sheet Cake Recipe with Easy Creamy Vanilla Buttercream Tutorial
A moist and tender sheet cake decorated with creamy vanilla buttercream in a festive red, white, and blue flag design. Perfect for patriotic occasions and easy to make with simple pantry ingredients.
- Prep Time: 30 minutes
- Cook Time: 35 minutes
- Total Time: 1 hour 35 minutes
- Yield: 12 servings 1x
- Category: Dessert
- Cuisine: American
Ingredients
- 2 ½ cups (315 g) all-purpose flour
- 2 ½ tsp baking powder
- ½ tsp salt
- 1 cup (227 g) unsalted butter, softened
- 1 ¾ cups (350 g) granulated sugar
- 4 large eggs, room temperature
- 2 tsp pure vanilla extract
- 1 cup (240 ml) whole milk, room temperature
- 1 cup (227 g) unsalted butter, softened (for buttercream)
- 4 cups (480 g) powdered sugar, sifted
- 2 tsp pure vanilla extract (for buttercream)
- 2–4 tbsp (30–60 ml) heavy cream
- Pinch of salt
- Red food coloring gel
- Blue food coloring gel
- White buttercream reserved for stars and stripes
Instructions
- Preheat oven to 350°F (175°C). Grease a 9×13-inch pan with butter or nonstick spray and line with parchment paper if desired.
- In a medium bowl, whisk together flour, baking powder, and salt until combined.
- In a large bowl, beat softened butter and granulated sugar until light, fluffy, and pale, about 5-7 minutes.
- Add eggs one at a time, beating well after each addition. Mix in vanilla extract.
- Add dry ingredients in three parts, alternating with milk in two parts, starting and ending with flour mixture. Mix gently until just combined.
- Pour batter into prepared pan and smooth the top with a spatula.
- Bake for 30-35 minutes or until a toothpick inserted in the center comes out clean or with a few moist crumbs.
- Cool cake in pan for 15 minutes, then transfer to wire rack to cool completely (at least 1 hour).
- For buttercream, beat softened butter until creamy. Gradually add powdered sugar on low speed to avoid sugar cloud.
- Add vanilla extract and pinch of salt. Slowly add heavy cream one tablespoon at a time until smooth and spreadable.
- Divide buttercream into three portions: leave one white, tint one blue with food coloring gel, and tint one red with food coloring gel.
- Spread white buttercream over entire cooled cake as base layer.
- Spread blue buttercream on one corner to create star field. Pipe small white stars on blue section using a piping bag or small spoon.
- Pipe or spread alternating red and white stripes across the rest of the cake.
- Chill briefly if needed to prevent colors from bleeding and to firm up frosting.
Notes
Do not rush the creaming of butter and sugar for a tender crumb. Fold dry ingredients gently to avoid tough cake. Use gel food coloring for vibrant colors without thinning frosting. Chill cake briefly after base layer to prevent color bleeding. Use a toothpick to mark star positions for easier piping. If buttercream is too stiff, add a splash more cream; if too runny, add more powdered sugar.
Nutrition
- Serving Size: One slice (1/12th of
- Calories: 350400
- Fat: 18
- Carbohydrates: 50
- Protein: 4
Keywords: flag cake, sheet cake, vanilla buttercream, patriotic dessert, Fourth of July cake, easy cake recipe, festive cake


