“You’re telling me this is just a simple twist on Rice Krispie treats?” my friend asked, eyeing the tray filled with those bright red, white, and blue squares. Honestly, I was half-expecting skepticism—the last thing anyone expects is that a kid-friendly, classic recipe could suddenly turn into a festive showstopper for a holiday party. But that summer afternoon, with the grill sizzling and fireworks faintly echoing in the distance, these treats became the unexpected star of our backyard celebration.
It all started as a last-minute idea. I’d promised to bring a dessert for a 4th of July picnic but was running low on time and energy. I glanced around the pantry, found the usual Rice Krispies, marshmallows, and butter, but then spotted some leftover red and blue food coloring. On a whim, I thought, why not split the batch and color it? What if the treats could look as good as they taste, painted in the colors of the flag? No stress, no fancy ingredients—just a playful spin on a beloved classic.
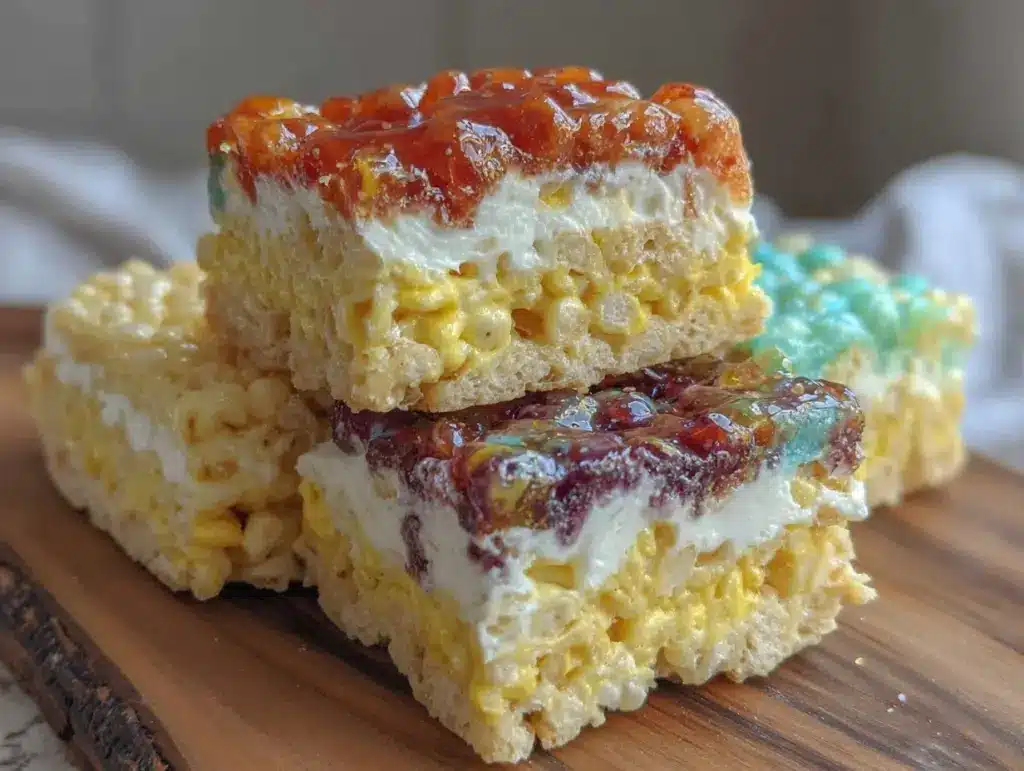
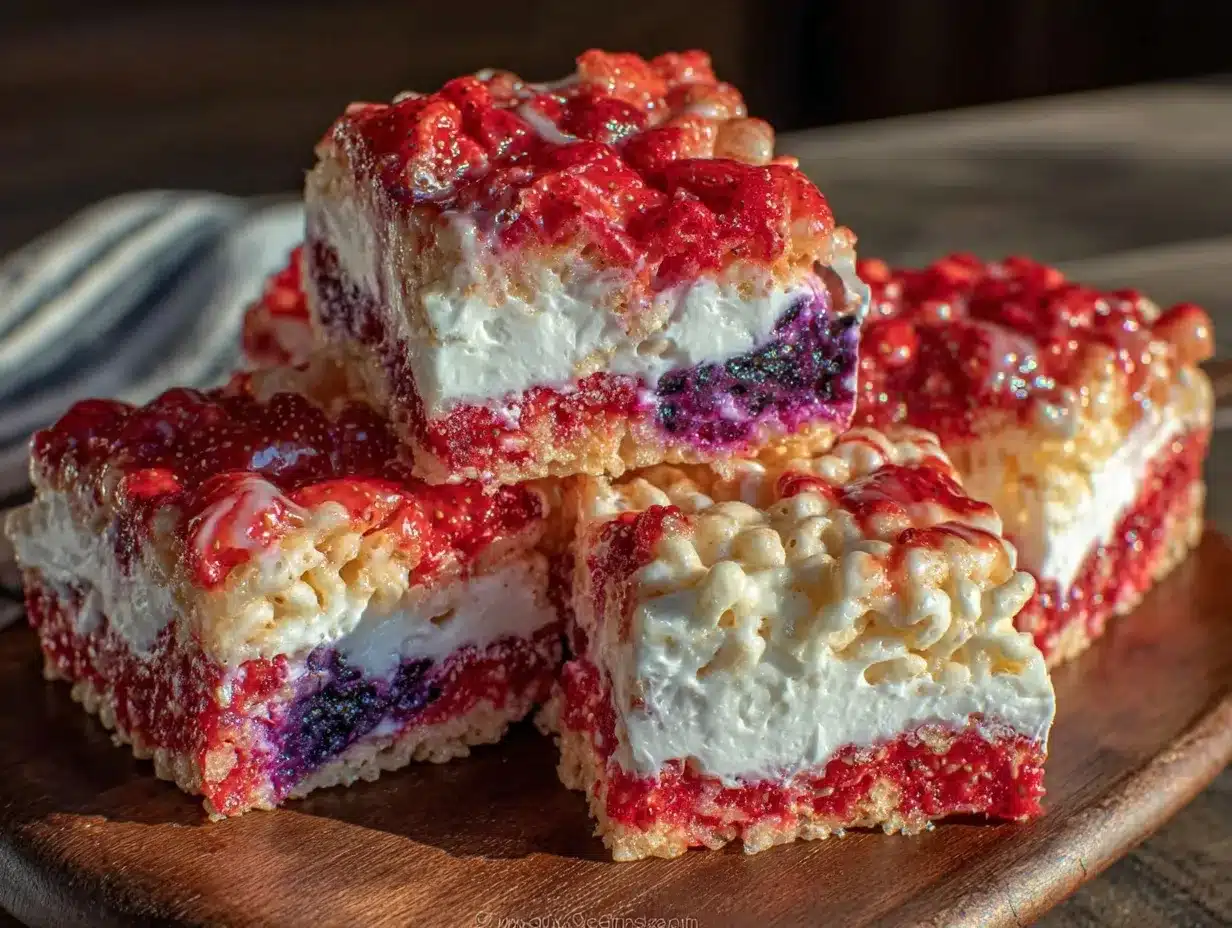
After mixing and layering the vibrant colors in the pan, I let them set while chatting with neighbors. When I finally cut into those crispy squares, the colors popped so vividly that even the kids stopped their games to grab another piece. The best part? Everyone kept coming back, asking for the recipe, convinced this was some complicated gourmet thing. Nope. Just Rice Krispies, marshmallows, butter, and a little fun.
That moment stuck with me. It reminded me how sometimes the simplest ideas, born out of a bit of improvisation and a sprinkle of creativity, end up being the most memorable. If you want a dessert that’s quick, crowd-pleasing, and has a bit of that festive magic, this recipe is your go-to. It’s a small celebration in every bite, perfect for those patriotic gatherings where you want to bring something cheerful and fuss-free to the table.
Why You’ll Love This Recipe
After making these Festive Red White & Blue Rice Krispie Treats multiple times over the summer holidays, I can say they really hit the mark for both ease and fun. Here’s why this recipe has earned a permanent spot in my party lineup:
- Quick & Easy: Ready in about 20 minutes, perfect for last-minute celebrations or when you need a fast dessert fix.
- Simple Ingredients: You likely already have everything in your pantry—no special trips required!
- Perfect for Patriotic Occasions: Whether it’s Independence Day, Memorial Day, or just a summer BBQ, these treats bring the festive spirit.
- Crowd-Pleaser: Kids and adults alike love the familiar crunch with a colorful twist that sparks smiles and conversations.
- Unbelievably Delicious: The classic chewy texture combined with the vibrant colors makes it feel like a treat that’s both nostalgic and exciting.
This isn’t just another Rice Krispie treat recipe—it’s a playful way to celebrate with color. I’ve experimented by splitting the marshmallow mixture into three bowls and tinting each with just a drop of gel food coloring to get those vivid red and blue hues without affecting the classic flavor. Plus, layering the colors creates a visual wow that feels like a mini fireworks show on your dessert table.
And honestly, there’s something comforting about the simplicity of this recipe that makes it perfect for summer afternoons. It’s the kind of treat you can whip up while you’re chatting with friends or supervising the kids’ water balloon fight. No stress, just fun with a patriotic punch.
What Ingredients You Will Need
This recipe uses simple, wholesome ingredients to deliver bold color and that signature satisfying Rice Krispie crunch without any fuss. Most are pantry staples you probably have on hand, with just a touch of food coloring for the festive flair.
- Rice Krispies cereal (6 cups / about 150 grams) – The classic crispy base, use your favorite brand for best texture.
- Marshmallows (10 oz / 280 grams) – Regular or mini, these are the sticky sweet glue that holds everything together.
- Unsalted butter (4 tablespoons / 57 grams) – Softened, to help melt and mix the marshmallows smoothly.
- Red gel food coloring (a few drops) – Gel coloring works better here, giving a vibrant shade without thinning the mixture.
- Blue gel food coloring (a few drops) – Same as above, for that perfect patriotic contrast.
- Vanilla extract (optional, 1 teaspoon) – Adds a subtle depth to the marshmallow mix.
- Cooking spray or butter – To grease your pan for easy removal.
If you want to tweak it a bit, consider swapping out the classic Rice Krispies for gluten-free crispy rice cereal if you need a gluten-free option. For a dairy-free version, vegan marshmallows and coconut oil can be used instead of butter. And if you’re feeling fancy, a sprinkle of edible glitter or star-shaped sprinkles on top adds a little extra sparkle (perfect for celebrations).
Equipment Needed
- Large mixing bowl: For melting and mixing the marshmallows and butter.
- Microwave-safe bowl or saucepan: To melt the butter and marshmallows together. I personally prefer the microwave method for speed, but stovetop works well too.
- Spatula or wooden spoon: For stirring the gooey mixture.
- 9×13 inch (23×33 cm) baking pan: This size works great for layering the colors and cutting into perfect squares.
- Cooking spray or butter: To grease the pan and keep the treats from sticking.
- Knife or bench scraper: For cutting the treats once set.
If you don’t have a 9×13 pan, a similar-sized dish or even a rimmed cookie sheet works fine. Just adjust the thickness accordingly. For easy cleanup, lining the pan with parchment paper helps, especially if you’re planning multiple batches.
Preparation Method
- Prepare your pan: Lightly grease a 9×13 inch (23×33 cm) baking pan with butter or cooking spray. This helps you remove the treats easily later on. Set aside.
- Melt butter and marshmallows: In a large microwave-safe bowl, combine 4 tablespoons (57 grams) of unsalted butter and 10 oz (280 grams) of marshmallows. Microwave in 30-second intervals, stirring between each, until fully melted and smooth. This usually takes about 1.5 to 2 minutes total. Alternatively, melt over low heat in a saucepan, stirring constantly to avoid burning.
- Add vanilla: Stir in 1 teaspoon of vanilla extract, if using, for a subtle flavor boost.
- Divide the marshmallow mixture: Quickly split the melted marshmallow mixture into three separate bowls. Work fast before it starts to set.
- Color the mixtures: Add a few drops of red gel food coloring to one bowl and blue gel food coloring to another. Leave the third bowl uncolored for the white portion. Stir each until the color is evenly distributed. Remember, a little goes a long way here to get bright, vibrant hues.
- Mix in cereal: To each colored marshmallow mixture, gently fold in 2 cups (about 50 grams) of Rice Krispies cereal. Use a spatula and fold carefully to keep the cereal crispy and evenly coated.
- Layer the colors: Pour the red mixture into the prepared pan and press down evenly using a buttered spatula or wax paper. Next, add the white (uncolored) layer, then the blue on top. Press each layer gently but firmly to stick them together without squashing the crispiness.
- Cool and set: Let the layered treats sit at room temperature for at least 30 minutes to firm up. If you’re impatient like me, pop the pan in the fridge for 15 minutes to speed things up.
- Cut and serve: Using a sharp knife or bench scraper, cut into squares or rectangles. Clean the knife with a warm damp cloth between cuts for neat edges.
Watch out not to over-press the layers or you’ll lose that lovely crisp texture. The marshmallow mixture sets quickly, so move swiftly during coloring and layering for best results. If you find the mixture getting too thick to work with, warming it briefly in the microwave for 10 seconds helps soften it back up.
Cooking Tips & Techniques
Making these festive Rice Krispie treats is pretty straightforward, but a few insider tips can make a big difference in your end result.
- Use gel food coloring: Regular liquid food coloring waters down the marshmallow mixture, making it sticky or runny. Gel colors give those vivid hues without changing texture.
- Work quickly when layering: The marshmallow mixture starts to firm up fast. Divide and color it promptly to avoid clumps or uneven layers.
- Press, don’t smash: When layering each color in the pan, press firmly but gently. Too much pressure crushes the crispy rice and makes the treats dense.
- Butter your spatula or hands: Sticky marshmallow mixtures can be frustrating. Lightly butter your spatula or hands before pressing the mixture to keep it from sticking.
- Cut cleanly: A sharp knife dipped in hot water helps slice through the treats smoothly without pulling or tearing.
- Temperature matters: Melt your marshmallows and butter just until smooth. Overheating can cause the mixture to become too thin and chewy rather than crisp.
I remember the first time I tried coloring the marshmallows—I added way too much red food coloring, and the flavor turned slightly off. Lesson learned: a little color goes a long way! Also, when I first attempted layering, I pressed too hard and ended up with a dense slab rather than light, airy treats. These days, I keep it gentle and the texture has been perfect every time.
Variations & Adaptations
One of the best things about this recipe is how easy it is to customize for different tastes and dietary needs. Here are a few ideas I’ve tried or recommend:
- Flavor twists: Add a teaspoon of almond extract instead of vanilla for a nutty note, or fold in mini white chocolate chips into the white layer for extra sweetness.
- Dietary swaps: Use gluten-free crispy rice cereal for a gluten-free treat, or swap butter for coconut oil and marshmallows for vegan versions to keep it dairy-free and vegan.
- Cooking method: Instead of layering, you can mix all three colors swirled together for a marbled effect. Or, press the colored mixtures into small silicone molds for cute individual pops.
- Seasonal spins: Around Memorial Day, I’ve added star-shaped sprinkles on top for extra festivity. For a summer picnic, mixing in fresh berries on the white layer adds a juicy surprise.
Personally, I once tossed in a handful of chopped toasted pecans to the blue layer for a little crunch variation. It was surprisingly good and added a subtle texture contrast. If you’re looking for inspiration beyond treats, you might enjoy the creamy coconut chickpea curry I often make when I want a cozy dinner after these sugar-packed celebrations.
Serving & Storage Suggestions
These Festive Red White & Blue Rice Krispie Treats are best served at room temperature when the marshmallow coating is soft and chewy. Cut into bite-sized squares or rectangles for easy snacking, especially fun for kids’ parties or casual gatherings.
They pair well with simple beverages like iced lemonade or cold milk. For a fun twist at a BBQ, serve alongside fresh fruit platters or light salads to balance the sweetness.
To store, place the treats in an airtight container at room temperature for up to 3 days. Avoid refrigerating if possible, as this can make them hard and less chewy. If you want to keep them longer, they freeze well—wrap individual squares in plastic wrap and place in a freezer bag. Thaw at room temperature when ready to eat.
Flavors tend to mellow and blend nicely after resting overnight, so making them a day ahead can actually improve the taste. Just keep them tightly covered to prevent drying out.
Nutritional Information & Benefits
Each serving (about one square) of these festive treats contains roughly:
| Calories | Fat | Carbohydrates | Protein | Sugar |
|---|---|---|---|---|
| 150 kcal | 4 g | 28 g | 1 g | 18 g |
While these are definitely a sweet treat rather than a health food, the recipe uses simple, minimally processed ingredients. Rice Krispies cereal is a source of iron and some B vitamins, and using real butter provides fat-soluble vitamins like A and E. The marshmallows are mainly sugar but offer that nostalgic comfort that’s worth savoring occasionally.
If you’re mindful of allergens, note this recipe contains dairy and gluten (unless you substitute gluten-free cereal). For lower sugar versions, try reducing the marshmallows slightly or mixing in puffed quinoa for added protein and texture.
Balancing this dessert with a fresh, savory side like the black bean and sweet potato tacos helps round out your meal during festive gatherings.
Conclusion
These Festive Red White & Blue Rice Krispie Treats are a reminder that sometimes, the simplest recipes make the biggest impact. They’re quick to prepare, visually cheerful, and a genuine crowd-pleaser for any patriotic celebration. I love how they bring a little joy to the table without any stress.
Feel free to tweak the colors, add your favorite mix-ins, or shape them however you like. The recipe is flexible enough to fit your mood and occasion. I’m always amazed at how such a humble treat can spark smiles and bring people together.
If you give this recipe a try, I’d love to hear how you make it your own — comments and photos are always welcome. Here’s to more fun, easy desserts that bring a little extra color to your celebrations!
Frequently Asked Questions
Can I make these treats ahead of time?
Yes! They hold up well for a couple of days at room temperature or can be frozen for longer storage. Just keep them in an airtight container to maintain freshness.
What type of food coloring is best?
Gel food coloring is ideal because it provides vibrant color without thinning the marshmallow mixture. Avoid liquid coloring for best results.
Can I use mini marshmallows instead of regular ones?
Absolutely. Mini marshmallows melt faster and can make the melting process quicker and easier.
How do I prevent the treats from sticking to my hands or utensils?
Lightly butter your hands or spatula before handling the marshmallow mixture, or use a piece of wax paper to press it down.
Is there a way to make these treats vegan?
Yes, use vegan marshmallows and substitute butter with coconut oil or vegan butter alternatives.
Pin This Recipe!
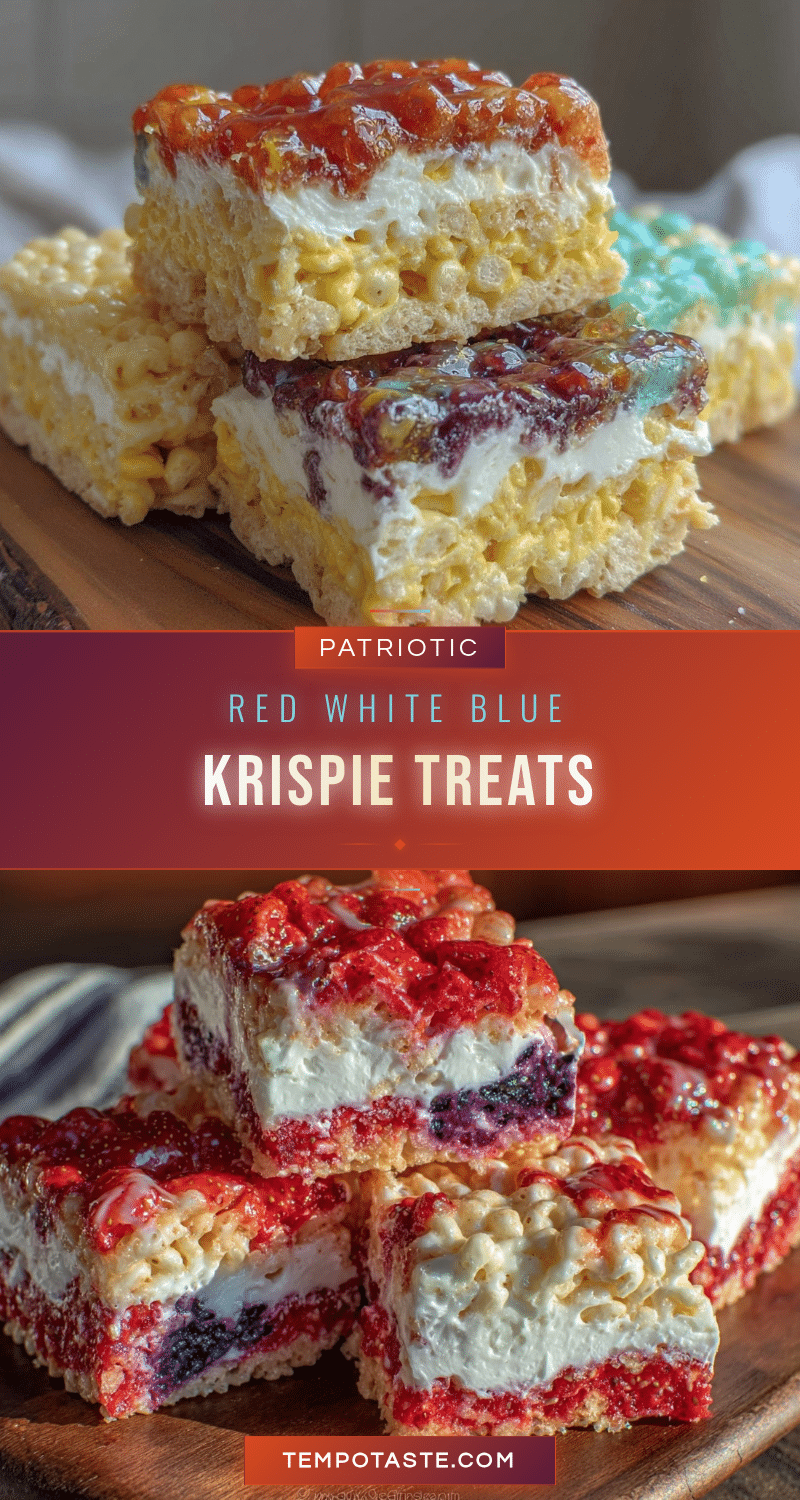
Festive Red White & Blue Rice Krispie Treats Easy Patriotic Dessert Recipe

A quick and easy twist on classic Rice Krispie treats featuring vibrant red, white, and blue layers perfect for patriotic celebrations like the 4th of July.
- Prep Time: 10 minutes
- Cook Time: 10 minutes
- Total Time: 30 minutes
- Yield: 12 servings 1x
- Category: Dessert
- Cuisine: American
Ingredients
- 6 cups Rice Krispies cereal (about 150 grams)
- 10 oz marshmallows (280 grams), regular or mini
- 4 tablespoons unsalted butter (57 grams), softened
- Red gel food coloring (a few drops)
- Blue gel food coloring (a few drops)
- 1 teaspoon vanilla extract (optional)
- Cooking spray or butter (for greasing the pan)
Instructions
- Lightly grease a 9×13 inch (23×33 cm) baking pan with butter or cooking spray and set aside.
- In a large microwave-safe bowl, combine 4 tablespoons unsalted butter and 10 oz marshmallows. Microwave in 30-second intervals, stirring between each, until fully melted and smooth (about 1.5 to 2 minutes). Alternatively, melt over low heat in a saucepan, stirring constantly.
- Stir in 1 teaspoon vanilla extract, if using.
- Quickly divide the melted marshmallow mixture into three separate bowls before it starts to set.
- Add a few drops of red gel food coloring to one bowl and blue gel food coloring to another. Leave the third bowl uncolored for the white portion. Stir each until color is evenly distributed.
- Gently fold 2 cups (about 50 grams) of Rice Krispies cereal into each colored marshmallow mixture using a spatula.
- Layer the mixtures in the prepared pan: pour the red mixture first and press down evenly, then add the white (uncolored) layer, and finally the blue layer on top. Press each layer gently but firmly to stick them together without crushing the crispiness.
- Let the layered treats sit at room temperature for at least 30 minutes to firm up. Optionally, refrigerate for 15 minutes to speed up setting.
- Cut into squares or rectangles using a sharp knife or bench scraper. Clean the knife with a warm damp cloth between cuts for neat edges.
Notes
Use gel food coloring for vibrant colors without thinning the marshmallow mixture. Work quickly when dividing and coloring the marshmallow mixture to avoid clumps. Press layers gently to maintain crisp texture. Butter your spatula or hands to prevent sticking. A sharp knife dipped in hot water helps cut cleanly. For gluten-free, use gluten-free crispy rice cereal. For dairy-free/vegan, substitute butter with coconut oil and use vegan marshmallows.
Nutrition
- Serving Size: One square treat
- Calories: 150
- Sugar: 18
- Fat: 4
- Carbohydrates: 28
- Protein: 1
Keywords: Rice Krispie treats, patriotic dessert, 4th of July dessert, easy dessert, red white and blue treats, kid-friendly dessert, quick dessert


