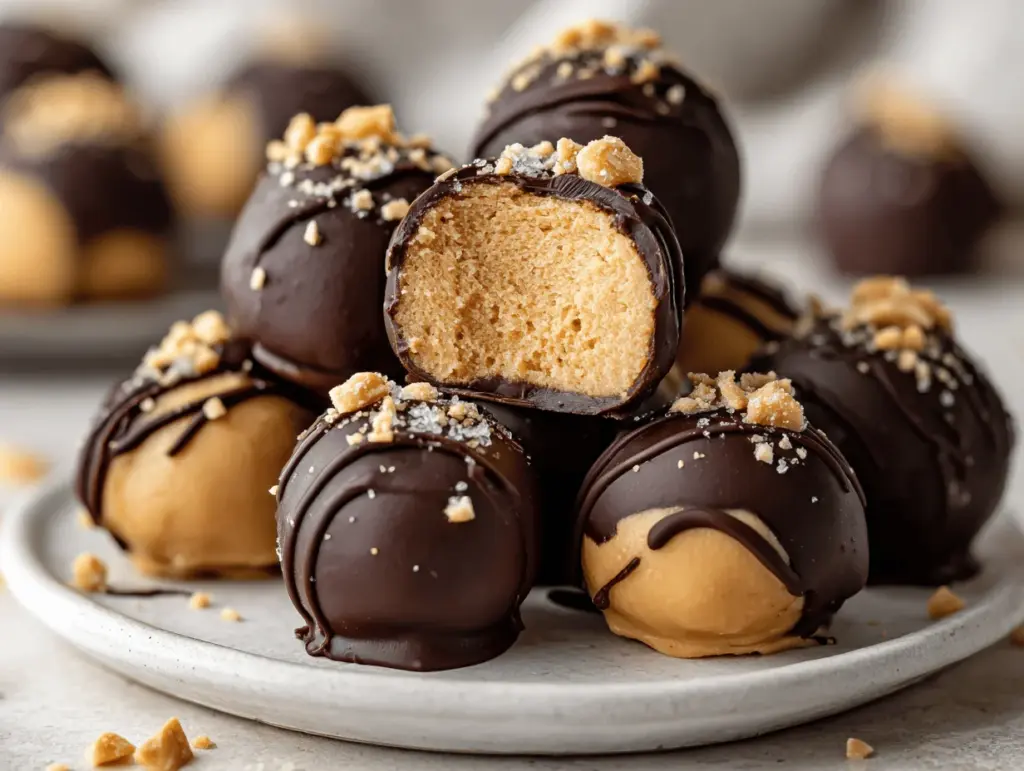
Imagine biting into a silky-smooth cheesecake truffle, the center bursting with creamy peanut butter and tangy cream cheese, all wrapped in a crisp shell of rich chocolate. It’s a little moment of bliss you can hold in your fingers. (Honestly, some days I crave these more than actual cake!) The first time I made chocolate-dipped peanut butter cheesecake truffles, it was late at night and I was feeling snacky—no oven, no fuss, just pure dessert magic in my kitchen.
I grew up in a house where peanut butter was practically its own food group. My mom loved making simple treats, and cheesecake anything was a staple at holidays. So when I stumbled across the idea of blending peanut butter with cream cheese, rolling it into bite-sized balls, and dipping them in chocolate—well, let’s just say it felt like the stars aligned. Over time, I’ve tweaked the ratios, tried different coatings, and even experimented with add-ins (mini chocolate chips, anyone?).
These chocolate-dipped peanut butter cheesecake truffles check all my boxes: they’re luscious, sweet, a little salty, and you don’t need an oven. Plus, they’re perfect for Pinterest-worthy dessert spreads! Whether you’re looking for a quick crowd-pleaser, something fun for kids to help with, or a high-protein treat that doesn’t skimp on flavor, this recipe has you covered. I’ve tested it at least a dozen times—different chocolates, peanut butter brands, and even a vegan version—and it always delivers. If you’re ready for a no-bake dessert that feels fancy but is secretly easy, you’re in the right place.
Why You’ll Love This Recipe
- Quick & Easy: These chocolate-dipped peanut butter cheesecake truffles come together in just 25 minutes, with zero baking required. Trust me, even my impatient little cousins can help and we still get dessert on the table fast.
- Simple Ingredients: You probably have everything you need—peanut butter, cream cheese, powdered sugar, chocolate chips, and vanilla. No need for a fancy shopping list!
- No Bake: There’s nothing like whipping up a batch without heating up the kitchen. Perfect for summer or when you just can’t deal with oven drama.
- Perfect for Any Occasion: I’ve made these for birthday parties, potlucks, and even a last-minute movie night. They always disappear fast. You can dress them up with sprinkles, drizzle, or just keep them classic.
- Crowd-Pleaser: Kids, adults, peanut butter lovers, even cheesecake skeptics—everyone comes back for seconds. The creamy center and chocolate shell are irresistible.
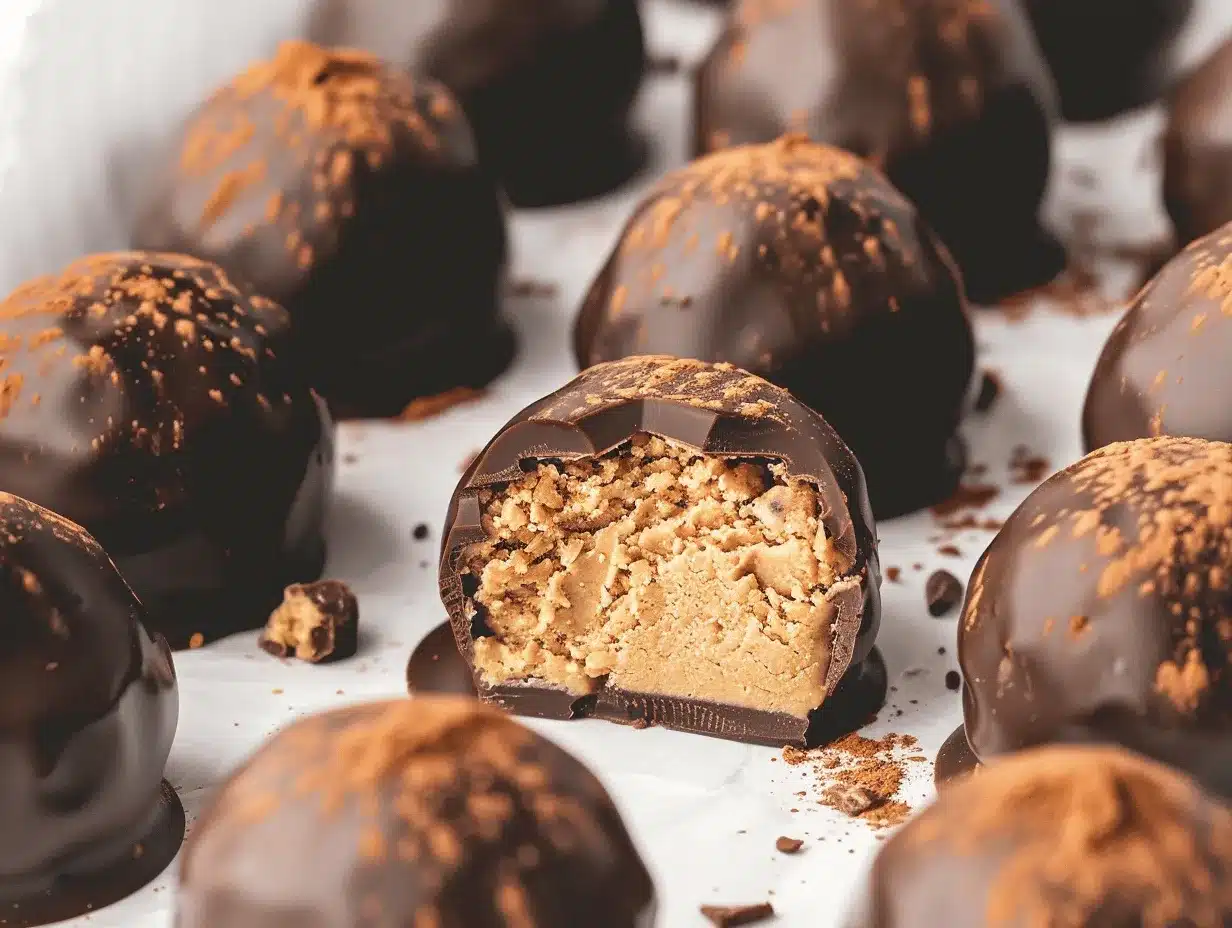
- Unbelievably Delicious: The texture is melt-in-your-mouth soft inside, with that snappy chocolate coating. It’s comfort food with a twist—and you get both sweet and salty in every bite.
What sets these apart? Blending cream cheese and peanut butter together makes for a filling that’s smooth but not too dense. The use of powdered sugar keeps the sweetness balanced, and the chocolate shell gives you that satisfying “snap.” I always chill the centers before dipping, so you get a perfect truffle shape (learned this the hard way—warm filling equals messy chocolate coats!).
I love how adaptable this recipe is. It’s not just another truffle—it’s my go-to for when I want something rich but not heavy, special but not complicated. It’s the kind of dessert that makes you pause, savor, and smile. Whether you’re looking for a healthier treat (swap in dark chocolate), an easy party dessert, or a fun DIY gift, these truffles never disappoint. You’ll want to keep a batch in your fridge—just in case.
What Ingredients You Will Need
This recipe uses a handful of everyday ingredients to create chocolate-dipped peanut butter cheesecake truffles that pack a punch in flavor and texture. No crazy specialty items here—just pantry and fridge staples. If you’ve got a well-stocked baking shelf, you’re probably halfway there already.
- Cream Cheese (8 oz/225 g, softened) – Full-fat gives you the richest flavor, but reduced-fat works in a pinch. I prefer Philadelphia for consistency.
- Peanut Butter (1/2 cup/130 g, creamy) – Go for classic smooth peanut butter. Natural peanut butter is fine but may make the filling softer; Jif or Skippy always turn out perfect for me.
- Powdered Sugar (1 cup/120 g) – Adds sweetness and helps firm up the filling. Sift to avoid lumps.
- Pure Vanilla Extract (1 tsp/5 mL) – Gives a bakery-style aroma (I love Nielsen-Massey for a little extra oomph).
- Salt (pinch) – Optional, but a little salt makes the flavors pop.
- Chocolate Chips or Melting Wafers (1 1/2 cups/270 g) – Semi-sweet or dark chocolate works best. I use Ghirardelli or Enjoy Life if making dairy-free. Milk chocolate is sweeter, but be careful—it can get a little sticky.
- Coconut Oil or Shortening (2 tbsp/28 g, optional) – Helps the chocolate melt smoothly and sets with a nice sheen.
- Sprinkles, Chopped Nuts, or Sea Salt (optional for garnish) – Adds a fun finish or a little crunch. My kids love rainbow sprinkles; I’m partial to flaky sea salt.
Ingredient tips: If you’re out of powdered sugar, you can blitz granulated sugar in a blender until fine. Want a gluten-free version? All ingredients here are naturally gluten-free—just check your chocolate labels. Swapping in almond butter works great for peanut allergies, and you can use vegan cream cheese if needed. Honestly, sometimes I toss in mini chocolate chips to the filling for a surprise crunch.
For seasonal twists, try adding a touch of cinnamon in winter, or swap peanut butter for cookie butter in autumn. You can also roll the finished truffles in crushed pretzels or graham cracker crumbs before dipping for a little extra pizzazz. Everything here is designed to be flexible—make it your own!
Equipment Needed
- Mixing Bowl: A medium-sized bowl works perfectly for blending the filling. I use glass because it’s easy to clean and lets you see if everything’s mixed well.
- Hand Mixer or Stand Mixer: Either will do—hand mixers are great for quick batches. I’ve used a spoon in a pinch, but you’ll get smoother results with a mixer.
- Rubber Spatula: For scraping down the sides and shaping your filling. Silicone spatulas make cleanup a breeze.
- Cookie Scoop or Tablespoon: For evenly portioning the truffles. If you don’t have a scoop, a regular spoon works (your truffles might be a little rustic, but that’s part of the charm).
- Baking Sheet or Tray: Lined with parchment or wax paper for chilling and dipping. Metal trays chill faster—I keep mine in the freezer before starting.
- Microwave-Safe Bowl: For melting chocolate. If you don’t have one, a double boiler on the stove works fine, but watch for steam.
- Fork or Dipping Tool: To coat the truffles in chocolate. I’ve used chopsticks, forks, and even toothpicks—honestly, whatever’s handy!
Don’t worry if your kitchen isn’t decked out in gadgets—these truffles are forgiving. I’ve made them with dollar-store bowls, and they turned out just as delicious. For specialty tools like dipping forks, just wash and dry thoroughly after each use, and they’ll last ages. If you’re on a budget, parchment paper is your best friend for easy cleanup and perfect truffle bottoms.
Preparation Method
- Make the Filling: In a medium mixing bowl, add 8 oz (225 g) cream cheese and 1/2 cup (130 g) peanut butter. Beat together with a hand mixer or stand mixer on medium speed until smooth and creamy (about 2 minutes). You want no lumps—scrape down the sides as needed.
- Add Sweetness: Sift in 1 cup (120 g) powdered sugar, plus 1 tsp (5 mL) vanilla extract and a pinch of salt. Mix again until everything is well combined. The mixture should be thick but scoopable. If it feels too soft, chill for 10 minutes.
- Shape Truffles: Using a small cookie scoop or tablespoon, portion out balls (about 1 inch/2.5 cm diameter). Roll gently between your palms for a smooth finish. Place them on a parchment-lined baking sheet. This recipe yields about 20-24 truffles.
- Chill: Pop the tray into the freezer for 15-20 minutes. This firms up the truffles and makes dipping easier. If you’re impatient (like me sometimes), you can speed chill by spreading them out in a single layer.
- Melt Chocolate: While the truffles chill, melt 1 1/2 cups (270 g) chocolate chips and 2 tbsp (28 g) coconut oil in a microwave-safe bowl, 20-30 seconds at a time, stirring after each interval until smooth. If using a double boiler, stir constantly—don’t let water touch the chocolate or it’ll seize.
- Dip the Truffles: Remove truffles from the freezer. Using a fork or dipping tool, dunk each ball in chocolate, turning to coat. Let excess chocolate drip off, then place back on the tray. If the filling starts to soften, pop back in the freezer for 5 minutes.
- Decorate: Quickly top each truffle with sprinkles, chopped nuts, or sea salt before the chocolate sets. Work in batches if needed, so the chocolate stays wet long enough for toppings to stick.
- Set: Chill the dipped truffles in the fridge for 20 minutes, or until the chocolate is firm. They’ll be ready to eat—and trust me, the hardest part is waiting!
Troubleshooting tips: If your filling is too sticky, add a bit more powdered sugar. If chocolate gets thick, microwave for 10 seconds and stir. Don’t worry if your truffles aren’t perfect spheres—homemade means a little character! For super-smooth chocolate, add coconut oil or shortening. If you’ve got warm hands, work quickly and keep the tray cold.
Efficiency tip: Portion all the filling first, chill, then melt chocolate while you wait. This way, you’re never just standing around. And hey, if you sneak a taste before dipping, I won’t judge!
Cooking Tips & Techniques
Over the years, I’ve learned a few tricks to make these chocolate-dipped peanut butter cheesecake truffles turn out just right. Here’s what works (and what doesn’t):
- Chill, Chill, Chill: Always chill the filling before dipping. If you skip this step, the truffles can melt into the chocolate—I’ve ended up with blobs more than once!
- Use Room Temperature Ingredients: Softened cream cheese blends smoother and gives a better texture. Cold cream cheese can leave lumps, and trust me, that’s not the look we’re going for.
- Don’t Overheat Chocolate: Melt slowly in the microwave, stirring every 20-30 seconds. Chocolate burns fast—once, I ended up with a grainy mess that wouldn’t coat anything. If you use a double boiler, keep the heat low and avoid any water splashes.
- Work in Batches: If your kitchen is warm, only take out a few truffles at a time for dipping. Keep the rest chilling so they stay firm.
- Prevent Cracking: If you chill the truffles too long and then dip in hot chocolate, the shell can crack. Let the truffles sit at room temp for a few minutes before dipping if they’re rock-hard.
- Decorate Quickly: Add toppings right after dipping. If the chocolate sets, sprinkles and nuts won’t stick (been there, done that).
- Use Parchment Paper: For easy release and no sticking. Wax paper works too, but parchment is my go-to.
- Clean Tools Between Dips: Wipe your fork or dipping tool every few truffles for a smooth finish.
Timing is key—multitask by melting chocolate while the centers chill. Consistency comes from using the same scoop size and keeping everything cold. Don’t stress if your truffles aren’t bakery-perfect; homemade treats have more soul! If you mess up a batch, crumble them over ice cream or blend into milkshakes. Honestly, every mistake is just a new dessert idea waiting to happen.
Variations & Adaptations
One of my favorite things about these truffles is how easy they are to tweak. Here are some tried-and-true variations if you want to switch up your chocolate-dipped peanut butter cheesecake truffles:
- Dietary Options: For a vegan batch, use dairy-free cream cheese and chocolate chips. Almond butter or sunflower seed butter substitutes nicely for peanut butter (I’ve made nut-free versions for school events).
- Seasonal Flavors: Mix in 1/2 tsp cinnamon or pumpkin spice for autumn vibes. In summer, add a handful of mini chocolate chips or crushed pretzels for extra crunch.
- Flavor Twists: Swap peanut butter for cookie butter or Nutella for a fun twist. Drizzle with white chocolate or toss in a pinch of espresso powder for grown-up flair.
- Different Cooking Methods: If you don’t have a microwave, melt chocolate in a double boiler or even a slow cooker (on low, stirring often). You can also use candy melts for a colorful coating—great for parties!
- Texture Customization: Add chopped roasted peanuts or mini chocolate chips to the filling for crunch. I once tried adding graham cracker crumbs and it tasted like s’mores cheesecake!
- Allergen Substitutions: Use sun butter for nut allergies and oat-based cream cheese for dairy-free needs. Always check chocolate labels for hidden gluten or dairy.
My personal favorite? Swapping half the peanut butter for almond butter and adding a sprinkle of sea salt on top. It’s sweet, salty, and absolutely addictive! Don’t be afraid to experiment—every batch is a little different, and that’s what makes it fun.
Serving & Storage Suggestions
These chocolate-dipped peanut butter cheesecake truffles are best served chilled. I love arranging them on a pretty plate or in mini cupcake liners for parties (they look adorable in a Pinterest board spread!). For a fancier touch, drizzle with extra melted chocolate and add a sprinkle of sea salt or chopped nuts.
Pair with coffee, tea, or a cold glass of milk for the ultimate dessert break. If you’re feeling festive, serve alongside fresh berries or a scoop of vanilla ice cream.
To store, keep truffles in an airtight container in the refrigerator for up to 5 days. Place parchment between layers to prevent sticking. You can freeze them for longer storage—just thaw in the fridge for an hour before serving. Reheat isn’t needed, but if you want a gooey center, let them sit at room temp for 10 minutes.
Pro tip: The flavors deepen after a day or two in the fridge. The chocolate shell stays crisp, and the filling becomes even creamier. If you’re making them for a party, prep a day ahead for maximum deliciousness!
Nutritional Information & Benefits
Each chocolate-dipped peanut butter cheesecake truffle contains approximately:
- Calories: 120
- Protein: 2g
- Carbohydrates: 9g
- Fat: 8g
- Sugar: 7g
The cream cheese delivers calcium and a bit of protein, while peanut butter adds healthy fats and more protein. Using dark chocolate can provide antioxidants and lower sugar if you’re watching your intake. All ingredients are naturally gluten-free—just double-check your chocolate if you need allergen safety.
If you’re aiming for lower carbs, try a sugar-free powdered sugar substitute and dark chocolate. For peanut allergies, swap in sunflower seed butter. Personally, I love that these truffles satisfy my sweet tooth without a huge sugar spike (and they’re way more filling than plain cookies!).
Conclusion
Chocolate-dipped peanut butter cheesecake truffles are the kind of dessert you’ll want to make again and again. They’re simple, no-bake, and absolutely delicious—perfect for when you want a treat that feels special but doesn’t require hours in the kitchen. Customize them with your favorite toppings or flavors, and don’t worry about perfection; homemade always tastes better.
These truffles have become my go-to for parties, gifts, and anytime snacking. I love how easy they are to adapt for allergies or dietary needs, and they always get rave reviews. If you’re looking for a dessert that’s impressive, fuss-free, and Pinterest-worthy, this is it!
Give them a try, and let me know how you customize your batch! Share your results in the comments, tag me on social, or send your creative adaptations my way. Happy snacking—hope your kitchen is filled with chocolatey smiles!
Frequently Asked Questions
How do I prevent my truffles from melting when dipping in chocolate?
Chill the truffle centers in the freezer for at least 20 minutes before dipping. If your kitchen is warm, work in batches and keep extras cold until you’re ready.
Can I use crunchy peanut butter instead of creamy?
Absolutely! Crunchy peanut butter gives a fun texture to the filling. Just expect a few lumps and bumps—homemade charm, you know?
Are these chocolate-dipped peanut butter cheesecake truffles gluten-free?
Yes—all main ingredients are naturally gluten-free. Just check your chocolate chips to be sure there’s no hidden gluten.
How far in advance can I make these truffles?
You can make them up to 5 days ahead. Store in the fridge, and they’ll stay fresh and delicious. They also freeze well for up to 2 months.
Can I use white chocolate or milk chocolate for dipping?
Of course! White or milk chocolate works well—just note that milk chocolate is sweeter and white chocolate sets a bit softer. Mix and match for a fun variety platter!
Pin This Recipe!
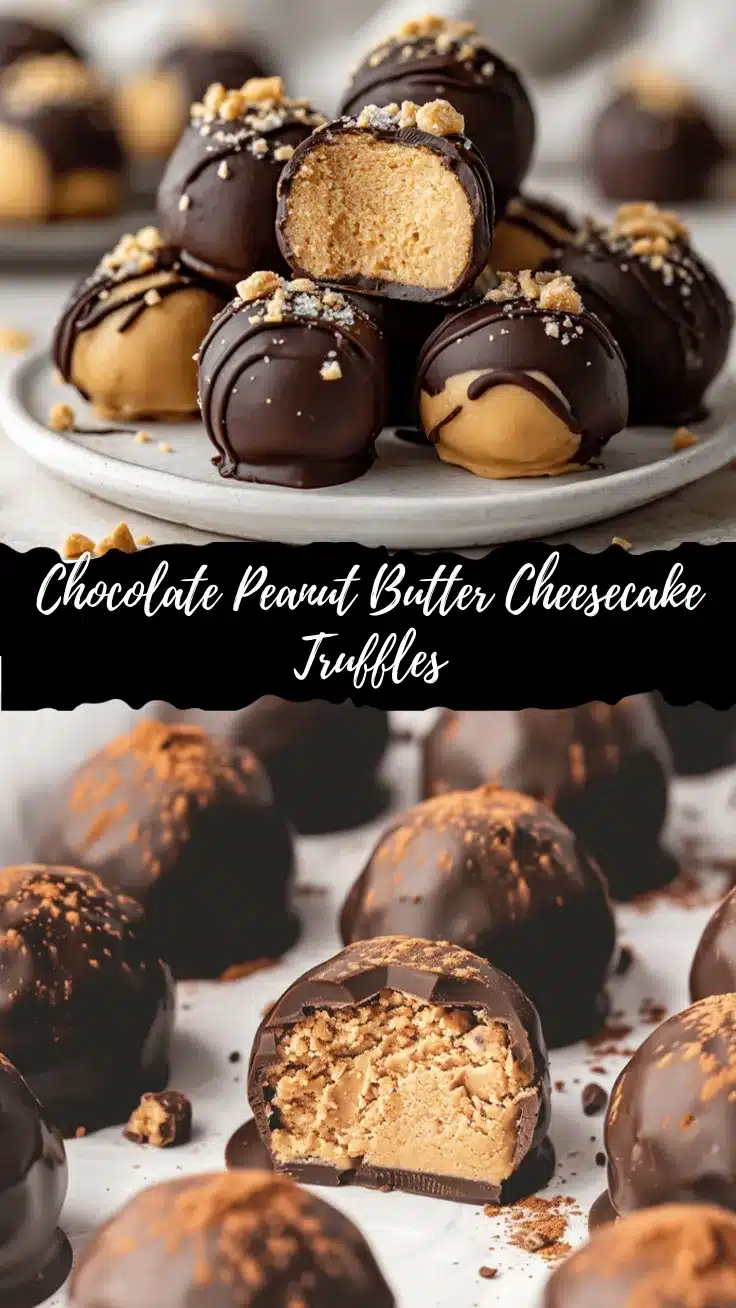
Chocolate-Dipped Peanut Butter Cheesecake Truffles

These no-bake truffles feature a creamy peanut butter and cheesecake center, coated in rich chocolate for a decadent, crowd-pleasing treat. Perfect for parties, gifts, or anytime snacking, they’re easy to make and naturally gluten-free.
- Prep Time: 15 minutes
- Cook Time: 0 minutes
- Total Time: 35 minutes
- Yield: 20-24 truffles 1x
- Category: Dessert
- Cuisine: American
Ingredients
- 8 oz (225 g) cream cheese, softened
- 1/2 cup (130 g) creamy peanut butter
- 1 cup (120 g) powdered sugar, sifted
- 1 tsp (5 mL) pure vanilla extract
- Pinch of salt (optional)
- 1 1/2 cups (270 g) chocolate chips or melting wafers (semi-sweet or dark preferred)
- 2 tbsp (28 g) coconut oil or shortening (optional, for smoother chocolate)
- Sprinkles, chopped nuts, or flaky sea salt (optional, for garnish)
Instructions
- In a medium mixing bowl, beat together cream cheese and peanut butter with a hand mixer or stand mixer on medium speed until smooth and creamy (about 2 minutes). Scrape down the sides as needed.
- Sift in powdered sugar, add vanilla extract and a pinch of salt. Mix again until well combined. The mixture should be thick but scoopable. If too soft, chill for 10 minutes.
- Using a small cookie scoop or tablespoon, portion out balls (about 1 inch in diameter). Roll gently between your palms for a smooth finish and place on a parchment-lined baking sheet. Yields about 20-24 truffles.
- Freeze the tray for 15-20 minutes to firm up the truffles for easier dipping.
- While truffles chill, melt chocolate chips and coconut oil (if using) in a microwave-safe bowl in 20-30 second intervals, stirring after each, until smooth. Alternatively, use a double boiler.
- Remove truffles from freezer. Using a fork or dipping tool, dip each ball in melted chocolate, turning to coat. Let excess chocolate drip off, then place back on the tray.
- Quickly top each truffle with sprinkles, chopped nuts, or sea salt before the chocolate sets.
- Chill the dipped truffles in the fridge for 20 minutes, or until the chocolate is firm. Serve chilled.
Notes
For best results, always chill the filling before dipping. Use room temperature cream cheese for a smoother texture. If the chocolate thickens, microwave for 10 seconds and stir. Decorate truffles immediately after dipping for toppings to stick. Store in an airtight container in the fridge for up to 5 days or freeze for up to 2 months. All ingredients are naturally gluten-free; check chocolate labels for allergens. For vegan or nut-free versions, use dairy-free cream cheese and chocolate, and substitute peanut butter as needed.
Nutrition
- Serving Size: 1 truffle
- Calories: 120
- Sugar: 7
- Sodium: 60
- Fat: 8
- Saturated Fat: 4
- Carbohydrates: 9
- Fiber: 1
- Protein: 2
Keywords: peanut butter, cheesecake, truffles, no bake, chocolate, dessert, gluten-free, party, easy, snack, holiday, kid-friendly


