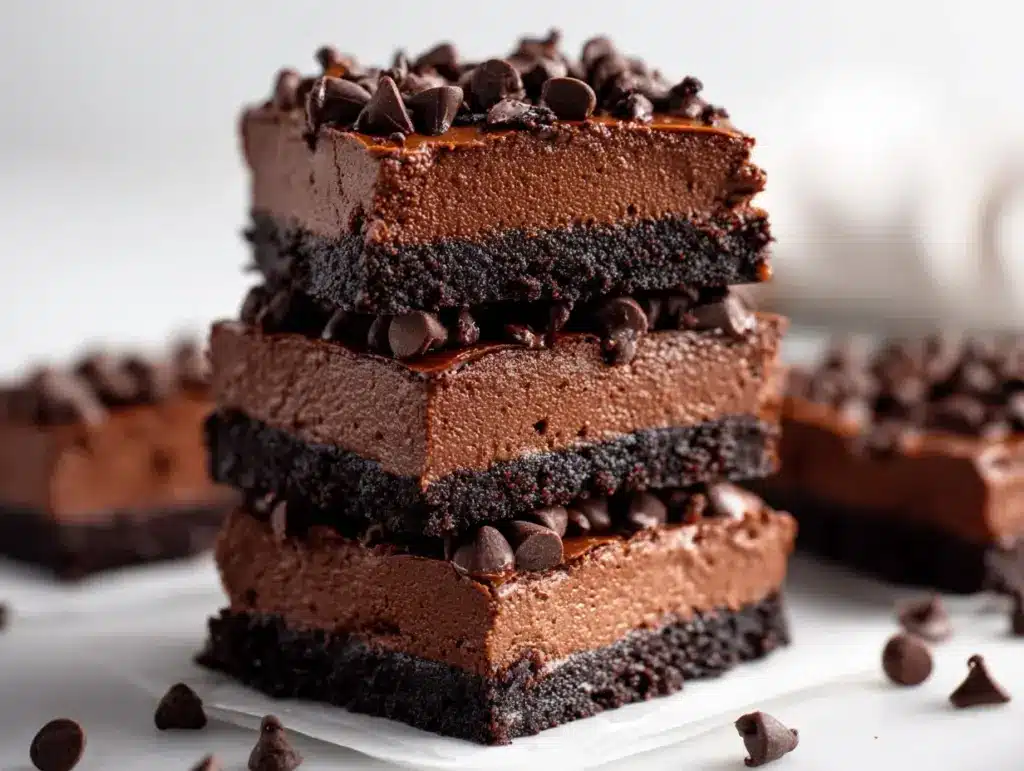
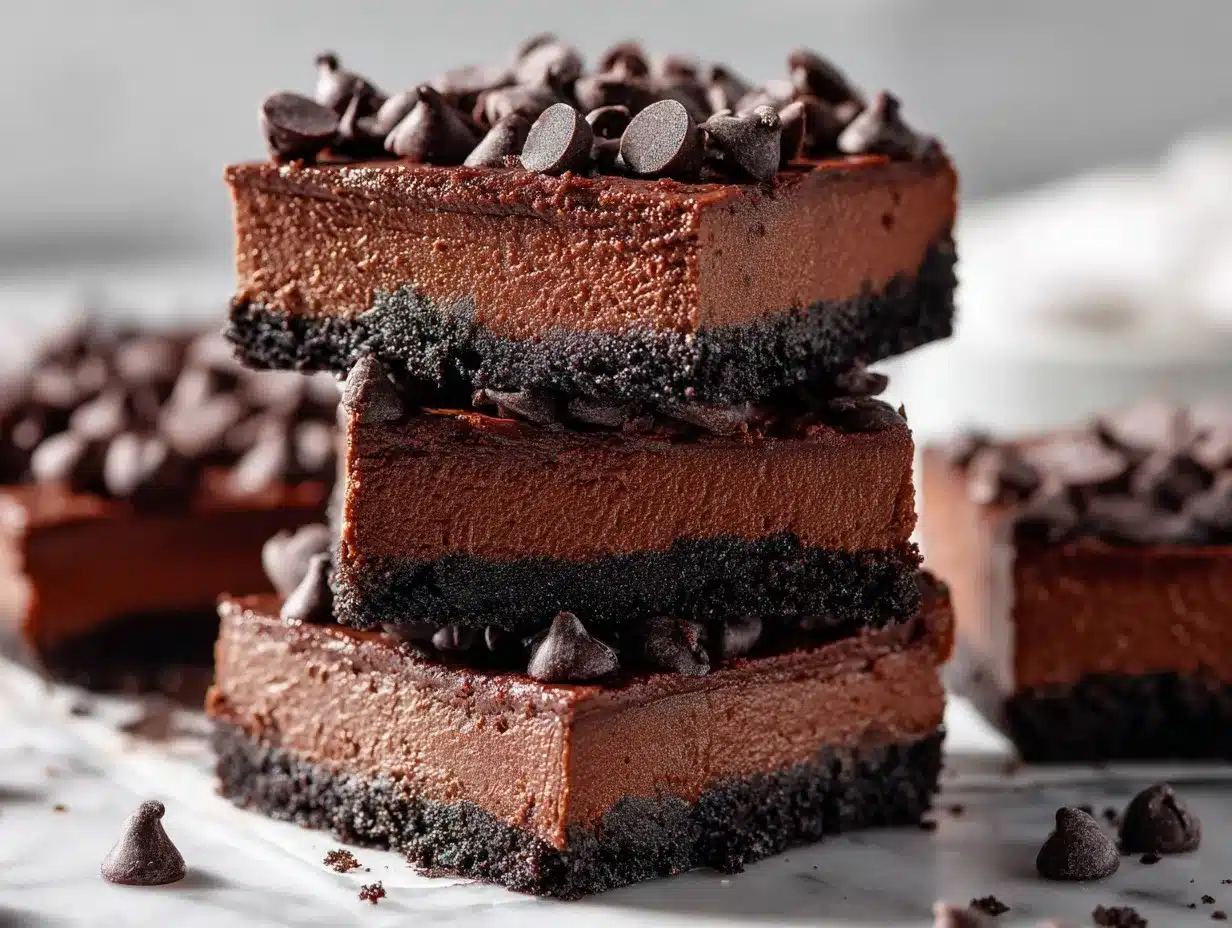
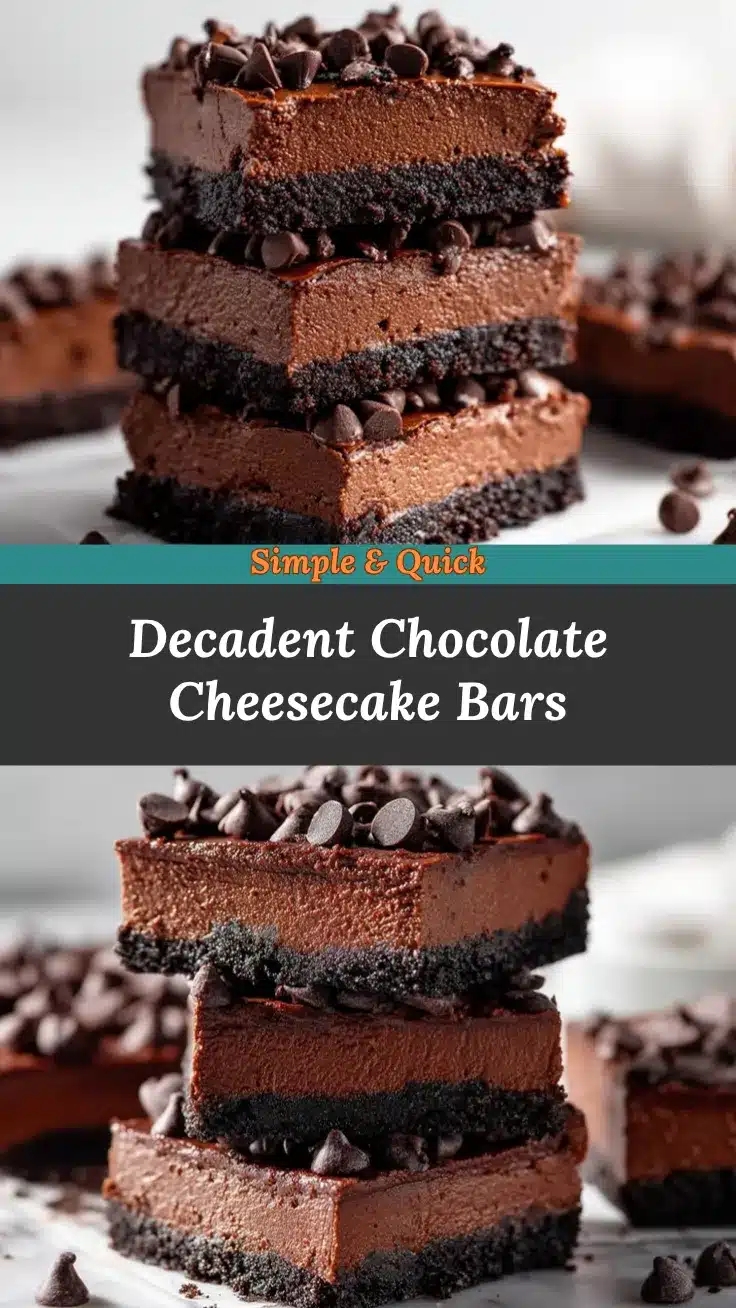
The first bite of these chocolate cheesecake bars feels like a decadent hug for your taste buds. Silky, creamy cheesecake layered with rich, chocolatey goodness—all without turning on the oven! I stumbled upon this recipe during a sweltering summer day when baking felt impossible, and honestly, it’s been a family favorite ever since. If you’re looking for an easy no-bake dessert that’s indulgent, eye-catching, and downright irresistible, this recipe is about to become your new go-to. Let’s talk about why you’ll love it!
Why You’ll Love This Recipe
- No Bake: Skip the oven! Perfect for hot days or when you’re short on time.
- Easy to Make: With simple layering and mixing, this recipe is beginner-friendly.
- Rich & Creamy: The combination of velvety cheesecake and chocolate is pure bliss.
- Perfect for Any Occasion: Whether it’s a party, potluck, or a cozy night in, these bars are always a hit.
- Customizable: You can tweak the flavors or toppings to suit your mood or pantry.
What sets these chocolate cheesecake bars apart is the flawless texture—smooth and creamy with a crisp cookie crust. Plus, they’re made with basic ingredients you probably already have on hand. Whether you’re impressing guests or simply treating yourself, this recipe delivers indulgence without the hassle.
What Ingredients You Will Need
This recipe uses simple, pantry-friendly ingredients to create a dessert that tastes like it came straight from a bakery.
For the crust:
- 2 cups (200g) chocolate cookie crumbs
- 6 tablespoons (85g) unsalted butter, melted
For the cheesecake filling:
- 16 oz (450g) cream cheese, softened
- 1 cup (120g) powdered sugar
- 1 teaspoon vanilla extract
- 1/2 cup (120ml) heavy cream
- 1 cup (180g) melted semi-sweet chocolate
Optional toppings:
- Chocolate shavings
- Crushed nuts
- Fresh berries
- Whipped cream
Feel free to swap out regular cream cheese for a dairy-free alternative or use dark chocolate for a richer flavor. If you don’t have chocolate cookie crumbs, graham crackers with cocoa powder work beautifully!
Equipment Needed
- 9×9-inch (23x23cm) baking dish
- Mixing bowls
- Hand mixer or stand mixer
- Spatula
- Parchment paper
If you don’t have a hand mixer, a sturdy whisk will do in a pinch—just expect a bit of an arm workout! For easy cleanup, I recommend lining your baking dish with parchment paper. This also makes it simple to lift the bars out when they’re ready to serve.
Preparation Method
- Prepare the crust: In a medium bowl, mix the chocolate cookie crumbs and melted butter until combined. Press the mixture evenly into the bottom of a parchment-lined 9×9-inch baking dish. Chill in the refrigerator while you make the filling.
- Make the cheesecake filling: In a large mixing bowl, beat the softened cream cheese until smooth and creamy. Add the powdered sugar and vanilla extract, mixing until fully incorporated.
- Whip the cream: In a separate bowl, whip the heavy cream until stiff peaks form. Gently fold the whipped cream into the cream cheese mixture until smooth.
- Add the chocolate: Slowly pour the melted chocolate into the cheesecake mixture, folding gently to combine. Be careful not to overmix—this helps keep the filling light and fluffy.
- Assemble the bars: Pour the cheesecake filling over the chilled crust, spreading evenly with a spatula. Smooth the top for a polished look.
- Chill: Cover the baking dish with plastic wrap and refrigerate for at least 4 hours, or overnight for best results.
- Serve: Slice into bars and garnish with your favorite toppings—chocolate shavings, crushed nuts, or a dollop of whipped cream.
Pro tip: If the chocolate hardens too quickly while mixing, microwave it for 5-10 seconds to loosen it up before folding into the filling.
Cooking Tips & Techniques
- Softened Cream Cheese: Let cream cheese come to room temperature before mixing to avoid lumps in your filling.
- Chill Time: Don’t rush the chilling process! The bars need at least 4 hours to set properly.
- Even Layers: Use a spatula to spread the crust and filling smoothly for picture-perfect bars.
- Melting Chocolate: Melt chocolate slowly in a microwave or double boiler to prevent burning.
- Cutting Clean Bars: Use a sharp knife dipped in hot water to slice neat squares.
If you’ve ever struggled with uneven layers or soft crusts, these tips will help you nail the recipe every time.
Variations & Adaptations
This recipe is incredibly versatile—here are some ways to switch it up:
- Peanut Butter Twist: Swirl in 1/2 cup of melted peanut butter for a chocolate-peanut butter combo.
- Gluten-Free Option: Use gluten-free chocolate cookies for the crust.
- Fruit-Flavored Cheesecake: Fold in 1/2 cup of raspberry or strawberry puree for a fruity variation.
- Vegan Version: Swap cream cheese and heavy cream for plant-based alternatives and use dairy-free chocolate.
- Seasonal Toppings: Add crushed peppermint candies for a holiday twist or drizzle caramel sauce for autumn vibes.
One of my favorite experiments was adding a layer of salted caramel between the crust and the cheesecake filling—it was divine!
Serving & Storage Suggestions
Serve these bars chilled for the ultimate creamy texture. Pair them with a hot cup of coffee or a glass of cold milk for a perfect treat. They’re also stunning on a dessert platter with fresh berries and a sprinkle of powdered sugar.
For storage, keep the bars covered in the refrigerator for up to 5 days. If you’re making them ahead, they freeze beautifully! Wrap individual bars in plastic wrap and store them in an airtight container for up to 2 months. To thaw, place in the fridge overnight or let them sit at room temperature for 15-20 minutes.
Nutritional Information & Benefits
Here’s an estimate per serving (based on 12 bars):
- Calories: 320
- Fat: 22g
- Carbohydrates: 25g
- Protein: 4g
The cream cheese provides a good source of calcium, while dark chocolate adds antioxidants. For a lighter option, you can use reduced-fat cream cheese and swap heavy cream for Greek yogurt. Keep in mind, this recipe contains dairy and chocolate, so it’s not suitable for certain allergies.
Conclusion
If you’re craving an indulgent dessert that’s easy to whip up, these no-bake chocolate cheesecake bars are your answer. They’re customizable, crowd-pleasing, and simply delicious. Every bite feels like a little celebration! I love how versatile they are—you can make them for a fancy dinner party or just a casual treat at home.
What’s stopping you? Give this recipe a try and let me know how it turns out! Share your favorite variations or topping ideas in the comments below. I can’t wait to hear how you make this recipe yours. Happy no-baking!
FAQs
Can I make this recipe ahead of time?
Absolutely! These bars can be made the day before and stored in the refrigerator until ready to serve.
What’s the best way to melt chocolate?
The easiest method is to microwave it in 20-second intervals, stirring in between. You can also use a double boiler for gentle melting.
Can I use a different type of cookie for the crust?
Yes, graham crackers, digestive biscuits, or even Oreos work great as substitutes.
How do I make clean cuts when slicing the bars?
Dip your knife in hot water, wipe it dry, and slice. Repeat for each cut for neat edges.
Can I freeze these bars?
Yes, wrap them individually and store in an airtight container for up to 2 months. Thaw in the fridge before serving.
Pin This Recipe!
Chocolate Cheesecake Bars Recipe Easy No Bake Dessert

Silky, creamy cheesecake layered with rich, chocolatey goodness—all without turning on the oven! Perfect for hot days or when you’re short on time.
- Prep Time: 20 minutes
- Cook Time: 4 hours (chilling time)
- Total Time: 4 hours 20 minutes
- Yield: 12 bars 1x
- Category: Dessert
- Cuisine: American
Ingredients
- 2 cups (200g) chocolate cookie crumbs
- 6 tablespoons (85g) unsalted butter, melted
- 16 oz (450g) cream cheese, softened
- 1 cup (120g) powdered sugar
- 1 teaspoon vanilla extract
- 1/2 cup (120ml) heavy cream
- 1 cup (180g) melted semi-sweet chocolate
- Chocolate shavings (optional)
- Crushed nuts (optional)
- Fresh berries (optional)
- Whipped cream (optional)
Instructions
- In a medium bowl, mix the chocolate cookie crumbs and melted butter until combined. Press the mixture evenly into the bottom of a parchment-lined 9×9-inch baking dish. Chill in the refrigerator while you make the filling.
- In a large mixing bowl, beat the softened cream cheese until smooth and creamy. Add the powdered sugar and vanilla extract, mixing until fully incorporated.
- In a separate bowl, whip the heavy cream until stiff peaks form. Gently fold the whipped cream into the cream cheese mixture until smooth.
- Slowly pour the melted chocolate into the cheesecake mixture, folding gently to combine. Be careful not to overmix—this helps keep the filling light and fluffy.
- Pour the cheesecake filling over the chilled crust, spreading evenly with a spatula. Smooth the top for a polished look.
- Cover the baking dish with plastic wrap and refrigerate for at least 4 hours, or overnight for best results.
- Slice into bars and garnish with your favorite toppings—chocolate shavings, crushed nuts, or a dollop of whipped cream.
Notes
[‘Let cream cheese come to room temperature before mixing to avoid lumps in your filling.’, ‘Don’t rush the chilling process! The bars need at least 4 hours to set properly.’, ‘Use a spatula to spread the crust and filling smoothly for picture-perfect bars.’, ‘Melt chocolate slowly in a microwave or double boiler to prevent burning.’, ‘Use a sharp knife dipped in hot water to slice neat squares.’]
Nutrition
- Serving Size: 1 bar
- Calories: 320
- Fat: 22
- Carbohydrates: 25
- Protein: 4
Keywords: Chocolate Cheesecake Bars, No Bake Dessert, Easy Cheesecake Recipe, Chocolate Dessert, No Bake Cheesecake