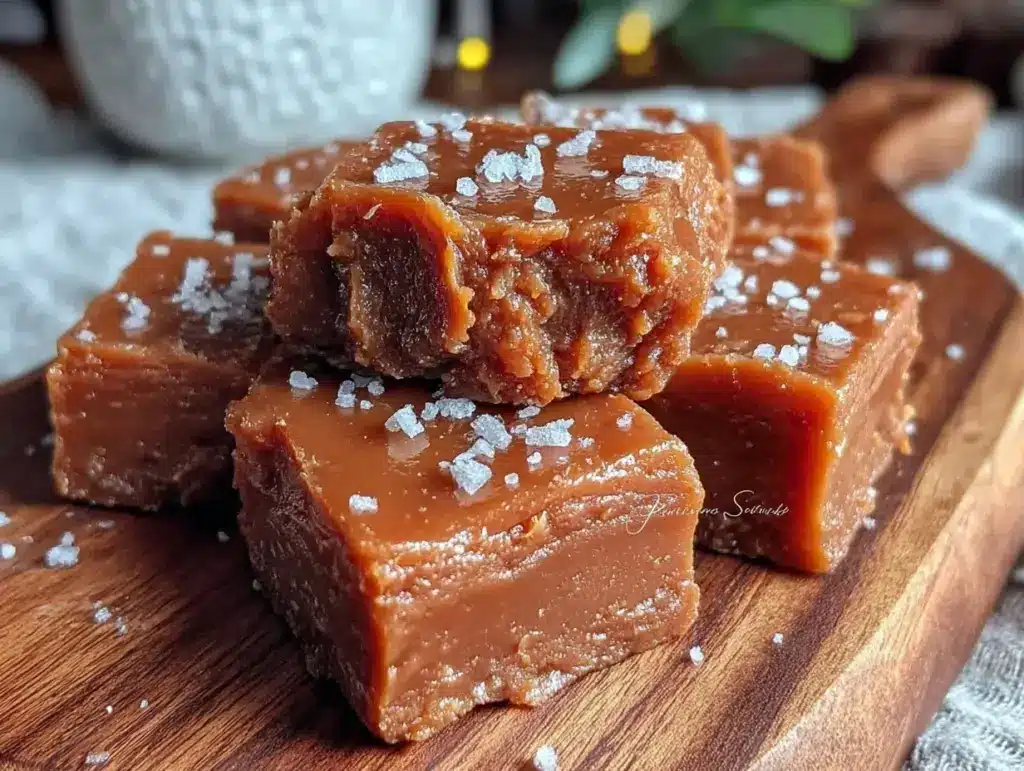
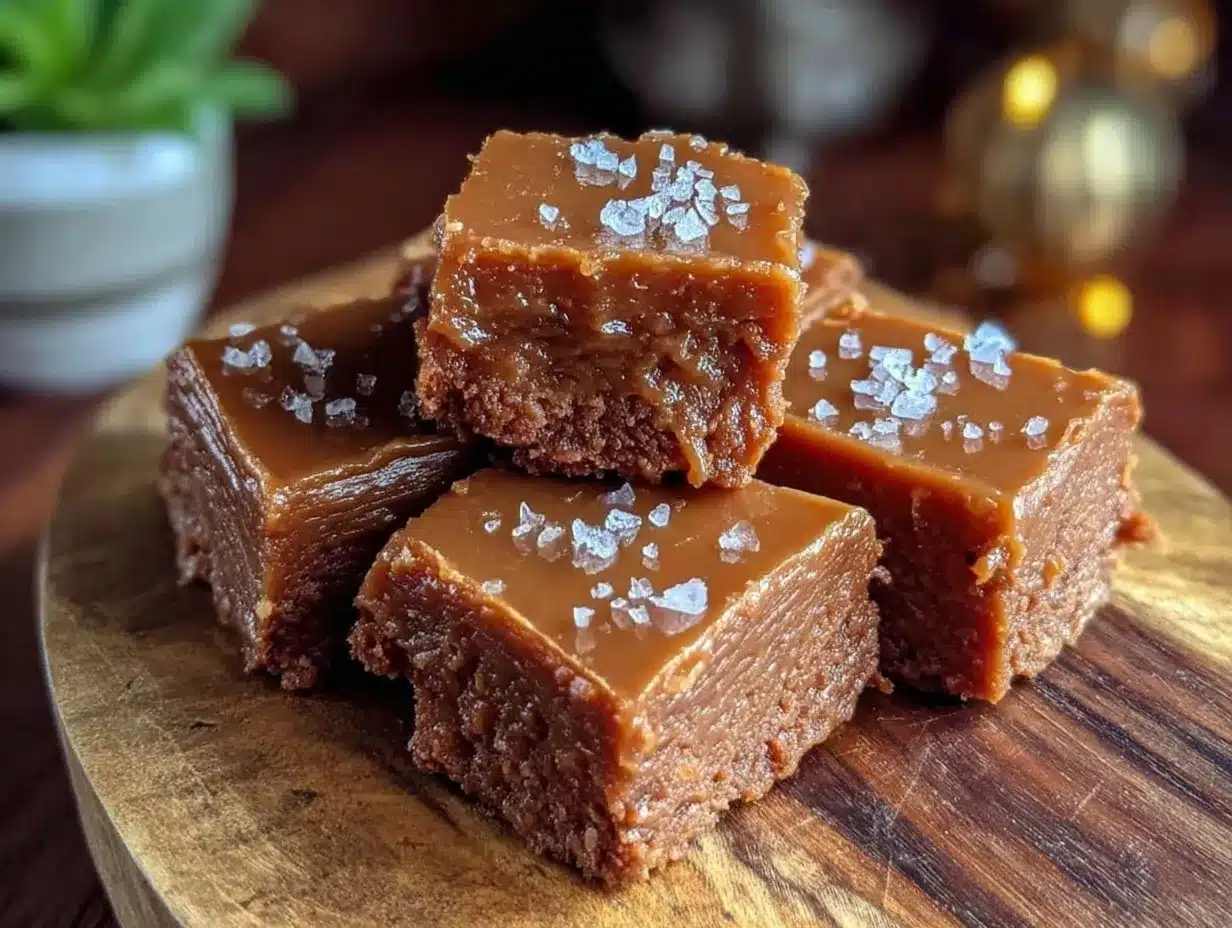
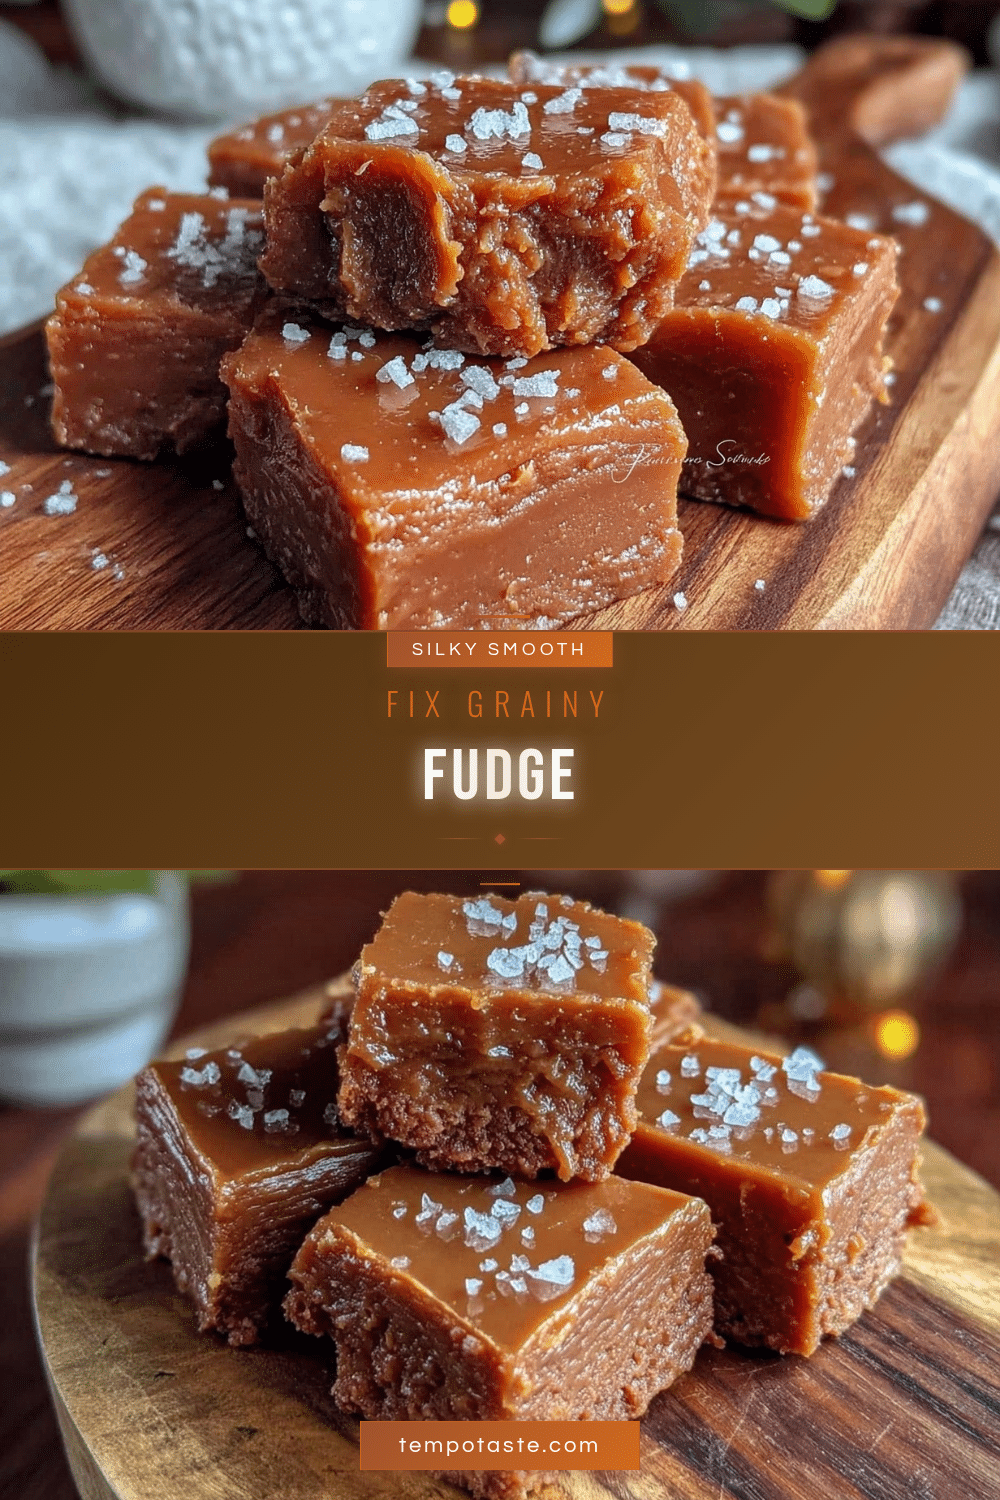
Let me tell you, the moment you unwrap a piece of silky smooth fudge and let it melt on your tongue, you’ll understand why this treat is simply irresistible. The glossy surface, the creamy texture, and that rich, buttery sweetness all come together in a way that feels like pure, nostalgic comfort. Honestly, nothing quite beats the joy of homemade fudge that’s perfectly smooth, without that annoying grainy bite that can sometimes sneak in.
I still remember the first time I baked this silky smooth fix grainy fudge recipe. It was a chilly winter afternoon, and the kitchen smelled like a cozy candy shop. I was instantly hooked—the kind of moment where you pause, take a deep breath, and just smile because you know you’re onto something truly special. Years ago, when I was knee-high to a grasshopper, my grandma’s fudge was legendary in our family, but I always struggled to get mine that same creamy texture. This recipe changed the game for me.
My family couldn’t stop sneaking pieces off the cooling rack (and I can’t really blame them). You know what? This fudge is dangerously easy to make and perfect for potlucks, gifting, or just a sweet treat for your kids after school. I’ve tested this recipe more times than I can count—in the name of research, of course—and it’s become a staple for family gatherings and holiday celebrations. Trust me, you’re going to want to bookmark this one.
Why You’ll Love This Recipe
After countless trials and a few burnt pots later, I finally nailed the perfect silky smooth fix grainy fudge recipe that anyone can whip up at home. Here’s why this recipe stands out:
- Quick & Easy: Comes together in under 30 minutes, making it perfect for last-minute cravings or holiday prep.
- Simple Ingredients: No fancy or hard-to-find items—just basic pantry staples you probably have on hand.
- Perfect for Any Occasion: Whether it’s a family gathering, a gift for neighbors, or a cozy night in, this fudge fits the bill.
- Crowd-Pleaser: Kids, adults, and even picky eaters rave about the smooth, melt-in-your-mouth texture.
- Unbelievably Delicious: The rich chocolate flavor combined with creamy butter and just the right touch of sweetness hits all the right notes.
What makes this recipe truly different? It’s all about the balance—using just the right temperature and stirring technique to prevent that dreaded graininess. Plus, a little trick I picked up from my grandma, blending the mixture briefly to ensure that silky finish. This isn’t just another fudge recipe; it’s the best version you’ll ever try, bringing that classic comfort with a modern twist.
Honestly, this fudge makes you close your eyes after the first bite. It’s like comfort food reinvented—simpler, faster, but still hitting that deep, soul-soothing spot. Perfect for impressing guests without the stress or turning a simple snack into a memorable moment.
What Ingredients You Will Need
This recipe uses simple, wholesome ingredients to deliver bold flavor and a satisfying, creamy texture without fuss. Most of these are pantry staples, and substitutions are easy if you need to tweak for allergies or preferences.
- Semi-sweet chocolate chips (2 cups / 340g) – I prefer Ghirardelli for its smooth melt and rich flavor.
- Sweetened condensed milk (1 can, 14 oz / 396g) – This adds creaminess and sweetness without extra fuss.
- Unsalted butter (4 tablespoons / 56g), softened – Adds richness and helps the fudge set perfectly.
- Vanilla extract (1 teaspoon) – For that warm, mellow undertone that ties everything together.
- Salt (a pinch) – Enhances the chocolate flavor and balances the sweetness.
- Optional add-ins: chopped nuts, sea salt for topping, or mini marshmallows for texture variety.
Ingredient tips: Use high-quality chocolate chips for the best silky texture. If you want a dairy-free version, swap sweetened condensed coconut milk and use a vegan butter alternative. In summer, try adding a handful of fresh berries or dried cherries for a fruity twist.
Equipment Needed
Here’s what you’ll want in your kitchen to make this silky smooth fix grainy fudge recipe a breeze:
- Medium saucepan: A heavy-bottomed pan works best to prevent scorching.
- Heatproof spatula or wooden spoon: For constant stirring without scratching your pan.
- 8×8-inch square baking pan: Perfect size for setting the fudge evenly.
- Parchment paper: Makes removing the fudge from the pan a snap.
- Measuring cups and spoons: For precise ingredient amounts.
- Optional: Electric hand mixer or immersion blender for that ultra-smooth finish.
If you don’t have an 8×8 pan, a similar-sized glass or ceramic dish works fine. I’ve used metal pans before, but they tend to set the fudge a bit faster, so watch the timing closely. No fancy candy thermometer needed here—just keep an eye on the melt and stir consistently.
Preparation Method
- Line your baking pan: Start by lining an 8×8-inch pan with parchment paper, leaving some overhang for easy fudge removal later. This step saves you a headache when it’s time to slice.
- Melt butter and condensed milk: In your medium saucepan, combine the softened butter (4 tbsp / 56g) and 1 can (14 oz / 396g) of sweetened condensed milk. Warm over low heat, stirring constantly for about 3-4 minutes until the butter melts and the mixture is smooth. Keep it low and slow—you don’t want to scorch anything.
- Add chocolate chips: Remove the pan from heat and stir in 2 cups (340g) of semi-sweet chocolate chips along with a pinch of salt. Stir vigorously until the chocolate is completely melted and the mixture is glossy and smooth. This usually takes 2-3 minutes.
- Stir in vanilla: Add 1 teaspoon of vanilla extract and mix well. This little touch makes a big flavor difference.
- Optional blending step: For the smoothest fudge, I like to use an immersion blender for 10-15 seconds here. It breaks down any lingering sugar crystals that cause graininess. If you don’t have one, just stir really well.
- Pour and set: Pour the fudge mixture into your prepared pan, spreading it evenly with your spatula. Tap the pan gently on the counter to release air bubbles.
- Cool and chill: Let the fudge cool at room temperature for about 30 minutes, then transfer to the refrigerator for at least 2 hours or until firm. Patience here pays off—rushing will mess with the texture.
- Slice and serve: Using the parchment overhang, lift the fudge out of the pan and cut into small squares. Store leftovers in an airtight container in the fridge.
Pro tip: Don’t rush the stirring process—constant, gentle stirring helps keep the sugar crystals tiny and prevents graininess. Also, avoid overheating, which can cause the fats to separate and that annoying gritty texture you want to avoid.
Cooking Tips & Techniques
Mastering fudge is all about technique and timing. Here are some tips I’ve picked up the hard way:
- Consistent stirring: This recipe demands your attention. Stir the mixture constantly on low heat to prevent burning and keep sugar crystals small.
- Low heat is key: High heat will scorch the chocolate or cause separation. Keep the stove on low and be patient. Let the heat do the work, not your impatience.
- Use quality ingredients: Cheap chocolate can contain stabilizers that affect melting. Semi-sweet chocolate chips from trusted brands create that velvety texture.
- Don’t skip the blending step: If you want that ultra-smooth fudge, a quick whirl with an immersion blender after melting helps break down sugar crystals that cause graininess.
- Watch the temperature: Overheating can ruin fudge. If you’re unsure, remove from heat as soon as chocolate is melted and smooth.
- Room temperature ingredients: Using softened butter and room temperature vanilla helps everything mix smoothly.
I once tried rushing the cooling by popping the fudge straight into the freezer—big mistake! It caused cracking and an uneven texture. Slow and steady wins this sweet race. Also, avoid stirring after pouring into the pan; that can introduce unwanted graininess or bubbles.
Variations & Adaptations
If you want to switch things up with your silky smooth fix grainy fudge recipe, here are some ideas I’ve tried and love:
- Peanut Butter Swirl: Before chilling, dollop spoonfuls of creamy peanut butter on top and swirl gently with a knife. It adds a salty-sweet punch that’s totally addictive.
- Nut-Free & Vegan: Use coconut condensed milk and dairy-free butter alternatives. Swap semi-sweet chips for dairy-free dark chocolate melts.
- Seasonal Spice: Add a pinch of cinnamon or chili powder to the melted mixture for a warm, spicy twist that’s perfect for fall and winter.
- Different Chocolate Types: Try white chocolate or milk chocolate chips for a milder, sweeter fudge. If you use white chocolate, be cautious with the heat as it melts differently.
- Extra Texture: Fold in chopped toasted nuts, dried cherries, or mini marshmallows before pouring into the pan.
One variation I love is adding espresso powder to the melted mixture—it deepens the chocolate flavor and creates a grown-up fudge with a little kick. Just a teaspoon does the trick!
Serving & Storage Suggestions
Serve this fudge chilled or at room temperature—the texture is delightfully creamy either way. For a special touch, sprinkle a tiny bit of flaky sea salt on top right before serving. It balances the sweetness and adds a gourmet flair.
This fudge pairs beautifully with a hot cup of coffee or a glass of cold milk. For holiday presentations, wrap individual squares in parchment paper and tie with a festive ribbon—trust me, gifting homemade fudge never goes out of style.
To store, keep the fudge in an airtight container in the refrigerator for up to two weeks. You can also freeze fudge for up to three months; just thaw in the fridge overnight before serving. Reheating isn’t necessary, but if you like it softer, let it sit at room temperature for 15 minutes before digging in.
Flavors tend to mellow and deepen after a day or two in the fridge, so making it a day ahead is a great way to get even better taste.
Nutritional Information & Benefits
This recipe yields about 16 small squares, with each piece packing roughly 150 calories. It’s rich in fats and sugars, so best enjoyed as an occasional treat. The semi-sweet chocolate contains antioxidants, and butter provides fat-soluble vitamins, but remember—this is indulgence in its purest form.
For those watching dietary needs, you can make it gluten-free easily since no flour is involved. Vegan and dairy-free versions are totally doable with ingredient swaps. Just keep an eye on nut additions if allergies are a concern.
From a wellness perspective, I see this fudge as a little joyful reward—sometimes, you just need that sweet comfort to brighten your day. It’s about balance, not deprivation.
Conclusion
In the end, this silky smooth fix grainy fudge recipe is a keeper. It’s simple, speedy, and delivers that luscious, melt-in-your-mouth texture that makes fudge truly special. Whether you’re a seasoned pro or a first-timer, you’ll find this recipe friendly and forgiving.
Feel free to customize with your favorite mix-ins or flavor twists—this fudge loves to be personalized. I love how it brings back family memories while also creating new ones, and I’m confident you’ll feel the same.
Go ahead, make a batch, and let me know how it turns out! Share your favorite variations or tips in the comments. Happy fudge-making and sweet moments ahead!
FAQs About Silky Smooth Fix Grainy Fudge Recipe
Why does my fudge turn out grainy?
Grainy fudge usually happens because sugar crystals form unevenly. Stirring constantly on low heat and avoiding overheating helps keep it smooth. Using an immersion blender can also break down any crystals that start to form.
Can I use chocolate bars instead of chocolate chips?
Yes, you can chop chocolate bars finely and melt them the same way. Just make sure the chocolate is good quality and watch the heat carefully to avoid burning.
How long does fudge last?
Stored in an airtight container in the fridge, fudge lasts up to two weeks. You can freeze it for up to three months; just thaw before serving.
Can I make this fudge dairy-free?
Absolutely! Use dairy-free sweetened condensed coconut milk and vegan butter substitutes. Choose dairy-free chocolate chips to keep it fully vegan.
What’s the best way to cut fudge without it sticking?
Use a sharp knife warmed under hot water, then wiped dry, to slice your fudge cleanly. This prevents sticking and gives you perfect squares every time.
Pin This Recipe!
Silky Smooth Fix Grainy Fudge Recipe

This easy homemade fudge recipe delivers a silky smooth, creamy texture without graininess, perfect for family gatherings, gifting, or a sweet treat.
- Prep Time: 10 minutes
- Cook Time: 15 minutes
- Total Time: 2 hours 45 minutes
- Yield: 16 small squares 1x
- Category: Dessert
- Cuisine: American
Ingredients
- 2 cups (340g) semi-sweet chocolate chips
- 1 can (14 oz / 396g) sweetened condensed milk
- 4 tablespoons (56g) unsalted butter, softened
- 1 teaspoon vanilla extract
- Pinch of salt
- Optional add-ins: chopped nuts, sea salt for topping, mini marshmallows
Instructions
- Line an 8×8-inch baking pan with parchment paper, leaving overhang for easy removal.
- In a medium saucepan, combine softened butter and sweetened condensed milk. Warm over low heat, stirring constantly for 3-4 minutes until butter melts and mixture is smooth.
- Remove pan from heat and stir in semi-sweet chocolate chips and a pinch of salt. Stir vigorously until chocolate is completely melted and mixture is glossy and smooth (2-3 minutes).
- Add vanilla extract and mix well.
- Optional: Use an immersion blender for 10-15 seconds to break down sugar crystals for extra smoothness, or stir very well if not using blender.
- Pour fudge mixture into prepared pan and spread evenly. Tap pan gently on counter to release air bubbles.
- Let fudge cool at room temperature for about 30 minutes, then refrigerate for at least 2 hours or until firm.
- Lift fudge out using parchment overhang and cut into small squares. Store leftovers in an airtight container in the refrigerator.
Notes
Constant, gentle stirring on low heat is key to prevent graininess. Avoid overheating to prevent fat separation. Use high-quality chocolate chips for best texture. Let fudge cool slowly and chill thoroughly for best results. Use a warm knife to cut fudge cleanly without sticking.
Nutrition
- Serving Size: 1 small square
- Calories: 150
- Sugar: 17
- Sodium: 45
- Fat: 9
- Saturated Fat: 5
- Carbohydrates: 18
- Fiber: 1
- Protein: 2
Keywords: fudge, homemade fudge, smooth fudge, easy fudge recipe, grainy fudge fix, chocolate fudge, holiday fudge, creamy fudge


