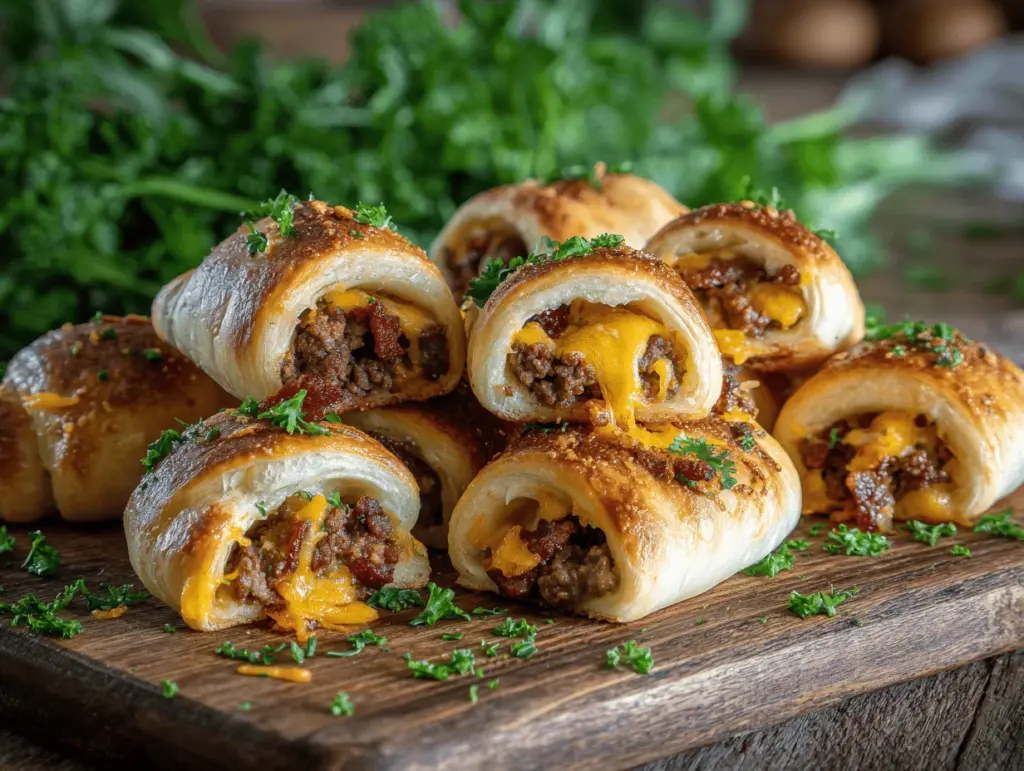
The sizzle of bacon mingling with juicy ground beef, melted cheddar oozing out as you pull apart a golden, flaky crescent roll—can you picture it? That’s exactly what happens every time I whip up my irresistible Bacon Cheeseburger Crescent Rollups with Garlic Butter. I’ll never forget the first time I made these for a game night; there was a mad dash to the kitchen before the tray even hit the table. It’s that kind of snack—craveworthy, a little nostalgic, and just plain fun.
Honestly, bacon cheeseburgers are my family’s ultimate comfort food, but dragging out the grill on a weeknight? Not happening. That’s when this recipe came about. I wanted all that classic cheeseburger flavor (bacon included!) but in a grab-and-go form. Let’s face it, sometimes you need something you can pop in your mouth with one hand while scrolling Pinterest with the other. And let’s talk about the garlic butter—brushing it over the top before baking sends these over the edge. You could call them a party appetizer, after-school snack, or a “just because” lazy dinner. They fit any craving.
As someone who’s tested this bacon cheeseburger crescent rollup recipe more times than I can count (my neighbors are now obsessed), I can tell you—they’re reliable, quick, and a total crowd-pleaser. If you’re looking for a snack that’s easy enough for busy weeknights yet impressive enough for potlucks, you’re in the right place. Let’s roll (pun intended) into all the reasons you’ll love this recipe!
Why You’ll Love This Bacon Cheeseburger Crescent Rollups Recipe
- Quick & Easy: These bacon cheeseburger crescent rollups come together in under 30 minutes. Perfect for last-minute guests, movie nights, or those days when dinner needs to happen fast.
- Simple Ingredients: No fancy trips to specialty stores required. Everything you need is probably already in your fridge or pantry—crescent roll dough, ground beef, bacon, cheese, and a handful of basics.
- Perfect for Any Occasion: Think game day, birthday parties, potlucks, or even a midweek dinner when you want something fun. I’ve made these as appetizers and, honestly, sometimes they steal the show as the main course.
- Crowd-Pleaser: This is one of those rare recipes that gets two thumbs up from both kids and adults. My picky eaters have never left a crumb behind.
- Unbelievably Delicious: The combo of crispy bacon, tender beef, gooey cheese, and that buttery, garlicky finish is total comfort food magic. You’ll find yourself reaching for seconds…and thirds.
What truly sets my bacon cheeseburger crescent rollups apart? Well, I blend the cooked beef with a touch of ketchup and mustard for that authentic cheeseburger taste, then add crispy bacon bits and sharp cheddar so every bite is packed with flavor. Brushing the tops with homemade garlic butter before baking creates a golden crust that’s pure bliss.
This isn’t just another crescent roll hack. It’s the recipe that people ask for after just one bite. It’s a little nostalgic, a little over the top, and 100% satisfying. If you love cheeseburgers, these rollups will hit all the right notes—no grill required. And honestly, they’re easier, less messy, and just as comforting as the real thing. You might even find they become your new go-to for impressing guests or making family night extra special.
What Ingredients You Will Need
This bacon cheeseburger crescent rollups recipe leans on simple, everyday ingredients that deliver big flavor with minimal fuss. Most are pantry or fridge staples, so you may not even need to hit the store.
- Crescent Roll Dough (2 cans, 8 oz each): The classic kind you find in the refrigerated section. I prefer Pillsbury for the fluffiest texture, but any brand works.
- Ground Beef (1 lb / 450g): Go for 80/20 or 85/15 for a perfect balance of flavor and juiciness. Leaner beef works if that’s what you have, but the filling might be a little drier.
- Cooked Bacon (6 slices, chopped): Crispy is best! You can use pre-cooked bacon bits in a pinch, but freshly cooked and crumbled gives the best texture. Turkey bacon works too.
- Cheddar Cheese (1 cup / 100g, shredded): Sharp cheddar gives that classic cheeseburger tang. Feel free to swap in Colby Jack or mozzarella for a milder flavor.
- Yellow Onion (1 small, finely diced): Adds a little sweetness and depth. Red onion works for a slightly spicier kick, or you can skip it altogether for picky eaters.
- Ketchup (2 tbsp / 30ml): For that classic burger flavor. I like Heinz, but use your favorite.
- Yellow Mustard (1 tbsp / 15ml): Adds tang and ties the cheeseburger theme together. Dijon is a fun swap if you want a little more bite.
- Salt & Black Pepper (to taste): I usually start with ½ tsp salt and ¼ tsp pepper, but adjust to your liking.
- Garlic Powder (½ tsp / 2g): For a subtle punch of flavor in the filling.
- Butter (3 tbsp / 45g, melted): For brushing the tops to get that golden, glossy finish.
- Fresh Garlic (1-2 cloves, minced): Combine with butter for that irresistible garlic aroma. You can use ½ tsp garlic powder if you don’t have fresh garlic.
- Sesame Seeds (optional, for garnish): Sprinkling a few on top gives that “burger bun” vibe, but skip if you prefer.
- Pickles (optional, for serving): Dill chips or slices are a fun addition on the side or tucked right into the rollup before baking.
Ingredient Swaps & Tips:
- Use ground turkey or chicken for a lighter version.
- Gluten-free crescent dough is available in some stores (or try homemade if you’re adventurous).
- Lactose-free cheese melts beautifully, too, if you want to make these dairy-friendly.
- For a spicy twist, add a dash of hot sauce or finely diced jalapeños to the beef mixture.
Basically, these bacon cheeseburger crescent rollups are as flexible as you need them to be—just keep those classic flavors at the heart, and you can’t go wrong!
Equipment Needed
You don’t need any fancy gadgets for these bacon cheeseburger crescent rollups—another reason they’re a weeknight winner. Here’s what I always have ready:
- Baking Sheet: A large, rimmed one is ideal to catch any cheesy drips. I use a standard 13×18-inch (33x46cm) sheet.
- Nonstick Parchment Paper or Silicone Baking Mat: For easy cleanup and to prevent sticking. Foil works in a pinch but parchment is best for even browning.
- Large Skillet: For browning the beef and crisping bacon. A nonstick or cast iron pan both work great—use what you love.
- Mixing Bowl: To combine the filling ingredients. I prefer a large glass bowl for easy mixing.
- Pastry Brush: For brushing on that glorious garlic butter. If you don’t have one, a spoon will do (just go gently).
- Knife & Cutting Board: For chopping onion, bacon, and garlic. Nothing fancy, just sharp and sturdy.
- Measuring Cups & Spoons: Especially for the butter and condiments. Eyeballing is fine, but accurate measurements keep the flavor balanced.
- Spatula: For mixing and spreading the filling. A silicone spatula makes scraping easy.
If you’re short on specialty tools, don’t stress. I’ve used a spoon instead of a pastry brush and regular foil for baking—just watch for sticking. A pizza cutter is handy for separating the crescent dough triangles, but a sharp knife works too. For easy cleanup, line your baking sheet, and you’ll be golden. If you bake often, investing in a silicone mat saves money and waste in the long run (mine’s lasted years!).
How to Make Bacon Cheeseburger Crescent Rollups with Garlic Butter
- Preheat Your Oven: Set your oven to 375°F (190°C). Line a large baking sheet with parchment paper or a silicone baking mat for easy cleanup.
- Cook the Bacon: In a large skillet over medium heat, cook 6 slices of bacon until crispy (about 6-8 minutes). Transfer to a paper towel-lined plate and chop into small pieces. (Tip: Clean out extra bacon grease from the skillet, but leave a little for flavor.)
- Brown the Beef & Onion: In the same skillet, add 1 lb (450g) ground beef and 1 small diced onion. Cook over medium-high heat, breaking up the meat, until browned and no longer pink (about 5-7 minutes). Drain excess fat for a less greasy filling.
- Season the Filling: Stir in 2 tbsp (30ml) ketchup, 1 tbsp (15ml) yellow mustard, ½ tsp garlic powder, ½ tsp salt, and ¼ tsp black pepper. Mix until everything’s well coated. Taste and adjust seasoning if needed. Turn off heat and let the mixture cool for 5 minutes.
- Add Bacon & Cheese: Once cooled a bit, stir in the chopped bacon and 1 cup (100g) shredded cheddar cheese. (If you add cheese when it’s super hot, it melts too soon and gets a little clumpy.)
- Prepare the Crescent Dough: Unroll 2 cans (8 oz each) of crescent roll dough onto a clean surface. Separate into 16 triangles. (Tip: If the dough is sticky, chill it for 10 minutes before handling.)
- Fill & Roll: Place about 1 heaping tablespoon of the beef mixture onto the wide end of each triangle. Roll up tightly, starting from the wide end and tucking in the sides as you go. (Don’t overfill or they’ll burst while baking.)
- Arrange on Baking Sheet: Space the rollups evenly on your prepared baking sheet, tip side down. (If they’re too close, they’ll steam instead of brown.)
- Make Garlic Butter: In a small bowl, combine 3 tbsp (45g) melted butter with 1-2 cloves minced garlic (or ½ tsp garlic powder). Brush generously over the tops of each rollup. Sprinkle with sesame seeds if using.
- Bake: Place in the oven and bake for 12-14 minutes, or until golden brown and the dough is cooked through. (Check at 12 minutes—the bottoms brown faster!)
- Cool & Serve: Let cool for 3-5 minutes before serving—hot cheese can be molten! Serve with extra ketchup, mustard, or your favorite burger dipping sauce.
Troubleshooting: If your rollups leak a little cheese, that’s normal! If they unroll, pinch the seams closed before baking. And if you want extra crispy bottoms, bake directly on the sheet without parchment for the last 2 minutes (just watch closely!).
Personal Tips: Prepping the filling a day ahead saves tons of time. You can also assemble the rollups and refrigerate them for up to 4 hours before baking—perfect for party planning. The aroma of that garlic butter as they bake? Mouthwatering!
Pro Cooking Tips & Techniques for Bacon Cheeseburger Crescent Rollups
- Don’t Overfill: I know it’s tempting to pack in extra filling, but trust me—less is more. Too much and the rollups spill open in the oven. Stick to a rounded tablespoon per triangle.
- Seal the Edges: Gently pinch the seams of the dough after rolling to keep all that cheesy goodness inside. If you skip this, you might end up with a cheesy mess (been there, done that—still delicious, just messy!).
- Cool the Filling: Letting the beef mixture cool for a few minutes before adding cheese prevents it from melting too soon. This keeps the filling chunky and easier to work with.
- Multitasking: Cook your bacon while browning the beef in another pan if you’re short on time. Or, bake the bacon in the oven at 400°F (205°C) for 15 minutes—no splatter, super crispy.
- Garlic Butter Timing: Brush the garlic butter on just before baking for the best flavor. If you brush it after, the rolls won’t be as crisp and glossy.
- Watch the Oven: Crescent dough browns quickly, so check at the 12-minute mark. Every oven runs a little differently—my first batch was a tad too brown underneath, but now I pull them out on time every time.
- Consistency: Use the same amount of filling in each rollup so they bake evenly. If you have extra filling, just save it for a mini burger bowl or toss it on a salad.
I’ve learned (the hard way) that rushing the rolling process leads to uneven baking—take your time, and you’ll get picture-perfect rollups. And if you ever forget the garlic butter (it happens!), just brush it on right as they come out of the oven for that glossy finish.
Variations & Adaptations for Bacon Cheeseburger Crescent Rollups
- Low-Carb Option: Use low-carb tortillas or fathead dough instead of crescent rolls. You can also try cloud bread for a keto-friendly version—the filling works great in any “wrapper.”
- Vegetarian Twist: Swap the ground beef and bacon for a plant-based alternative (like Beyond Meat and veggie bacon), and use your favorite dairy-free cheese for a meatless snack that still brings the cheeseburger vibes.
- Spicy Kick: Add diced jalapeños to the beef mixture, or sprinkle crushed red pepper flakes into the filling. Pepper Jack cheese is another great way to add heat.
- Breakfast Remix: Mix scrambled eggs into the beef mixture and swap cheddar for Swiss. Serve with a side of salsa for a morning treat!
- Different Cooking Methods: Air fryer fans—these bake up beautifully at 350°F (175°C) for about 8-10 minutes. Just don’t overcrowd the basket.
- Allergen Swaps: Try gluten-free crescent dough and lactose-free cheese for sensitive eaters. Nut-free, egg-free, and soy-free versions are easy by checking your dough and cheese ingredients.
- My Go-To Personal Variation: I sometimes add a spoonful of caramelized onions and a dollop of barbecue sauce to the filling—talk about next-level flavor!
Don’t be afraid to get creative—these bacon cheeseburger crescent rollups are super forgiving. Swap ingredients based on what’s in your fridge, and feel free to add your own family favorites. They’re easy to customize for any diet or craving!
Serving & Storage Suggestions
These bacon cheeseburger crescent rollups are best served warm, fresh out of the oven when the cheese is gooey and the tops are golden. Arrange them on a platter with a sprinkle of chopped parsley for color, or stick a toothpick in each for easy party snacking. I love serving them with small bowls of ketchup, mustard, or even ranch for dipping—kids especially go wild for this.
Pair them with a crisp dill pickle, a side of oven-baked fries, or a simple green salad. For parties, they’re right at home next to a veggie tray or chips and dip. A frosty lemonade or cold beer is perfect for grown-up gatherings.
Storing is a breeze: let leftovers cool completely, then transfer to an airtight container. They’ll keep in the fridge for up to 3 days. To freeze, wrap individually in foil and store in a zip-top bag for up to a month. Reheat in a 350°F (175°C) oven for 8-10 minutes (straight from the fridge) or 14-16 minutes (from frozen) so the dough stays crisp. Microwave works too, but the rolls get a bit softer. The flavors actually meld and deepen after a day, making leftovers even tastier—if you have any left!
Nutritional Information & Benefits
Each bacon cheeseburger crescent rollup (based on 16 servings) packs about 180 calories, 9g fat, 12g protein, and 13g carbohydrates. That’s a snack that fills you up without weighing you down. Using leaner beef or turkey can lower the fat content, and swapping in lower-fat cheese shaves off even more calories.
These rollups are a nice source of protein thanks to the beef, bacon, and cheese. Crescent roll dough brings in some carbs for quick energy—perfect for an after-school snack or party fuel. If you opt for gluten-free or dairy-free swaps, they fit a variety of dietary needs. Just keep in mind there’s wheat, dairy, and sometimes soy in the store-bought dough and cheese, so always check labels for allergens.
In my house, these are a treat, not an everyday thing, but I love that you can tweak the ingredients to suit your wellness goals. They’re satisfying, full of comforting flavors, and a fun way to sneak a little protein into snack time!
Conclusion
There’s just something about these bacon cheeseburger crescent rollups that makes them impossible to resist. They’re easy, reliable, and have all the flavors you love in a classic cheeseburger—wrapped up in buttery, flaky dough and finished with garlicky goodness. Whether you’re making them for a party, family movie night, or just because you’re craving something comforting, they always hit the spot.
I hope you give this recipe a try, and don’t be afraid to make it your own—add some spice, go vegetarian, or serve with your favorite dips. That’s the beauty of a recipe like this: it’s endlessly adaptable and always a hit. I love making these for my family and friends, and I bet you’ll find they become a regular request at your house, too.
If you try these bacon cheeseburger crescent rollups, leave a comment below and let me know your favorite variations! Pin this recipe, share it with your friends, and tag me if you post your own creations. Happy snacking, friends!
FAQs About Bacon Cheeseburger Crescent Rollups
Can I make bacon cheeseburger crescent rollups ahead of time?
Yes! You can assemble them up to 4 hours in advance, cover, and refrigerate. Bake just before serving for best results.
Can I freeze these rollups after baking?
Absolutely. Let them cool, wrap individually, and freeze for up to 1 month. Reheat in the oven for best texture.
What dips go best with these crescent rollups?
Ketchup, mustard, ranch, or even a spicy burger sauce are perfect. Get creative with your favorites!
Can I use other meats instead of ground beef?
Definitely! Ground turkey, chicken, or even plant-based crumbles work great. Just season as you would the beef.
How do I keep the rollups from unrolling during baking?
Pinch the seams firmly and place them seam side down on the baking sheet. If needed, tuck the ends under a bit for extra security.
Pin This Recipe!
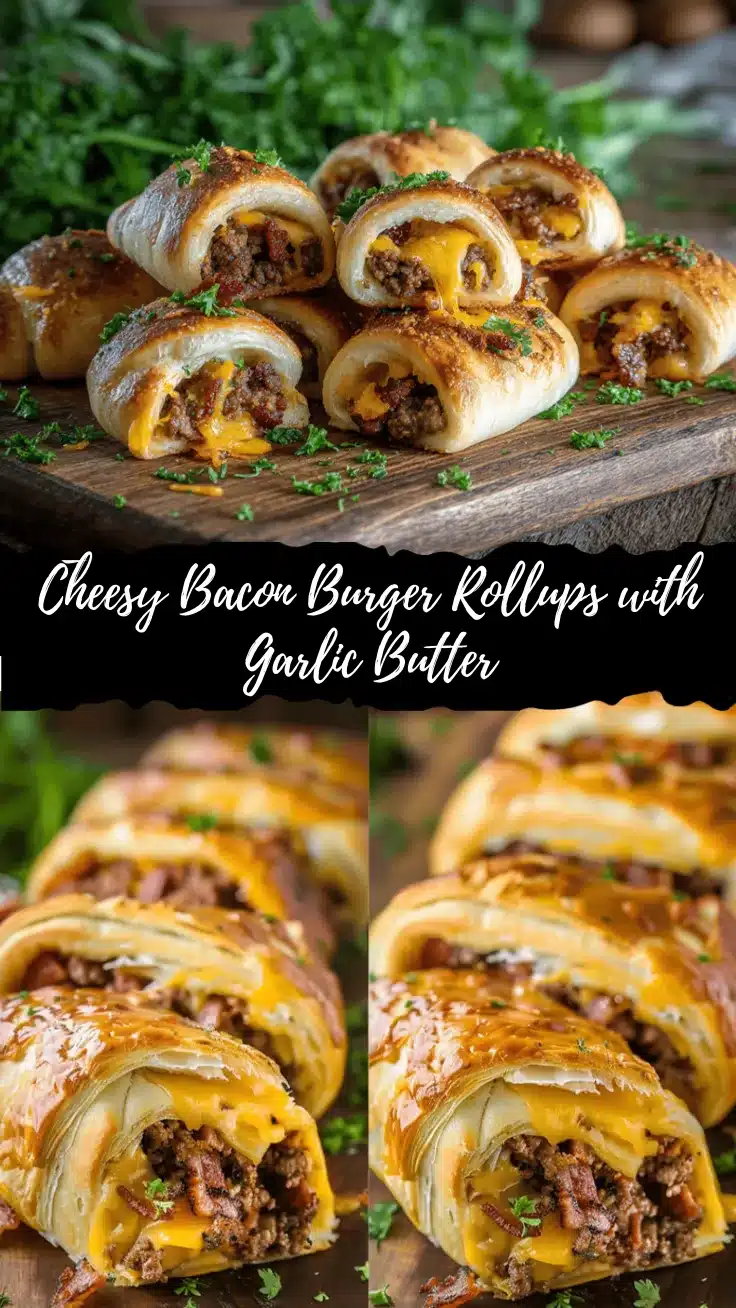
Bacon Cheeseburger Crescent Rollups with Garlic Butter

These Bacon Cheeseburger Crescent Rollups are a craveworthy, easy snack or appetizer featuring juicy ground beef, crispy bacon, sharp cheddar, and a garlicky butter finish, all wrapped in golden crescent roll dough. Perfect for parties, game nights, or a comforting family treat—no grill required!
- Prep Time: 15 minutes
- Cook Time: 14 minutes
- Total Time: 29 minutes
- Yield: 16 rollups 1x
- Category: Appetizer
- Cuisine: American
Ingredients
- 2 cans (8 oz each) crescent roll dough
- 1 lb ground beef (80/20 or 85/15 preferred)
- 6 slices cooked bacon, chopped
- 1 cup shredded cheddar cheese
- 1 small yellow onion, finely diced
- 2 tbsp ketchup
- 1 tbsp yellow mustard
- 1/2 tsp salt (or to taste)
- 1/4 tsp black pepper (or to taste)
- 1/2 tsp garlic powder
- 3 tbsp butter, melted
- 1–2 cloves fresh garlic, minced (or 1/2 tsp garlic powder)
- Sesame seeds (optional, for garnish)
- Pickles (optional, for serving)
Instructions
- Preheat oven to 375°F (190°C). Line a large baking sheet with parchment paper or a silicone baking mat.
- In a large skillet over medium heat, cook bacon until crispy (about 6-8 minutes). Transfer to a paper towel-lined plate and chop into small pieces.
- In the same skillet, add ground beef and diced onion. Cook over medium-high heat, breaking up the meat, until browned and no longer pink (about 5-7 minutes). Drain excess fat.
- Stir in ketchup, mustard, garlic powder, salt, and black pepper. Mix until well coated. Taste and adjust seasoning if needed. Let mixture cool for 5 minutes.
- Stir in chopped bacon and shredded cheddar cheese once the mixture has cooled slightly.
- Unroll crescent roll dough onto a clean surface and separate into 16 triangles.
- Place about 1 heaping tablespoon of beef mixture onto the wide end of each triangle. Roll up tightly, starting from the wide end and tucking in the sides.
- Arrange rollups evenly on the prepared baking sheet, tip side down.
- In a small bowl, combine melted butter and minced garlic (or garlic powder). Brush generously over the tops of each rollup. Sprinkle with sesame seeds if desired.
- Bake for 12-14 minutes, or until golden brown and dough is cooked through. Check at 12 minutes.
- Let cool for 3-5 minutes before serving. Serve with extra ketchup, mustard, or your favorite burger dipping sauce.
Notes
Don’t overfill the dough to prevent bursting. Pinch seams closed for best results. Filling can be made ahead and rollups assembled up to 4 hours in advance. For extra crispy bottoms, bake directly on the sheet for the last 2 minutes. Variations include using ground turkey, plant-based meat, or gluten-free dough. Serve warm with dipping sauces and pickles.
Nutrition
- Serving Size: 1 rollup
- Calories: 180
- Sugar: 2
- Sodium: 350
- Fat: 9
- Saturated Fat: 4
- Carbohydrates: 13
- Fiber: 1
- Protein: 12
Keywords: bacon cheeseburger, crescent rollups, garlic butter, party snack, appetizer, easy recipe, game day, comfort food


