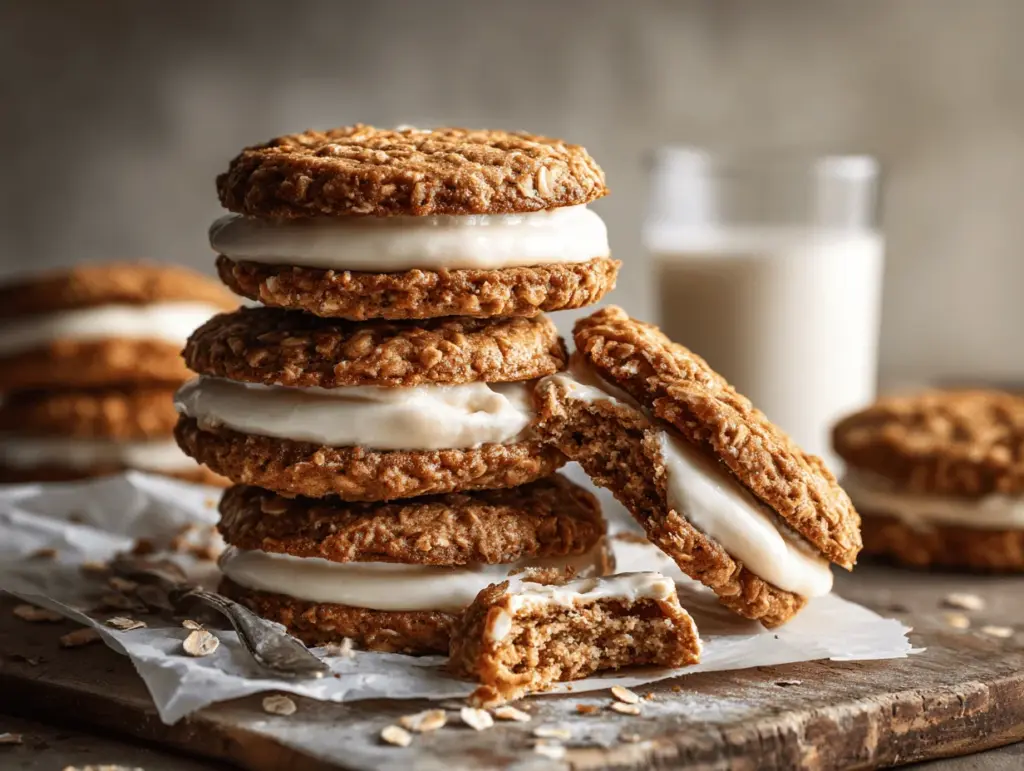
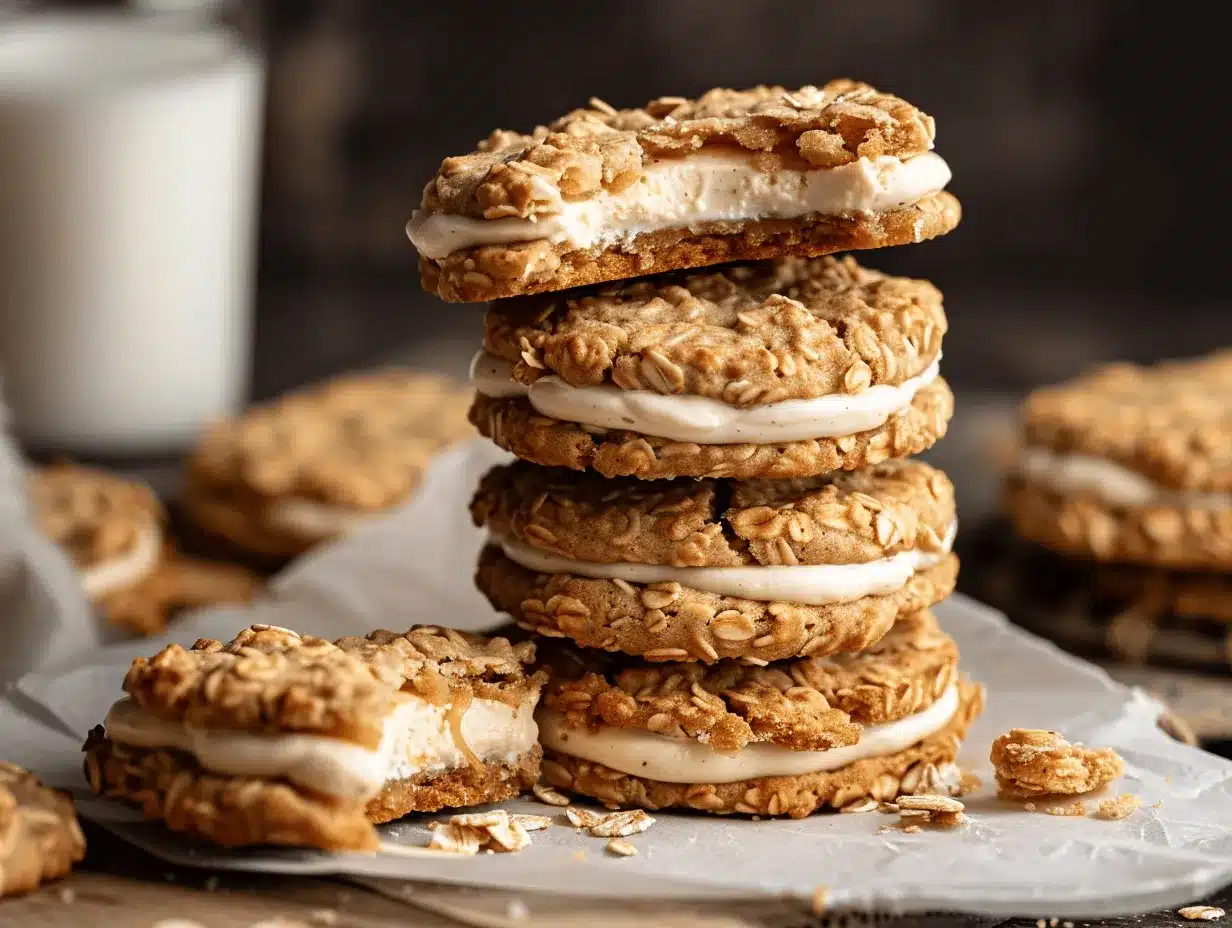
The nutty aroma of brown butter swirling through my kitchen always feels like an invitation to slow down. The first time I made these Brown Butter Oatmeal Cream Pies, I was actually trying to recreate the classic lunchbox treat—only, you know, with a grown-up twist. That twist? Toasty brown butter and a cloud-like maple vanilla filling sandwiched between soft, chewy oatmeal cookies. Honestly, if you love nostalgic desserts but crave something just a little more special, this recipe is going to win you over.
I’ll admit, I’m a little obsessed with brown butter. It transforms everything it touches, making plain old cookies taste like they’ve spent time in a fancy pastry shop. When I started tinkering with oatmeal cookie recipes, I wanted something that felt both familiar and new. You see, those store-bought cream pies were always too sweet for me, and sometimes a little too crumbly. So, after a handful of messy kitchen experiments (and more than a few sticky fingers), I landed on this version: tender, chewy cookies with a hint of cinnamon, and a creamy maple vanilla filling that is light but not cloying.
Why do I keep coming back to these Brown Butter Oatmeal Cream Pies? It’s simple: they’re comforting, but they also feel a little bit fancy. They’re perfect for sharing at potlucks, packing in lunchboxes, or just sneaking as a late-night treat. Plus, the brown butter and maple combo is a match made in dessert heaven—rich, cozy, and just the right amount of sweet. Whether you’re baking for family, impressing friends, or treating yourself, this recipe is one I’ve tested and tweaked until it’s just right. So grab your mixing bowl, and let’s make something truly irresistible.
Why You’ll Love This Recipe
- Quick & Easy: These Brown Butter Oatmeal Cream Pies come together in under an hour, making them perfect for busy days or spontaneous baking sessions.
- Simple Ingredients: You probably have most of these pantry staples already—no wild goose chase for fancy stuff.
- Perfect for Any Occasion: Whether you’re planning a cozy brunch, a birthday party, or just want a sweet afternoon pick-me-up, this recipe fits the bill.
- Crowd-Pleaser: Kids love the creamy filling, adults appreciate the depth of brown butter. I’ve brought these to family gatherings, and they disappear faster than I can snap a photo!
- Unbelievably Delicious: The chewy oatmeal cookies are loaded with flavor, and the maple vanilla filling is so good you’ll want to lick the spoon.
What makes these stand out from regular oatmeal cream pies? The brown butter, for starters. It adds a layer of nutty complexity you just don’t get with regular melted butter. Blending the oatmeal gives the cookies just the right texture—not too chunky, not too smooth—so you get that classic chew with a touch of sophistication. And let’s talk about the filling: the combination of real maple syrup and vanilla creates a creamy, dreamy center that’s not too sweet, but still feels indulgent.
This isn’t just another oatmeal cookie recipe—it’s the one that makes people ask, “What’s in these?!” after their first bite. It’s comfort food, sure, but it’s also a little bit magic. I love how these cookies can turn a simple afternoon into something memorable. If you’re looking for a treat that’s easy to make, impossible to resist, and totally worth sharing, these Brown Butter Oatmeal Cream Pies are it.
What Ingredients You Will Need
This recipe uses simple, wholesome ingredients to create bold flavor and a satisfying texture—no complicated stuff here. Most of what you need is probably already tucked away in your pantry (and if not, substitutions are easy!).
For the Cookies:
- Unsalted butter (1 cup/226g, browned) – The star ingredient! Browning the butter adds a deep, nutty flavor.
- Light brown sugar (1 cup/200g, packed) – Adds sweetness and a hint of caramel.
- Granulated sugar (1/4 cup/50g) – Balances the brown sugar for a perfect chew.
- Large eggs (2, room temperature) – Helps bind the dough and gives structure.
- Pure vanilla extract (2 tsp) – For warmth and depth. I recommend Nielsen-Massey for the best vanilla punch.
- All-purpose flour (1 3/4 cups/220g) – The base of your cookies. You can sub in a 1:1 gluten-free blend if needed.
- Old-fashioned rolled oats (2 cups/180g) – Gives that classic oatmeal texture. Quick oats work in a pinch, but you’ll lose some chew.
- Baking soda (1 tsp) – For lift.
- Salt (1/2 tsp) – Balances the sweetness.
- Ground cinnamon (1/2 tsp) – Adds warmth and a hint of spice.
For the Maple Vanilla Filling:
- Unsalted butter (1/2 cup/113g, softened) – Makes the filling creamy and rich.
- Cream cheese (4 oz/113g, softened) – Adds tang and stability to the filling.
- Powdered sugar (2 cups/240g, sifted) – For smooth sweetness.
- Pure maple syrup (3 tbsp) – Gives the filling its signature flavor. Use real maple syrup for the best taste.
- Pure vanilla extract (1 tsp) – Rounds out the flavor.
- Pinch of salt – Just a touch to balance the sweetness.
Ingredient Tips & Substitutions:
- If you’re out of cream cheese, swap in mascarpone for a slightly richer filling.
- Dairy-free? Substitute plant-based butter and vegan cream cheese—works surprisingly well!
- For a gluten-free option, use certified gluten-free oats and a 1:1 gluten-free flour blend.
- No maple syrup? Honey or agave will work in a pinch, though the flavor will be different.
- Want a stronger cinnamon hit? Add an extra 1/4 tsp to the cookie dough.
These ingredients come together for a treat that’s chewy, creamy, and just the right amount of sweet. I swear by using quality vanilla and real maple syrup—they make all the difference!
Equipment Needed
- Mixing bowls – One large for dough, one medium for filling. Glass or stainless steel work best.
- Hand mixer or stand mixer – To cream butter and mix the filling. A sturdy wooden spoon will do if you want an arm workout.
- Baking sheet – Standard rimmed sheet for baking cookies. I use Nordic Ware because they don’t warp.
- Parchment paper – Keeps cookies from sticking, and makes cleanup a breeze.
- Cookie scoop (1.5 tbsp size) – For evenly sized cookies. Two spoons work if you don’t have one.
- Wire cooling rack – Lets cookies cool evenly.
- Medium saucepan – For browning butter. If you’ve never browned butter, a light-colored pan makes it easier to spot when it’s ready.
- Rubber spatula – For scraping dough and filling.
- Measuring cups and spoons – Accurate measurements matter here (especially for the filling).
Tip: If your hand mixer is on its last legs, you can make do with a whisk and some elbow grease. I’ve tested this with both budget-friendly and fancy equipment, and honestly, it’s more about your technique than your tools. Just keep the parchment paper stocked—it’s a lifesaver for sticky doughs!
Preparation Method
-
Brown the Butter:
Add 1 cup (226g) unsalted butter to a medium saucepan over medium heat. Stir often as it melts, then foams and turns golden brown with a nutty aroma—about 6-8 minutes. Pour into a large bowl and let cool for 10 minutes (it should be warm, not hot).
-
Prep the Dough:
To the cooled brown butter, add 1 cup (200g) light brown sugar and 1/4 cup (50g) granulated sugar. Beat until combined and creamy (about 2 minutes). Add in 2 eggs, one at a time, mixing well after each. Stir in 2 tsp vanilla extract.
-
Mix Dry Ingredients:
In a separate bowl, whisk together 1 3/4 cups (220g) all-purpose flour, 2 cups (180g) rolled oats, 1 tsp baking soda, 1/2 tsp salt, and 1/2 tsp cinnamon. (Tip: For a softer texture, pulse the oats in a food processor 2-3 times.)
-
Combine & Chill:
Gradually add dry ingredients to the wet mixture. Stir until just combined—don’t overmix! Cover and chill dough for 30 minutes (this prevents spreading and gives the cookies a chewy center).
-
Shape & Bake:
Preheat oven to 350°F (175°C). Line baking sheets with parchment. Scoop dough into 1.5 tbsp balls, spacing 2 inches apart. Bake 10-12 minutes, until edges are set and centers look slightly underdone. Cookies firm up as they cool!
-
Cool Completely:
Transfer cookies to wire racks. Cool for at least 20 minutes before filling—they’re fragile when warm.
-
Maple Vanilla Filling:
Beat 1/2 cup (113g) unsalted butter and 4 oz (113g) cream cheese until smooth. Add 2 cups (240g) powdered sugar, 3 tbsp maple syrup, 1 tsp vanilla, and a pinch of salt. Beat until fluffy (about 2-3 minutes). Taste for sweetness—add more maple if desired.
-
Assemble Cream Pies:
Spread or pipe 2-3 tbsp filling onto the flat side of half the cookies. Top with remaining cookies, pressing gently to sandwich them together.
Troubleshooting: If cookies spread too much, chill dough longer. If filling feels runny, add a bit more powdered sugar. For extra neat edges, pipe the filling with a zip-top bag snipped at the corner. Sensory cues: Cookies should smell toasty and feel soft but sturdy; filling will be pale, creamy, and fragrant with maple.
Efficiency Tip: Brown the butter while gathering other ingredients. Use a cookie scoop for speedy portioning—less sticky hands, more uniform treats!
Cooking Tips & Techniques
- Brown Butter Like a Pro: Watch the butter closely—it can go from golden to burnt in seconds. When it smells nutty and the milk solids are deep amber, pull it off the heat. (Trust me, I’ve learned this the hard way!)
- Don’t Skip Chilling: I once tried to rush the dough and ended up with flat, crispy cookies. Chilling ensures perfect thickness and chewy centers.
- Mixing Matters: Use a gentle hand once you add the dry ingredients. Overmixing means tough cookies. If in doubt, stop mixing when you still see a little flour—it’ll disappear as you scoop.
- Uniform Sizing: A cookie scoop gives you identical cookies, which means even baking and better sandwiches. If you eyeball it, try to keep them as close in size as possible.
- Perfect Filling Texture: Beat the filling until fluffy, but not soupy. If it’s too stiff, add a splash of milk; if it’s too loose, add more powdered sugar.
Common mistakes (that I’ve made): Forgetting to cool the cookies before filling—disaster! The filling melts and slides right off. Be patient. Multitasking tip: While the dough chills, make the filling and prep your piping bag. That way, assembly is a breeze.
Consistency tip: Always use room temperature butter and eggs for both cookies and filling. It makes mixing easier and gives a smoother texture. If you want the best results every time, keep an eye on the bake time—ovens vary, so check at 10 minutes. These little tweaks make a huge difference, and honestly, they’ve saved me from more than one batch of cookie heartbreak.
Variations & Adaptations
- Gluten-Free: Swap in a 1:1 gluten-free flour blend and certified gluten-free oats. I’ve made this for friends with celiac, and everyone loved it!
- Dairy-Free: Use plant-based butter and vegan cream cheese for the filling. The dough works with vegan butter too—just watch the browning time, since some brands melt quicker.
- Seasonal Twist: Try adding 1/2 cup dried cranberries or chopped pecans to the dough in the fall. In spring, a dash of lemon zest brightens up the flavors.
- Flavor Boost: Add 1/4 tsp almond extract to the filling for a subtle nutty note. Or mix in mini chocolate chips for a playful touch.
- Maple-Free Option: If you’re not a maple fan, swap it for honey or golden syrup. The filling will be a little different, but still delicious.
Personal favorite? I like sprinkling flaked sea salt on the finished pies for a salty-sweet kick. My kids vote for chocolate chip oatmeal cookies with the same maple vanilla filling—so you can definitely customize based on your crowd. Allergens? You can use sunflower seed butter in place of cream cheese for a nut-free alternative.
Experiment and make these your own! Every batch can be a little different, and that’s half the fun.
Serving & Storage Suggestions
These Brown Butter Oatmeal Cream Pies are best served at room temperature—the cookies are soft and the filling is creamy. If you want to get fancy, arrange them on a pretty platter and dust with a little powdered sugar for extra flair.
- Pairing Ideas: Serve with hot coffee or chai for a cozy treat. They also go great with milk (classic!) or a scoop of vanilla ice cream for dessert.
- Storage: Store cream pies in an airtight container at room temperature for up to 2 days. For longer storage, refrigerate up to 5 days—just let them sit out for 15 minutes before serving so the filling softens.
- Freezing: Freeze assembled pies for up to 1 month. Wrap each in plastic, then store in a zip-top bag. Thaw overnight in the fridge, then bring to room temp before eating.
- Reheating: If you like a warm cookie, microwave for 10 seconds. Filling may soften, so don’t overdo it.
Flavor note: The cookies actually taste even better on the second day as the flavors meld together. The filling sets up nicely, and the oatmeal cookies stay chewy. If you’re packing for a picnic or party, separate layers with parchment so they don’t stick.
Nutritional Information & Benefits
Each Brown Butter Oatmeal Cream Pie contains approximately 320 calories, 16g fat, 44g carbs, 4g protein, and 24g sugar (these are estimates and will vary by ingredients used).
- Oats: Provide fiber, which helps keep you full and adds a hearty texture.
- Brown Butter: Adds flavor, but also healthy fats in moderation.
- Maple Syrup: Contains minerals like manganese and zinc (a little wellness bonus!).
This recipe can be adapted for gluten-free or dairy-free diets, as noted above. Potential allergens include wheat, dairy, and eggs—be sure to check substitutions if needed. Personally, I love knowing that homemade treats like this have real ingredients, no artificial flavors, and can be tweaked for special dietary needs. It’s all about balance, right?
Conclusion
So, why should you try these Brown Butter Oatmeal Cream Pies with Maple Vanilla Filling? Because they’re the kind of treat that makes you smile with every bite. They’re easy enough for a weeknight, special enough for a party, and customizable for almost any taste or dietary need. The brown butter and maple combination is just unbeatable—once you try it, you’ll never go back to regular cream pies.
I’ve made these more times than I can count, and every batch has its own little quirks—sometimes a touch more cinnamon, sometimes a sprinkle of sea salt. That’s part of the fun! Don’t be afraid to make them your own. If you bake these, please let me know how they turn out—share your adaptations, leave a comment, or tag me on social. There’s nothing better than seeing how others enjoy a recipe I love so much.
Happy baking! Remember, the best desserts are the ones you share. Now go grab some oats and butter—you’ve got cream pies to make!
FAQs
Can I make these Brown Butter Oatmeal Cream Pies gluten-free?
Yes! Use a 1:1 gluten-free flour blend and certified gluten-free oats. The cookies stay chewy and delicious.
Can I prepare the cookies ahead of time?
Absolutely. You can bake the cookies up to 2 days in advance and assemble the cream pies the day you plan to serve. Store cookies airtight to keep them fresh.
How do I know when the butter is properly browned?
Watch for a golden color and a nutty smell. Little brown bits will form at the bottom—these are flavor gold! Remove from heat immediately once it’s fragrant.
Can I use quick oats instead of rolled oats?
You can, but the texture will be a bit softer and less chewy. Rolled oats are best for that classic bite, but quick oats work in a pinch.
What’s the best way to spread the filling?
I like to use a piping bag or a zip-top bag with the corner snipped off. If you don’t have one, a spoon works just fine—just be gentle so you don’t break the cookies.
Pin This Recipe!
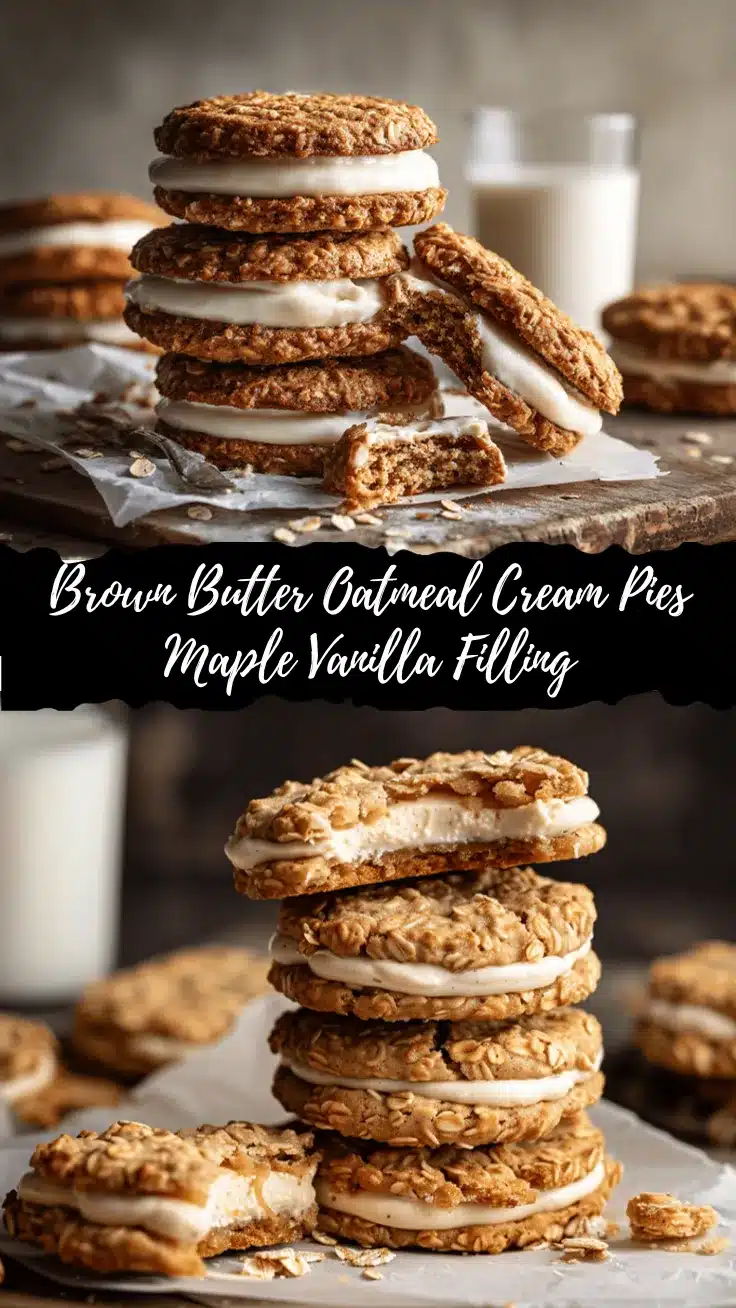
Brown Butter Oatmeal Cream Pies with Easy Maple Vanilla Filling

These Brown Butter Oatmeal Cream Pies feature chewy, nutty oatmeal cookies sandwiched with a fluffy maple vanilla cream cheese filling. A nostalgic treat with a grown-up twist, perfect for sharing or indulging any time.
- Prep Time: 25 minutes
- Cook Time: 12 minutes
- Total Time: 1 hour
- Yield: 12 cream pies 1x
- Category: Dessert
- Cuisine: American
Ingredients
- 1 cup (226g) unsalted butter, browned
- 1 cup (200g) light brown sugar, packed
- 1/4 cup (50g) granulated sugar
- 2 large eggs, room temperature
- 2 teaspoons pure vanilla extract
- 1 3/4 cups (220g) all-purpose flour
- 2 cups (180g) old-fashioned rolled oats
- 1 teaspoon baking soda
- 1/2 teaspoon salt
- 1/2 teaspoon ground cinnamon
- For the Maple Vanilla Filling:
- 1/2 cup (113g) unsalted butter, softened
- 4 oz (113g) cream cheese, softened
- 2 cups (240g) powdered sugar, sifted
- 3 tablespoons pure maple syrup
- 1 teaspoon pure vanilla extract
- Pinch of salt
Instructions
- Add 1 cup unsalted butter to a medium saucepan over medium heat. Stir often as it melts, then foams and turns golden brown with a nutty aroma (about 6-8 minutes). Pour into a large bowl and let cool for 10 minutes.
- To the cooled brown butter, add light brown sugar and granulated sugar. Beat until combined and creamy (about 2 minutes). Add eggs one at a time, mixing well after each. Stir in vanilla extract.
- In a separate bowl, whisk together flour, rolled oats, baking soda, salt, and cinnamon. (Optional: Pulse oats in a food processor 2-3 times for a softer texture.)
- Gradually add dry ingredients to the wet mixture. Stir until just combined—do not overmix. Cover and chill dough for 30 minutes.
- Preheat oven to 350°F (175°C). Line baking sheets with parchment paper. Scoop dough into 1.5 tablespoon balls, spacing 2 inches apart. Bake 10-12 minutes, until edges are set and centers look slightly underdone.
- Transfer cookies to wire racks and cool completely for at least 20 minutes before filling.
- For the filling: Beat softened butter and cream cheese until smooth. Add powdered sugar, maple syrup, vanilla, and a pinch of salt. Beat until fluffy (about 2-3 minutes). Taste and adjust sweetness if desired.
- Spread or pipe 2-3 tablespoons of filling onto the flat side of half the cookies. Top with remaining cookies, pressing gently to sandwich together.
Notes
Chill the dough for chewy cookies and to prevent spreading. Use real maple syrup and quality vanilla for best flavor. For gluten-free, use a 1:1 gluten-free flour blend and certified gluten-free oats. Filling can be piped for neat edges. Cookies taste even better the next day as flavors meld.
Nutrition
- Serving Size: 1 cream pie
- Calories: 320
- Sugar: 24
- Sodium: 180
- Fat: 16
- Saturated Fat: 9
- Carbohydrates: 44
- Fiber: 2
- Protein: 4
Keywords: brown butter, oatmeal cream pies, maple vanilla filling, sandwich cookies, nostalgic dessert, chewy cookies, homemade, easy dessert, lunchbox treat, cream cheese filling


