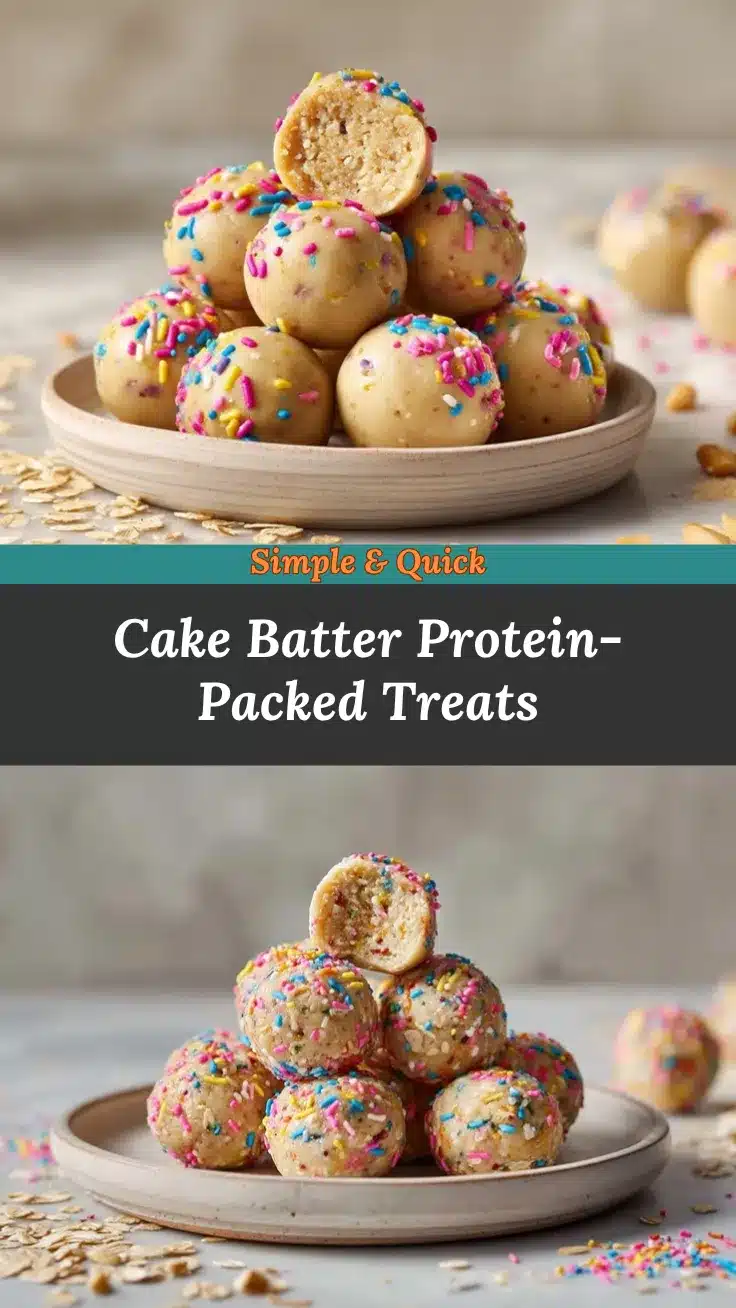
The first time I made cake batter protein balls, I was looking for a snack that felt indulgent but was still packed with nutrients. It became an instant hit—not just with me, but with my kids! These bite-sized snacks have all the sweet, nostalgic flavor of cake batter, but they’re healthy, protein-packed, and super easy to whip up. Honestly, they’re perfect for busy mornings, after-school munchies, or even as a midday pick-me-up.
If you’ve ever struggled to find a snack that both you and your little ones enjoy, this recipe is a game-changer. It’s quick, fun to make, and doesn’t require any baking (because who has time for that every day?). Plus, it’s customizable for different dietary needs. Let’s dig into why these cake batter protein balls are about to become your go-to snack.
Why You’ll Love This Recipe
- No-Bake Simplicity: These protein balls come together in 15 minutes flat—no oven required!
- The sweet cake batter flavor makes them irresistible to kids (and adults).
- Healthy and Filling: Packed with protein, they’re a much smarter choice than sugary snacks.
- Customizable: You can easily tweak the recipe for gluten-free, dairy-free, or nut-free diets.
- Perfect for Any Occasion: Whether you need a quick breakfast, lunchbox addition, or party treat, these protein balls fit the bill.
- Fun to Make: Rolling the balls is a great activity to do with kids—they’ll love getting hands-on in the kitchen.
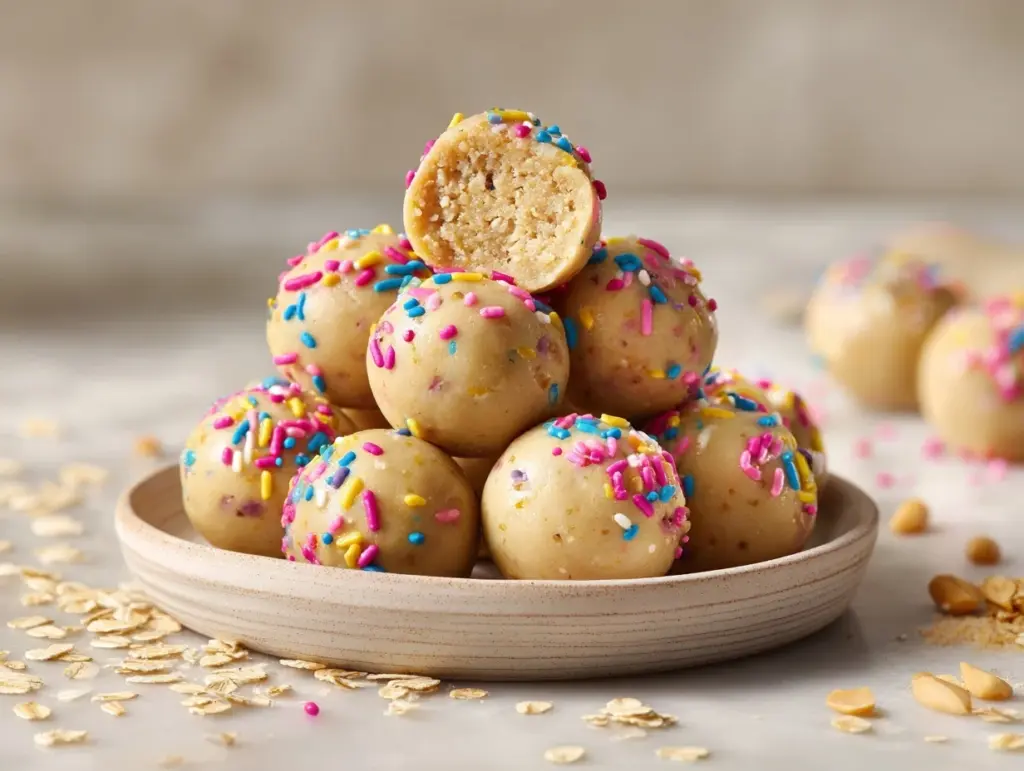
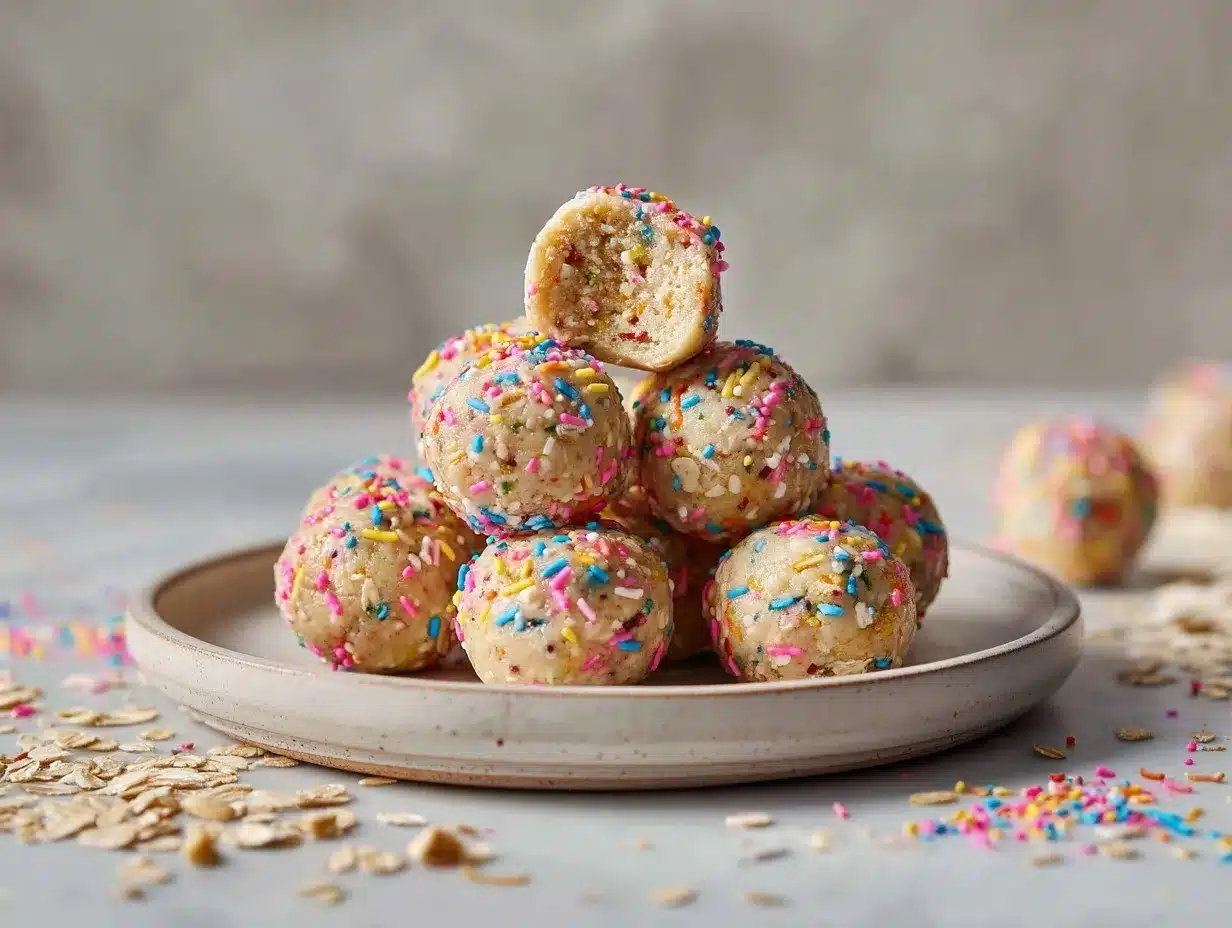
What sets this recipe apart is its cake batter flavor without being overly sweet or artificial. Plus, the texture is just spot-on—soft with a slight chew, and those sprinkles make them extra fun. Trust me, once you make these, you’ll be hooked.
What Ingredients You Will Need
This recipe uses simple, wholesome ingredients that you likely already have in your pantry. Here’s what you’ll need:
- Vanilla Protein Powder: Choose a high-quality brand you love. Vanilla works best for that authentic cake batter flavor.
- Oat Flour: Adds structure and a soft texture. You can make your own by blending oats into a fine powder.
- Almond Butter: Creamy almond butter provides healthy fats and helps bind everything together. Peanut butter works too!
- Honey: A natural sweetener that complements the vanilla flavor beautifully.
- Vanilla Extract: Enhances the cake batter vibe—don’t skip this!
- Sprinkles: For a fun, colorful touch. Choose naturally dyed sprinkles if you prefer a cleaner option.
- Milk: Use a splash of milk (any variety: dairy or plant-based) to adjust the consistency.
Optional swaps include using sunflower seed butter for a nut-free version or maple syrup in place of honey for a vegan-friendly adaptation. These ingredients are flexible enough to suit your preferences!
Equipment Needed
You don’t need fancy equipment for these protein balls—just the basics:
- Mixing Bowl: A medium-sized bowl to combine all the ingredients.
- Spatula: For stirring and scraping the sides of the bowl.
- Measuring Cups and Spoons: Precision makes all the difference in texture.
- Cookie Scoop: Optional, but it helps create evenly sized balls quickly.
- Hands: The most important tool for rolling the balls into shape!
If you don’t have a cookie scoop, a teaspoon works just fine for portioning. Cleanup is also a breeze since there’s no baking involved.
Preparation Method
- Combine Dry Ingredients: In a medium mixing bowl, whisk together the vanilla protein powder and oat flour. This ensures even distribution and prevents clumping.
- Add Wet Ingredients: Stir in the almond butter, honey, and vanilla extract. Mix well until a dough starts to form. It might look crumbly at first, but keep mixing—it will come together!
- Adjust Consistency: Add a splash of milk, one teaspoon at a time, until the dough is soft and holds together when pressed.
- Fold in Sprinkles: Gently fold in the sprinkles. Be careful not to overmix, or the colors might bleed.
- Roll into Balls: Using your hands or a cookie scoop, portion out the dough and roll into bite-sized balls. Aim for about 1-inch diameter.
- Chill: Place the protein balls on a plate or tray lined with parchment paper and refrigerate for at least 30 minutes to firm up.
- Serve: Enjoy straight from the fridge or pack them up for an on-the-go snack!
Pro Tip: If the dough feels too sticky, add a little more oat flour. If it’s too dry, add another splash of milk. It’s all about finding the perfect balance.
Cooking Tips & Techniques
- Choose the Right Protein Powder: Not all protein powders are created equal. Make sure to pick one with a flavor you love and a smooth texture.
- Don’t Skip the Sprinkles: They’re not just for looks—they add a subtle crunch and fun factor that kids adore.
- Use Warm Almond Butter: If your almond butter is too thick, warm it slightly to make mixing easier.
- Consistency Matters: The dough should be soft but firm enough to hold its shape. Adjust with oat flour or milk as needed.
- Get the Kids Involved: Rolling the balls is a great activity for little hands. Just lay down some parchment paper to keep things tidy.
Variations & Adaptations
This recipe is super versatile! Here are some fun ways to mix things up:
- Gluten-Free: Swap oat flour with almond flour or coconut flour for a gluten-free version.
- Dairy-Free: Use plant-based protein powder and almond milk instead of dairy-based options.
- Nut-Free: Replace almond butter with sunflower seed butter for a school-safe snack.
- Chocolate Lovers: Add mini chocolate chips instead of sprinkles or a tablespoon of cocoa powder to the mix.
- Seasonal Twist: Add a pinch of cinnamon or nutmeg for a holiday-inspired batch.
One of my favorite variations is rolling the balls in shredded coconut for a tropical vibe—it’s so delicious!
Serving & Storage Suggestions
These cake batter protein balls are best served chilled, straight from the fridge. Here’s how to store them:
- Refrigerator: Store in an airtight container for up to 1 week.
- Freezer: Freeze for up to 3 months. Just thaw them in the fridge overnight before serving.
- On-the-Go: Pack them in a small container or reusable bag for school lunches or snacks.
Pro Tip: The flavors deepen over time, so they taste even better the next day!
Nutritional Information & Benefits
Here’s a quick rundown of what makes these protein balls a smart snack choice:
- Protein-Packed: With approximately 6 grams of protein per ball, these are great for keeping you full and energized.
- Healthy Fats: Almond butter provides heart-healthy fats and a creamy texture.
- Low Sugar: Sweetened naturally with honey, they avoid the sugar crash of traditional snacks.
- Diet-Friendly: Easily adaptable for gluten-free, dairy-free, and vegan diets.
What’s not to love about a snack that’s fun, delicious, and nutritious?
Conclusion
If you’re looking for a snack that’s as fun to make as it is to eat, these cake batter protein balls are the answer. They’re healthy, kid-friendly, and packed with flavor—plus, they fit into almost any diet. The best part? You can customize them to suit your taste or whatever ingredients you have on hand.
Give this recipe a try and let me know how you like it! Whether you stick to the original or put your own spin on it, I’d love to hear about your creations. Drop a comment below, or share a photo on social media—there’s nothing better than seeing your kitchen adventures!
Enjoy these little bites of happiness, and remember, snacks don’t have to be boring when you can make something this fun and tasty.
FAQs
Can I use a different flavor of protein powder?
Absolutely! Vanilla works best for the classic cake batter taste, but chocolate or birthday cake flavors are great alternatives.
What if the dough is too sticky?
Add a bit more oat flour, one tablespoon at a time, until the texture firms up.
How do I make these nut-free?
Swap out almond butter for sunflower seed butter to make them safe for nut-free environments.
Can I freeze these protein balls?
Yes! Store them in an airtight container in the freezer for up to 3 months. Thaw in the fridge before enjoying.
Are these safe for toddlers?
Yes, these are great for toddlers! Just ensure they don’t have allergies to any of the ingredients.
Pin This Recipe!
Cake Batter Protein Balls

These no-bake cake batter protein balls are a healthy, kid-friendly snack packed with protein and nostalgic flavor, perfect for busy mornings or midday pick-me-ups.
- Prep Time: 15 minutes
- Cook Time: 0 minutes
- Total Time: 45 minutes
- Yield: 12 servings 1x
- Category: Snack
- Cuisine: American
Ingredients
- 1 cup vanilla protein powder
- 1 cup oat flour
- 1/2 cup almond butter
- 1/4 cup honey
- 1 teaspoon vanilla extract
- 2 tablespoons sprinkles
- 2–3 tablespoons milk (dairy or plant-based)
Instructions
- In a medium mixing bowl, whisk together the vanilla protein powder and oat flour to ensure even distribution.
- Stir in the almond butter, honey, and vanilla extract. Mix well until a dough starts to form.
- Add a splash of milk, one teaspoon at a time, until the dough is soft and holds together when pressed.
- Gently fold in the sprinkles, being careful not to overmix to avoid color bleeding.
- Using your hands or a cookie scoop, portion out the dough and roll into bite-sized balls, about 1-inch in diameter.
- Place the protein balls on a plate or tray lined with parchment paper and refrigerate for at least 30 minutes to firm up.
- Serve chilled or pack them for an on-the-go snack.
Notes
If the dough feels too sticky, add more oat flour. If it’s too dry, add another splash of milk. Rolling the balls is a fun activity for kids.
Nutrition
- Serving Size: 1 protein ball
- Calories: 120
- Sugar: 5
- Sodium: 50
- Fat: 6
- Saturated Fat: 1
- Carbohydrates: 10
- Fiber: 2
- Protein: 6
Keywords: protein balls, cake batter, no-bake snack, kid-friendly, healthy snack