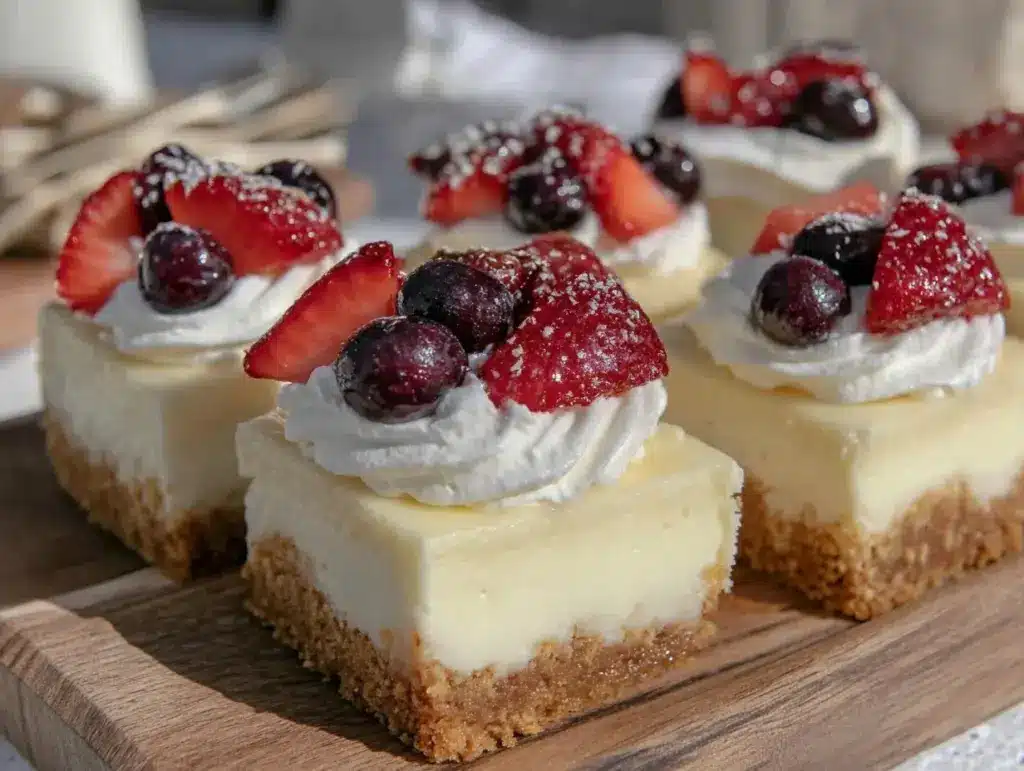
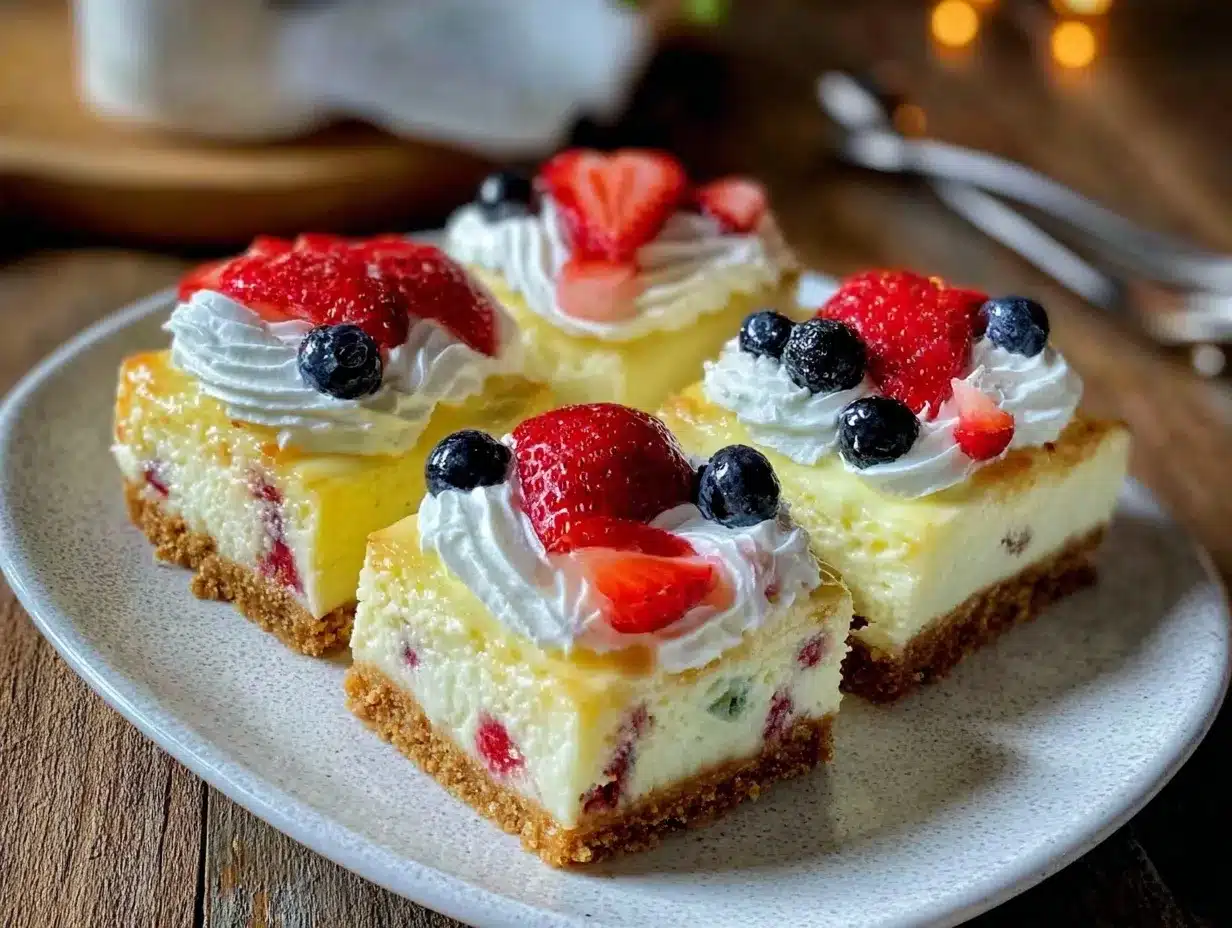
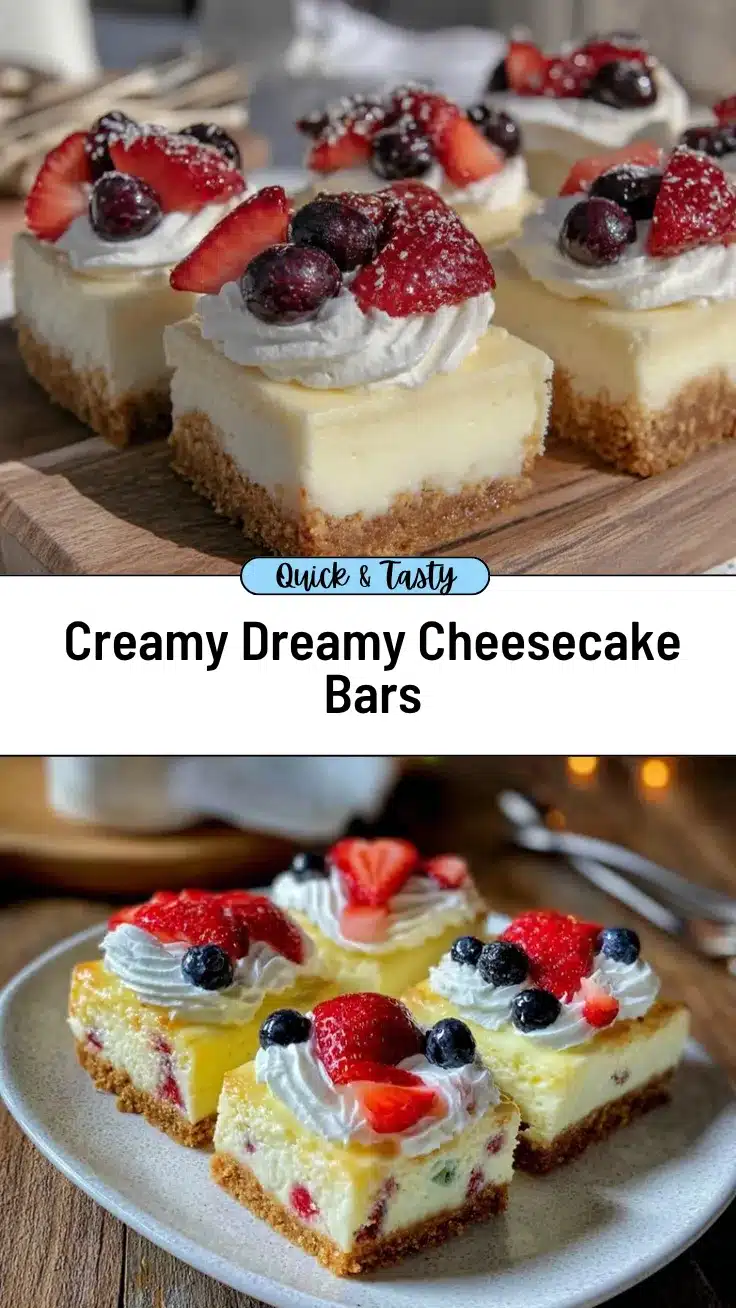
The first bite of these creamy cheesecake bars topped with fresh, juicy berries is like a little slice of heaven. That perfect balance of tangy cream cheese, buttery graham cracker crust, and the burst of sweetness from ripe berries makes this dessert unforgettable. I still remember the first time I made these for a family gathering—it was a hit, and not a single crumb was left on the plate! Whether you’re looking for a show-stopping dessert or just something indulgent to treat yourself, this recipe is bound to become one of your favorites.
What makes this recipe extra special is the combination of rich creaminess with the vibrant freshness of berries. It’s the ultimate treat for berry lovers (and cheesecake fans, obviously). The best part? These bars are easy to make and are perfect for sharing—or not, if you’re feeling selfish! Keep reading to learn how to make Creamy Cheesecake Bars with Fresh Berries that will have everyone asking for seconds.
Why You’ll Love This Recipe
- Effortlessly delicious: These cheesecake bars are simple to make and don’t require any fancy techniques. If you can stir and bake, you can make this recipe.
- Perfect balance: The creamy cheesecake filling paired with the buttery graham cracker crust is pure bliss. Add the tartness and sweetness of fresh berries, and it’s magic.
- Great for any occasion: Whether it’s a summer barbecue, holiday dinner, or a casual weekend dessert, these bars fit the bill.
- Customizable: You can mix and match your favorite berries or use what’s in season for a fresh twist every time.
- Crowd-pleaser: Everyone loves a good cheesecake, but these bars are easier to serve and share, making them ideal for gatherings.
- Made for berry lovers: This recipe lets the natural sweetness of fresh berries shine while complementing the creamy, rich filling.
Unlike regular cheesecake recipes, these bars are less fussy—no water baths or tricky techniques involved. They’re also a little easier to portion out, so you can avoid the awkward moment of trying to slice clean pieces from a big cheesecake. Plus, they’re just plain fun to make!
What Ingredients You Will Need
These Creamy Cheesecake Bars with Fresh Berries use simple ingredients that come together beautifully. Here’s what you’ll need:
- For the crust:
- 1 ½ cups graham cracker crumbs
- ¼ cup granulated sugar
- ½ cup unsalted butter, melted
- For the cheesecake filling:
- 16 oz cream cheese, softened (full-fat for the best texture)
- ½ cup granulated sugar
- 2 large eggs, room temperature
- 1 tsp vanilla extract
- ⅓ cup sour cream (adds a tangy richness)
- For the berry topping:
- 2 cups fresh mixed berries (e.g., strawberries, blueberries, raspberries)
- 2 tbsp sugar (optional, depending on the sweetness of your berries)
- Juice of ½ lemon (brightens the flavor)
Feel free to substitute ingredients as needed—use gluten-free graham crackers for a gluten-free option, or swap out sour cream for Greek yogurt if that’s what you have on hand. For the berries, you can use frozen ones if fresh isn’t available, but make sure to thaw and drain them before using.
Equipment Needed
- 9×13 inch baking pan (or a square pan for thicker bars)
- Parchment paper (for easy removal)
- Mixing bowls (medium and large)
- Electric hand mixer or stand mixer (for the smoothest cheesecake filling)
- Spatula (to spread the filling evenly)
- Measuring cups and spoons
- Knife or pastry cutter (to slice the bars neatly)
If you don’t have a stand mixer or electric hand mixer, a sturdy whisk will work, but it might take a bit more effort to get the cream cheese mixture perfectly smooth. For the baking pan, I recommend using one with straight edges for cleaner slices, but any baking dish will do.
How to Make Creamy Cheesecake Bars
- Prepare the crust: Preheat your oven to 350°F (175°C). Line your baking pan with parchment paper, leaving some overhang for easy removal later. In a medium-sized bowl, combine the graham cracker crumbs, sugar, and melted butter. Stir until evenly combined and the mixture resembles wet sand. Press the mixture firmly into the bottom of the pan to form an even layer. Bake for 8-10 minutes, then set aside to cool.
- Make the cheesecake filling: While the crust cools, beat the softened cream cheese and sugar together in a large bowl until smooth and creamy. Add the eggs one at a time, mixing well after each addition. Stir in the vanilla extract and sour cream until fully combined. Be sure to scrape down the sides of the bowl to ensure everything is evenly mixed.
- Assemble the bars: Pour the cheesecake filling over the cooled crust, spreading it out evenly with a spatula. Bake for 25-30 minutes, or until the center is set and no longer jiggles when you gently shake the pan. Allow the bars to cool to room temperature, then refrigerate for at least 3 hours (overnight is even better) to fully set.
- Prepare the berry topping: While the cheesecake is chilling, toss your fresh berries with sugar (if using) and lemon juice in a bowl. Let them sit for about 15 minutes so they release their juices and become even more flavorful.
- Top and serve: Once the cheesecake bars are fully chilled, gently spread the berry mixture over the top. Slice into squares or rectangles using a sharp knife. Serve chilled and enjoy the creamy, fruity goodness!
Pro tip: When slicing, wipe your knife clean after each cut for neat edges. These bars are perfect for prepping ahead of time, so don’t stress about making them last minute.
Cooking Tips & Techniques
Making cheesecake bars is easier than you might think, but a few tips can make your life even simpler:
- Room temperature ingredients: Make sure your cream cheese, eggs, and sour cream are at room temperature before mixing. This helps create a smooth, lump-free filling.
- Don’t overmix: It’s tempting to keep beating the filling until it’s super fluffy, but overmixing can lead to cracks when baking. Mix until just combined for the best results.
- Cool completely: Patience is key! Let the bars cool to room temperature after baking, then refrigerate for at least 3 hours to set. Rushing this step will make slicing messy.
- Use parchment paper: Line your pan with parchment paper and leave enough overhang to lift the cheesecake bars out easily. This makes slicing and serving a breeze.
- Choose ripe berries: For the topping, go for berries that are in season and perfectly ripe. They’ll provide sweetness and bright flavor without the need for extra sugar.
Remember, cheesecake bars are all about the texture. A smooth filling, crisp crust, and juicy topping make the perfect combination, so take your time with each step.
Variations & Adaptations
- Gluten-free option: Swap regular graham crackers for gluten-free graham crackers or use almond flour mixed with melted butter and sugar to create a nut-based crust.
- Dairy-free option: Use dairy-free cream cheese and coconut cream in place of the sour cream. Pair with a dairy-free buttery spread for the crust.
- Seasonal twist: In summer, try using peaches and nectarines for the topping. In fall, swap the berries for a spiced apple compote or caramel drizzle.
- Chocolate lovers: Add a layer of melted chocolate between the crust and cheesecake filling for a decadent treat.
- Nutty crunch: Sprinkle some toasted almonds or pecans over the berry topping for added texture and flavor.
Feel free to experiment with different combinations to suit your taste. That’s the beauty of cheesecake bars—so versatile and forgiving!
Serving & Storage Suggestions
These cheesecake bars are best served chilled, straight from the fridge. The cool, creamy filling pairs wonderfully with a hot cup of coffee or tea. For an extra elegant presentation, garnish each slice with a sprig of fresh mint or a dusting of powdered sugar.
If you’re serving them at a party, arrange the bars on a platter with some extra fresh berries scattered around—they’ll look stunning and inviting!
To store leftovers (if there are any!), keep the bars covered in the refrigerator for up to five days. For longer storage, you can freeze them for up to a month. Place the bars in an airtight container, layering parchment paper between slices to prevent sticking. Thaw them in the fridge overnight before serving.
When reheating, skip the microwave—it can melt the filling. Instead, let the bars sit at room temperature for about 15 minutes to take the chill off.
Nutritional Information & Benefits
These Creamy Cheesecake Bars with Fresh Berries are a delicious treat that you can enjoy guilt-free in moderation. Here’s a breakdown of some nutritional highlights:
- Calories: About 250-300 per bar, depending on the size and berry topping.
- Protein: Thanks to the cream cheese and eggs, these bars provide a nice protein boost to keep you satisfied.
- Fiber: Fresh berries add a good dose of fiber, which aids digestion.
- Vitamins: Berries are packed with antioxidants, vitamin C, and other nutrients to support your immune system.
- Low-carb option: Use almond flour for the crust and sugar substitutes for a lower-carb version of this recipe.
These bars are a wonderful way to enjoy a treat without going overboard, and the fresh berries make them feel lighter than traditional desserts. Eating dessert can be part of a balanced lifestyle, and this recipe is perfect for those moments when you want something sweet but still wholesome.
Conclusion
If you’re looking for a dessert that’s indulgent, easy to make, and perfect for fresh berry season, these Creamy Cheesecake Bars are it. I love how they come together quickly and never fail to impress. Plus, they’re so versatile—you can swap out the berries, tweak the crust, or even add different toppings to make them your own.
Don’t forget to share your creations! Leave a comment below to let me know how yours turned out or tag me on social media. I’d love to see your cheesecake bars and hear about any twists you made to the recipe. Happy baking!
Let’s face it—life is better with cheesecake. Go ahead and treat yourself and your loved ones to a batch of these creamy, dreamy bars. You won’t regret it!
FAQs
Can I use frozen berries instead of fresh?
Yes! Just make sure to thaw and drain them well before using to avoid excess moisture that could make the topping runny.
What’s the best way to prevent cracks in the cheesecake?
Don’t overmix the filling, and avoid opening the oven door while baking. Let the bars cool gradually to room temperature before refrigerating.
How long do these bars need to chill?
At least 3 hours, but overnight chilling is ideal for the best texture and flavor.
Can I make these ahead of time?
Absolutely! These bars are perfect for prepping ahead. Just store them in the fridge and add the berry topping right before serving.
Can I use a different crust instead of graham crackers?
Yes, you can use crushed cookies, like Oreos or shortbread, or even a nut-based crust for a gluten-free option.
Pin This Recipe!
Creamy Cheesecake Bars Recipe Perfect for Fresh Berry Lovers

These creamy cheesecake bars topped with fresh, juicy berries offer a perfect balance of tangy cream cheese, buttery graham cracker crust, and the burst of sweetness from ripe berries. They are easy to make and perfect for sharing or indulging yourself.
- Prep Time: 20 minutes
- Cook Time: 40 minutes
- Total Time: 4 hours
- Yield: 12 bars 1x
- Category: Dessert
- Cuisine: American
Ingredients
- 1 ½ cups graham cracker crumbs
- ¼ cup granulated sugar
- ½ cup unsalted butter, melted
- 16 oz cream cheese, softened
- ½ cup granulated sugar
- 2 large eggs, room temperature
- 1 tsp vanilla extract
- ⅓ cup sour cream
- 2 cups fresh mixed berries (e.g., strawberries, blueberries, raspberries)
- 2 tbsp sugar (optional)
- Juice of ½ lemon
Instructions
- Preheat your oven to 350°F (175°C). Line your baking pan with parchment paper, leaving some overhang for easy removal later. In a medium-sized bowl, combine the graham cracker crumbs, sugar, and melted butter. Stir until evenly combined and the mixture resembles wet sand. Press the mixture firmly into the bottom of the pan to form an even layer. Bake for 8-10 minutes, then set aside to cool.
- While the crust cools, beat the softened cream cheese and sugar together in a large bowl until smooth and creamy. Add the eggs one at a time, mixing well after each addition. Stir in the vanilla extract and sour cream until fully combined. Be sure to scrape down the sides of the bowl to ensure everything is evenly mixed.
- Pour the cheesecake filling over the cooled crust, spreading it out evenly with a spatula. Bake for 25-30 minutes, or until the center is set and no longer jiggles when you gently shake the pan. Allow the bars to cool to room temperature, then refrigerate for at least 3 hours (overnight is even better) to fully set.
- While the cheesecake is chilling, toss your fresh berries with sugar (if using) and lemon juice in a bowl. Let them sit for about 15 minutes so they release their juices and become even more flavorful.
- Once the cheesecake bars are fully chilled, gently spread the berry mixture over the top. Slice into squares or rectangles using a sharp knife. Serve chilled and enjoy!
Notes
[‘Make sure cream cheese, eggs, and sour cream are at room temperature for a smooth filling.’, ‘Avoid overmixing the filling to prevent cracks during baking.’, ‘Let the bars cool completely before refrigerating for at least 3 hours.’, ‘Use parchment paper with overhang for easy removal and clean slicing.’, ‘Choose ripe, fresh berries for the topping to enhance flavor.’]
Nutrition
- Serving Size: 1 bar
- Calories: 250300
- Sugar: 15
- Sodium: 150
- Fat: 16
- Saturated Fat: 10
- Carbohydrates: 22
- Fiber: 2
- Protein: 4
Keywords: cheesecake bars, berry dessert, creamy cheesecake, easy dessert, summer dessert, party dessert, berry cheesecake