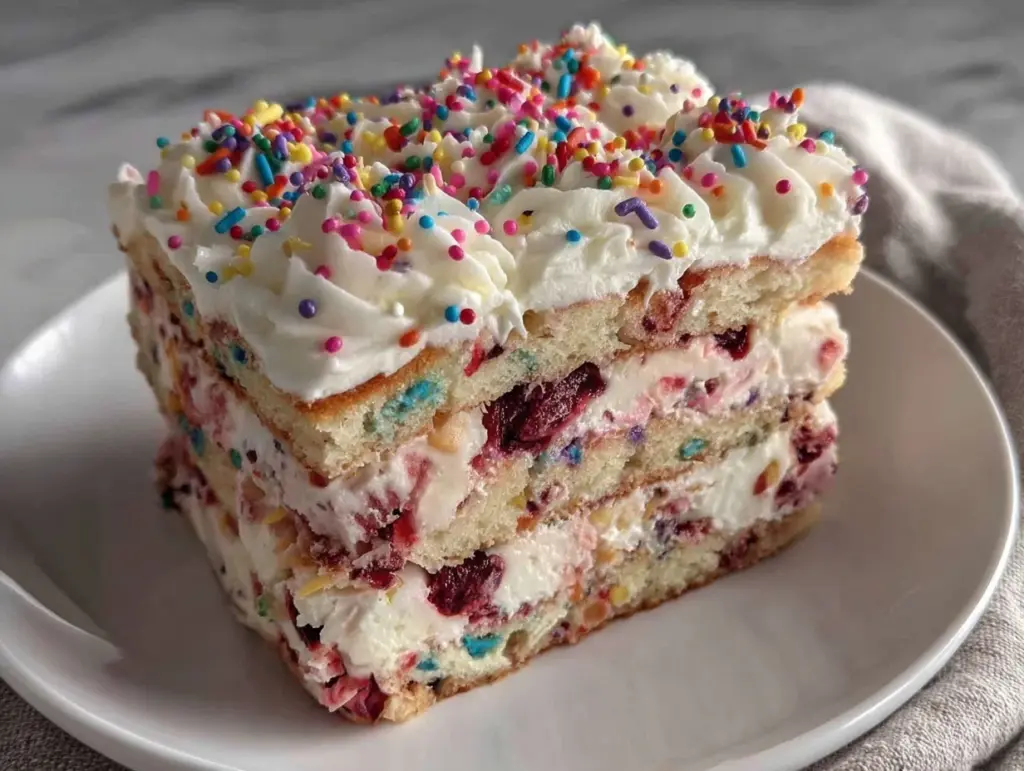
“Wait, you made this entire rainbow icebox cake with sprinkles in under 20 minutes?” That’s what my friend gasped the first time she saw the Creamy Funfetti Sprinkle Icebox Cake with Rainbow Layers chilling in my fridge. Honestly, I was half skeptical myself before this recipe became my go-to for last-minute celebrations. It all started one hectic afternoon when I wanted to whip up something festive but zero fuss. I had some leftover rainbow sprinkles from a neglected jar, a tub of whipped cream, and a box of store-bought vanilla wafers staring back at me. No baking, no complicated steps—just simple layers coming together like magic.
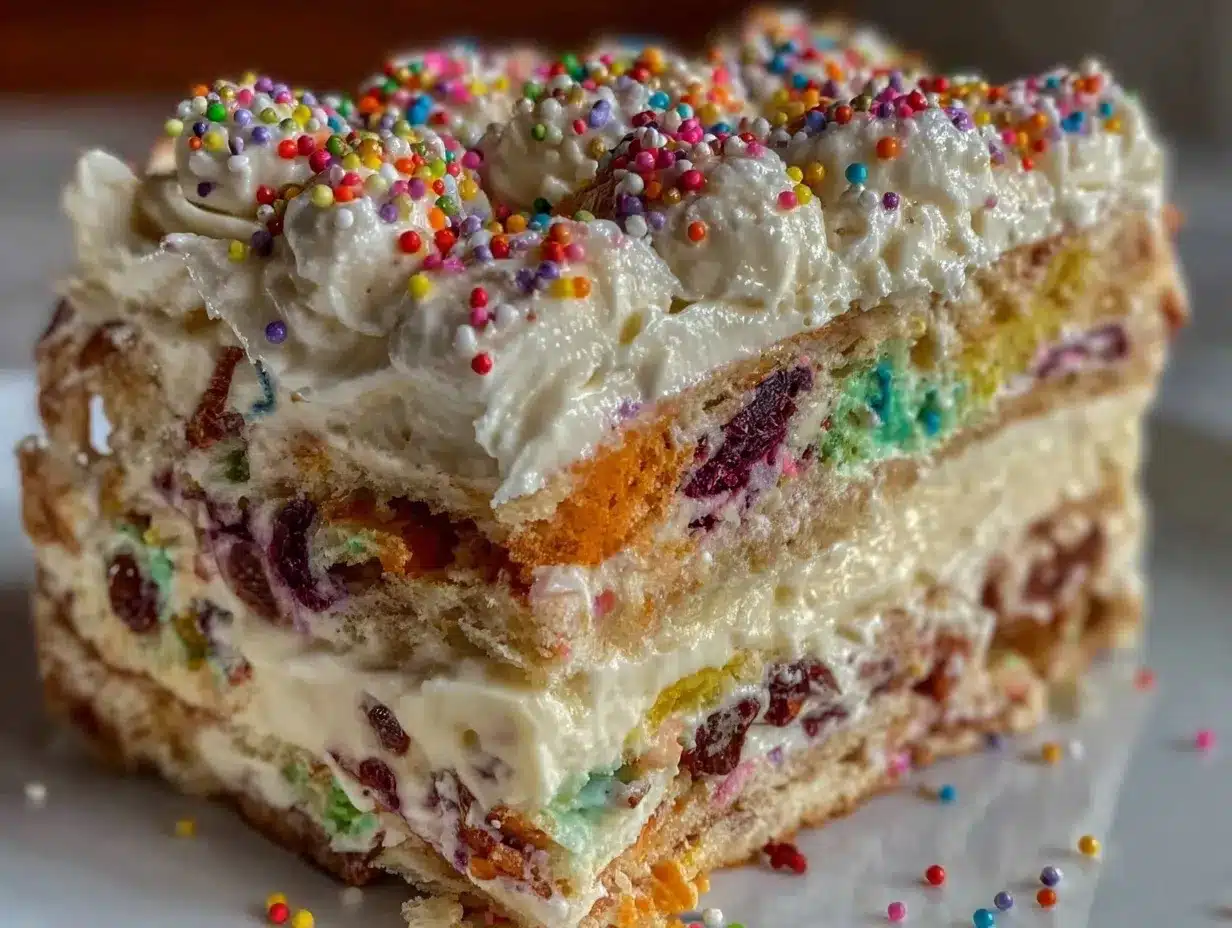
The vibrant colors peeked through the glass dish, tempting everyone before the first forkful even happened. I remember the quiet joy as the creamy layers and crunchy wafers melded overnight, creating a texture that felt like a party in every bite. What really stuck with me was how this icebox cake turned a rushed afternoon into a moment of pure delight—something so effortless yet so satisfying. It’s that kind of recipe that invites you to experiment, add a little extra sprinkle love, and savor the joy of simple, colorful desserts.
It’s funny how a spontaneous mix of pantry staples can become a new favorite, especially when the kids start asking for it again and again. This cake now has a little corner in my recipe box, right next to my tried-and-true creamy lemon posset and the cool, refreshing vibe of homemade Thai iced tea. The layers of rainbow sprinkles nestled in silky cream? That’s the kind of comfort I didn’t know I needed, quietly waiting in the fridge.
Why You’ll Love This Creamy Funfetti Sprinkle Icebox Cake with Rainbow Layers
Honestly, this is not just another dessert—it’s a celebration wrapped in creamy, colorful layers that anyone can make. Here’s why you’ll find yourself coming back to this recipe:
- Quick & Easy: From start to fridge, this cake comes together in about 20 minutes. No oven required, which means less heat and more time to enjoy the party.
- Simple Ingredients: You don’t need to hunt down fancy or obscure items. Most of these ingredients are pantry staples, like whipped cream, vanilla wafers, and rainbow sprinkles.
- Perfect for Any Occasion: Whether it’s a birthday, potluck, or just a way to brighten up a dull weeknight, the rainbow layers make it fun and festive.
- Crowd-Pleaser: Kids adore the sprinkles, and adults can’t resist the creamy texture combined with the light crunch of wafers.
- Unbelievably Delicious: The balance between the sweet, fluffy cream and the slightly crunchy wafers with sprinkles is just perfect—comfort food that feels special.
What sets this apart? The layering technique, honestly. Each rainbow layer gets a gentle sprinkle of colorful funfetti right into the cream, which softens just enough overnight, making every slice a surprise of textures and colors. Plus, swapping in store-bought vanilla wafers keeps it easy but still tasty. I’ve tried mixing in vanilla bean paste for a richer cream flavor, and that little twist really brings a whole new depth without complicating things.
It’s the kind of dessert that makes you close your eyes and smile after the first bite—simple, joyful, and just a little bit nostalgic. It’s not just a cake; it’s a mood lifter, a quick fix for when you want to impress without stress.
What Ingredients You Will Need
This recipe uses simple, wholesome ingredients to deliver bold flavor and satisfying texture without the fuss. Most are everyday essentials, and you can easily swap a few based on what’s in your kitchen.
- For the Cream Layers:
- 2 cups (480 ml) heavy whipping cream, cold (for best volume and fluffiness)
- 1/2 cup (60 g) powdered sugar, sifted (adds sweetness without graininess)
- 1 teaspoon pure vanilla extract (or vanilla bean paste for extra flavor)
- 4 oz (115 g) cream cheese, softened (for tang and creaminess)
- For the Funfetti Layers:
- 1/2 cup (90 g) rainbow sprinkles (choose quality non-melting sprinkles like Wilton brand)
- For the Cake Base:
- 2 packs (about 9 oz / 255 g) vanilla wafer cookies (Nilla wafers work great)
Ingredient Tips: I recommend using chilled heavy cream straight from the fridge for easier whipping. If you want a dairy-free option, coconut whipped cream can substitute but the texture will be a little different. For a gluten-free version, try gluten-free vanilla wafers or swap with thin almond cookies.
Equipment Needed
- Mixing bowls — preferably one large for whipping cream and another for cream cheese
- Electric hand mixer or stand mixer with whisk attachment (makes whipping the cream smooth and fast)
- Rubber spatula for folding ingredients gently
- 9×13 inch (23×33 cm) glass or clear plastic rectangular dish (so you can see those gorgeous rainbow layers)
- Measuring cups and spoons for accuracy
- Plastic wrap or airtight cover for chilling
If you don’t have an electric mixer, a good old-fashioned whisk will work but expect a bit of an arm workout! I’ve also tried using a hand blender with a whisk attachment, which worked surprisingly well. For budget-friendly options, silicone spatulas and glass dishes from affordable brands do the job without fuss.
Preparation Method
- Prepare the Cream Mixture (10 minutes): In a large bowl, beat the softened cream cheese with an electric mixer until smooth and creamy. Slowly add the powdered sugar and vanilla extract, mixing well. In a separate chilled bowl, whip the heavy cream until soft peaks form. Gently fold the whipped cream into the cream cheese mixture using a rubber spatula. The result should be light, fluffy, and smooth.
- Divide and Color the Cream: If you want to create distinct rainbow layers, divide the cream mixture evenly into five bowls. Add a few drops of food coloring to each bowl to get red, orange, yellow, green, and blue. Mix gently to combine without deflating the cream. (If you prefer a more subtle pastel look, use less color.)
- Layering the Cake (5-7 minutes): Spread a thin layer of one colored cream mixture evenly at the bottom of your dish. Lightly sprinkle a handful of vanilla wafers over the cream—try to cover evenly but don’t overcrowd. Add a generous sprinkle of rainbow sprinkles over the wafers to infuse that funfetti magic. Repeat this layering process with each colored cream and wafers in rainbow order, finishing with a final layer of cream and sprinkles on top.
- Chill the Cake: Cover the dish tightly with plastic wrap and refrigerate for at least 6 hours, preferably overnight. This allows the wafers to absorb moisture and become soft while the cream layers set beautifully.
- Serving: Before serving, use a sharp knife to cut clean slices. You’ll notice the rainbow layers shining through each cut—pure joy!
Pro Tip: If your cream mixture looks too thick, add a tablespoon of milk or cream to loosen it slightly. If it’s too runny, whip for a bit longer before folding. The balance is key for those perfect layers!
Cooking Tips & Techniques
Whipping the cream just right is the cornerstone of this recipe. Under-whip, and the cream won’t hold layers; over-whip, and it turns grainy or buttery. I learned the hard way that cold equipment makes a huge difference—chill your mixing bowl and beaters for about 15 minutes before starting. It’s a little extra step but really pays off.
When folding the whipped cream into the cream cheese mixture, be gentle. Use a spatula to fold with a light hand rather than stirring vigorously. You want to keep as much air in the mixture as possible to maintain that fluffy texture.
Layering takes a bit of patience. Don’t rush spreading the cream—smooth it out evenly for clean layers. Also, sprinkle the wafers and funfetti lightly but evenly to avoid clumps. A thin layer of wafers per cream layer is enough to soften perfectly overnight without becoming mushy.
I’ve found that letting the cake chill overnight is best for flavor melding and texture. If you’re short on time, at least 6 hours will do, but the longer it rests, the better it tastes.
Variations & Adaptations
- Flavor Twists: Add a teaspoon of almond extract or lemon zest to the cream mixture for a subtle flavor lift.
- Dietary Adjustments: Use coconut whipped cream and dairy-free cream cheese to make this vegan-friendly. Swap vanilla wafers for gluten-free cookies to accommodate gluten sensitivities.
- Seasonal Fruit Layers: Layer in thin slices of fresh strawberries, mango, or kiwi between cream layers for a fruity surprise and extra color.
- Chocolate Funfetti: Mix mini chocolate chips into one of the cream layers or swap vanilla wafers for chocolate wafers for a richer taste.
- Personal Favorite: I once added a thin drizzle of salted caramel sauce between the layers—unexpected but delicious and a hit at a family gathering.
Serving & Storage Suggestions
This icebox cake is best served chilled straight from the refrigerator. The creamy layers and softened wafers are at their peak when cool, giving that melt-in-your-mouth feel. For presentation, serve in clear glass dishes or individual mason jars to show off the vibrant rainbow layers.
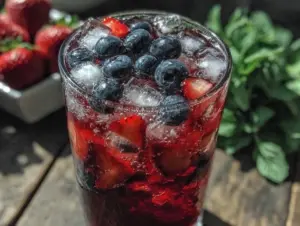
Pair this dessert with light beverages like a sparkling lemonade or the refreshing peach Bellini for an extra festive vibe. It’s also surprisingly complementary to creamy drinks like the homemade Thai iced tea.
Store leftovers covered in the fridge for up to 3 days. The flavors develop even more, but the wafers can get a bit too soft after a while. If you want to keep it longer, freeze slices wrapped well and thaw in the fridge before serving. Reheat is not recommended as it alters texture.
Nutritional Information & Benefits
This cake is a treat, but it also offers some nutritional perks thanks to the cream cheese and heavy cream, which provide calcium and protein. A standard serving (about 1/8 of the cake) contains approximately 320 calories, 22g fat, 25g carbs, and 4g protein.
For those mindful of dietary restrictions, swapping ingredients can make this gluten-free or vegan. Just watch the sugar content in sprinkles if you’re managing intake. The funfetti sprinkles bring pure joy but are best enjoyed in moderation.
Conclusion
The Creamy Funfetti Sprinkle Icebox Cake with Rainbow Layers is one of those rare recipes that feels both festive and laid-back. It’s perfect when you want something colorful and creamy without standing over a hot stove or oven. I love how it can be made ahead, waiting patiently in the fridge to surprise everyone with its joyful layers.
Feel free to play with colors, flavors, and add-ins to make it truly your own. If you’ve got a sweet tooth and a craving for easy, this cake has your name on it. I’d love to hear how you customize yours or what memories it brings up—drop a comment or share your tweaks.
Here’s to colorful desserts and the little moments they make sweeter!
Frequently Asked Questions About Creamy Funfetti Sprinkle Icebox Cake
Can I make this cake ahead of time?
Absolutely! It’s best made at least 6 hours ahead, preferably overnight, so the layers set and the wafers soften perfectly.
What can I use instead of vanilla wafers?
Gluten-free cookies, graham crackers, or thin almond cookies work well as alternatives, depending on your dietary needs.
How do I prevent the sprinkles from bleeding color?
Use quality sprinkles designed for baking, like Wilton’s non-melting types. Adding them last and storing the cake properly in the fridge helps avoid color bleeding.
Can I freeze this icebox cake?
Yes, slices freeze well when wrapped tightly. Thaw in the fridge before eating. Avoid reheating as it changes texture.
Is there a dairy-free version of this cake?
Yes! Substitute dairy cream with coconut whipped cream and use dairy-free cream cheese. Choose dairy-free cookies as needed.
Pin This Recipe!

Creamy Funfetti Sprinkle Icebox Cake with Rainbow Layers
A quick and easy no-bake icebox cake featuring creamy layers, rainbow sprinkles, and vanilla wafers, perfect for festive occasions and last-minute celebrations.
- Prep Time: 15 minutes
- Cook Time: 0 minutes
- Total Time: 6 hours 15 minutes
- Yield: 8 servings 1x
- Category: Dessert
- Cuisine: American
Ingredients
- 2 cups (480 ml) heavy whipping cream, cold
- 1/2 cup (60 g) powdered sugar, sifted
- 1 teaspoon pure vanilla extract (or vanilla bean paste)
- 4 oz (115 g) cream cheese, softened
- 1/2 cup (90 g) rainbow sprinkles (non-melting, e.g., Wilton brand)
- 2 packs (about 9 oz / 255 g) vanilla wafer cookies (e.g., Nilla wafers)
Instructions
- Prepare the Cream Mixture (10 minutes): In a large bowl, beat the softened cream cheese with an electric mixer until smooth and creamy. Slowly add the powdered sugar and vanilla extract, mixing well. In a separate chilled bowl, whip the heavy cream until soft peaks form. Gently fold the whipped cream into the cream cheese mixture using a rubber spatula until light, fluffy, and smooth.
- Divide and Color the Cream: Divide the cream mixture evenly into five bowls. Add a few drops of food coloring to each bowl to create red, orange, yellow, green, and blue layers. Mix gently to combine without deflating the cream.
- Layering the Cake (5-7 minutes): Spread a thin layer of one colored cream mixture evenly at the bottom of a 9×13 inch glass or clear plastic dish. Lightly sprinkle a handful of vanilla wafers over the cream, then add a generous sprinkle of rainbow sprinkles. Repeat layering with each colored cream and wafers in rainbow order, finishing with a final layer of cream and sprinkles on top.
- Chill the Cake: Cover the dish tightly with plastic wrap and refrigerate for at least 6 hours, preferably overnight, to allow wafers to soften and cream layers to set.
- Serving: Use a sharp knife to cut clean slices before serving, revealing vibrant rainbow layers.
Notes
Use chilled heavy cream and cold equipment for best whipping results. Fold whipped cream gently into cream cheese mixture to keep it fluffy. Use quality non-melting sprinkles to avoid color bleeding. Chill at least 6 hours or overnight for best texture. For dairy-free, substitute coconut whipped cream and dairy-free cream cheese; use gluten-free cookies for gluten-free version.
Nutrition
- Serving Size: 1 slice (1/8 of cake
- Calories: 320
- Fat: 22
- Carbohydrates: 25
- Protein: 4
Keywords: funfetti, icebox cake, rainbow layers, no bake dessert, vanilla wafers, sprinkles, easy dessert, party dessert