“Hey, you got any dessert ideas that don’t need the oven?” my friend texted me one soggy Saturday afternoon. Honestly, I was about ready to just call it quits and grab takeout, but something about that question nudged me toward the kitchen. I rummaged through my pantry and found mascarpone, ladyfingers, and a lonely bottle of espresso. Not exactly the lineup I planned for, but hey, sometimes the best things happen when you’re not looking.
I whipped up these creamy no-bake tiramisu cups with espresso without much fuss, expecting maybe a passable snack. Instead? They turned out so silky, rich, and just perfectly coffee-kissed that I couldn’t stop sneaking bites. I ended up making them twice that week, hiding cups in the fridge from my own sweet tooth.
What really got me was how effortless the whole thing was—no baking, minimal cleanup, and that creamy texture which felt indulgent yet light. It felt like a little calming ritual amid the chaos of a rainy day, a sweet pause that made everything a bit better. The espresso gave it a bold kick, but not in a bitter way; more like a cozy hug from the inside.
These tiramisu cups aren’t just about dessert; they’re about those quiet moments you carve out for yourself or share with good company. They stuck with me because they proved that sometimes, the best recipes come from just winging it with what you have. And honestly, isn’t that the kind of recipe we all need more of? This one’s a keeper, and I’m happy to share how you can make it your own.
Why You’ll Love This Recipe
After testing and tweaking this creamy no-bake tiramisu cups with espresso recipe multiple times (yes, I’m guilty of making it several weeks in a row), I can confidently say it’s a keeper for any dessert lover who values simplicity without sacrificing flavor. Here’s what sets this recipe apart and why it’s perfect for your kitchen:
- Quick & Easy: Comes together in under 30 minutes, perfect for busy weeknights or unexpected guests.
- Simple Ingredients: Uses pantry staples and fresh dairy items you probably already have on hand.
- Perfect for Entertaining: Individual cups make it easy to serve at parties or casual get-togethers.
- Crowd-Pleaser: The balance of creamy mascarpone, espresso-soaked ladyfingers, and a dusting of cocoa wins over both kids and adults.
- Unbelievably Delicious: The texture is luxuriously smooth and light, with just enough coffee flavor to keep things interesting.
What sets this tiramisu apart from the rest? The no-bake method means you skip the fuss of ovens and long chilling times while still getting that classic Italian dessert feel. The espresso infusion isn’t overpowering—it’s just the right touch to bring out the richness of the mascarpone and the subtle crunch of the ladyfingers. Plus, layering it all in cups not only looks beautiful but makes portion control easy.
Whether you’re after a fuss-free dessert after a long day or want to impress guests without breaking a sweat, this recipe brings a little joy and comfort in every spoonful. It’s the kind of treat that quietly steals the show, without needing a fancy setup.
What Ingredients You Will Need
This recipe uses simple, wholesome ingredients to deliver bold flavor and satisfying texture without the fuss. Most of these are pantry staples or easy to find at any grocery store. If you don’t have something, I’ve included substitutions so you can make it work.
- Mascarpone Cheese (8 oz / 225 g) – The star of the creamy filling. Choose a good quality brand like Galbani for the best texture.
- Heavy Cream (1 cup / 240 ml) – For whipping into soft peaks, which adds lightness.
- Granulated Sugar (1/3 cup / 65 g) – Sweetens the mascarpone mixture without overpowering.
- Espresso (1 cup / 240 ml) – Freshly brewed and cooled. Essential for soaking ladyfingers to get that authentic coffee flavor.
- Ladyfingers (about 24 pieces) – Light and airy biscuits that soak up the espresso perfectly. If unavailable, use sponge cake pieces.
- Cocoa Powder (for dusting) – Unsweetened, to finish with that classic tiramisu look.
- Vanilla Extract (1 tsp) – Adds a subtle warmth to the cream filling.
- Optional: Coffee Liqueur (2 tbsp) – Like Kahlúa, for an adult twist and deeper flavor (can be omitted).
Ingredient Tips: For best results, use cold heavy cream and mascarpone straight from the fridge. If you prefer a dairy-free version, swap mascarpone with a coconut cream-based spread and use coconut milk for whipping.
If you want to try a gluten-free option, almond flour-based cakes can be sliced and used instead of ladyfingers, though texture will differ slightly.
Equipment Needed
- Mixing Bowls: At least two – one for whipping cream, one for mascarpone mixture.
- Electric Mixer or Whisk: An electric hand mixer speeds up whipping the cream, but a sturdy whisk works if you have patience.
- Measuring Cups and Spoons: To get the sweetness and espresso just right.
- Serving Cups or Glasses: Small clear cups work beautifully to showcase the layers.
- Sifter or Fine Mesh Strainer: For dusting cocoa powder evenly on top.
Optional but handy:
- Espresso Machine or Moka Pot: For making fresh espresso. If you don’t have one, strong brewed coffee can substitute, but espresso is best.
- Refrigerator Space: You’ll want to chill the cups for at least 4 hours or overnight to let flavors meld and texture set.
Personally, I find that using glass cups not only looks fancy but helps me gauge portion size better than bowls. If you don’t have a sifter, just dust the cocoa powder through a small tea strainer for a light touch.
Preparation Method
- Prepare the Espresso: Brew 1 cup (240 ml) of espresso and let it cool to room temperature. If you want a boozy touch, stir in 2 tablespoons of coffee liqueur now. (Approx. 10 minutes)
- Whip the Cream: In a chilled mixing bowl, whip 1 cup (240 ml) of heavy cream with 1/3 cup (65 g) sugar until soft peaks form. This usually takes about 3-5 minutes with an electric mixer. It should feel light and billowy, not stiff.
- Mix the Mascarpone Filling: In another bowl, gently fold 8 oz (225 g) mascarpone cheese with 1 teaspoon vanilla extract until smooth. Carefully fold in the whipped cream, combining until creamy and uniform. Avoid overmixing or the cream might deflate.
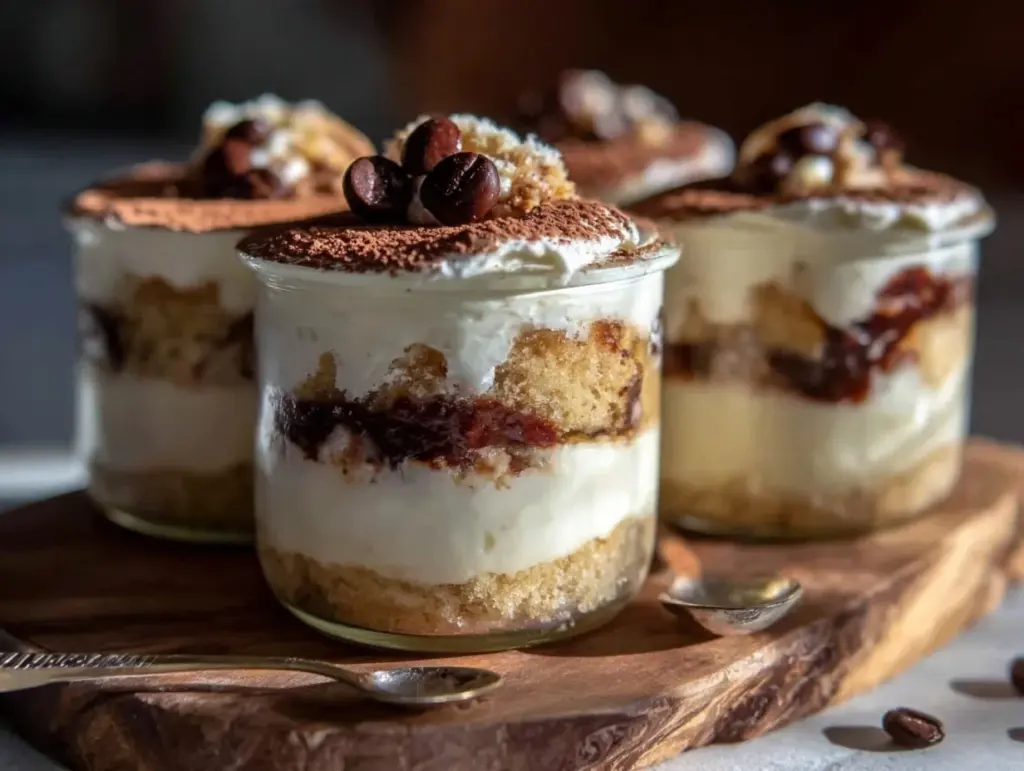
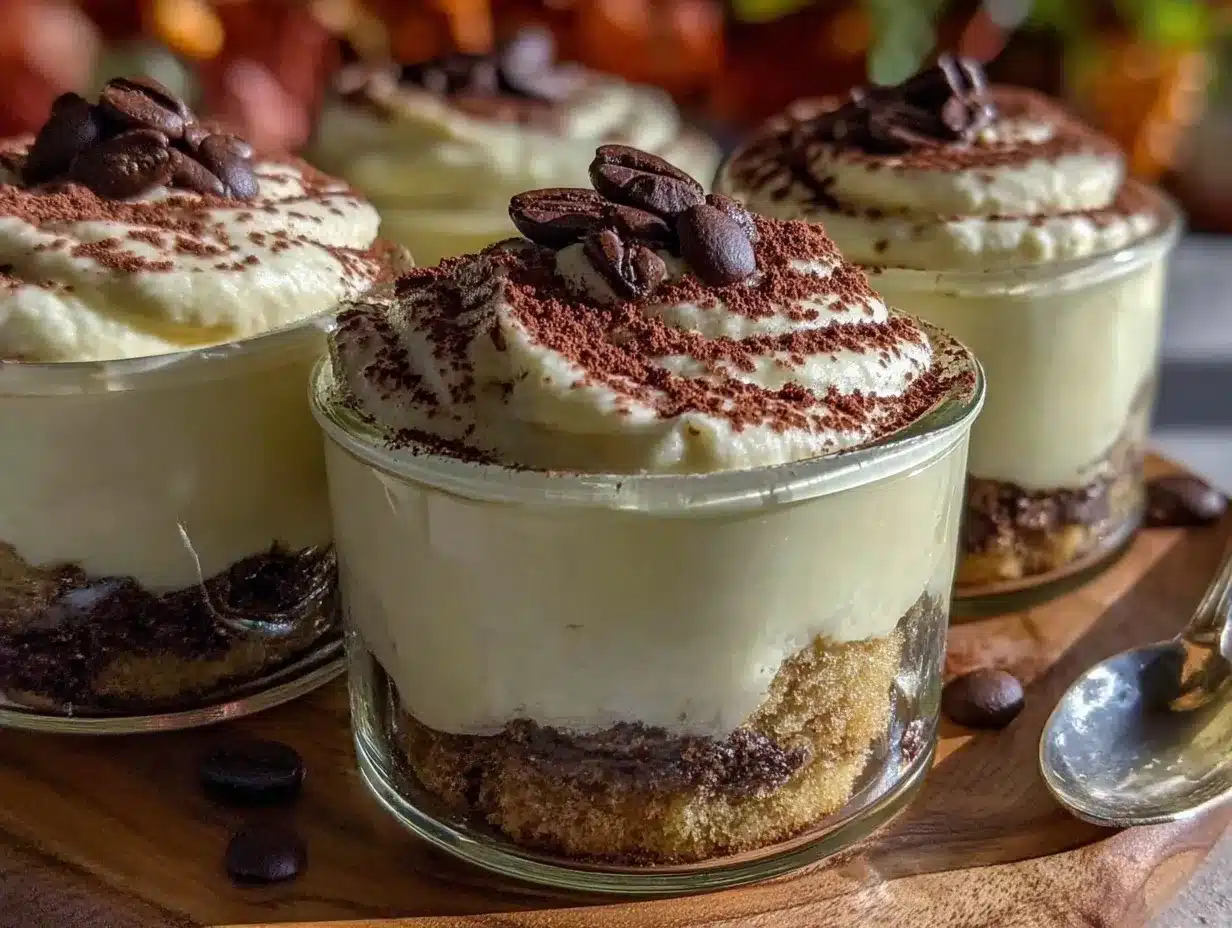
- Assemble the Layers: Quickly dip each ladyfinger into the cooled espresso for about 1-2 seconds—just enough to soak but not soggy. Place a layer of soaked ladyfingers at the bottom of each serving cup (about 3-4 ladyfingers per cup).
- Add Mascarpone Cream: Spoon a generous layer of the mascarpone mixture over the ladyfingers, smoothing the top with the back of a spoon.
- Repeat Layers: Add another layer of espresso-dipped ladyfingers and top with the remaining mascarpone cream. The cups should be about 3/4 full.
- Chill: Cover the cups with plastic wrap and refrigerate for at least 4 hours, preferably overnight. This resting time lets the flavors blend and the texture become luscious.
- Finish and Serve: Just before serving, dust the tops with unsweetened cocoa powder using a sifter or fine mesh strainer. For a little extra flair, sprinkle shaved dark chocolate or a few espresso beans on top.
Pro Tip: Don’t over-soak the ladyfingers or they’ll turn mushy—just a quick dip is enough. If your mascarpone is too firm, let it sit out for 10 minutes to soften before mixing. And if you’re pressed for time, these cups can be enjoyed after just 2 hours chilling, though the flavor deepens with longer wait.
Cooking Tips & Techniques
Getting the perfect creamy no-bake tiramisu cups with espresso is all about balance and timing. Here are some tips that I picked up after a few trial runs (and a couple of near disasters):
- Whip Cream to Soft Peaks: It’s tempting to whip the cream stiff, but soft peaks blend more smoothly with mascarpone, resulting in that classic airy texture.
- Use Fresh Espresso: Instant coffee just won’t cut it here. The bold, fresh espresso flavor is what makes these cups sing.
- Don’t Over-Dip Ladyfingers: A quick 1-2 second dip is enough. Too long and they’ll fall apart, ruining the layers.
- Work Quickly: Ladyfingers soak up espresso fast, so assemble swiftly to avoid sogginess.
- Chilling Matters: The longer you chill, the better the flavors marry. Overnight is ideal if you can wait.
I remember the first time I tried making tiramisu cups without chilling enough—the texture was too loose and the espresso flavor hadn’t mellowed. Lesson learned: patience pays off. Also, when I first tried adding coffee liqueur, it was a game changer, but feel free to skip it if you prefer non-alcoholic.
Multitasking tip: While the cups chill, you can prep a simple coffee or whip up a quick appetizer like buffalo chicken stuffed mushrooms to keep the party going.
Variations & Adaptations
This recipe is really flexible—here are a few ways I’ve adapted it over time to suit different occasions and preferences:
- Chocolate Lover’s Twist: Add a layer of chocolate ganache or sprinkle mini chocolate chips between layers for extra richness.
- Fruit Infusion: In warmer months, swap espresso for chilled coffee mixed with a splash of orange liqueur and add fresh berries between layers for a bright contrast.
- Dairy-Free Version: Use coconut cream whipped with a bit of powdered sugar and a dairy-free cream cheese alternative. Ladyfingers can be replaced with gluten-free biscuits.
- Low-Sugar Option: Substitute sugar with a natural sweetener like erythritol or monk fruit sweetener; reduce quantity slightly to taste.
- Instant Pot Variation: For a warm dessert, layer ingredients in a heatproof dish and steam in an Instant Pot for 15-20 minutes, then chill before serving.
One of my favorite tweaks was layering in some crushed gluten-free chocolate chip cookies for a fun texture contrast. It brought a playful crunch that balanced the creamy softness beautifully.
Serving & Storage Suggestions
Serve these creamy no-bake tiramisu cups chilled for the best texture and flavor. They look lovely in clear glass cups or small mason jars, dusted with cocoa powder and perhaps a few chocolate shavings or espresso beans on top for garnish.
They pair wonderfully with a fresh cup of espresso or coffee, making for a cozy finish to a meal or a pick-me-up treat during afternoon breaks. If you’re serving at a party, arrange them alongside light bites like creamy white pizza with ricotta and spinach for a nice flavor balance.
Leftovers keep well covered in the refrigerator for up to 3 days. The flavors mellow even more with time, so sometimes they taste better the next day. When reheating, you’re better off enjoying them cold or at room temperature—warming them up can cause the mascarpone to separate.
For longer storage, these cups can be frozen without the cocoa dusting. Thaw in the fridge overnight and add cocoa right before serving. Texture might change slightly but still delicious.
Nutritional Information & Benefits
Each serving of these creamy no-bake tiramisu cups packs approximately:
| Calories | Fat | Protein | Carbs | Sugar |
|---|---|---|---|---|
| 320 kcal | 22 g | 5 g | 25 g | 18 g |
Key ingredients like mascarpone and heavy cream provide a good source of calcium and healthy fats, which help keep you full and satisfied. The espresso adds antioxidants and a small caffeine boost without added calories.
This dessert is gluten-friendly if you choose gluten-free ladyfingers or alternatives, and can be adapted to keto or low-carb diets by swapping sugars and ladyfingers for suitable substitutes. Note that it contains dairy and eggs (in ladyfingers), so those with allergies should adjust accordingly.
From my wellness standpoint, the recipe strikes a nice balance—it feels indulgent but made with quality ingredients, so when enjoyed in moderation, it’s a sweet treat that doesn’t weigh you down.
Conclusion
If you’re looking for a creamy, fuss-free dessert that feels special but doesn’t demand hours in the kitchen, these no-bake tiramisu cups with espresso are a fantastic pick. They’re easy to customize, quick to assemble, and bring that classic Italian coffeehouse vibe right to your table.
I love how this recipe started as a happy accident and became a weekly go-to, especially when life gets hectic. It’s proof that sometimes the simplest ideas—just a few good ingredients combined thoughtfully—can bring the most comfort.
Give it a try, tweak it to your taste, and don’t forget to share how it worked out for you. Your next favorite dessert might just be hiding in these cups.
FAQs about Creamy No-Bake Tiramisu Cups with Espresso
Can I use regular coffee instead of espresso?
Yes, but it’s best to make it strong and let it cool completely. Espresso gives a richer, bolder flavor, but strong brewed coffee can be a good substitute.
How long should I soak the ladyfingers?
Just 1-2 seconds per ladyfinger to avoid getting soggy. A quick dip is enough to absorb flavor but keep the structure.
Can I prepare these tiramisu cups ahead of time?
Absolutely! They actually taste better after chilling overnight, which lets the flavors meld and texture set perfectly.
Is it possible to make this dessert vegan?
Yes, by using coconut cream whipped to stiff peaks, dairy-free cream cheese alternatives, and vegan ladyfingers or sponge cake, you can make a vegan-friendly version.
What’s the best way to store leftover tiramisu cups?
Keep them covered in the refrigerator for up to 3 days. Avoid freezing if possible to maintain the creamy texture, but if you do freeze, thaw slowly in the fridge.
Pin This Recipe!
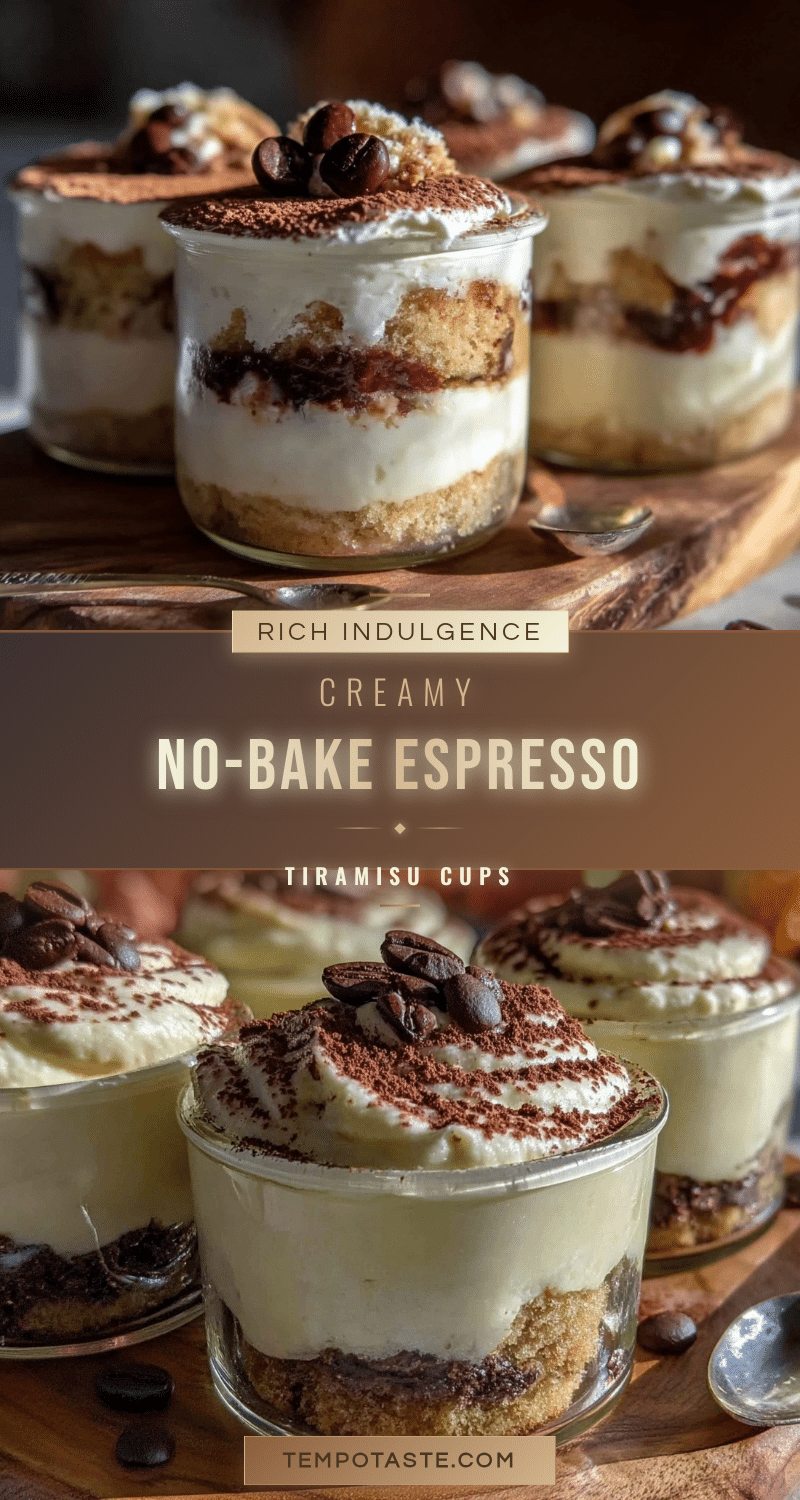
Creamy No-Bake Tiramisu Cups Recipe Easy Perfect Espresso Dessert

A quick and easy no-bake tiramisu dessert made with creamy mascarpone, espresso-soaked ladyfingers, and a dusting of cocoa powder. Perfect for a fuss-free, indulgent treat with minimal cleanup.
- Prep Time: 15 minutes
- Cook Time: 0 minutes
- Total Time: 4 hours 15 minutes
- Yield: 6 servings 1x
- Category: Dessert
- Cuisine: Italian
Ingredients
- 8 oz (225 g) mascarpone cheese
- 1 cup (240 ml) heavy cream
- 1/3 cup (65 g) granulated sugar
- 1 cup (240 ml) freshly brewed espresso, cooled
- About 24 ladyfingers
- Unsweetened cocoa powder, for dusting
- 1 tsp vanilla extract
- Optional: 2 tbsp coffee liqueur (e.g., Kahlúa)
Instructions
- Brew 1 cup (240 ml) of espresso and let it cool to room temperature. Stir in 2 tablespoons of coffee liqueur if using.
- In a chilled mixing bowl, whip 1 cup (240 ml) of heavy cream with 1/3 cup (65 g) sugar until soft peaks form.
- In another bowl, gently fold 8 oz (225 g) mascarpone cheese with 1 teaspoon vanilla extract until smooth. Carefully fold in the whipped cream until creamy and uniform.
- Quickly dip each ladyfinger into the cooled espresso for 1-2 seconds, just enough to soak but not soggy. Place a layer of soaked ladyfingers at the bottom of each serving cup (3-4 ladyfingers per cup).
- Spoon a generous layer of the mascarpone mixture over the ladyfingers, smoothing the top with the back of a spoon.
- Repeat layers with espresso-dipped ladyfingers and mascarpone cream until cups are about 3/4 full.
- Cover the cups with plastic wrap and refrigerate for at least 4 hours, preferably overnight.
- Just before serving, dust the tops with unsweetened cocoa powder using a sifter or fine mesh strainer. Optionally, sprinkle shaved dark chocolate or a few espresso beans on top.
Notes
Do not over-soak ladyfingers to avoid sogginess; a quick 1-2 second dip is sufficient. Use cold heavy cream and mascarpone straight from the fridge for best results. The dessert tastes better after chilling overnight but can be enjoyed after 2 hours. For dairy-free or gluten-free versions, substitute mascarpone and ladyfingers accordingly. Avoid warming leftovers to prevent mascarpone separation.
Nutrition
- Serving Size: 1 cup serving
- Calories: 320
- Sugar: 18
- Fat: 22
- Carbohydrates: 25
- Protein: 5
Keywords: no-bake tiramisu, tiramisu cups, espresso dessert, easy dessert, creamy tiramisu, no oven dessert, mascarpone dessert


