Three-time in a week and those pickles still crunch louder than the opening of a fresh bag of chips. Honestly, I wasn’t planning on turning into the neighborhood pickle queen, but every Friday for a month, I found myself slicing cucumbers, peeling cloves of garlic, and layering dill sprigs into jars like some culinary ritual I couldn’t quit. What kept pulling me back wasn’t just the crispy snap or that garlicky punch—it was that satisfying moment when you realize you’ve got a quick, tangy snack that’s ready almost before you can decide what to eat. The whole process feels like a secret handshake between me and my fridge, a pact that fresh, homemade pickles can be fast without losing their soul.
And no, it’s not a complicated canning marathon or some mystical fermentation that takes weeks. This recipe is that rare gem where you get crunchy, flavorful garlic dill pickles with minimal fuss, a method I stumbled upon after messing up a batch that turned too soft. The crispness stuck, the flavors deepened, and suddenly this was my go-to sidekick for everything from sandwich days to late-night snacking. It’s funny how such a simple recipe can quietly become the thing you trust to brighten every meal without any drama.
There’s this subtle joy in knowing that in just a couple of hours, those vibrant green cucumber spears soak up a punch of garlic and dill, ready to crunch through any craving. I guess this recipe stuck because it’s fast, reliable, and honestly, it feels a little like a secret weapon in the kitchen. No frills, just the kind of pickles you want when you want them—and that’s a comforting thought for anyone with a busy life and a hungry stomach.
Why You’ll Love This Recipe
Let’s be real—making pickles usually feels like a long game. But these crispy garlic dill refrigerator pickles flip that script with a few tricks I learned after countless batches:
- Quick & Easy: Ready to eat in as little as 4 hours, perfect for last-minute cravings or busy weeknight meals.
- Simple Ingredients: No fancy or hard-to-find stuff here—just fresh cucumbers, garlic, dill, and a few pantry staples.
- Perfect for Snacking or Sides: These pickles make a crunchy, tangy companion for sandwiches, burgers, and even crispy honey garlic chicken dinners.
- Crowd-Pleaser: Kids and adults alike love the crunch and garlicky dill flavor without being overpowering.
- Unbelievably Delicious: The crisp texture balances beautifully with the bright, garlicky dill brine—a combo that’s just addictive.
What makes this recipe stand apart is the balance: not too salty, not too sour, with just the right garlic kick. Instead of soggy, over-brined pickles, you get that satisfying snap every time. Plus, the refrigerator method means you skip the heat and fuss of traditional canning, making it ideal for quick prep and easy clean-up. Honestly, after trying this, I rarely reach for store-bought pickles anymore—it’s like having a little jar of magic in the fridge ready to jazz up any meal.
What Ingredients You Will Need
This recipe uses simple, wholesome ingredients to deliver bold flavor and satisfying texture without the fuss. Most are pantry staples, and you can easily swap a few to fit your preferences or dietary needs.
- Cucumbers: 4-5 medium Kirby cucumbers, sliced into spears or rounds (Kirby cucumbers are ideal for their firm texture)
- Garlic: 4-5 large cloves, peeled and smashed (fresh garlic is non-negotiable here for that punch)
- Fresh Dill: 3-4 sprigs, roughly chopped (or 2 tsp dried dill if fresh isn’t available)
- White Vinegar: 1 1/2 cups (you can use apple cider vinegar for a slightly sweeter note)
- Water: 1 1/2 cups (filtered or distilled for best flavor clarity)
- Salt: 2 tablespoons kosher salt or pickling salt (table salt can work but may affect texture)
- Granulated Sugar: 1 tablespoon (balances the acidity just right)
- Black Peppercorns: 1 teaspoon (adds subtle spice)
- Mustard Seeds: 1 teaspoon (optional but recommended for a slight tangy warmth)
- Red Pepper Flakes: 1/4 teaspoon or to taste (optional, if you like a little heat)
If you want a dairy-free or vegan option, no worries here—it’s naturally plant-based. For a gluten-free twist, just double-check your vinegar and spices to avoid additives. I usually go with Bragg’s apple cider vinegar and Morton kosher salt, which have never let me down. And if you’re feeling seasonal, swapping out fresh dill for a pinch of dried dill works just fine, though the fresh stuff really makes a difference.
Equipment Needed
- Glass Jars: Quart-sized mason jars or any clean, sealable glass containers. I prefer wide-mouth jars for easier packing.
- Sharp Knife: For slicing cucumbers evenly—this helps keep the pickles crisp.
- Cutting Board: A sturdy surface for slicing and prepping garlic and cucumbers.
- Measuring Cups and Spoons: To keep your brine balanced.
- Mixing Bowl or Measuring Jug: For combining the brine ingredients before pouring over cucumbers.
Don’t have fancy pickling crocks? No problem. I’ve done this in recycled glass jars without issues. You want to keep everything clean and avoid metal lids directly touching the brine for extended periods—plastic or coated metal lids work best. If you want to invest, a set of good-quality mason jars will last forever and make refrigerator pickling a breeze.
Preparation Method
- Prepare the Cucumbers: Rinse 4-5 medium Kirby cucumbers thoroughly. Slice them into spears about 3-4 inches long or into 1/4-inch thick rounds—whatever crunch style you prefer. Pat dry with paper towels to reduce excess moisture that could soften your pickles. (10 minutes)
- Make the Brine: In a mixing bowl or measuring jug, combine 1 1/2 cups white vinegar, 1 1/2 cups water, 2 tablespoons kosher salt, and 1 tablespoon granulated sugar. Stir until salt and sugar dissolve completely. This brine strikes a perfect balance between tang and saltiness without being harsh. (5 minutes)
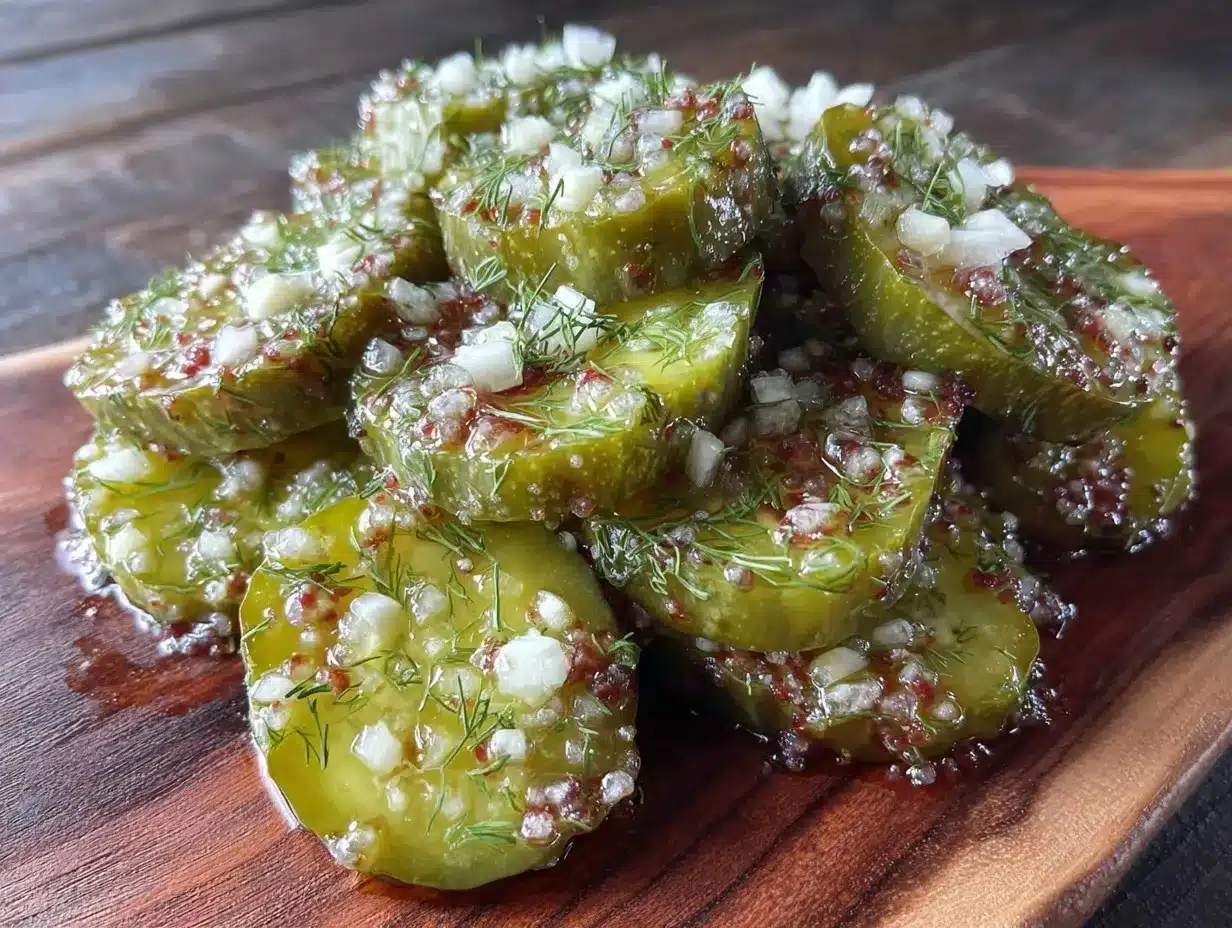
- Pack the Jars: Into clean quart jars, layer the cucumber spears or rounds tightly but without crushing. Add 4-5 smashed garlic cloves, 3-4 sprigs fresh dill, 1 teaspoon black peppercorns, 1 teaspoon mustard seeds, and optionally 1/4 teaspoon red pepper flakes for a mild kick. I’ve found distributing garlic evenly around the jar gives consistent flavor in every bite. (10 minutes)
- Pour the Brine: Slowly pour the brine over the cucumbers and aromatics, leaving about 1/2 inch of headspace at the top. Make sure everything is submerged—use a clean chopstick or spoon to gently press down if needed. Submerging cucumbers fully keeps them crisp and prevents spoilage. (5 minutes)
- Seal and Chill: Screw on the lids snugly (not too tight) and place jars in the refrigerator. Let sit for at least 4 hours before tasting; however, for best results, wait 24-48 hours. The flavors develop quickly, but patience yields pickles that really sing. (4-48 hours)
- Enjoy: Once the pickles reach your desired flavor and crunch, dig in! Store them in the fridge up to 2 weeks. The garlic dill notes deepen over time, but the crispness stays intact thanks to the quick refrigerator method. (Ongoing)
Pro tip: If you ever find your pickles softening prematurely, try slicing the cucumbers thicker or patting them drier before brining next time. I learned that the hard way after one too many soggy batches. Also, making smaller batches helps you enjoy fresh pickles without worrying about waste.
Cooking Tips & Techniques
The key to crispy garlic dill refrigerator pickles is all in the prep and brine balance. Here are some lessons I picked up along the way:
- Choose the Right Cucumber: Kirby cucumbers or pickling cucumbers have fewer seeds and firmer skins, which hold up better in the brine. Avoid large slicing cucumbers—they tend to get mushy fast.
- Dry Before Brining: Excess water on cucumber slices dilutes the brine and softens the pickles. Patting them dry before packing the jars is a small step that pays off.
- Don’t Overfill the Jars: Leave a bit of headspace so the brine can circulate and the flavors meld evenly.
- Fresh Garlic is Essential: Powder or jarred garlic just won’t deliver the same punch. I like smashing the cloves lightly to release oils without pulverizing them.
- Seal Loosely: You want to keep the jar closed but not airtight to avoid pressure buildup, especially in the first 24 hours.
- Multitask: While your pickles chill, you can prep a quick meal like the quick skillet lasagna, which pairs perfectly with a side of crisp pickles.
One rookie mistake I made was skipping the sugar to keep it “healthier,” but honestly, that touch of sweetness balances the vinegar nicely and rounds out the flavor. Also, refrigerating rather than canning keeps the cucumbers crunchy—no heat means they don’t get mushy from overcooking.
Variations & Adaptations
This crispy garlic dill refrigerator pickles recipe is flexible and invites tweaks to suit your taste or dietary needs:
- Spicy Garlic Dill Pickles: Add 1/2 teaspoon of crushed red pepper flakes or a chopped jalapeño to the jar for extra heat. I’ve tried this when craving a kick—it’s fantastic on sandwiches.
- Low-Sodium Version: Reduce salt to 1 tablespoon, but expect a milder brine. You might want to increase dill or garlic for more punch.
- Quick Bread-and-Butter Style: Add 2 tablespoons sugar and a few sliced onions to the brine for a sweeter, tangier pickle twist.
- Herb Variations: Swap dill for fresh tarragon or basil for a different herbaceous note. Tarragon gives a subtle anise flavor that’s unexpectedly lovely.
- Vinegar Swap: Use apple cider vinegar for a fruitier flavor or white wine vinegar for a lighter taste.
Personally, I once tried this recipe with fresh lemon slices tucked in and it gave the pickles a bright, summery zing that was a nice change. Feel free to experiment—you can’t really go wrong with quick refrigerator pickles!
Serving & Storage Suggestions
Serve these crispy garlic dill refrigerator pickles chilled straight from the jar, ideally after 24 hours for full flavor. They make a perfect crunchy side for sandwiches, burgers, and even creamy baked potato soup on cozy nights.
Store pickles in the refrigerator in their brine for up to 2 weeks. Over time, the garlic and dill notes intensify but the cucumbers stay pleasantly crisp. I find that flavors deepen after the first couple of days, so sometimes I make a batch in advance to enjoy that fuller taste.
If you want to re-crisp pickles that have softened a bit, soak them briefly in ice water for 15-30 minutes before serving. It’s a little trick I’ve picked up that helps bring back some crunch without drying them out.
Nutritional Information & Benefits
These crispy garlic dill refrigerator pickles are naturally low in calories—about 10-15 calories per spear—and packed with flavor without added fat. The vinegar and garlic have antimicrobial properties and may support digestion, while dill adds antioxidants and a fresh herbal note.
This recipe is gluten-free, vegan, and suitable for paleo diets, making it a versatile snack or side. Just watch the salt if you’re on a low-sodium plan. Personally, I appreciate having a fresh, tangy snack that’s both satisfying and light, especially compared to processed options.
Conclusion
After a month of obsessively making and tweaking these crispy garlic dill refrigerator pickles, it’s clear why this recipe has become a staple. It’s fast, reliable, and delivers that addictive crunch and garlicky brightness every time. More than just a condiment, it’s a quick fix for flavor that fits right into busy days and casual meals.
Feel free to customize it—add heat, swap herbs, or adjust salt and sugar to your liking. The beauty is in the simplicity and how quickly you can have fresh pickles ready to satisfy cravings or complement your favorite dishes. I’m still amazed how such a basic recipe keeps pulling me back, jar after jar, every Friday night.
Give it a try, and who knows? Maybe these pickles will find a way to sneak into your routine like they did in mine.
Frequently Asked Questions
How long do refrigerator pickles last?
Typically, they last up to 2 weeks in the fridge. After that, the texture and flavor may start to decline, but they’re usually safe to eat as long as they smell fresh.
Can I use regular cucumbers instead of Kirby cucumbers?
You can, but Kirby cucumbers hold up better in the brine and stay crisp longer. Regular slicing cucumbers tend to get soft faster.
Do I need to sterilize the jars for refrigerator pickles?
While sterilizing is not mandatory like in traditional canning, it’s a good practice to wash jars thoroughly with hot, soapy water to avoid contamination.
Can I make these pickles without garlic?
Yes, but garlic is a key flavor here. You can reduce or omit it if necessary, but expect a milder taste.
What if my pickles aren’t crunchy enough?
Try slicing them thicker, patting dry before brining, or using fresh Kirby cucumbers. Also, avoid leaving them at room temperature, as refrigeration helps maintain crispness.
Pin This Recipe!
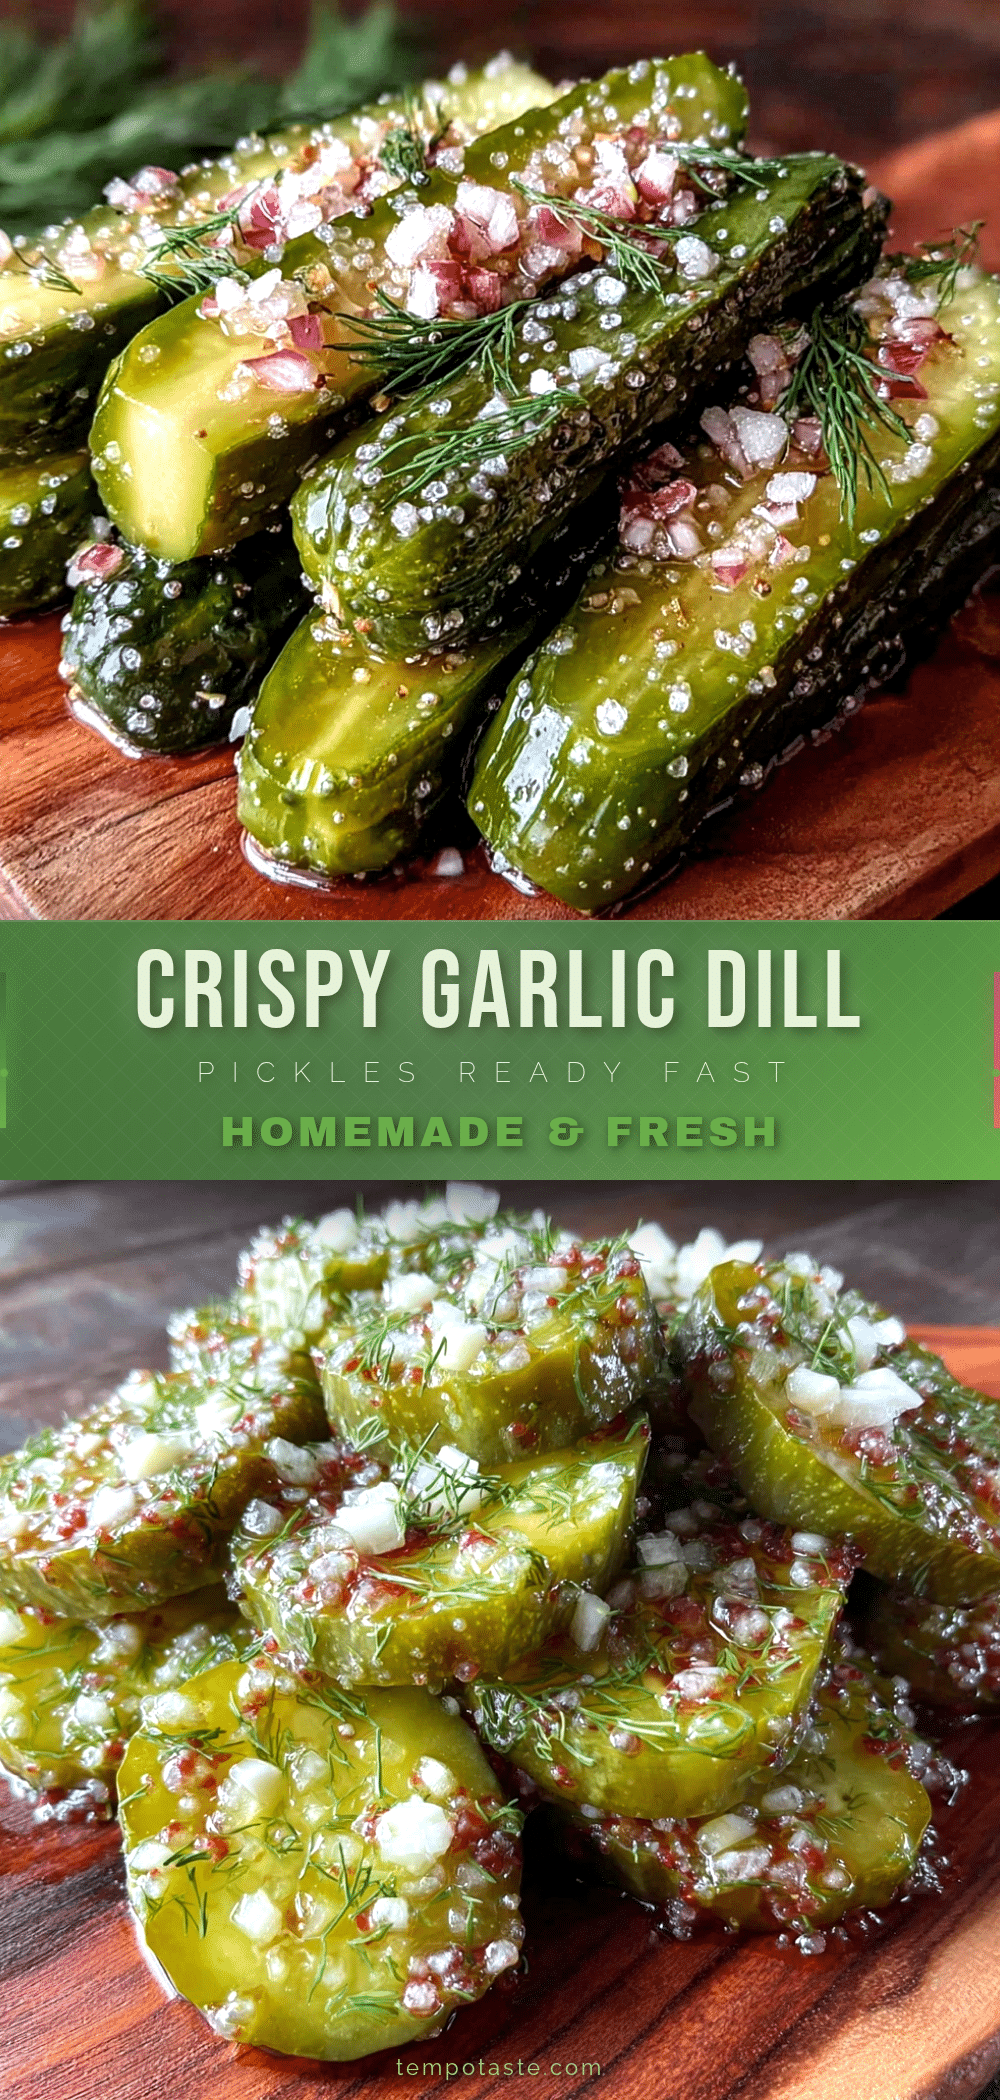
Crispy Garlic Dill Refrigerator Pickles

Quick and easy refrigerator pickles with a crispy texture and bold garlic dill flavor, ready in as little as 4 hours. Perfect for snacking or as a tangy side for sandwiches and burgers.
- Prep Time: 15 minutes
- Cook Time: 0 minutes
- Total Time: 4 hours to 48 hours
- Yield: 4-5 cups of pickles (about 4 servings) 1x
- Category: Side Dish
- Cuisine: American
Ingredients
- 4–5 medium Kirby cucumbers, sliced into spears or rounds
- 4–5 large garlic cloves, peeled and smashed
- 3–4 sprigs fresh dill, roughly chopped (or 2 tsp dried dill)
- 1 1/2 cups white vinegar (or apple cider vinegar)
- 1 1/2 cups water (filtered or distilled)
- 2 tablespoons kosher salt or pickling salt
- 1 tablespoon granulated sugar
- 1 teaspoon black peppercorns
- 1 teaspoon mustard seeds (optional)
- 1/4 teaspoon red pepper flakes (optional)
Instructions
- Rinse 4-5 medium Kirby cucumbers thoroughly. Slice into spears about 3-4 inches long or into 1/4-inch thick rounds. Pat dry with paper towels to reduce excess moisture. (10 minutes)
- In a mixing bowl or measuring jug, combine 1 1/2 cups white vinegar, 1 1/2 cups water, 2 tablespoons kosher salt, and 1 tablespoon granulated sugar. Stir until salt and sugar dissolve completely. (5 minutes)
- Into clean quart jars, layer the cucumber spears or rounds tightly but without crushing. Add 4-5 smashed garlic cloves, 3-4 sprigs fresh dill, 1 teaspoon black peppercorns, 1 teaspoon mustard seeds, and optionally 1/4 teaspoon red pepper flakes. (10 minutes)
- Slowly pour the brine over the cucumbers and aromatics, leaving about 1/2 inch of headspace at the top. Ensure everything is submerged; use a clean chopstick or spoon to gently press down if needed. (5 minutes)
- Screw on the lids snugly (not too tight) and place jars in the refrigerator. Let sit for at least 4 hours before tasting; for best results, wait 24-48 hours. (4-48 hours)
- Once pickles reach desired flavor and crunch, enjoy! Store in the fridge up to 2 weeks.
Notes
Use Kirby cucumbers for best crispness. Pat cucumbers dry before brining to avoid soggy pickles. Seal jars loosely to avoid pressure buildup. For softer pickles, slice thicker or pat drier. Store pickles in fridge up to 2 weeks. To re-crisp softened pickles, soak in ice water for 15-30 minutes before serving.
Nutrition
- Serving Size: About 1/2 cup (4-5 s
- Calories: 15
- Sugar: 1
- Sodium: 900
- Carbohydrates: 3
- Fiber: 0.5
Keywords: garlic dill pickles, refrigerator pickles, quick pickles, crispy pickles, easy pickles, homemade pickles, dill pickles, snack, side dish