“You’ve got to try this,” my friend said over a slightly chaotic text thread, the kind where dinner plans were last-minute and everyone was hangry. I was skeptical — homemade Japanese chicken katsu curry? That sounded like a full-on restaurant undertaking, right? But the way she described the crispy chicken paired with the warming, rich curry sauce and the sharp tang of pickled daikon had me hooked.
That night, armed with nothing but a vague memory of her message and a craving that wouldn’t quit, I set out to make this dish. To my surprise, it wasn’t complicated at all — just a few simple steps and pantry staples. The chicken came out golden and crunchy, the curry was deeply comforting without being heavy, and that pickled daikon? It was the zingy little hero that cut through the richness like a charm.
Honestly, I found myself making this recipe multiple times in a week — it quickly became my go-to comfort meal after long days when I needed something satisfying but fuss-free. The texture contrasts are just so addictive: crisp fried chicken, smooth curry, and the sharp crunch of pickled radish. It’s like a little flavor party on your plate that’s both cozy and fresh.
Looking back, I realize this recipe stuck with me because it’s not just about the food. It’s about how a simple message from a friend turned into a comforting ritual. This crispy Japanese chicken katsu curry with pickled daikon is more than a meal — it’s a warm hug on a plate, ready whenever you need it most.
Why You’ll Love This Crispy Japanese Chicken Katsu Curry Recipe
Trust me, I’ve put this recipe through its paces — from hurried weeknight dinners to casual weekend indulgences. It’s one of those dishes that feels fancy but comes together like a snap.
- Quick & Easy: You’ll have this ready in about 40 minutes, perfect if you’re juggling work, family, or just craving something satisfying after a long day.
- Simple Ingredients: No need to hunt down obscure spices — the curry roux uses common pantry items and the chicken breading is straightforward, making this accessible for any home cook.
- Perfect for Cozy Dinners: This dish shines on chilly evenings or when you want to impress guests with minimal effort — the crispy chicken and rich curry combo always wins smiles.
- Crowd-Pleaser: Whether you’re feeding picky eaters or adventurous food lovers, this recipe hits the spot with its comforting flavors and crunchy textures.
- Unbelievably Delicious: The secret lies in the golden, perfectly fried panko crust and the velvety curry sauce, balanced beautifully by the refreshing pickled daikon.
What sets this recipe apart? It’s the balance of textures and flavors — the chicken’s crispiness isn’t soggy at all, thanks to the right frying technique. The curry sauce is homemade but doesn’t require hours of simmering, and the pickled daikon adds a tangy brightness that lifts the entire dish. This isn’t just Japanese chicken katsu curry you find at your local takeout spot; it’s a homemade spin that feels both authentic and uniquely yours.
Plus, it’s one of those meals that make you pause and savor the moment — whether you’re eating alone or sharing with friends. Honestly, it’s the kind of recipe that makes you close your eyes after the first bite and smile quietly to yourself.
What Ingredients You Will Need
This recipe uses simple, wholesome ingredients to deliver bold flavor and a satisfying crunch without complicated prep. Most are pantry staples or easy to find at your local grocery store or Asian market.
- For the Chicken Katsu:
- Boneless, skinless chicken breasts (about 2 large, 1 to 1.5 pounds / 450-700g) — pounded evenly for quick, even cooking
- All-purpose flour (about 1 cup / 120g) — for dredging
- Large eggs (2, beaten) — helps the panko stick
- Panko breadcrumbs (1.5 cups / 150g) — Japanese-style breadcrumbs for that signature crunch, I like the Yamamotoyama brand
- Salt and black pepper — simple seasoning
- Vegetable oil (for frying) — choose a neutral oil with a high smoke point
- For the Curry Sauce:
- Unsalted butter (2 tablespoons / 28g) — adds richness
- Yellow onion (1 medium, finely chopped) — caramelized for deep flavor
- Garlic cloves (2, minced) — aromatic base
- Carrot (1 medium, diced) — sweetness and texture
- All-purpose flour (2 tablespoons / 16g) — thickening agent
- Japanese curry powder or curry roux blocks (3 tablespoons powder or 2 blocks) — the star of the sauce, I recommend S&B Golden Curry powder for a balanced flavor
- Chicken broth (2 cups / 480ml) — liquid base
- Soy sauce (1 tablespoon) — adds umami depth
- Honey or brown sugar (1 teaspoon) — balances the spice
- For the Pickled Daikon:
- Daikon radish (1 small, peeled and thinly sliced) — crunchy and fresh
- Rice vinegar (1/2 cup / 120ml) — tangy pickling liquid
- Granulated sugar (1/4 cup / 50g) — sweetens the pickling brine
- Salt (1 teaspoon) — brings out flavors
- Optional: a few slices of fresh chili or a small piece of kombu for subtle heat or umami
Seasoning the chicken simply with salt and pepper before breading lets the panko shine. You can swap almond flour for a gluten-free version or coconut sugar in the pickling mix if you prefer. For the curry, if you can’t find Japanese curry powder, mild garam masala mixed with a touch of turmeric works in a pinch.
Equipment Needed
- Heavy-bottomed skillet or frying pan — for frying the chicken evenly without burning
- Mixing bowls — one for flour, one for beaten eggs, one for panko breadcrumbs
- Meat mallet or rolling pin — to pound the chicken breasts to an even thickness (about 1/2 inch / 1.3cm)
- Sharp knife and cutting board — for prepping the daikon and vegetables
- Small saucepan — to prepare the curry sauce
- Jar or container with lid — for quick pickling the daikon radish
- Slotted spoon or tongs — handy for flipping and removing the chicken from oil
- Wire rack or paper towels — to drain excess oil from fried chicken
I usually prefer a cast iron skillet for frying because it retains heat well, helping get that perfect golden crust without hot spots. If you don’t have one, a heavy stainless steel pan works fine. For pounding chicken, an old-fashioned meat mallet is best, but wrapping the chicken in plastic wrap and using a rolling pin works just as well.
Preparation Method
- Prep the Chicken: Trim chicken breasts and place each between two sheets of plastic wrap. Use a meat mallet or rolling pin to pound them evenly to about 1/2 inch (1.3cm) thickness. Season both sides with salt and black pepper.
- Set up Breading Stations: In three shallow bowls, place the flour, beaten eggs, and panko breadcrumbs separately. Coat each chicken piece first in flour, shaking off excess, then dip into the egg, and finally press firmly into the panko mixture to cover completely. Set aside on a plate.
- Make the Pickled Daikon: Thinly slice the peeled daikon radish using a mandoline or sharp knife. In a jar or bowl, combine rice vinegar, sugar, and salt. Stir until sugar dissolves. Add daikon slices (and chili or kombu if using). Let sit at least 30 minutes while you prepare the rest, though overnight is better for deeper flavor.
- Prepare the Curry Sauce: In a saucepan over medium heat, melt butter. Add chopped onions and sauté until soft and golden, about 8 minutes. Add garlic and cook for 1 minute until fragrant. Stir in diced carrots and cook another 3 minutes.
- Make the Roux: Sprinkle flour over the vegetables and stir constantly for 2 minutes to cook out the raw flour taste. Then add curry powder or crumble in curry roux blocks, stirring to combine.
- Add Liquids: Slowly pour in chicken broth while whisking to avoid lumps. Bring to a gentle simmer and cook for 10-15 minutes until the sauce thickens and carrots are tender. Stir in soy sauce and honey or brown sugar. Taste and adjust seasoning if needed.
- Fry the Chicken Katsu: Heat vegetable oil in a deep skillet over medium-high heat (about 350°F / 175°C). Carefully add breaded chicken and fry for 3-4 minutes per side until golden brown and cooked through (internal temperature 165°F / 74°C). Avoid overcrowding the pan. Transfer to wire rack or paper towels to drain.
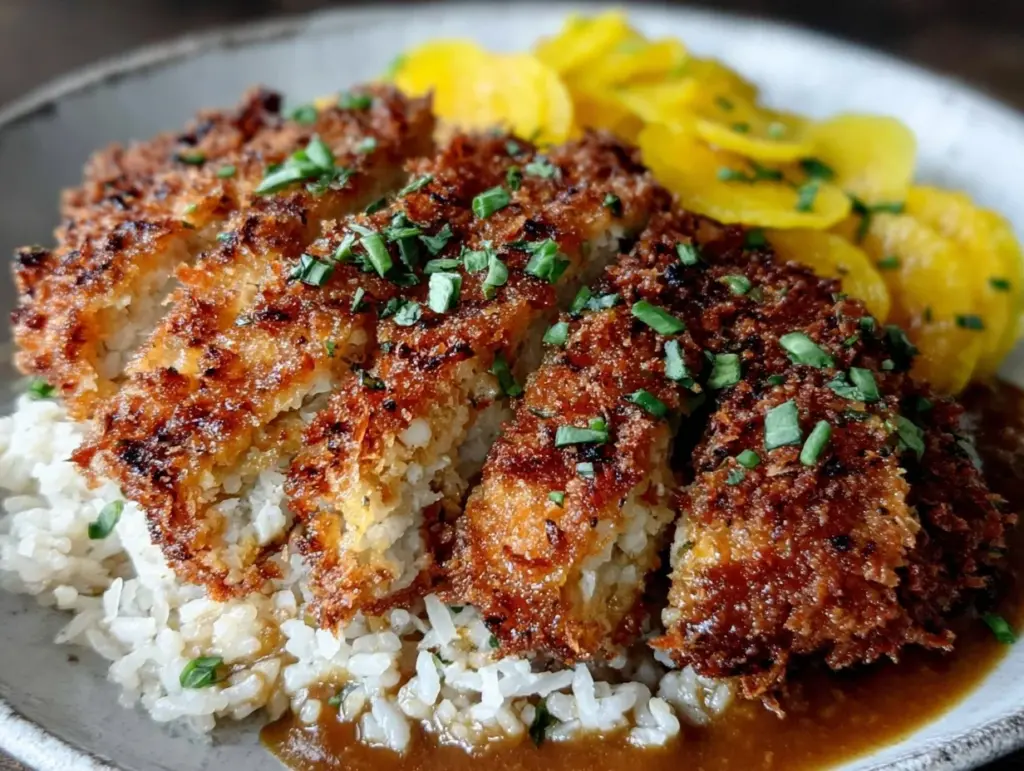
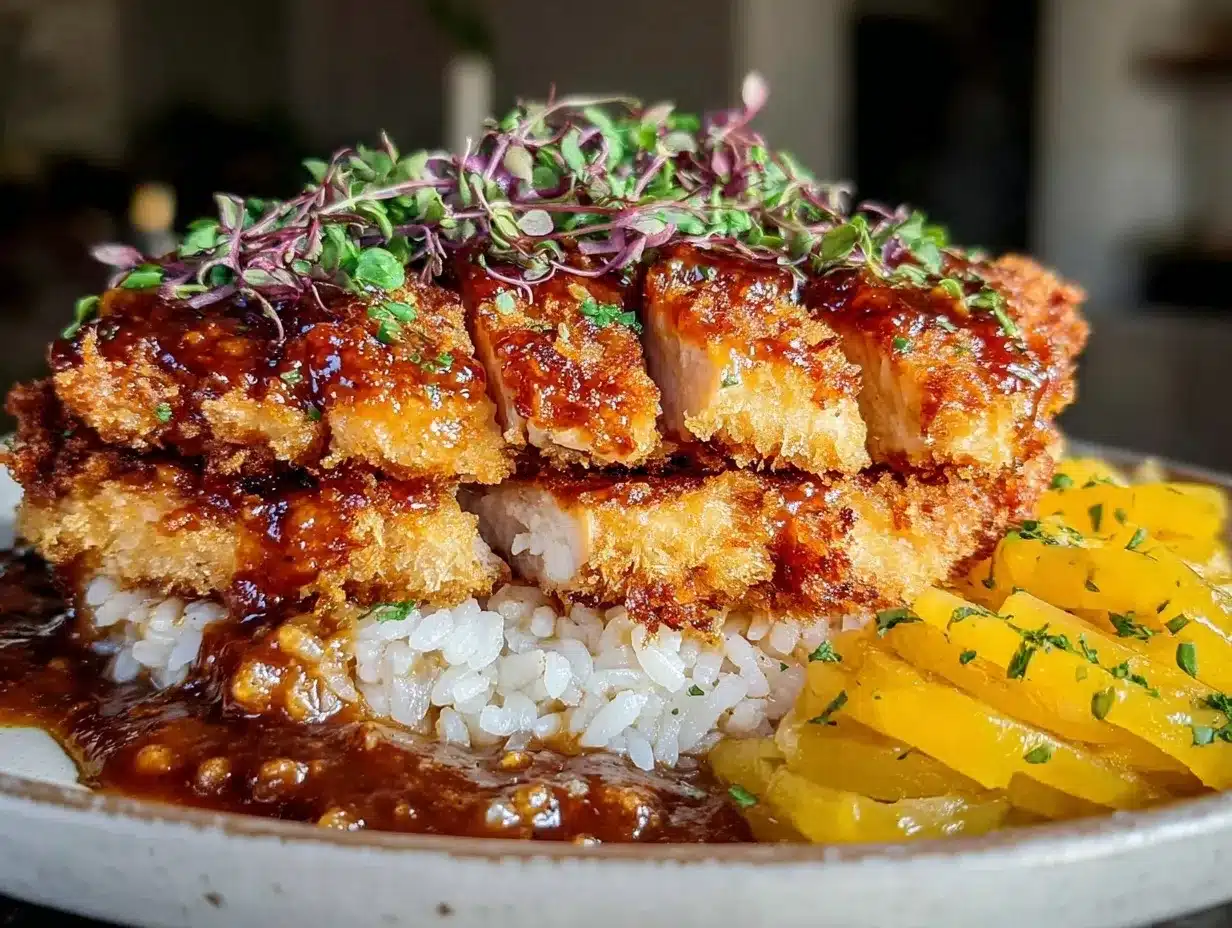
- Assemble the Dish: Slice the chicken katsu into strips. Serve over steamed rice, ladle plenty of curry sauce on top, and garnish with pickled daikon on the side for a refreshing crunch.
Tip: Keep an eye on the oil temperature when frying — too hot and the crust browns too fast while the inside remains undercooked; too cool and the chicken absorbs excess oil, getting greasy. If you want to multitask, prepare the pickled daikon first since it benefits from sitting longer.
Cooking Tips & Techniques
Getting that perfect crispy chicken katsu takes a little practice but is honestly worth every second. The key is patting the chicken dry before breading — moisture is the enemy of crunch. Also, pressing the panko firmly onto the chicken helps it stick through frying and slicing.
Don’t rush the curry sauce; sautéing the onions slowly builds a rich flavor foundation. If you find the sauce too thick, add a splash more broth or water. For a smoother sauce, you can blend it partially before adding the chicken, but I like the rustic texture with tender carrot pieces.
One mistake I made early on was overcrowding the frying pan. That drops the oil temperature, leading to soggy katsu. Fry in batches if needed, and keep cooked pieces warm in a low oven (around 200°F / 90°C).
Timing the steps is key — start the pickled daikon first, then prep the curry, and finally fry the chicken just before serving to keep it crisp. If you want to save time, you can make the curry sauce a day ahead; it actually tastes better the next day!
Variations & Adaptations
This recipe is pretty flexible, so feel free to tweak it to your liking or dietary needs.
- Protein Swap: Use pork loin instead of chicken for a traditional tonkatsu curry. Similarly, tofu steaks can be breaded and fried for a vegetarian option.
- Spice Level: Add a pinch of cayenne or a splash of hot sauce to the curry sauce if you like things spicy. For a milder curry, use less curry powder or add a bit more honey.
- Gluten-Free Option: Substitute all-purpose flour and panko with gluten-free flour blends and gluten-free breadcrumbs. Almond flour works well for coating, too.
- Pickled Daikon Twists: Try adding sliced cucumber or carrots to the pickling mix for extra color and crunch. You can also infuse the vinegar with ginger slices for a zingy note.
- Cooking Method: For a lighter take, bake the breaded chicken at 425°F (220°C) on a wire rack for about 20 minutes, flipping halfway, until golden and cooked through.
Personally, I once swapped out the pickled daikon for a quick kimchi side, and it was a fun, tangy twist that added a new dimension to the dish.
Serving & Storage Suggestions
Serve your crispy Japanese chicken katsu curry hot over freshly steamed jasmine or short-grain rice. The curry sauce is best spooned generously over the chicken and rice. Arrange the pickled daikon on the side to add that much-needed bright crunch.
This dish pairs beautifully with a simple green salad or steamed vegetables to balance the richness. For a refreshing drink, something like the fresh blueberry lavender lemonade would be a lovely contrast.
Store leftovers in airtight containers — the chicken is best eaten within 2 days as the crust loses its crunch, but the curry sauce can last up to 4 days refrigerated. Reheat curry gently on the stovetop, and crisp up the chicken again in a hot oven or skillet to revive the texture.
Flavors meld over time, so if you make the curry a day ahead, it’ll taste even richer. Just remember to keep the pickled daikon separate until serving to retain its crunchiness.
Nutritional Information & Benefits
This crispy Japanese chicken katsu curry recipe offers a balanced meal with protein from the chicken, complex carbs from rice, and vitamins from the veggies and pickled daikon. The panko crust provides a satisfying crunch without heavy batter, keeping the dish lighter than typical fried foods.
Japanese curry powder often contains turmeric, which has anti-inflammatory properties. The pickled daikon adds a probiotic boost, aiding digestion. For those watching carbs, you can swap rice for cauliflower rice or another vegetable base.
Note that the dish contains gluten (from flour and panko) and soy (soy sauce), so substitutions might be needed for allergies. Overall, it’s a comforting meal that fits well into a balanced diet when enjoyed in moderation.
Conclusion
This crispy Japanese chicken katsu curry with pickled daikon stands out as a recipe I return to again and again — it’s straightforward, satisfying, and full of flavor contrasts that keep every bite interesting. I love how it brings a little joy and calm to busy evenings or casual gatherings.
Feel free to tweak the spice levels, switch up the protein, or experiment with different pickled veggies to make it your own. It’s a recipe that welcomes creativity while delivering reliable comfort.
Whenever I make it, I’m reminded that great food doesn’t have to be complicated — sometimes, it’s just about simple ingredients combined with a bit of care and a touch of that crispy magic.
Give it a try and let me know how you customize it — I’d love to hear your twists and tips!
FAQs About Crispy Japanese Chicken Katsu Curry with Pickled Daikon
How do I keep the chicken katsu crispy after frying?
Drain the fried chicken on a wire rack instead of paper towels to avoid sogginess. If not serving immediately, keep it warm in a low oven (around 200°F / 90°C) and re-crisp in a hot skillet before serving.
Can I make the curry sauce ahead of time?
Absolutely! The curry sauce tastes even better after sitting overnight. Just reheat gently on the stovetop before serving.
What can I substitute for pickled daikon if I can’t find it?
Quick-pickled cucumbers, carrots, or even kimchi can add a similar tangy crunch. You can also make your own pickled daikon using fresh radish and a vinegar-sugar brine.
Is this recipe gluten-free?
Not as written, since it uses all-purpose flour and panko breadcrumbs. But you can swap in gluten-free flour and breadcrumbs to make it gluten-free.
How do I know when the chicken is cooked through?
The internal temperature should reach 165°F (74°C). The chicken should be opaque and juices run clear when pierced.
Pin This Recipe!
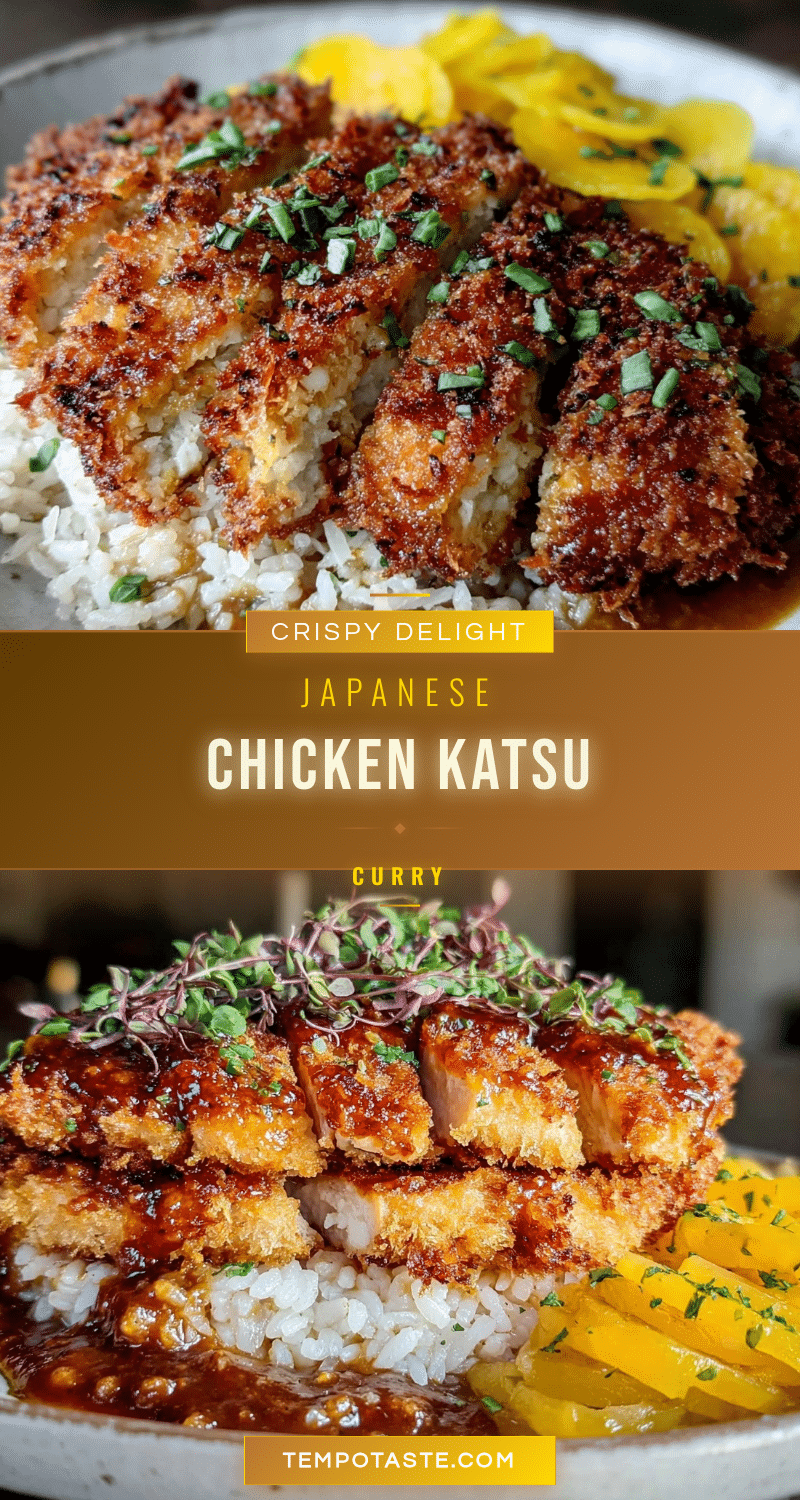
Crispy Japanese Chicken Katsu Curry Recipe Easy Homemade with Pickled Daikon

A comforting and easy homemade Japanese chicken katsu curry featuring crispy fried chicken, rich curry sauce, and tangy pickled daikon for a perfect balance of textures and flavors.
- Prep Time: 20 minutes
- Cook Time: 20 minutes
- Total Time: 40 minutes
- Yield: 4 servings 1x
- Category: Main Course
- Cuisine: Japanese
Ingredients
- 2 large boneless, skinless chicken breasts (1 to 1.5 pounds)
- 1 cup all-purpose flour (120g)
- 2 large eggs, beaten
- 1.5 cups panko breadcrumbs (150g)
- Salt and black pepper to taste
- Vegetable oil for frying
- 2 tablespoons unsalted butter (28g)
- 1 medium yellow onion, finely chopped
- 2 garlic cloves, minced
- 1 medium carrot, diced
- 2 tablespoons all-purpose flour (16g)
- 3 tablespoons Japanese curry powder or 2 curry roux blocks
- 2 cups chicken broth (16 fl oz / 480ml)
- 1 tablespoon soy sauce
- 1 teaspoon honey or brown sugar
- 1 small daikon radish, peeled and thinly sliced
- 1/2 cup rice vinegar (4 fl oz / 120ml)
- 1/4 cup granulated sugar (50g)
- 1 teaspoon salt
- Optional: a few slices of fresh chili or a small piece of kombu
Instructions
- Trim chicken breasts and place each between two sheets of plastic wrap. Pound evenly to about 1/2 inch thickness using a meat mallet or rolling pin. Season both sides with salt and black pepper.
- Set up three shallow bowls with flour, beaten eggs, and panko breadcrumbs. Dredge each chicken piece in flour, shake off excess, dip into egg, then press firmly into panko to coat completely. Set aside.
- Thinly slice peeled daikon radish. In a jar or bowl, combine rice vinegar, sugar, and salt; stir until sugar dissolves. Add daikon slices and optional chili or kombu. Let sit at least 30 minutes or overnight for deeper flavor.
- In a saucepan over medium heat, melt butter. Add chopped onions and sauté until soft and golden, about 8 minutes. Add garlic and cook 1 minute until fragrant. Stir in diced carrots and cook 3 more minutes.
- Sprinkle flour over vegetables and stir constantly for 2 minutes to cook out raw flour taste. Add curry powder or crumble in curry roux blocks and stir to combine.
- Slowly pour in chicken broth while whisking to avoid lumps. Bring to a gentle simmer and cook 10-15 minutes until sauce thickens and carrots are tender. Stir in soy sauce and honey or brown sugar. Adjust seasoning if needed.
- Heat vegetable oil in a deep skillet over medium-high heat (about 350°F). Fry breaded chicken 3-4 minutes per side until golden brown and cooked through (internal temperature 165°F). Avoid overcrowding. Drain on wire rack or paper towels.
- Slice chicken katsu into strips. Serve over steamed rice, ladle curry sauce on top, and garnish with pickled daikon on the side.
Notes
Keep oil temperature steady at about 350°F to ensure crispy crust without undercooking. Prepare pickled daikon first to allow flavors to develop. Avoid overcrowding frying pan to maintain oil temperature. Curry sauce can be made ahead and tastes better the next day. For gluten-free, substitute flour and panko with gluten-free alternatives.
Nutrition
- Serving Size: 1 serving (about 1 c
- Calories: 550
- Sugar: 10
- Sodium: 850
- Fat: 25
- Saturated Fat: 7
- Carbohydrates: 45
- Fiber: 4
- Protein: 35
Keywords: chicken katsu, Japanese curry, crispy chicken, pickled daikon, homemade curry, comfort food, easy dinner


