I remember the first time I tried making artisan bread at home—it was a total mess. Flour everywhere, dough stuck to every surface, and hours spent kneading only to end up with a dense, sad loaf. Honestly, I was ready to give up baking bread forever. Then a friend casually mentioned a no-knead method that sounded too good to be true: minimal effort, no fancy equipment, and supposedly crispy crust. Skeptical but desperate, I gave it a shot one lazy Sunday afternoon, and, well, that easy crispy no-knead artisan bread recipe completely changed my kitchen game.
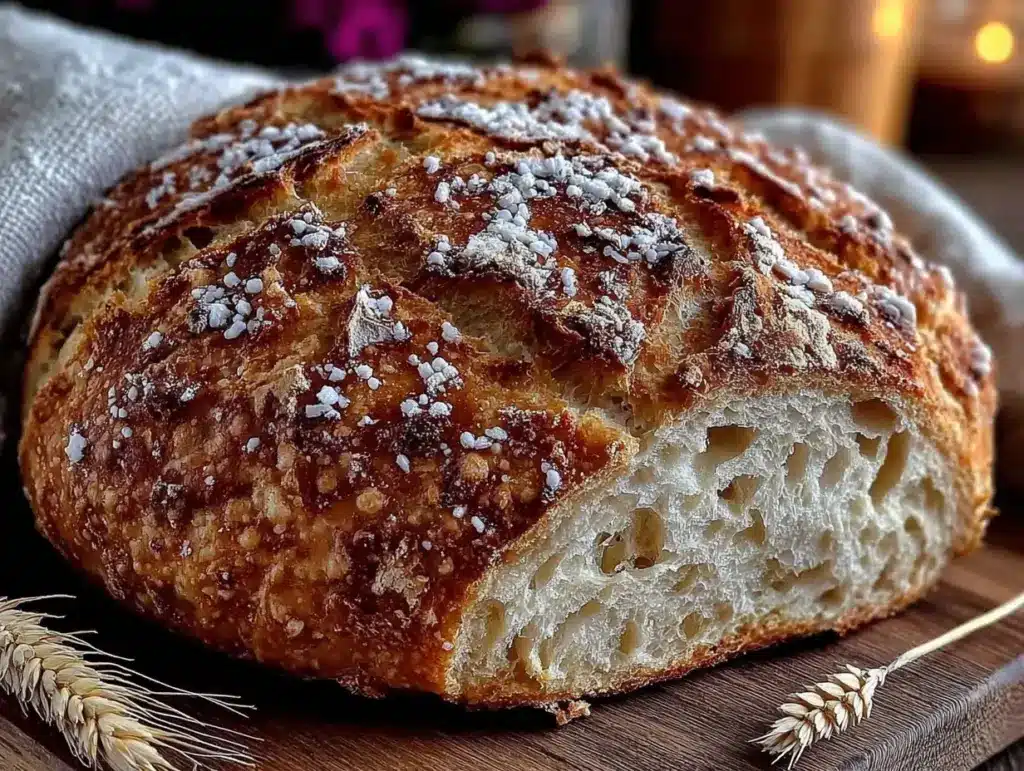
That first loaf came out with a crust so crunchy it practically sang when I sliced it, and the inside was delightfully chewy and airy—nothing like the bricks I’d made before. The thing is, this recipe doesn’t just work; it feels like a little miracle for anyone who thought homemade bread was out of reach. It’s the kind of recipe that sneaks into your routine, popping up on the table again and again, especially when you want something homemade but don’t have hours to dedicate.
What stuck with me, beyond the taste, was the simplicity. No kneading means no wrestling with sticky dough or aching wrists, making it perfect for those of us juggling life’s chaos yet craving that fresh-baked warmth. So yeah, I’m sharing this recipe because it’s not just bread—it’s a little bit of comfort, patience rewarded, and a crispy crust that’s honestly addictive.
Why You’ll Love This Recipe
- Quick & Easy: This easy crispy no-knead artisan bread recipe comes together with just a few minutes of active prep, making it perfect for busy weekdays or spontaneous baking urges.
- Simple Ingredients: No need to hunt down obscure flours or fancy yeast—just pantry staples you probably already have on hand.
- Perfect for Any Occasion: Whether it’s a cozy dinner, a brunch spread, or simply to dip into olive oil, this bread fits right in.
- Crowd-Pleaser: Friends and family always ask for the recipe after tasting this loaf—kids love the crunch, and grown-ups appreciate the rustic charm.
- Unbelievably Delicious: The combination of a crackly crust and soft, airy crumb is the kind of texture that makes you close your eyes mid-bite (honestly!).
- What sets this apart? The secret is in the slow fermentation and that no-knead technique that lets gluten develop naturally without the fuss.
- This bread isn’t just food—it’s a small, satisfying achievement that brings the bakery home without the stress.
What Ingredients You Will Need
This recipe relies on a handful of simple, wholesome ingredients that come together to create that perfect crust and tender crumb. Most of these are pantry staples and easy to source, which is part of the charm.
- All-Purpose Flour: 3 cups (360 g) – I prefer King Arthur for consistent texture, but any unbleached flour works fine.
- Instant Yeast: 1/4 teaspoon – no need to proof it; it blends smoothly into the dough.
- Salt: 1 1/4 teaspoons – essential for flavor and crust formation.
- Warm Water: 1 1/2 cups (350 ml) – about 75°F (24°C), to activate the yeast gently.
Optional but recommended:
- Cornmeal or Semolina: for dusting the baking surface, helps prevent sticking and adds a nice texture to the crust.
- Olive Oil: a light drizzle before baking can add subtle richness, but it’s entirely optional.
If you want to switch things up, whole wheat flour can replace half of the all-purpose for a nuttier flavor, and gluten-free flours need a bit more tweaking (feel free to ask if you want tips!). The beauty here is that the ingredient list is forgiving but still creates a loaf that tastes like it took way more effort than it actually did.
Equipment Needed
- Large Mixing Bowl: for combining ingredients and letting the dough rest—glass or metal both work.
- Dutch Oven: a 5- to 6-quart heavy pot with a lid is ideal for baking to trap steam and create that crispy crust.
- Measuring Cups and Spoons: precise measurements help keep the loaf consistent.
- Wooden Spoon or Spatula: to mix the sticky dough without fuss.
- Kitchen Scale (Optional): for accuracy, especially if you want to bake frequently.
If you don’t have a Dutch oven, any heavy oven-safe pot with a lid will do. I once baked this bread in a cast iron skillet covered tightly with foil—worked surprisingly well! Just be sure your equipment can handle 450°F (230°C) temperatures.
Also, a bench scraper can be handy for handling the dough, but your hands work just fine too. I keep a small spray bottle of water nearby to dampen my hands when the dough gets too sticky.
Preparation Method
- Mix Dry Ingredients: In your large mixing bowl, combine 3 cups (360 g) of all-purpose flour, 1/4 teaspoon instant yeast, and 1 1/4 teaspoons salt. Use a wooden spoon to stir these together until evenly distributed, about 1-2 minutes.
- Add Water and Stir: Pour in 1 1/2 cups (350 ml) warm water. Stir with your spoon until a shaggy, sticky dough forms. It’ll look rough and a bit messy—that’s totally normal. No kneading needed here.
- First Rise: Cover the bowl tightly with plastic wrap or a clean kitchen towel. Let it rest at room temperature for 12 to 18 hours. The dough will rise, bubble, and smell slightly yeasty. If your kitchen’s cold, lean toward 18 hours.
- Prepare for Shaping: After the long rest, lightly flour your work surface. Using a floured hand, gently scrape the dough out of the bowl—it’ll be loose and sticky. Fold it over onto itself a couple of times to form a rough ball. Handle gently to keep the air bubbles intact.
- Second Rise: Place the dough seam-side down on a piece of parchment paper dusted with cornmeal or flour. Cover loosely with a towel and let it rise for 1-2 hours until puffy but not doubled.
- Preheat Oven and Dutch Oven: About 30 minutes before baking, place your Dutch oven with its lid inside the oven and preheat to 450°F (230°C). This step is key for that crispy crust.
- Bake the Bread: Carefully remove the hot Dutch oven from the oven. Using the parchment, lift and place the dough into the pot. Cover with the lid and bake for 30 minutes.
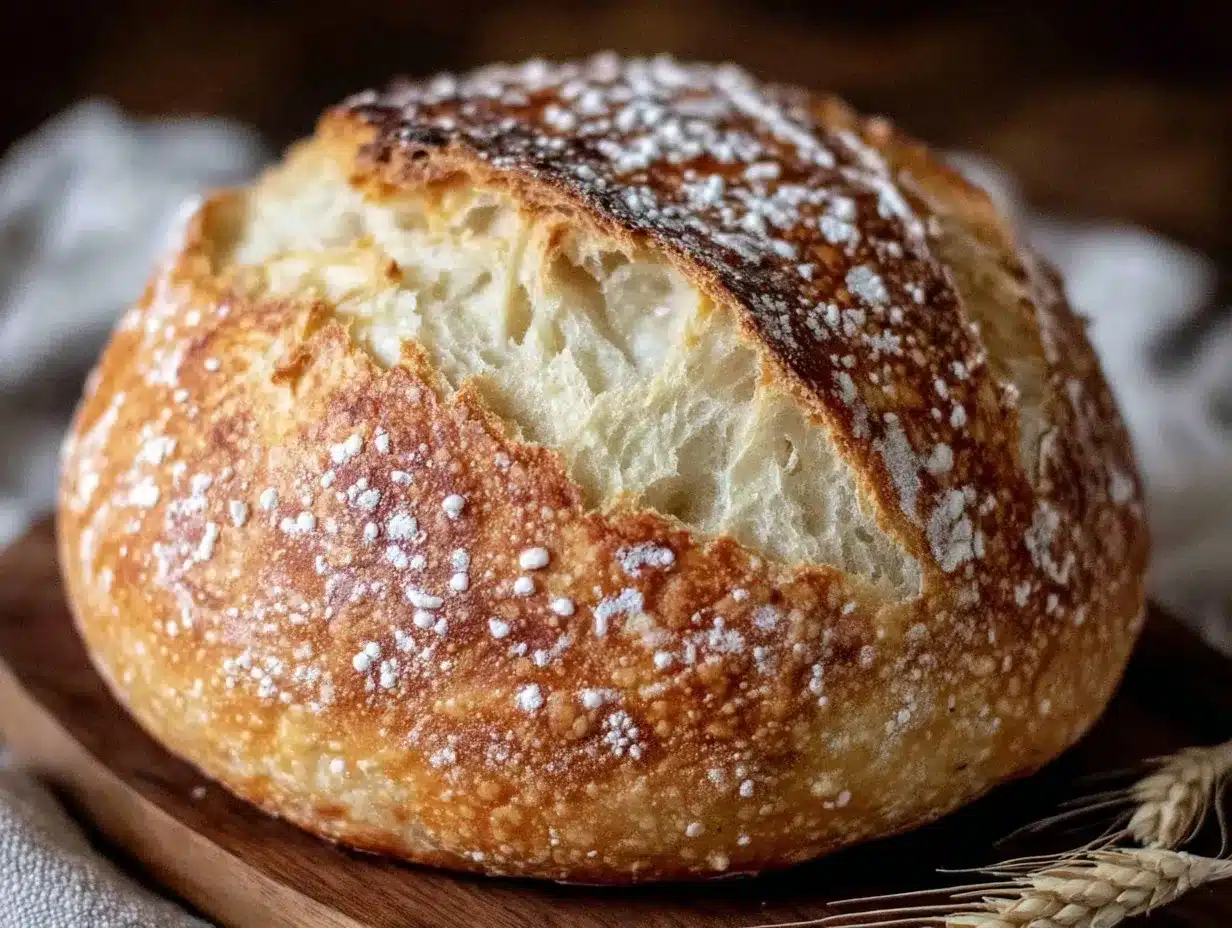
- Finish Baking: After 30 minutes, remove the lid and bake for an additional 10-15 minutes until the crust is a deep golden brown and crackly. You’ll hear that lovely crust crackle as it cools.
- Cool Before Slicing: Transfer the bread to a wire rack and let it cool for at least 1 hour. Patience is key—cutting too soon can make the crumb gummy.
Pro tip: If you notice the crust browning too fast, tent the bread loosely with foil for the last 10 minutes. Also, the dough might feel wetter than traditional bread dough—that’s exactly what gives you those big holes inside.
Cooking Tips & Techniques
- Patience is Your Friend: This bread needs time, especially for the first rise. Resist the urge to speed it up with hot water—it changes the texture.
- Wet Dough Handling: The dough will be sticky and loose; flour your hands rather than the dough to avoid toughening the crust.
- Steam is Essential: Baking in a covered Dutch oven traps steam, which is the secret to that crackly, shiny crust.
- Don’t Skip Cooling: Let the bread cool fully before slicing to let the crumb set—cutting early is a rookie mistake I’ve made too many times!
- Multitasking Tip: Prepare your dough the night before, then bake when you wake up or get home—no extra prep needed that day.
- Adjust for Your Oven: Some ovens run hot or cold; keep an eye on the crust color and adjust baking time accordingly.
Variations & Adaptations
- Whole Wheat Twist: Swap half the all-purpose flour for whole wheat for a heartier loaf with a nutty flavor.
- Herb-Infused: Add 1-2 tablespoons of fresh chopped rosemary or thyme to the flour mixture for a fragrant touch.
- Gluten-Free Version: Use a gluten-free all-purpose blend and add a teaspoon of xanthan gum to help with texture—expect a denser loaf.
- Cheese Bread: Fold in 1/2 cup of grated sharp cheddar or parmesan right after mixing the dough for a savory upgrade.
- Different Shapes: Instead of a round boule, shape the dough into an oval for a batard or divide into smaller portions for rolls.
I once tried adding olives and sun-dried tomatoes to the dough—huge hit with guests, though it made the dough a bit trickier to handle. Don’t be afraid to experiment!
Serving & Storage Suggestions
This artisan bread shines when served fresh and warm, straight from the oven. Slice it thick for breakfast with butter and jam or thin for sandwiches. It pairs beautifully with soups, stews, and a drizzle of good olive oil for dipping.
To store, wrap the cooled loaf in a clean kitchen towel and keep it at room temperature for up to two days. For longer storage, slice and freeze in an airtight bag—toast slices straight from the freezer for that fresh-baked feel.
Reheating in a toaster oven or conventional oven at 350°F (175°C) for about 5-7 minutes refreshes the crust nicely. Over time, the flavor deepens, so leftovers can be surprisingly good the next day.
Nutritional Information & Benefits
One slice (about 60 g) of this easy crispy no-knead artisan bread contains roughly:
| Nutrient | Amount |
|---|---|
| Calories | 160 |
| Carbohydrates | 30 g |
| Protein | 5 g |
| Fat | 1 g |
| Fiber | 1-2 g (depending on flour type) |
This bread provides a good source of energy and, when made with whole wheat flour, adds dietary fiber that supports digestion. It’s naturally free from additives and preservatives, making it a wholesome choice compared to many store-bought options.
For gluten-sensitive individuals, this recipe is not suitable unless adapted with gluten-free flours. The simple ingredients make it easy to customize for different dietary needs or preferences.
Conclusion
This easy crispy no-knead artisan bread recipe has become a staple in my kitchen—not because it’s fancy, but because it’s dependable, delicious, and surprisingly simple. It’s proof that great bread doesn’t demand hours of kneading or complicated steps, just a bit of time and patience.
Feel free to tweak the recipe to fit your tastes or dietary needs; the forgiving nature of this dough means many variations work beautifully. Whether you’re a bread newbie or just someone who loves fresh-baked goodness, this loaf promises to bring a little joy to your table.
Give it a try, and don’t be shy about sharing your own spins—I’d love to hear how your easy crispy no-knead artisan bread turns out!
FAQs
How long does the dough need to rise?
The first rise takes 12 to 18 hours at room temperature. This slow fermentation develops flavor and texture. The second rise should be 1 to 2 hours until the dough is puffy.
Can I make this bread without a Dutch oven?
Yes! Use any heavy, oven-safe pot with a lid, or even a cast iron skillet covered with foil to trap steam. Just ensure it can withstand high heat (450°F/230°C).
What type of flour works best?
All-purpose flour is perfect, but you can substitute half with whole wheat for a nuttier flavor. Avoid bleached flours for best results.
Why is the bread so sticky? Is that normal?
Yes, the dough is wetter and stickier than traditional bread dough. This wetness helps create the open crumb and crisp crust that define artisan bread.
How do I store leftover bread?
Wrap cooled bread in a towel at room temperature for up to two days, or slice and freeze for longer storage. Reheat slices in a toaster or oven to refresh the crust.
Pin This Recipe!
Easy Crispy No-Knead Artisan Bread Recipe Perfect for Beginners

A simple no-knead artisan bread recipe that yields a crispy crust and airy crumb with minimal effort, perfect for beginners and busy bakers.
- Prep Time: 10 minutes
- Cook Time: 45 minutes
- Total Time: 13 hours 55 minutes
- Yield: 1 loaf (about 8 servings) 1x
- Category: Bread
- Cuisine: American
Ingredients
- 3 cups (360 g) all-purpose flour
- 1/4 teaspoon instant yeast
- 1 1/4 teaspoons salt
- 1 1/2 cups (350 ml) warm water (about 75°F / 24°C)
- Optional: cornmeal or semolina for dusting
- Optional: olive oil for drizzling before baking
Instructions
- In a large mixing bowl, combine 3 cups (360 g) all-purpose flour, 1/4 teaspoon instant yeast, and 1 1/4 teaspoons salt. Stir with a wooden spoon until evenly distributed, about 1-2 minutes.
- Pour in 1 1/2 cups (350 ml) warm water and stir until a shaggy, sticky dough forms. No kneading needed.
- Cover the bowl tightly with plastic wrap or a clean kitchen towel and let rest at room temperature for 12 to 18 hours until the dough rises and bubbles.
- Lightly flour your work surface. Gently scrape the dough out of the bowl and fold it over onto itself a couple of times to form a rough ball.
- Place the dough seam-side down on parchment paper dusted with cornmeal or flour. Cover loosely with a towel and let rise for 1-2 hours until puffy but not doubled.
- About 30 minutes before baking, preheat your oven to 450°F (230°C) with a Dutch oven and lid inside.
- Carefully remove the hot Dutch oven from the oven. Using the parchment, lift and place the dough into the pot. Cover with the lid and bake for 30 minutes.
- Remove the lid and bake for an additional 10-15 minutes until the crust is deep golden brown and crackly.
- Transfer the bread to a wire rack and let cool for at least 1 hour before slicing.
Notes
If crust browns too fast, tent with foil for last 10 minutes. Dough is wetter than traditional bread dough—this creates big holes inside. Let bread cool fully before slicing to avoid gummy crumb. Use any heavy oven-safe pot if no Dutch oven is available.
Nutrition
- Serving Size: 1 slice (about 60 g)
- Calories: 160
- Fat: 1
- Carbohydrates: 30
- Fiber: 12
- Protein: 5
Keywords: artisan bread, no-knead bread, crispy crust, easy bread recipe, beginner bread, homemade bread


