“You really think you can make a flag out of Oreos?” my niece asked skeptically, eyeing the pile of cookies and whipped cream spread across the counter. That afternoon, I was scrambling to find a quick dessert for our little family barbecue, and honestly, I wasn’t expecting much. I’d been too tired to bake anything complicated, and the idea of a no-bake treat sounded like a dream. But as I started layering crushed Oreos, whipped cream, strawberries, and blueberries, something clicked. The simple, no-fuss ingredients came together in a way that looked festive and fun, perfect for a spontaneous 4th of July celebration.
It wasn’t planned or polished — just a handful of crumbs here, a dollop of cream there — but as we dug in, the skeptical looks melted away. That first bite, the crunch and cream, the sweet and tart mingling, it was like a little fireworks show on my tongue. I made this Easy Patriotic No-Bake Oreo Flag Cake multiple times that week. Each time, someone asked for the recipe, and it became the unexpected highlight of our holiday gatherings. No oven needed, no complicated steps — just a playful, delicious dessert that anyone can pull together, even on a crazy day.
There’s something quietly satisfying about making a dessert that looks impressive without the stress. This cake stays cool, so it’s perfect for summer, and it’s a sweet way to celebrate with a bit of Americana twist. I still think about how a box of Oreos and some fresh berries turned a hectic day into a moment worth savoring.
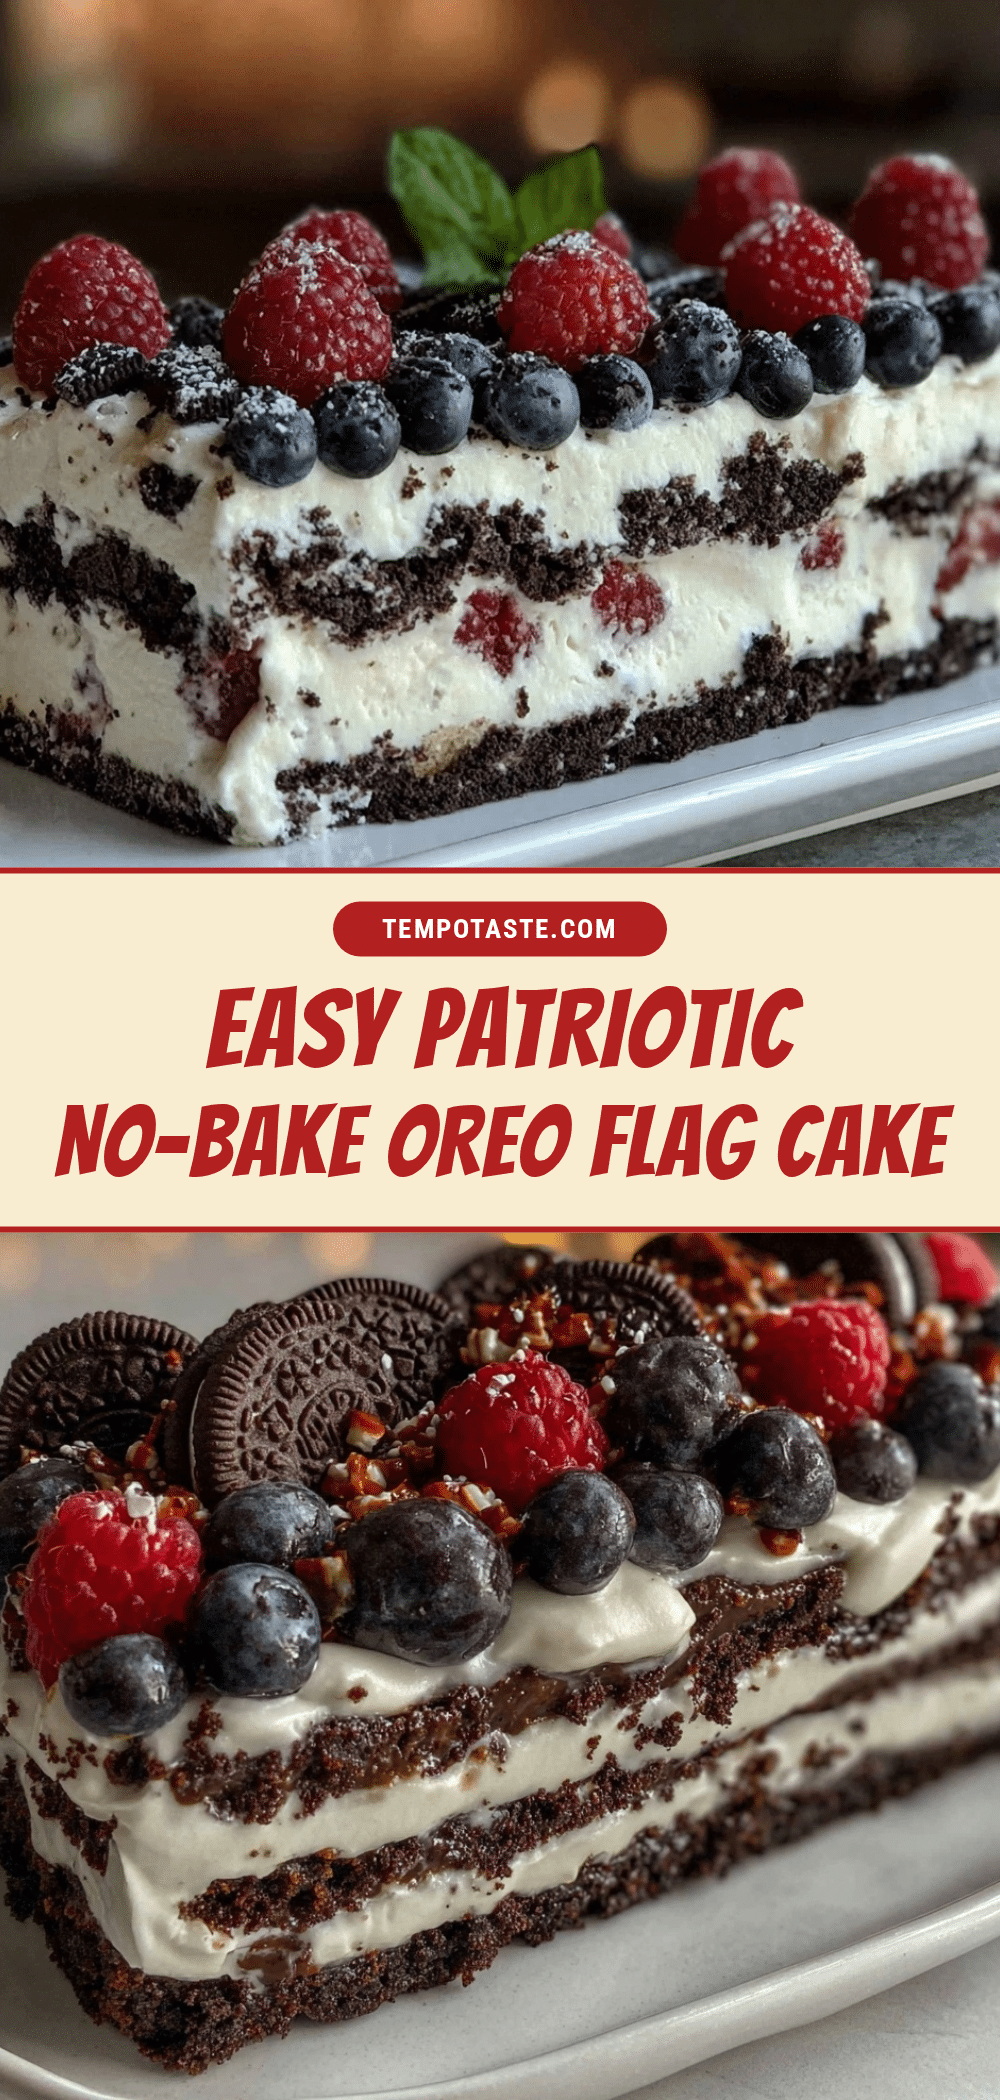
Why You’ll Love This Easy Patriotic No-Bake Oreo Flag Cake Recipe
This recipe has earned a spot in my summer dessert rotation for good reasons. After testing it several times and sharing it with friends and family, I’m confident it’s one of the easiest yet most crowd-pleasing treats you’ll find for a patriotic celebration.
- Quick & Easy: Ready in under 30 minutes, making it perfect for last-minute 4th of July parties or casual get-togethers.
- Simple Ingredients: No need for fancy shopping lists—Oreos, whipped cream, and fresh berries are likely already in your kitchen or easy to grab.
- Perfect for Summer: This no-bake recipe stays cool and refreshing, offering relief from the heat while still feeling indulgent.
- Crowd-Pleaser: Kids love the crunchy Oreos, adults appreciate the fresh berry touch, and everyone enjoys the visual appeal.
- Unbelievably Delicious: The creamy texture paired with the tartness of berries and the chocolaty crunch of Oreos makes for an irresistible combo.
What sets this cake apart is the layering technique—crushing the Oreos just right for texture, folding whipped cream for fluffiness, and arranging berries to mimic the American flag without fuss. It’s not just another no-bake dessert; it’s a sweet conversation starter and a playful way to bring a patriotic vibe to your table. Honestly, it’s the kind of dish that makes you pause and smile after the first bite, feeling like summer’s sweetness wrapped up in one festive cake.
What Ingredients You Will Need
This Easy Patriotic No-Bake Oreo Flag Cake uses straightforward, wholesome ingredients that come together beautifully without any complicated prep. Most are pantry staples or fresh produce you can find year-round, with easy substitutions if needed.
- Oreos: Approximately 30 cookies (about 300g). I prefer classic Oreos for their balanced sweetness and crunch, but you can use Double Stuf if you like it a little creamier.
- Whipped Cream: 2 cups (480 ml) of heavy whipping cream, chilled. You can use store-bought whipped topping in a pinch, but homemade whipped cream whips up fluffier and tastes fresher.
- Powdered Sugar: 2 tablespoons (15 g) to sweeten the whipped cream gently.
- Vanilla Extract: 1 teaspoon (5 ml) for a subtle warmth in the cream.
- Fresh Strawberries: About 1 cup (150 g), sliced. They create the vibrant red stripes on the flag. In summer, fresh berries are best, but frozen and thawed work too.
- Fresh Blueberries: 1/2 cup (75 g) for the blue star field. Choose firm, plump berries for the best look and texture.
- Optional: A splash of lemon juice (1 teaspoon) to brighten the whipped cream if you prefer a slight tang.
If you want to try a dairy-free version, swap the heavy cream for coconut cream and use dairy-free Oreos (check the label). For a gluten-free option, gluten-free sandwich cookies will work just fine, and the layering technique stays the same. The key is balancing the cookie crunch with fluffy cream and fresh fruit for that perfect flag look.
Equipment Needed
- Mixing Bowl: A large bowl for whipping the cream. Glass or metal bowls work best as they stay cold longer.
- Electric Mixer or Whisk: For whipping the cream to soft peaks. A hand mixer speeds things up, but a sturdy whisk and some elbow grease work too.
- 9×13 Inch (23×33 cm) Rectangular Pan: This size fits the flag design perfectly. A glass or plastic container with straight edges works well.
- Spatula or Spoon: For spreading the whipped cream and layering the crushed Oreos.
- Plastic Wrap: To cover the cake while chilling.
- Optional: A food processor or rolling pin to crush Oreos quickly.
Personally, I find that chilling the mixing bowl and beaters in the fridge for 15 minutes before whipping helps the cream come together faster and fluffier. No need for fancy gadgets here—just simple tools you probably already have. If you’re curious about other easy desserts that come together quickly, you might enjoy the Creamy No-Bake Mango Cheesecake—another no-bake treat that’s perfect for warm days.
Preparation Method

- Chill your equipment: Place your mixing bowl and beaters in the fridge for about 15 minutes to get them nice and cold. This helps the cream whip up faster and hold its shape.
- Crush the Oreos: Place the Oreos in a sealed plastic bag and crush them with a rolling pin until you have a mix of coarse crumbs and small chunks. Alternatively, pulse them a few times in a food processor. You want some texture, not just powder.
- Whip the cream: Pour the chilled heavy cream into your cold bowl. Add powdered sugar and vanilla extract. Beat on medium-high speed until soft peaks form—when the cream holds shape but still has a slight wobble. Be careful not to overwhip, or it’ll turn grainy.
- Assemble the base: Spread a thin layer of whipped cream evenly across the bottom of your 9×13 inch pan—about 1/4 inch (0.5 cm) thick. This helps the Oreo crumbs stick.
- Layer crushed Oreos: Sprinkle half of the crushed Oreos evenly over the whipped cream base. Press down gently with the back of a spoon to create a firm layer.
- Add more whipped cream: Spread another 1/4 inch (0.5 cm) layer of whipped cream over the Oreo layer, smoothing it out carefully.
- Repeat layers: Add the remaining crushed Oreos on top of the cream layer, followed by a final layer of whipped cream, smoothing the top evenly.
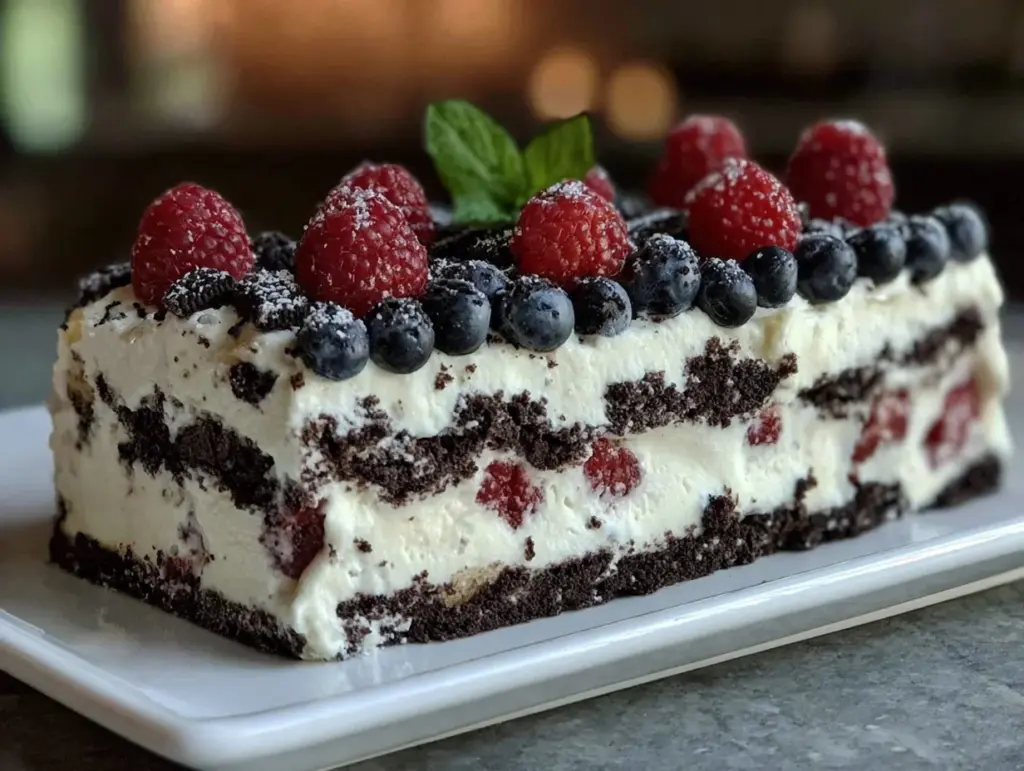
- Create the flag design: Arrange the blueberries in the top left corner of the cake to form the “star” section of the flag. Then, lay the sliced strawberries in horizontal rows next to and below the blueberries to mimic the red stripes. Use whipped cream for the white stripes in between.
- Chill the cake: Cover the pan with plastic wrap and refrigerate for at least 4 hours, ideally overnight. This lets the layers set and flavors meld together.
- Serve and enjoy: Use a sharp knife to cut into squares, wiping the blade clean between cuts for neat edges. Serve chilled for the best texture and flavor.
Some tips: If you notice the whipped cream starts to soften while assembling, pop the cake back in the fridge for 10 minutes before continuing. The flag design doesn’t have to be perfect—it’s the festive spirit and taste that count. For a fun twist, try adding a little lemon zest to the whipped cream for brightness.
Cooking Tips & Techniques
Whipping cream might seem straightforward, but getting it just right can be tricky. Here’s what I’ve learned from trial and error:
- Temperature is everything: Cold cream whips better. Keep your bowl and beaters cold, and chill the cream until just before whipping.
- Watch the peaks: Stop whipping when soft peaks form. Going past stiff peaks can make the cream grainy or turn it into butter (yikes!).
- Crushing Oreos: Aim for a mix of fine crumbs and chunks for texture. Too fine and the cake gets soggy; too chunky and it won’t hold well.
- Layering: Spread layers gently to avoid mixing everything together. Use a spatula to smooth but don’t press too hard—keep the layers distinct.
- Chilling time: Don’t rush this step. The cake firms up in the fridge, so at least 4 hours is needed. Overnight is better if you have time.
I once skipped chilling the cake and the layers slid apart when cutting—lesson learned! Also, if you want to multitask, prepare the whipped cream and crushed Oreos the day before, then assemble the flag right before chilling. This way, you save time and keep everything fresh.
Variations & Adaptations
The Easy Patriotic No-Bake Oreo Flag Cake is a flexible canvas for creativity. Here are some ways you can switch things up:
- Dietary swaps: Use gluten-free sandwich cookies and coconut whipped cream for a gluten- and dairy-free version that still tastes great.
- Seasonal fruit: In place of strawberries and blueberries, try raspberries and blackberries for a slightly different color palette and tartness.
- Additional layers: Add a layer of cream cheese mixed with a bit of powdered sugar and vanilla between the Oreo and whipped cream layers for a richer texture.
- Flavor twists: Mix a teaspoon of cinnamon or espresso powder into the crushed Oreos for a subtle taste boost.
Personally, I once tried swapping the Oreos for crushed chocolate graham crackers when I ran out, and while it was less chocolaty, the cake still looked festive and tasted delicious. If you love a little extra crunch, sprinkle mini chocolate chips between layers, but be sure not to overdo it.
Serving & Storage Suggestions
This cake is best served chilled, right from the fridge. The contrast between the cool whipped cream, the crunchy Oreos, and juicy berries is what makes it so satisfying. For presentation, serving it on a white platter really makes the red, white, and blue pop.
Pair it with sparkling lemonade or an iced herbal tea for a refreshing summer combo. It also makes a sweet finish after a savory meal like crispy Baja fish tacos or a casual picnic spread.
Store leftovers covered tightly in the refrigerator for up to 3 days. The cake softens slightly over time, but flavors deepen, making it even tastier the next day. To serve again, just slice and enjoy cold. Avoid freezing, as the whipped cream texture changes unfavorably when thawed.
Nutritional Information & Benefits
This Easy Patriotic No-Bake Oreo Flag Cake is definitely a treat, but it features fresh fruit that adds a boost of vitamins and antioxidants. Here’s a rough estimate per serving (assuming 12 servings):
| Nutrient | Amount |
|---|---|
| Calories | 220 |
| Fat | 14g |
| Saturated Fat | 8g |
| Carbohydrates | 23g |
| Sugar | 17g |
| Protein | 2g |
| Fiber | 1g |
While not low in sugar or fat, this dessert provides calcium from the cream and vitamin C from the berries. If you’re mindful of allergens, note it contains dairy and gluten unless substitutions are made. For a balanced approach, enjoy it alongside lighter dishes like a fresh salad or vegetable sides.
Conclusion
This Easy Patriotic No-Bake Oreo Flag Cake is more than just a dessert — it’s a fun, simple way to bring a festive spirit to your 4th of July celebrations without the stress of baking. Whether you’re a last-minute host or someone who likes to keep things easy but tasty, this recipe delivers a sweet, crunchy, and creamy combo that’s hard to resist.
Feel free to tweak the fruits or add your own twist, because that’s part of the joy in making it your own. It’s the kind of recipe that makes you smile quietly, knowing you whipped up something special with minimal fuss. And hey, if you’re a fan of no-bake treats, you might want to try the Creamy No-Bake Peanut Butter Chocolate Eclair Icebox Cake next time — it’s another winner on a hot day.
Give this patriotic Oreo flag cake a try, and don’t forget to share how you made it yours!
FAQs About Easy Patriotic No-Bake Oreo Flag Cake
Can I make this cake ahead of time?
Absolutely! In fact, chilling it overnight helps the layers set perfectly and flavors meld beautifully.
What if I don’t have fresh berries?
You can use frozen berries—just thaw and drain them well before arranging to avoid extra moisture.
Can I use a different type of cookie instead of Oreos?
Yes, chocolate sandwich cookies or even chocolate graham crackers work well. Just keep a good balance of crunch and flavor.
Is it possible to make this vegan?
Yes, by using dairy-free whipped cream and vegan sandwich cookies, you can create a vegan-friendly version.
How long does the cake keep in the fridge?
Store it covered for up to 3 days. It tastes best chilled and fresh but still enjoyable a day or two later.
Pin This Recipe!
Easy Patriotic No-Bake Oreo Flag Cake Recipe for 4th of July Celebrations

A quick and festive no-bake dessert featuring layers of crushed Oreos, whipped cream, strawberries, and blueberries arranged to resemble the American flag. Perfect for summer celebrations and last-minute parties.
- Prep Time: 15 minutes
- Cook Time: 0 minutes
- Total Time: 4 hours 15 minutes
- Yield: 12 servings 1x
- Category: Dessert
- Cuisine: American
Ingredients
- Approximately 30 Oreos (about 300g or 10.5 oz)
- 2 cups (480 ml) heavy whipping cream, chilled
- 2 tablespoons (15 g) powdered sugar
- 1 teaspoon (5 ml) vanilla extract
- About 1 cup (150 g or 5.3 oz) fresh strawberries, sliced
- 1/2 cup (75 g or 2.6 oz) fresh blueberries
- Optional: 1 teaspoon lemon juice
Instructions
- Chill your mixing bowl and beaters in the fridge for about 15 minutes to help the cream whip faster and hold its shape.
- Crush the Oreos in a sealed plastic bag with a rolling pin until you have a mix of coarse crumbs and small chunks, or pulse a few times in a food processor.
- Pour the chilled heavy cream into the cold bowl. Add powdered sugar and vanilla extract. Beat on medium-high speed until soft peaks form.
- Spread a thin layer (about 1/4 inch) of whipped cream evenly across the bottom of a 9×13 inch pan.
- Sprinkle half of the crushed Oreos evenly over the whipped cream base and press down gently.
- Spread another 1/4 inch layer of whipped cream over the Oreo layer, smoothing it out.
- Add the remaining crushed Oreos on top of the cream layer, followed by a final layer of whipped cream, smoothing the top evenly.
- Arrange blueberries in the top left corner to form the star section of the flag. Lay sliced strawberries in horizontal rows next to and below the blueberries to mimic the red stripes, using whipped cream for the white stripes in between.
- Cover the pan with plastic wrap and refrigerate for at least 4 hours, ideally overnight.
- Cut into squares with a sharp knife, wiping the blade clean between cuts. Serve chilled.
Notes
Chill the mixing bowl and beaters before whipping cream for better results. Stop whipping cream at soft peaks to avoid graininess. Crush Oreos to a mix of crumbs and chunks for texture. Chill cake at least 4 hours or overnight for best flavor and firmness. Use frozen berries thawed and drained if fresh are unavailable. Variations include gluten-free or dairy-free substitutions and adding cream cheese layers or flavor twists like cinnamon.
Nutrition
- Serving Size: 1 slice (1/12th of c
- Calories: 220
- Sugar: 17
- Fat: 14
- Saturated Fat: 8
- Carbohydrates: 23
- Fiber: 1
- Protein: 2
Keywords: no-bake, Oreo, patriotic, 4th of July, flag cake, easy dessert, summer dessert, whipped cream, berries


