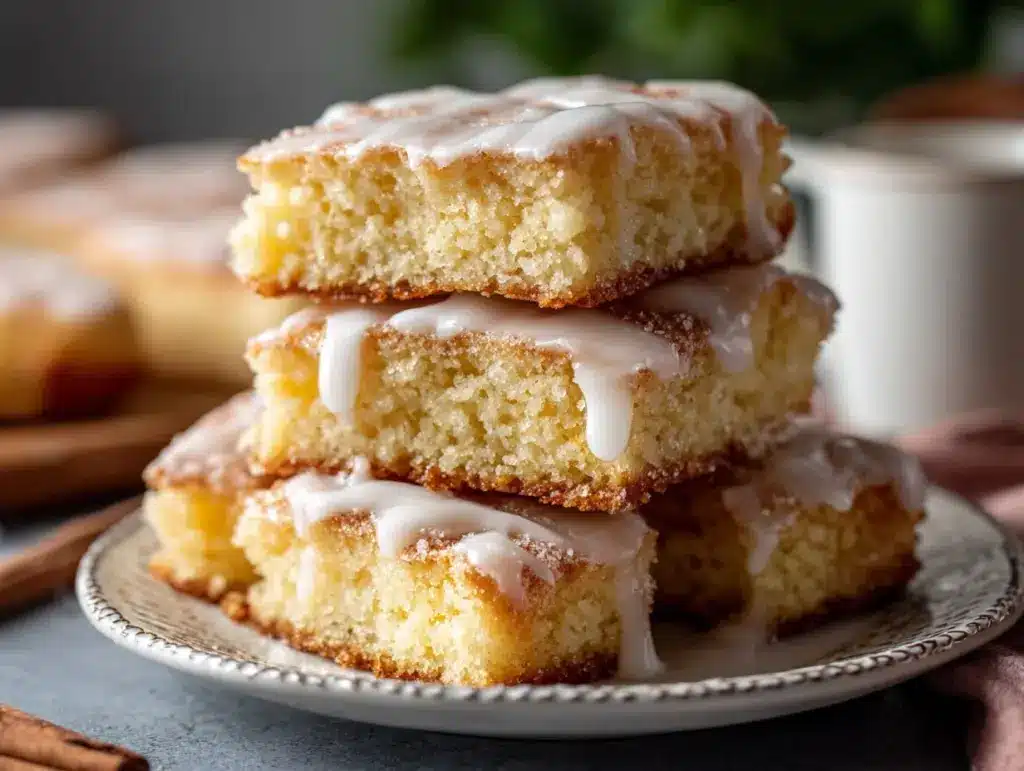
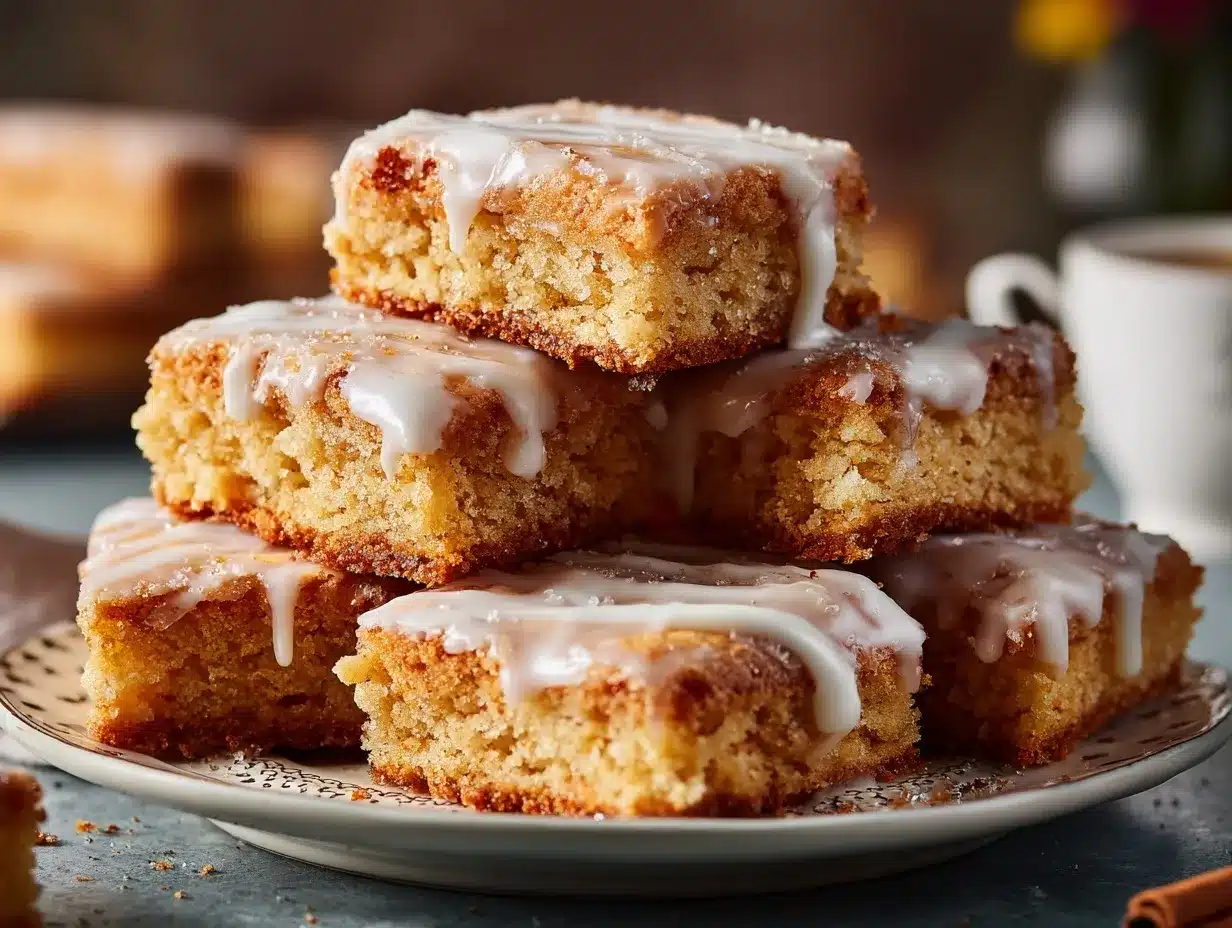
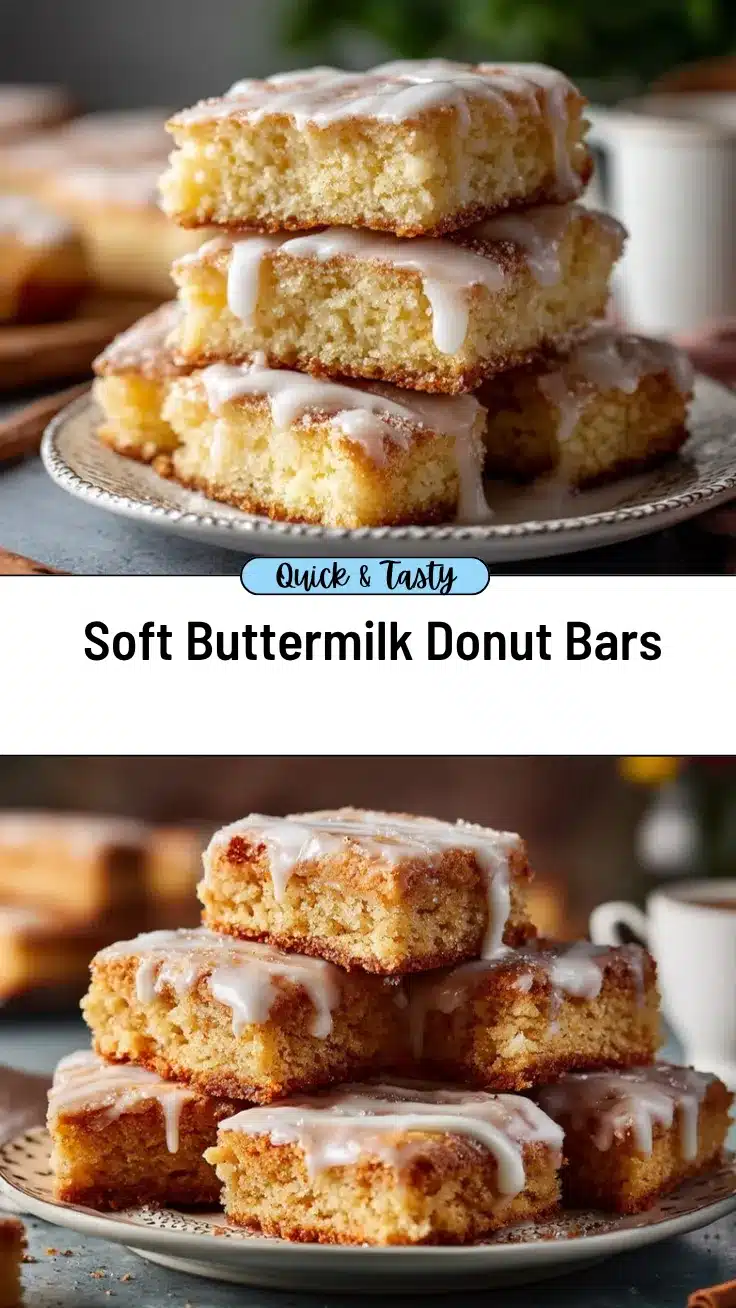
The smell of freshly baked buttermilk donut bars wafting through the air is enough to make anyone’s day brighter. These golden-brown beauties are soft, sweet, and melt in your mouth with every bite. The best part? You don’t need to be a seasoned baker to whip up a batch of these heavenly treats. With a handful of pantry staples and a little time, you can create a dessert that’s perfect for breakfast, brunch, or even a late-night snack. Trust me, once you try these, you’ll find yourself reaching for buttermilk more often than you ever imagined.
I first made these irresistible buttermilk donut bars when my family was craving something sweet but didn’t want the hassle of rolling, cutting, and frying traditional donuts. It was a lightbulb moment—why not simplify things into a bar form? Ever since, these have been a hit at every family gathering and, honestly, they’re so good I even sneak one with my morning coffee sometimes. Let me show you how to make this magical treat that’s sure to become a favorite in your home, too!
Why You’ll Love This Recipe
There’s a lot to adore about these buttermilk donut bars. Let me tell you why this recipe has become a staple in my kitchen:
- Quick & Easy: No rolling, shaping, or frying required—these bars come together in under an hour and bake to perfection.
- Simple Ingredients: You probably already have everything you need in your pantry and fridge!
- Perfect for Any Occasion: Whether it’s breakfast, a potluck, or a midnight snack, these bars fit the bill.
- A Crowd-Pleaser: Kids and adults alike love them. Seriously, I’ve yet to meet someone who didn’t ask for seconds.
- Irresistibly Delicious: They’re melt-in-your-mouth soft with a subtle tangy flavor from the buttermilk, a hint of vanilla, and just the right amount of sweetness.
What makes these buttermilk donut bars stand out? It’s the perfect balance between simplicity and indulgence. They’re not overly sweet, have a moist and tender crumb, and the glaze adds a little sparkle to each bite. Plus, they’re baked—not fried—so you can enjoy them without the extra hassle or grease.
What Ingredients You Will Need
This recipe uses simple, wholesome ingredients to achieve the perfect soft and sweet buttermilk donut bars without the need for frying.
- All-purpose flour: The base for your batter, providing structure and softness.
- Granulated sugar: Adds sweetness and a touch of caramelization.
- Baking powder: Helps the bars rise for that light, fluffy texture.
- Salt: Balances the sweetness and enhances flavors.
- Buttermilk: The star of the recipe—adds a tangy richness that makes these bars extra moist and tender.
- Unsalted butter, melted: Adds richness and moisture.
- Eggs: Help bind the ingredients and add structure to the bars.
- Vanilla extract: For that classic, comforting flavor.
For the glaze:
- Powdered sugar: The base of the glaze for smooth sweetness.
- Milk: Helps thin out the glaze to the perfect consistency.
- Vanilla extract: Adds a subtle flavor to the glaze for an extra pop.
If you need substitutions, don’t worry! You can use gluten-free flour if necessary. For a dairy-free version, opt for almond milk mixed with a tablespoon of vinegar as a buttermilk alternative and swap the butter with coconut oil or a vegan butter.
Equipment Needed
- Mixing bowls: You’ll need at least two—one for wet ingredients and one for dry.
- Whisk: For combining the wet ingredients and ensuring the batter is smooth.
- Spatula: Perfect for folding the batter without overmixing.
- 9×13 baking pan: The ideal size for these bars. You can also use smaller pans, but adjust the bake time accordingly.
- Parchment paper: Helps with easy removal of the bars once baked.
- Cooling rack: Essential for cooling the bars evenly before adding the glaze.
If you don’t have a 9×13 baking pan, a square pan or even individual muffin tins could work—the baking time will just need to be adjusted. For the whisk and spatula, I always recommend silicone tools because they’re easy to clean and gentle on your bowls.
Preparation Method
- Preheat your oven to 350°F (175°C). Line your 9×13 baking pan with parchment paper, leaving some overhang for easy removal later.
- In a large mixing bowl, whisk together 2 cups (250g) of all-purpose flour, 1 cup (200g) granulated sugar, 2 teaspoons baking powder, and 1/2 teaspoon salt. Set aside.
- In another bowl, whisk together 3/4 cup (180ml) buttermilk, 1/2 cup (115g) melted unsalted butter, 2 large eggs, and 1 teaspoon vanilla extract. Make sure the melted butter is slightly cooled to avoid cooking the eggs.
- Gradually pour the wet ingredients into the dry ingredients. Using a spatula, gently fold until just combined. Be careful not to overmix—stop as soon as you don’t see streaks of flour.
- Pour the batter into the prepared baking pan, spreading it out evenly. Smooth the top with your spatula.
- Bake in the preheated oven for 20-25 minutes, or until a toothpick inserted into the center of the bars comes out clean.
- While the bars are baking, prepare the glaze. In a small mixing bowl, whisk together 1 cup (120g) powdered sugar, 2 tablespoons (30ml) milk, and 1/2 teaspoon vanilla extract until smooth. Adjust the consistency by adding more milk, a teaspoon at a time, if needed.
- Once the bars are done, let them cool in the pan for about 10 minutes, then use the parchment overhang to lift them onto a cooling rack. Allow them to cool completely before glazing.
- Drizzle the glaze generously over the cooled bars. Let the glaze set for 10-15 minutes, then slice and serve.
These buttermilk donut bars are best enjoyed fresh, but they can be stored in an airtight container at room temperature for up to 3 days.
Cooking Tips & Techniques
Making buttermilk donut bars is straightforward, but a few expert tips can ensure they turn out perfectly every time:
- Measure ingredients accurately: Baking is a science, so use measuring cups and spoons to get precise amounts.
- Don’t overmix: Overmixing leads to dense bars—gently fold the batter until just combined.
- Use room temperature ingredients: Let eggs and buttermilk come to room temperature for smoother mixing and better texture.
- Check your baking powder: Make sure it’s fresh. Expired baking powder can lead to flat bars.
- Cool completely before glazing: This prevents the glaze from melting and ensures a perfect finish.
One trick I’ve learned: if your bars seem too dry, you can brush a little extra buttermilk over the top before adding the glaze. It works wonders!
Variations & Adaptations
Want to customize your buttermilk donut bars? Here are some ideas to try:
- Chocolate Swirl: Add 1/4 cup cocoa powder to the batter or swirl in melted chocolate for a delicious twist.
- Seasonal Fruits: Fold in fresh berries, diced apples, or even chopped peaches for a fruity boost.
- Spiced Delight: Add 1 teaspoon cinnamon or pumpkin spice to the batter for a warm, cozy flavor.
- Gluten-Free Option: Substitute the all-purpose flour with a 1:1 gluten-free flour blend.
- Dairy-Free Version: Use almond milk mixed with a tablespoon of vinegar instead of buttermilk, and swap butter for coconut oil.
A personal favorite of mine is adding a sprinkle of sea salt to the glaze—it’s a small touch that really elevates the flavor profile and balances the sweetness beautifully.
Serving & Storage Suggestions
These buttermilk donut bars are best served at room temperature, so the glaze sets perfectly. Slice them into generous squares or rectangles, and arrange them on a pretty platter for a picture-perfect presentation. They pair wonderfully with a hot cup of coffee, tea, or cocoa, making them an ideal treat for breakfast or a cozy afternoon snack.
To store, place the bars in an airtight container at room temperature for up to 3 days. If you want to keep them longer, you can freeze them—just wrap each bar individually in plastic wrap, then store them in a freezer-safe container for up to a month. When you’re ready to eat, let them thaw at room temperature or pop them in a microwave for a few seconds to warm them up.
Fun tip: These bars taste even better the day after baking as the glaze settles and the flavors meld together beautifully.
Nutritional Information & Benefits
These buttermilk donut bars aren’t just a treat—they’re made with simple, wholesome ingredients:
- Estimated Calories: 180 per bar
- Protein: 3g per serving
- Key Benefits: Buttermilk adds calcium and protein, while the baked method reduces fat compared to fried donuts.
- Dietary Note: Can be adapted to gluten-free or dairy-free diets with simple substitutions.
- Allergen Alert: Contains dairy, eggs, and gluten (unless substitutions are made).
As someone who loves dessert but also tries to maintain balance, these bars are a great option for a sweet treat that doesn’t feel overly indulgent. Perfect for sharing—or not!
Conclusion
There’s something magical about these irresistible buttermilk donut bars. They’re easy to make, full of flavor, and versatile enough for any occasion. Whether you’re a seasoned baker or a newbie in the kitchen, this recipe will make you feel like a pro. The soft, sweet texture paired with the tangy buttermilk and creamy glaze is simply unforgettable.
Take this recipe and make it your own—try out some of the variations or get creative with your toppings. I’d love to hear how you enjoyed these bars! Share your thoughts in the comments below, or tag me on social media with your mouthwatering creations. Let’s spread the joy of baking one irresistible buttermilk donut bar at a time!
Happy baking!
FAQs
Can I make buttermilk donut bars without buttermilk?
Yes! You can create a buttermilk substitute by mixing 1 tablespoon of vinegar or lemon juice with 1 cup of milk. Let it sit for 5 minutes before using.
Can I freeze buttermilk donut bars?
Absolutely! Wrap each bar individually in plastic wrap and store in a freezer-safe container for up to a month. Thaw at room temperature or microwave to reheat.
Can I make these donut bars gluten-free?
Yes, simply replace the all-purpose flour with a 1:1 gluten-free flour blend. The results are just as delicious!
How do I prevent my donut bars from being dry?
Make sure you don’t overmix the batter and use fresh baking powder. If they seem dry after baking, lightly brush with some extra buttermilk before glazing.
Can I add toppings to the glaze?
Of course! Sprinkle crushed nuts, shredded coconut, or colorful sprinkles over the glaze for a fun and personalized touch.
Pin This Recipe!
Irresistible Buttermilk Donut Bars Recipe Perfect for Beginners

These golden-brown buttermilk donut bars are soft, sweet, and melt in your mouth with every bite. Perfect for breakfast, brunch, or a late-night snack, they’re easy to make and a crowd-pleaser.
- Prep Time: 15 minutes
- Cook Time: 25 minutes
- Total Time: 40 minutes
- Yield: 12 bars 1x
- Category: Dessert
- Cuisine: American
Ingredients
- 2 cups (250g) all-purpose flour
- 1 cup (200g) granulated sugar
- 2 teaspoons baking powder
- 1/2 teaspoon salt
- 3/4 cup (180ml) buttermilk
- 1/2 cup (115g) unsalted butter, melted
- 2 large eggs
- 1 teaspoon vanilla extract
- 1 cup (120g) powdered sugar
- 2 tablespoons (30ml) milk
- 1/2 teaspoon vanilla extract
Instructions
- Preheat your oven to 350°F (175°C). Line your 9×13 baking pan with parchment paper, leaving some overhang for easy removal later.
- In a large mixing bowl, whisk together 2 cups (250g) of all-purpose flour, 1 cup (200g) granulated sugar, 2 teaspoons baking powder, and 1/2 teaspoon salt. Set aside.
- In another bowl, whisk together 3/4 cup (180ml) buttermilk, 1/2 cup (115g) melted unsalted butter, 2 large eggs, and 1 teaspoon vanilla extract. Make sure the melted butter is slightly cooled to avoid cooking the eggs.
- Gradually pour the wet ingredients into the dry ingredients. Using a spatula, gently fold until just combined. Be careful not to overmix—stop as soon as you don’t see streaks of flour.
- Pour the batter into the prepared baking pan, spreading it out evenly. Smooth the top with your spatula.
- Bake in the preheated oven for 20-25 minutes, or until a toothpick inserted into the center of the bars comes out clean.
- While the bars are baking, prepare the glaze. In a small mixing bowl, whisk together 1 cup (120g) powdered sugar, 2 tablespoons (30ml) milk, and 1/2 teaspoon vanilla extract until smooth. Adjust the consistency by adding more milk, a teaspoon at a time, if needed.
- Once the bars are done, let them cool in the pan for about 10 minutes, then use the parchment overhang to lift them onto a cooling rack. Allow them to cool completely before glazing.
- Drizzle the glaze generously over the cooled bars. Let the glaze set for 10-15 minutes, then slice and serve.
Notes
[‘Measure ingredients accurately for best results.’, ‘Don’t overmix the batter to avoid dense bars.’, ‘Use room temperature ingredients for smoother mixing and better texture.’, ‘Ensure your baking powder is fresh to avoid flat bars.’, ‘Cool bars completely before glazing to prevent the glaze from melting.’]
Nutrition
- Serving Size: 1 bar
- Calories: 180
- Sugar: 18
- Sodium: 150
- Fat: 6
- Saturated Fat: 3
- Carbohydrates: 28
- Fiber: 1
- Protein: 3
Keywords: buttermilk donut bars, easy dessert recipe, baked donuts, breakfast treat, brunch recipe


