Sticky rice, sizzling beef, and that addictive sweet-savory sauce—just the smell of this Korean ground beef bowl gets my stomach rumbling every single time. There’s something magical about how fast it comes together, yet it tastes like you ordered in from a cozy little Korean eatery. I still remember the first time I whipped this up on a weeknight when I was flat-out exhausted and craving something hearty. Let’s be real—sometimes you just want big flavor without a big fuss, right? That’s where this recipe shines.
Honestly, “elevated” doesn’t even begin to cover it. The way the garlicky beef caramelizes in the pan, the little hint of ginger, and that finish of toasted sesame oil—it’s pure comfort food, but with a punch of energy and freshness. I’ve tested this Korean ground beef bowl recipe at least a dozen times (yay for leftovers!), tweaked the sauce, played with toppings, and even tried it with cauliflower rice. No matter what, it always hits the spot.
Whether you’re a busy parent, feeding picky eaters, or just want to treat yourself to an easy 20-minute dinner, this bowl has your name all over it. It’s perfect for meal prepping, too—just ask my husband, who basically lives off these bowls for lunch. If you love Korean flavors but don’t have time for hours of marinating or grilling, this recipe is the shortcut you never knew you needed. Let me show you why you’ll fall in love with it.
Why You’ll Love This Korean Ground Beef Bowl Recipe
- Quick & Foolproof: This dinner is ready in under 20 minutes. When you come home hungry and tired, that’s a lifesaver! I’ve made this after late soccer practices and, trust me, it never disappoints.
- Simple, Real Ingredients: No fancy stuff—just ground beef, basic pantry sauces, and fresh toppings. You probably have most of it on hand already.
- Perfect for Busy Nights: It’s my go-to for those crazy evenings when my brain is fried and nobody wants to wait long for food. It’s also great for meal prep: make a big batch, and you’re set for lunches all week.
- Crowd-Pleaser: My kids beg for this, and even my pickiest friends have asked for the recipe. The beef is rich without being heavy, and you can totally customize the toppings.
- Unbeatable Flavor: The sauce is everything—sticky, a little sweet, a little spicy, and full of umami. There’s a reason Korean ground beef bowls are so popular on Pinterest!
What makes this version special? Well, I blend the sauce separately before adding it to the beef, so every bite gets coated. Plus, I finish it all off with a sprinkle of toasted sesame seeds and some quick-pickled veggies for crunch—just enough to make it feel restaurant-level, but without any hassle. And if you’re watching your carbs, it’s so easy to swap in cauliflower rice or serve it over a pile of greens. This Korean ground beef bowl isn’t just another “bowl recipe”—it’s the one my family comes back to again and again. It’s honestly become a comfort food staple in our house, and I’m betting it’ll become one in yours too!
What Ingredients You Will Need
This Korean ground beef bowl keeps things straightforward, but every ingredient has a role to play in building those bold flavors. Most are pantry staples, so you won’t have to hunt down anything wild. Here’s what you’ll need:
- Ground Beef (1 lb / 450g): I usually go for 85% lean, but any ground beef works. For a lighter bowl, use ground turkey or chicken.
- Soy Sauce (1/4 cup / 60ml): The salty, umami-rich base of our sauce. Tamari or coconut aminos work for gluten-free.
- Brown Sugar (2–3 tbsp / 25–40g): Adds that signature sweetness that balances the soy. You can use coconut sugar or honey for a different twist.
- Garlic (3 cloves, minced): Don’t skip it—garlic makes the beef sing. Fresh is best, but pre-minced works in a pinch.
- Fresh Ginger (1 tbsp / 15g, grated): It adds a zippy warmth. Ground ginger is okay if that’s all you have (use 1/2 tsp).
- Sesame Oil (1 tbsp / 15ml): That toasty finish is what makes the flavor pop. Save a drizzle for the end, too.
- Red Pepper Flakes (1/2 tsp or to taste): For a hint of heat. Skip or reduce for kids, or add more if you like things spicy.
- Cooked White or Brown Rice (about 3 cups / 450g): The classic base. Cauliflower rice or quinoa are great swaps for a low-carb or gluten-free bowl.
- Green Onions (2–3, sliced): They add freshness and a little bite. I love lots, but you can use less if you prefer.
- Toasted Sesame Seeds (1–2 tbsp / 10–20g): Adds crunch and nuttiness.
- Optional Toppings:
- Quick-pickled carrots or cucumbers (for tang and crunch)
- Sliced radishes or shredded cabbage (for freshness)
- Kimchi (for a classic Korean kick)
- Sriracha or gochujang (for extra heat)
- Fried or soft-boiled egg (for added richness)
Tips: For the best texture, I buy beef that’s not too lean—fat = flavor here. If you want to make it dairy-free, you’re in luck—there’s zero dairy in this recipe. And if you’re watching sodium, use low-sodium soy sauce and go easy on the pickled toppings. I’ve even tried this with Impossible ground “beef” for a plant-based version, and it was surprisingly good! Just keep the sauce as the star, and you really can’t go wrong.
Equipment Needed
- Large Skillet or Wok: Nonstick or cast iron both work. I prefer a deep skillet to prevent splatters when browning the beef.
- Spatula or Wooden Spoon: For breaking up and stirring the beef as it cooks. A wooden spoon gives you more control, but honestly, any sturdy spatula will do the trick.
- Measuring Cups and Spoons: You’ll want to be precise with the sauce for the perfect balance of salty and sweet.
- Rice Cooker or Saucepan: For preparing the rice. I’m a fan of my simple $20 rice cooker—makes life so much easier!
- Mixing Bowl (Optional): To blend the sauce ingredients before adding to the pan. I sometimes just mix it in a measuring cup for fewer dishes.
- Knife and Cutting Board: For prepping garlic, ginger, and toppings.
If you don’t have a rice cooker, stovetop rice is totally fine—just don’t forget to let it rest after cooking for fluffier grains. A wok isn’t necessary, but if you have one, it’s fantastic for even browning. And for easy cleanup, I always season my cast iron skillet after each use. If you’re on a budget, you can make this entire meal with just a single frying pan and a basic saucepan for the rice—no need for anything fancy.
Preparation Method
-
Cook the Rice:
- Rinse 1.5 cups (285g) of uncooked rice under cold water until the water runs clear.
- Add to a rice cooker or saucepan with 3 cups (720ml) water and a pinch of salt.
- Cook according to package or rice cooker instructions (usually 15–20 minutes). Let it rest for 5 minutes before fluffing with a fork.
- Tip: Start the rice first—it can cook while you prepare the beef!
-
Make the Sauce:
- In a small bowl or measuring cup, combine 1/4 cup (60ml) soy sauce, 2–3 tbsp (25–40g) brown sugar, 1 tbsp (15ml) sesame oil, 1/2 tsp red pepper flakes, and 1 tbsp (15g) grated ginger.
- Whisk until the sugar is mostly dissolved. Taste and adjust sweetness or spice as desired.
-
Brown the Beef:
- Heat your skillet over medium-high heat. Add 1 lb (450g) ground beef.
- Use a spatula to break up the beef. Let it cook undisturbed for 2–3 minutes to get some browning, then stir and continue cooking until no longer pink (about 5–6 minutes total).
- If there’s a lot of fat, drain some off, but leave just a bit for flavor.
-
Add Garlic & Ginger:
- Reduce heat to medium. Add 3 cloves garlic (minced) and sauté with the beef for 1 minute, until fragrant.
- Warning: Garlic burns fast—keep it moving and don’t walk away!
-
Add the Sauce:
- Pour your sauce mixture evenly over the beef. Stir well to coat every bit.
- Let it simmer for 2–3 minutes, allowing the sauce to thicken and caramelize. It should look glossy and slightly sticky.
-
Finish & Taste:
- Turn off the heat. Taste and adjust seasoning—add a splash more soy if you need more salt, or a pinch of sugar if you want it sweeter.
- Stir in half the green onions, saving the rest for garnish.
- Drizzle a little extra sesame oil for extra aroma, if desired.
-
Assemble the Bowls:
- Divide cooked rice among bowls. Top with generous scoops of the beef mixture.
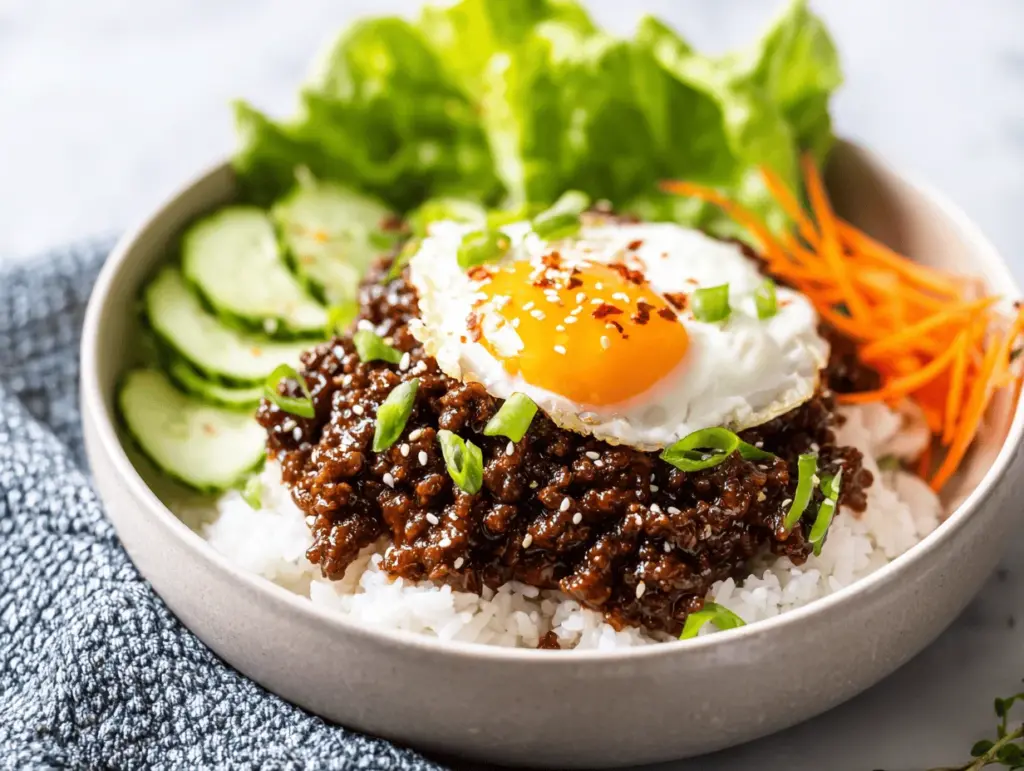
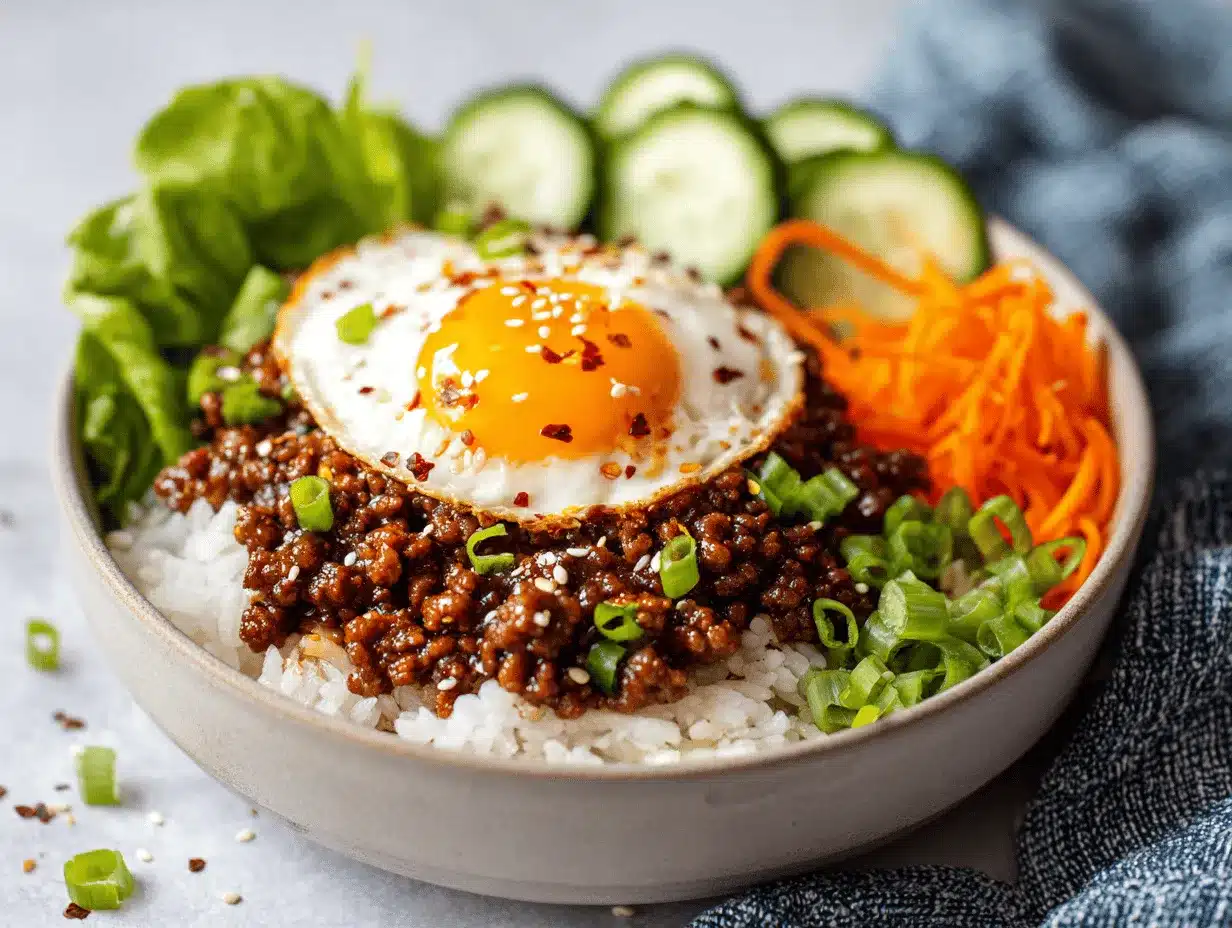
- Add your favorite toppings: more green onions, sesame seeds, pickled veggies, kimchi, or a fried egg.
- Serve immediately while hot and steamy!
Prep Notes: If you’re prepping ahead, keep rice and beef separate until ready to serve. For extra crunch, toss on sliced radishes or quick-pickled cucumbers. And if the beef looks too dry, just add a splash of water to loosen it up before serving. The goal is saucy, glistening beef—don’t be afraid to taste and tweak as you go!
Cooking Tips & Techniques
After a handful of rushed weeknights and a few “oops, it’s too salty” moments, I’ve picked up some tricks for getting this Korean ground beef bowl just right.
- Browning is Key: Let the beef sit for a minute or two before stirring. You want those caramelized bits—they give so much flavor! Don’t overcrowd the pan, or it’ll steam instead of brown.
- Balance Your Sauce: Soy sauce brands vary in saltiness. Always taste the sauce before adding to the beef, and remember you can add more, but you can’t take it out.
- Rice Texture: Fluffy rice makes the best base—let it rest after cooking and fluff gently. Sticky or mushy rice can ruin the bowl vibe.
- Timing: Start the rice first, then prep all your toppings while the beef cooks. That way, everything comes together at once. (I learned this the hard way—nobody likes cold rice with hot beef!)
- Customize the Heat: Start with less red pepper flakes if you’re unsure. You can always add more at the end or let everyone add their own sriracha.
- Don’t Skip the Sesame Oil: It’s tempting to use less, but that nutty finish ties the whole dish together. If you’re out, toasted sunflower oil is a decent backup.
One time, I added the sauce before draining the beef and ended up with a watery, bland mess—don’t make my mistake! Always drain excess fat first. And if you want to get fancy, try a quick pickle on your veggies for extra zing. A little effort goes a long way here, and once you’ve made it a couple times, you’ll fly through the steps like a pro.
Variations & Adaptations
One of my favorite things about this Korean ground beef bowl recipe is how flexible it is. You can really make it your own—here are some ideas I’ve tried and loved:
- Low-Carb / Keto: Swap the rice for cauliflower rice or shredded cabbage. The sauce is naturally low-carb if you use a sugar substitute like monk fruit or erythritol.
- Vegetarian or Vegan: Use plant-based ground “beef” (like Impossible or Beyond), and sub the fish sauce (if using) with extra soy sauce or a splash of mushroom sauce. Tofu crumbles work well, too—just press and crumble firm tofu, then cook as you would the beef.
- Spicy Lovers: Double up on red pepper flakes, add diced fresh chili, or finish with a drizzle of gochujang or sriracha. My husband loves it with a fried egg and extra hot sauce!
- Different Proteins: Ground turkey, chicken, or even pork all work. Each brings a slightly different flavor, but the sauce keeps it classic.
- Allergen-Friendly: Use tamari or coconut aminos for gluten-free. For soy-free, try coconut aminos and swap beef for ground chicken or turkey. Skip sesame seeds if there’s an allergy and use roasted sunflower seeds for crunch.
- Seasonal Bowls: In summer, add fresh cucumber or shredded carrots. In winter, try sautéed spinach or roasted sweet potatoes as a base.
Personally, I love a “bibimbap-inspired” bowl with a runny egg and lots of quick-pickled veggies. It adds color and that tangy bite I crave. Don’t be afraid to get creative—this is a true “use what you have” kind of recipe!
Serving & Storage Suggestions
Serve your Korean ground beef bowl piping hot, right after assembly. The beef should be glossy and saucy, the rice fluffy, and the toppings fresh and vibrant. I like to pile everything in wide, shallow bowls for that Pinterest-worthy look—don’t forget a sprinkle of sesame seeds and a handful of green onions!
Pair with a side of steamed broccoli, kimchi, or a crisp cucumber salad for a full meal. If you’re having friends over, set up a “bowl bar” with toppings so everyone can customize their own. Iced green tea or a light beer makes a great drink pairing.
Leftovers are a lifesaver—store beef and rice separately in airtight containers in the fridge for up to 4 days. Reheat the beef gently in the microwave or a skillet with a splash of water to loosen the sauce. Rice reheats best covered with a damp paper towel. You can freeze the beef for up to 2 months; thaw overnight and reheat as above.
The flavors deepen as it sits, so it’s honestly even better on day two. I’ve even stuffed leftovers into lettuce wraps for a lighter lunch. Just avoid freezing fresh veggies or eggs—add those fresh when serving.
Nutritional Information & Benefits
This Korean ground beef bowl is surprisingly balanced for comfort food. A typical serving (with rice and basic toppings) packs about 500-600 calories, 25g protein, and 40g carbs. If you opt for cauliflower rice or leaner beef, you’ll cut calories and carbs significantly.
Ground beef brings iron and B vitamins, and the fresh toppings offer fiber and vitamins. Using brown rice or quinoa boosts fiber and minerals. The sauce is flavorful but not overloaded with sugar—just enough for that signature sticky finish. Watch out for sodium if you’re sensitive; use low-sodium soy sauce and go light on kimchi or pickles.
If you’re gluten-free or dairy-free, this recipe is easy to adapt. Just be mindful of sesame allergies. Personally, I love how it fills me up without feeling heavy, and the protein keeps me energized all evening. It’s a great way to sneak in extra veggies, too—just load up those toppings!
Conclusion
If you’re looking for a weeknight dinner that’s fast, packed with flavor, and totally customizable, this Korean ground beef bowl recipe is your new best friend. It’s got the cozy, comforting vibe of takeout, but you control the ingredients and the spice. Plus, it’s just plain fun to eat!
Don’t be afraid to play with the toppings and make it truly your own. This is the kind of recipe that grows with you—you can tweak it for every season, every craving, and every dietary need. I love it because it makes dinner exciting again, even on the busiest nights.
Give it a try, and let me know what you think! Did you add a fried egg? Make it extra spicy? I’d love to hear your variations—drop a comment below, share your photos, or tag me on Pinterest. Happy cooking, and may your bowls always be saucy and delicious!
Frequently Asked Questions
How can I make this Korean ground beef bowl gluten-free?
Just swap out regular soy sauce for tamari or coconut aminos—both are gluten-free and work perfectly. Double-check any store-bought toppings like kimchi, as some brands may contain wheat.
Can I use a different type of ground meat?
Absolutely! Ground turkey, chicken, or even pork all work. The sauce is the real star here, so you’ll still get those classic flavors.
What can I use instead of rice?
Cauliflower rice, quinoa, or even shredded cabbage make great low-carb or grain-free bases. I’ve even served it over zucchini noodles for a lighter twist.
Is this recipe spicy?
It has a mild kick from the red pepper flakes, but you can easily adjust the heat up or down to suit your taste. Leave them out for kids, or add extra sriracha for more spice.
Can I meal prep this Korean ground beef bowl?
Yes! Cook the beef and rice ahead, store them separately, and just reheat before serving. Add fresh toppings each time for the best texture and flavor.
Pin This Recipe!
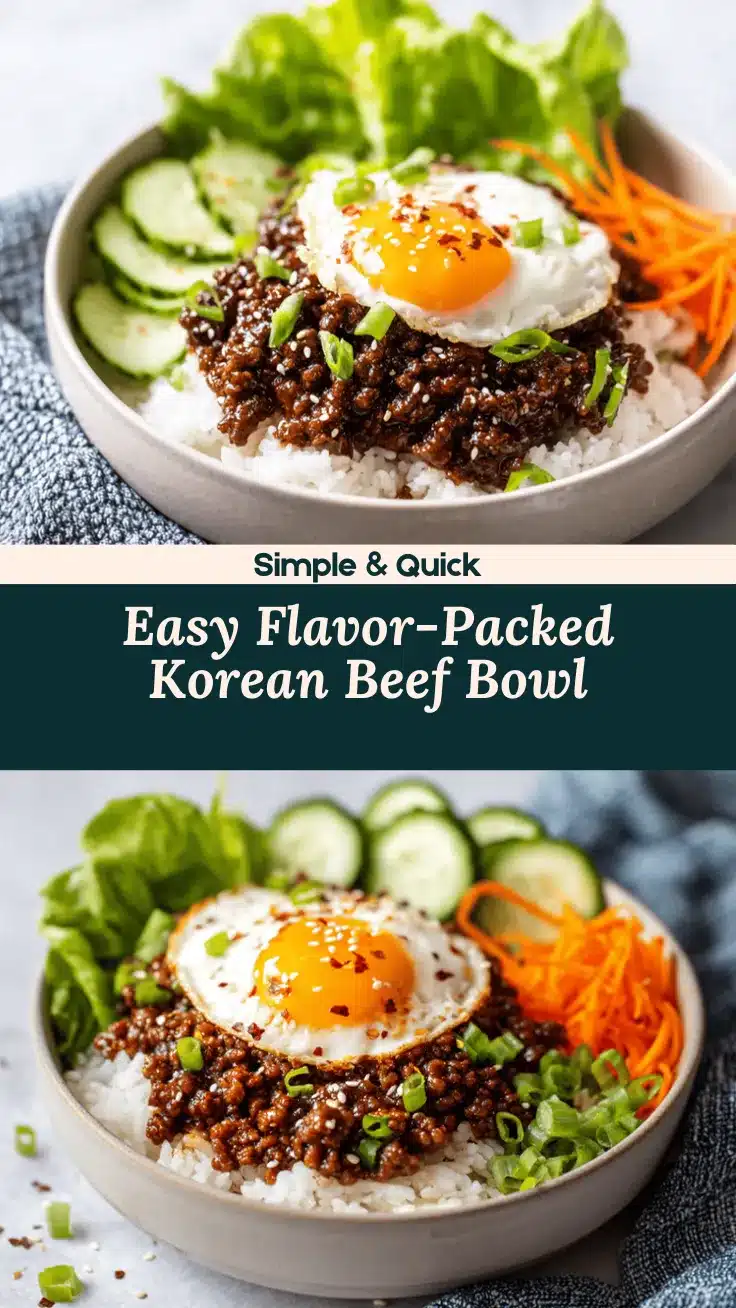
Korean Ground Beef Bowl

This easy Korean ground beef bowl features sticky rice, caramelized garlicky beef, and a sweet-savory sauce for a comforting, flavor-packed dinner in just 20 minutes. It’s perfect for busy weeknights, meal prep, and totally customizable with your favorite toppings.
- Prep Time: 10 minutes
- Cook Time: 10 minutes
- Total Time: 20 minutes
- Yield: 4 servings 1x
- Category: Main Course
- Cuisine: Korean
Ingredients
- 1 lb ground beef (85% lean preferred)
- 1/4 cup soy sauce (or tamari/coconut aminos for gluten-free)
- 2–3 tbsp brown sugar
- 3 cloves garlic, minced
- 1 tbsp fresh ginger, grated (or 1/2 tsp ground ginger)
- 1 tbsp sesame oil, plus more for drizzling
- 1/2 tsp red pepper flakes (to taste)
- 3 cups cooked white or brown rice (about 1.5 cups uncooked)
- 2–3 green onions, sliced
- 1–2 tbsp toasted sesame seeds
- Optional toppings: quick-pickled carrots or cucumbers, sliced radishes, shredded cabbage, kimchi, sriracha or gochujang, fried or soft-boiled egg
Instructions
- Rinse 1.5 cups uncooked rice under cold water until clear. Add to rice cooker or saucepan with 3 cups water and a pinch of salt. Cook per package or rice cooker instructions (15–20 minutes). Let rest 5 minutes, then fluff.
- In a small bowl, whisk together soy sauce, brown sugar, sesame oil, red pepper flakes, and grated ginger until sugar dissolves. Adjust sweetness or spice to taste.
- Heat a large skillet over medium-high. Add ground beef and break up with a spatula. Let brown undisturbed for 2–3 minutes, then stir and cook until no longer pink (5–6 minutes total). Drain excess fat, leaving a little for flavor.
- Reduce heat to medium. Add minced garlic and sauté with beef for 1 minute until fragrant.
- Pour sauce mixture over beef. Stir to coat and simmer 2–3 minutes until sauce thickens and caramelizes.
- Turn off heat. Taste and adjust seasoning if needed. Stir in half the green onions, reserving the rest for garnish. Drizzle with extra sesame oil if desired.
- Divide cooked rice among bowls. Top with beef mixture and your choice of toppings: green onions, sesame seeds, pickled veggies, kimchi, or a fried egg. Serve hot.
Notes
For gluten-free, use tamari or coconut aminos. For low-carb, serve over cauliflower rice. Customize toppings with pickled veggies, kimchi, or a fried egg. Drain excess fat before adding sauce for best texture. Store beef and rice separately for meal prep. Adjust spice level to taste.
Nutrition
- Serving Size: 1 bowl (about 1/4 of recipe with rice and toppings)
- Calories: 550
- Sugar: 10
- Sodium: 950
- Fat: 22
- Saturated Fat: 7
- Carbohydrates: 48
- Fiber: 2
- Protein: 25
Keywords: Korean ground beef bowl, easy dinner, 20-minute meal, beef rice bowl, meal prep, Asian bowl, gluten-free option, dairy-free, spicy, quick weeknight dinner