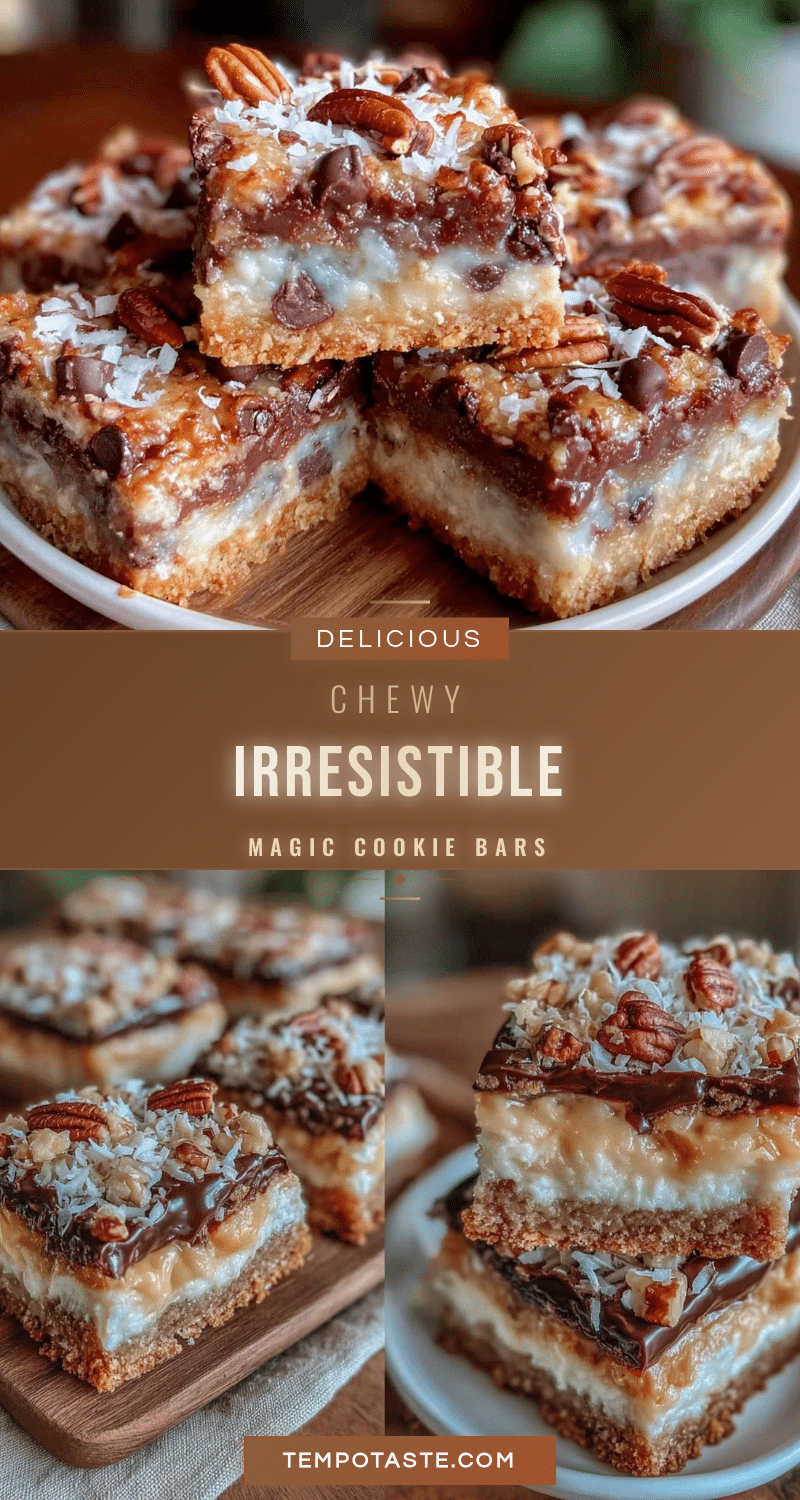
“Hey, you gotta try these bars,” my coworker texted me one dreary afternoon, just when I was about ready to drown in spreadsheets and emails. Honestly, I wasn’t expecting much—just another quick snack suggestion—but that message led me down a delicious rabbit hole. The bar she mentioned was none other than the Cozy Magic Cookie Bars Seven Layer with Irresistible Texture. The name alone piqued my curiosity, but the real surprise was how this simple, homemade dessert turned into my go-to comfort food on hectic days.
It all started when I was scrambling to bring something sweet to a last-minute potluck. I rummaged through my pantry and found a mix of standard staples: graham crackers, chocolate chips, coconut flakes—nothing fancy. I threw them together, half skeptical, and baked them up. The kitchen filled with that warm, nutty aroma that instantly softened the chaos of the day. When I took the first bite, the layers melded together perfectly—the crunch of the crust, the gooey middle, the sprinkle of nuts on top. Honestly, I couldn’t believe something so effortless could produce that kind of magic.
Since then, this recipe has become my quiet little secret for cozy nights and unexpected guests. It’s not flashy, but it always feels like a hug in dessert form. No fuss, no weird ingredients, just that perfect balance between chewy, crunchy, and sweet that keeps you coming back for one more bite. It’s the kind of treat that reminds me why homemade desserts, like the classic Boston cream pie, hold a special place in our hearts—simple, comforting, and undeniably satisfying.
So, whether you’re wrestling with a hectic schedule or just want something to curl up with after a long day, these magic cookie bars might just be the cozy reset you didn’t know you needed. It’s funny how a humble seven-layer bar can turn into a small but meaningful ritual. And that texture? Honestly, it’s what sold me—the kind of bite that makes you pause and savor, long after the first taste.
Why You’ll Love This Recipe
This Magic Cookie Bars Seven Layer recipe has been tested countless times in my kitchen, and it never fails to impress. I’ve tweaked it here and there over the years, and each version has brought me closer to the perfect cozy dessert that’s both quick and incredibly satisfying.
- Quick & Easy: It comes together in under 15 minutes, making it a lifesaver for busy weeknights or spontaneous sweet cravings.
- Simple Ingredients: You don’t need a special trip to the store—basic pantry staples like sweetened condensed milk, graham cracker crumbs, and chocolate chips cover it all.
- Perfect for Potlucks & Gatherings: Everyone always asks for seconds, and it travels well, making it my go-to for casual get-togethers.
- Crowd-Pleaser: Kids and adults alike adore the multi-layered textures and flavors—soft, crunchy, chewy, and nutty all in one bite.
- Unbelievably Delicious: The combination of melted sweetened condensed milk and coconut flakes creates a luscious, caramel-like binding that’s genuinely addictive.
This recipe stands out because it strikes a real balance in texture and flavor—not too sweet, not too dense. Unlike other cookie bars that can be dry or too gooey, this one has that “just right” consistency thanks to the layering technique. Plus, the graham cracker crust adds a subtle, buttery crunch that makes every bite interesting.
It’s the kind of treat that feels like a little celebration after a long day, yet it’s humble enough to whip up on a whim. Honestly, it’s one of those recipes that makes you close your eyes and smile after the first bite—no exaggeration. If you’ve ever enjoyed a cozy dessert like the creamy one-pot vodka rigatoni for dinner and craved something sweet to follow, this will satisfy that sweet tooth without weighing you down.
What Ingredients You Will Need
This recipe relies on simple, wholesome ingredients to deliver bold flavor and a satisfyingly layered texture without any fuss. Most are pantry staples, and you can easily swap a few to fit your dietary needs or what you have on hand.
- Graham Cracker Crust:
- 1 1/2 cups graham cracker crumbs (about 10 sheets, finely crushed)
- 6 tablespoons unsalted butter, melted (adds richness and helps crust set)
- 1/4 cup granulated sugar (balances buttery flavor)
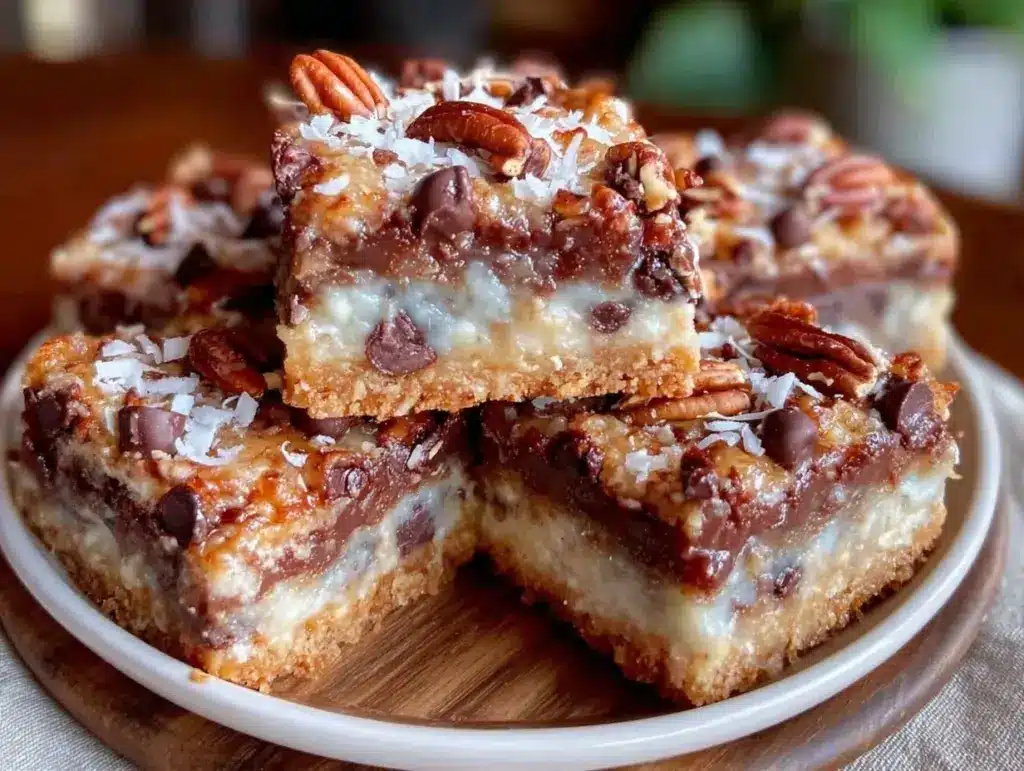
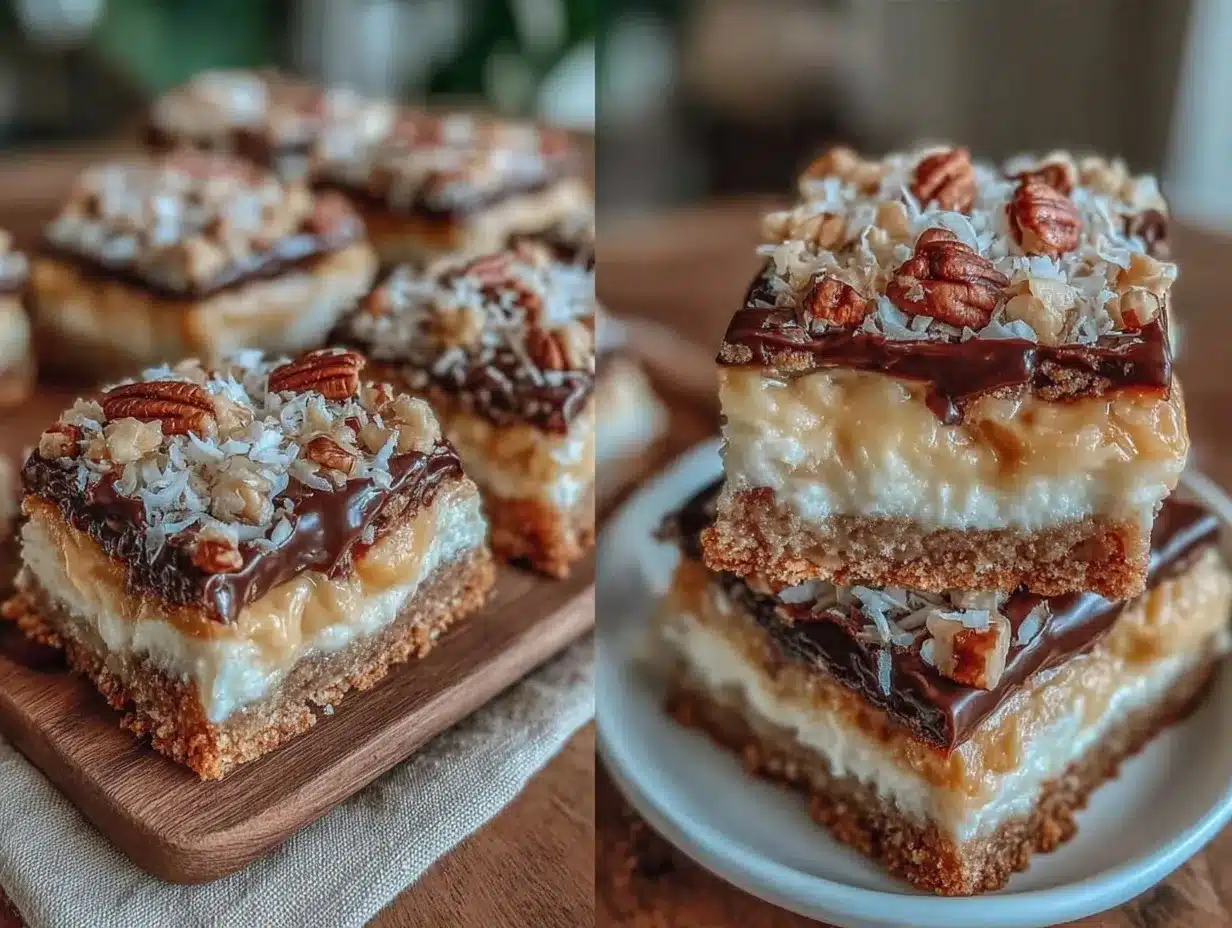
- Seven Layer Filling:
- 1 cup semisweet chocolate chips (I prefer Ghirardelli for best melt and flavor)
- 1 cup sweetened shredded coconut (use unsweetened if you want less sugar)
- 1 cup chopped walnuts or pecans (toasted for extra depth, optional but recommended)
- 1 (14 oz) can sweetened condensed milk (this is the glue that holds it all together)
- 1/2 cup butterscotch chips or white chocolate chips (optional, adds a nice twist)
For substitutions, you can swap the walnuts with pecans or almonds depending on your nut preference or allergies. Use dairy-free butter and sweetened condensed coconut milk if you need vegan options. If you want a gluten-free version, try almond flour crust or gluten-free graham crackers.
Seasonal tip: In summer, fresh berries make a great side, or you could fold some dried cranberries into the nut layer for a tart surprise. The ingredients come together effortlessly, and you likely already have them ready, making this a stress-free dessert choice.
Equipment Needed
- 9×13 inch baking pan (glass or metal works fine; glass tends to bake more evenly)
- Mixing bowls (medium and large)
- Measuring cups and spoons for accuracy
- Spatula or wooden spoon for mixing
- Food processor or plastic bag and rolling pin (to crush graham crackers)
- Oven mitts and cooling rack
If you don’t have a food processor, no worries—just place the graham crackers in a sturdy plastic bag and crush them with a rolling pin. I’ve done this dozens of times, and it works just as well. For budget-friendly baking pans, simple aluminum pans from your local store do the trick, but if you bake often, investing in a heavier pan improves heat distribution and browning.
Personally, I use a silicone spatula for mixing because it scrapes every bit of batter effortlessly, but a wooden spoon works just as well. Keeping your butter at room temperature makes mixing the crust a breeze too.
Preparation Method
- Preheat the oven: Set your oven to 350°F (175°C) to get it ready while you prepare your ingredients. This step is crucial to ensure even baking.
- Prepare the crust: In a medium bowl, combine 1 1/2 cups of graham cracker crumbs, 1/4 cup granulated sugar, and 6 tablespoons melted butter. Stir until the mixture resembles wet sand.
- Press the crust: Transfer the crumb mixture into your 9×13 inch baking pan. Use the back of a spoon or your fingers to press it firmly and evenly across the bottom. The firmer the crust, the better it holds up to the luscious layers on top.
- Bake the crust: Pop it in the oven for 8-10 minutes until lightly golden and fragrant. This step prevents sogginess and gives the crust a toasty flavor.
- Layer the fillings: Remove the crust from the oven and immediately sprinkle the chocolate chips evenly over it. Follow with a layer of shredded coconut, then the chopped nuts, and if you’re using, butterscotch or white chocolate chips.
- Pour the sweetened condensed milk: Slowly drizzle the entire can (14 oz or 396g) evenly over the layers. This milky drizzle binds all ingredients together beautifully, creating that iconic gooey magic.
- Bake the bars: Return the pan to the oven and bake for 25-30 minutes. You’ll know it’s done when the edges are golden brown and the center is set but still slightly soft to the touch. Avoid overbaking; you want a chewy, moist texture, not dry bars.
- Cool completely: Let the bars cool on a wire rack for at least 1 hour before slicing. This allows the layers to firm up and makes cutting much easier without crumbling.
- Slice and serve: Use a sharp knife (wipe it clean between cuts for neat squares) to slice into bars. Serve at room temperature or chilled—both work wonderfully.
For troubleshooting, if your bars seem too soft after cooling, pop them in the fridge for 15-20 minutes to help firm up. If you find the crust a bit crumbly, pressing it more firmly before baking usually fixes that. I’ve made this recipe on busy days and found that prepping the crust the night before saves me time without sacrificing freshness.
Cooking Tips & Techniques
From my many attempts, a few cooking tips make all the difference:
- Don’t skip baking the crust: It might seem like an extra step, but it keeps the base crisp and holds the layers better.
- Even layering is key: Try to spread each layer evenly for consistent texture and flavor—no one wants a bite with just nuts or just coconut!
- Use quality chocolate chips: Cheap chips tend to burn or fail to melt evenly. I swear by brands like Ghirardelli or Guittard for smooth, rich flavor.
- Watch your oven: Baking times can vary, especially in older ovens. Start checking bars around 25 minutes to avoid overbaking.
- Let bars cool fully: Patience here pays off—cutting too soon leads to crumbly bars and melted fillings running everywhere.
One funny lesson I learned the hard way was forgetting to toast the nuts beforehand. The bars tasted decent, but the nuts lacked that depth and crunch I love. Toasting nuts in a dry skillet for 3-5 minutes until fragrant adds a subtle toasty note that elevates the whole bar.
When multitasking in the kitchen, I prepare the crust while the oven preheats and toast nuts in the same skillet immediately after. This little time-saving trick keeps the process smooth without rushing through steps.
Variations & Adaptations
Feel free to make this recipe your own by experimenting with these variations:
- Nut-Free Version: Replace nuts with extra chocolate chips or sunflower seeds for crunch without allergies.
- Seasonal Fruit Twist: Add dried cherries, cranberries, or chopped dried apricots to the layers for a fruity surprise that cuts through the sweetness.
- Salted Caramel Drizzle: After baking, drizzle a bit of salted caramel sauce over cooled bars to add a luscious, sophisticated touch.
- Vegan Adaptation: Use vegan butter, dairy-free sweetened condensed milk alternatives, and dairy-free chocolate chips. Coconut flakes and nuts remain the same.
- Alternative Crust: Swap graham cracker crumbs with crushed pretzels or digestive biscuits for a salty-sweet contrast.
Personally, I tried swapping the butterscotch chips with peanut butter chips once, and the result was a nutty, rich flavor that my family couldn’t get enough of. It’s a subtle twist but adds a lovely new layer to the bars.
Serving & Storage Suggestions
These bars are best served at room temperature when the layers are soft and chewy, but you can also enjoy them chilled for a firmer texture. I like to pair them with a cup of strong coffee or a creamy iced pistachio latte to balance the sweetness—if that sounds intriguing, you might enjoy the creamy iced pistachio latte recipe from the site.
For storage, keep the bars in an airtight container at room temperature for up to 3 days. If you want them to last longer, pop them in the fridge where they’ll stay fresh for up to a week. Freezing is also an option—wrap individual bars in plastic wrap and store in a freezer bag for up to 2 months. Thaw at room temperature before enjoying.
Reheating is not usually necessary, but if you prefer warm bars, microwave them for 10-15 seconds. The texture softens beautifully, almost like a fresh-baked treat. Just watch out—it gets hot fast!
Interestingly, the flavors meld and deepen over time, so sometimes I make these bars a day ahead to let the layers settle and get even more luscious. It’s a small trick that makes the dessert feel extra special.
Nutritional Information & Benefits
While these magic cookie bars are definitely a treat, they also include some nutritional benefits from key ingredients. One bar (roughly a 2×2 inch square) contains approximately:
| Calories | Fat | Carbohydrates | Protein | Fiber |
|---|---|---|---|---|
| 280-320 kcal | 15-18g | 35-40g | 3-4g | 2-3g |
The nuts provide healthy fats and protein, while the coconut adds a bit of fiber and a tropical touch. Sweetened condensed milk is rich and caloric, so moderation is key. For those watching carbs, swapping out some chocolate chips for nuts or seeds can reduce sugar content.
These bars are gluten-friendly if you use gluten-free graham crackers and are naturally vegetarian. They do contain nuts and dairy, so check for allergens if serving to guests. From my experience, they make a great occasional indulgence balanced with wholesome ingredients rather than overly processed sweets.
Conclusion
This Magic Cookie Bars Seven Layer recipe has become one of those rare desserts that’s both reliably delicious and wonderfully easy. It’s comfort food you can whip up on a whim, yet it feels special enough for company or a cozy night in. I love how each layer brings something different—crunch, chew, sweetness—and how the whole thing comes together with minimal effort.
Don’t hesitate to play around with the layers and make it your own. Whether you add nuts, swap chips, or drizzle caramel, this recipe is a flexible canvas for your cravings. I hope it becomes as much of a staple in your kitchen as it is in mine.
If you try it, I’d love to hear how your bars turned out or what variations you experimented with—leave a comment or share your thoughts! And if desserts with rich layers are your thing, you might appreciate the pineapple upside-down cake recipe for another cozy homemade treat.
Here’s to sweet moments and the magic found in simple layers.
FAQs About Cozy Magic Cookie Bars Seven Layer Recipe
Can I make these bars gluten-free?
Yes! Just use gluten-free graham cracker crumbs or substitute with crushed gluten-free cookies for the crust. The rest of the ingredients are naturally gluten-free.
How long do these bars stay fresh?
Stored in an airtight container, they last about 3 days at room temperature or up to a week in the fridge. You can also freeze them for up to 2 months.
Can I use different types of nuts?
Absolutely. Walnuts, pecans, almonds, or even hazelnuts work great. Toast them lightly for extra flavor before layering.
Is it okay to skip the butterscotch or white chocolate chips?
Yes, those are optional. The bars will still be delicious with just semisweet chocolate chips, coconut, nuts, and sweetened condensed milk.
What if I don’t have sweetened condensed milk?
This is a key ingredient for the signature texture and sweetness. You can make a homemade version by simmering sweetened milk or try a vegan condensed milk alternative if needed.
Pin This Recipe!
Magic Cookie Bars Seven Layer Recipe

A quick and easy homemade dessert featuring a crunchy graham cracker crust layered with chocolate chips, coconut, nuts, and sweetened condensed milk for a chewy, irresistible texture.
- Prep Time: 15 minutes
- Cook Time: 35-40 minutes
- Total Time: 50-55 minutes
- Yield: 24 bars 1x
- Category: Dessert
- Cuisine: American
Ingredients
- 1 1/2 cups graham cracker crumbs (about 10 sheets, finely crushed)
- 6 tablespoons unsalted butter, melted
- 1/4 cup granulated sugar
- 1 cup semisweet chocolate chips
- 1 cup sweetened shredded coconut
- 1 cup chopped walnuts or pecans (toasted, optional)
- 1 (14 oz) can sweetened condensed milk
- 1/2 cup butterscotch chips or white chocolate chips (optional)
Instructions
- Preheat the oven to 350°F (175°C).
- In a medium bowl, combine graham cracker crumbs, granulated sugar, and melted butter. Stir until mixture resembles wet sand.
- Press the crumb mixture firmly and evenly into the bottom of a 9×13 inch baking pan.
- Bake the crust for 8-10 minutes until lightly golden and fragrant.
- Remove crust from oven and immediately sprinkle semisweet chocolate chips evenly over it.
- Layer shredded coconut over the chocolate chips, then add chopped nuts, and if using, butterscotch or white chocolate chips.
- Slowly drizzle the entire can of sweetened condensed milk evenly over the layers.
- Return the pan to the oven and bake for 25-30 minutes until edges are golden brown and center is set but slightly soft.
- Cool completely on a wire rack for at least 1 hour before slicing.
- Slice into bars using a sharp knife and serve at room temperature or chilled.
Notes
Toast nuts in a dry skillet for 3-5 minutes for extra flavor. Press crust firmly before baking to prevent crumbliness. Let bars cool completely before slicing to avoid crumbling. Bars can be refrigerated to firm up if too soft. Use quality chocolate chips like Ghirardelli for best melt and flavor. Vegan and gluten-free substitutions are possible.
Nutrition
- Serving Size: One 2x2 inch bar
- Calories: 280320
- Fat: 1518
- Carbohydrates: 3540
- Fiber: 23
- Protein: 34
Keywords: magic cookie bars, seven layer bars, easy dessert, homemade cookie bars, graham cracker crust, chocolate chip bars, coconut bars, nut bars, quick dessert


