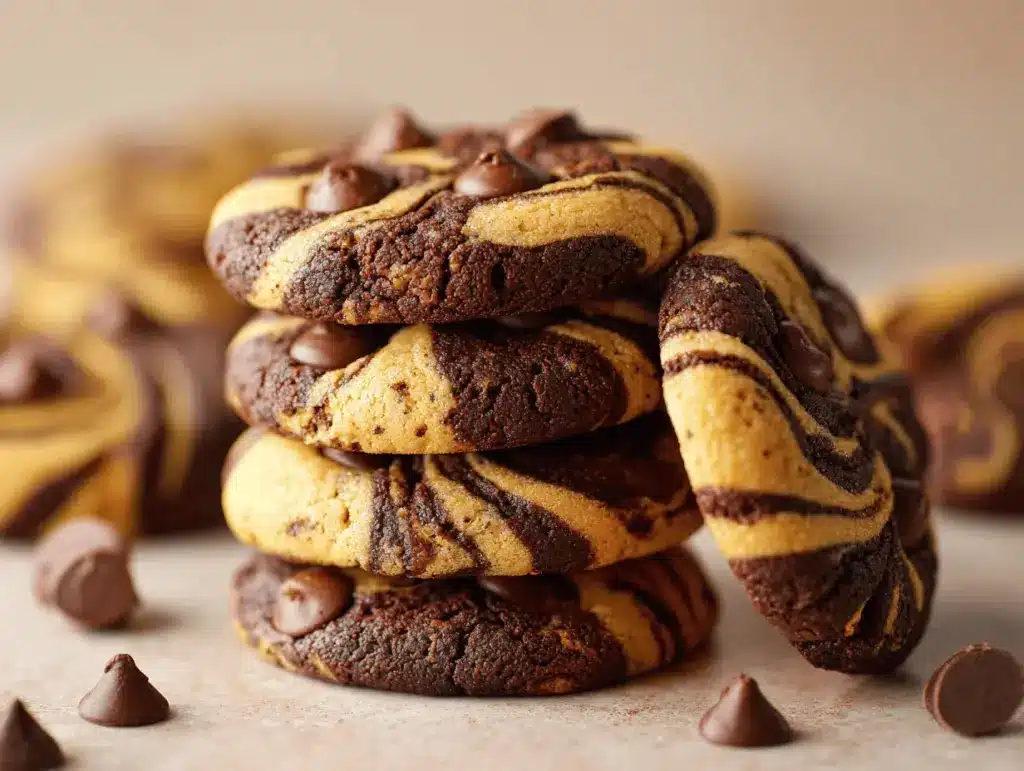
The first time I pulled a batch of marbled chocolate peanut butter swirl cookies from the oven, the kitchen smelled like pure happiness—think warm cocoa and roasted peanuts mingling with buttery dough. You know those days when you crave something nostalgic but want a twist? These cookies are exactly that. I stumbled on the idea during a late-night baking session, with a half-empty jar of peanut butter and a chocolate craving that just wouldn’t quit. Suddenly, I thought, why not combine the two flavors—swirled together for a treat that looks as good as it tastes?
Honestly, marbled chocolate peanut butter swirl cookies are my go-to when I want to wow friends without spending hours in the kitchen. I’ve tested this recipe at least a dozen times, swapping brands of chocolate and tweaking the peanut butter ratio until the marbling came out just right. If you’re a cookie fan—especially if you love that sweet-salty combo—you’ll be hooked. The best part? The recipe is simple enough for beginner bakers but impressive enough for a Pinterest-worthy dessert table.
These cookies are great for busy families, picky eaters, and anyone who’s trying to add a little extra protein to their treat (thanks to the peanut butter). Whether you’re baking for an after-school snack, holiday party, or just because you want something delicious with your coffee, marbled chocolate peanut butter swirl cookies deliver every time. As someone who’s spent way too many hours experimenting with cookie dough, I can promise these are worth every bite!
Why You’ll Love This Recipe
I’ve baked a lot of cookies over the years, and let me tell you—these marbled chocolate peanut butter swirl cookies stand out for so many reasons. After sharing them at family gatherings and bake sales, I’m still amazed at how quickly they disappear. Here’s why you’ll love them, too:
- Quick & Easy: Ready in about 30 minutes, so you don’t have to plan ahead or wait forever for a sweet fix.
- Simple Ingredients: You probably already have everything you need in your pantry—no fancy chocolate or obscure nut butters required.
- Great for Any Occasion: Perfect for cozy nights in, potlucks, school lunches, or festive holiday trays.
- Crowd-Pleaser: Both kids and adults go crazy for the marbled look and the rich flavor combo. They’re also nutty enough to satisfy peanut butter lovers, but not so much that chocolate fans feel left out.
- Unbelievably Delicious: The balance of creamy peanut butter and deep chocolate is just… wow. Every bite is a little different, thanks to the swirl!
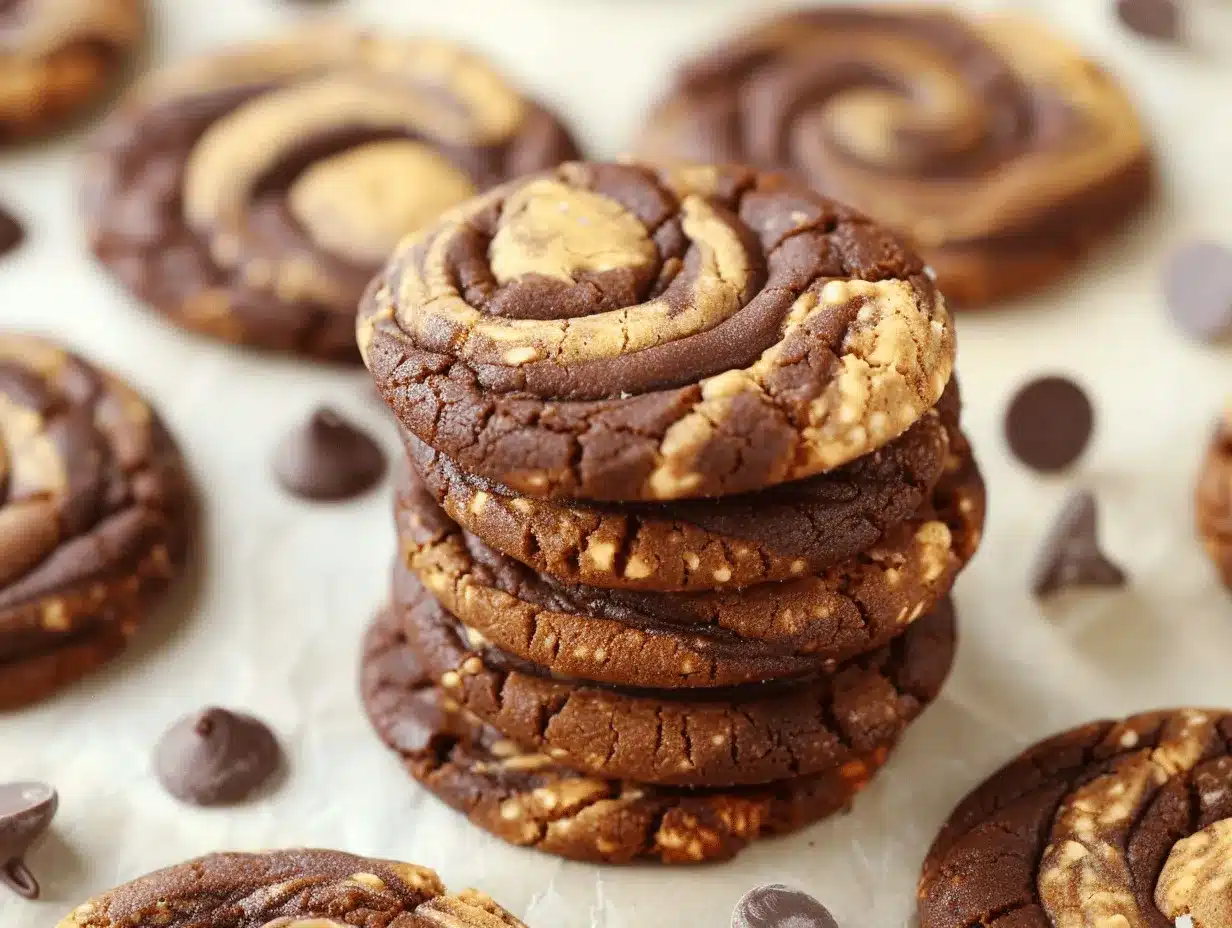
What makes this recipe different? I blend the peanut butter and chocolate doughs just enough to get those gorgeous marbled streaks (without muddying the flavors). The cookies bake up soft in the middle, with slightly crisp edges that make dunking irresistible. If you’ve ever had trouble getting swirl cookies right—maybe they turned out flat or the flavors got lost—this method solves all that.
This isn’t just another cookie recipe. It’s my best version, with tweaks learned from trial (and a few errors—trust me, don’t overmix!). Every time I make these, someone asks for the recipe. It’s comfort food at its prettiest, and you’ll want to snap a photo before you take a bite. Seriously, these marbled chocolate peanut butter swirl cookies are the kind of treat that brings people together. And honestly, who doesn’t love a cookie you can customize for your mood?
What Ingredients You Will Need
This recipe uses straightforward ingredients to deliver bold flavor and satisfying texture—without any complicated steps. You’ll find most items are pantry staples, and there’s room to swap if needed. Here’s what you’ll need for marbled chocolate peanut butter swirl cookies:
- For the Peanut Butter Dough:
- 1/2 cup (120g) creamy peanut butter (I like Skippy or Jif—chunky works for extra texture)
- 1/4 cup (60g) unsalted butter, softened (adds richness)
- 1/2 cup (100g) granulated sugar
- 1/4 cup (50g) light brown sugar, packed (for chewiness)
- 1 large egg, room temperature
- 1/2 tsp vanilla extract
- 1 cup (120g) all-purpose flour
- 1/2 tsp baking soda
- 1/4 tsp salt
- For the Chocolate Dough:
- 1/2 cup (120g) unsalted butter, softened
- 1/2 cup (100g) granulated sugar
- 1/4 cup (50g) light brown sugar, packed
- 1 large egg, room temperature
- 1/2 tsp vanilla extract
- 3/4 cup (90g) all-purpose flour
- 1/4 cup (25g) unsweetened cocoa powder (Dutch-process is my favorite for deeper flavor)
- 1/2 tsp baking soda
- 1/4 tsp salt
- 1/2 cup (90g) semi-sweet chocolate chips (optional, for extra chocolaty pockets)
- Optional Add-Ins:
- Chopped roasted peanuts (for crunch)
- White chocolate chips (for a sweeter twist)
- Mini peanut butter cups (chopped, if you’re feeling decadent)
If you’re gluten-free, you can swap the all-purpose flour with your favorite 1:1 GF blend—the texture is a tad softer but still delicious. For vegan cookies, use plant-based butter and egg substitute (I’ve tried flaxseed meal with good results). If you only have natural peanut butter, just stir well before measuring (the cookies might spread a bit more, but hey, sometimes imperfect is perfect!).
For sourcing, I recommend using high-quality cocoa powder for the chocolate dough—Ghirardelli or Hershey’s are solid picks. And if you’re running low on any ingredient, don’t stress. These cookies are forgiving, so make them your own!
Equipment Needed
Making marbled chocolate peanut butter swirl cookies doesn’t require anything fancy—just the basics you probably already own. Here’s what I use every time:
- Mixing bowls: At least two, one for each dough. Glass or metal both work (I prefer glass for easy cleanup).
- Hand mixer or stand mixer: Helpful for creaming butter and sugar. You can use a sturdy whisk and some elbow grease if needed.
- Spatula: For folding doughs together and scraping down the sides. Silicone ones are my favorite—they last forever and don’t absorb smells.
- Measuring cups and spoons: Precision matters for cookies! If you’re on a budget, basic plastic sets work fine.
- Baking sheet: Line with parchment paper for easy cleanup and perfect bottoms (trust me on this—less sticking, prettier cookies).
- Cookie scoop or tablespoon: Makes portioning easier and ensures even baking. I’ve used both, and either works.
- Wire cooling rack: Optional, but helps cookies cool faster and keeps them crisp.
If you’re short on mixing bowls, just rinse and reuse between doughs. No stand mixer? Use a hand mixer or mix by hand—just mix until smooth, don’t overdo it. For parchment paper, wax paper is a last-resort substitute (but don’t bake on it directly). I’ve used everything from vintage cookie sheets to newer nonstick ones, and honestly, as long as you don’t overcrowd the pan, you’ll get great results!
Preparation Method
- Preheat the oven: Set to 350°F (175°C). Line two baking sheets with parchment paper for easy cleanup.
- Make the peanut butter dough:
- In a medium bowl, cream 1/2 cup (120g) peanut butter and 1/4 cup (60g) unsalted butter until smooth (about 2 minutes).
- Add 1/2 cup (100g) granulated sugar and 1/4 cup (50g) brown sugar. Beat for 1 minute until fluffy.
- Mix in 1 large egg and 1/2 tsp vanilla extract. Beat until combined.
- Stir in 1 cup (120g) flour, 1/2 tsp baking soda, and 1/4 tsp salt. Mix until just combined; dough will be thick.
- Make the chocolate dough:
- In another bowl, cream 1/2 cup (120g) unsalted butter until smooth.
- Add 1/2 cup (100g) granulated sugar and 1/4 cup (50g) brown sugar. Beat for 1 minute until light and fluffy.
- Mix in 1 large egg and 1/2 tsp vanilla extract. Beat until incorporated.
- Sift together 3/4 cup (90g) flour, 1/4 cup (25g) cocoa powder, 1/2 tsp baking soda, and 1/4 tsp salt. Gradually add to wet ingredients, mixing just until combined.
- Fold in 1/2 cup (90g) chocolate chips if using.
- Marble the doughs:
- Take spoonfuls of each dough and drop them side by side into a large bowl.
- Use a spatula to gently fold the doughs together about 3-4 times—don’t overmix! You want visible streaks, not a blended mess.
- Shape the cookies:
- Using a cookie scoop or tablespoon, portion out balls of dough (about 2 tbsp or 30g each).
- Place on prepared baking sheets, spacing about 2 inches (5cm) apart. If you like flatter cookies, gently press down with your fingers.
- Bake:
- Bake for 10-12 minutes, until edges are set but centers look slightly underdone (they’ll firm up as they cool).
- Rotate pans halfway through baking if your oven has hot spots.
- Cool: Let cookies rest on the baking sheet for 5 minutes, then transfer to a wire rack to cool completely. The marbled chocolate peanut butter swirl cookies will firm up and develop their signature texture as they cool.
- Troubleshooting: If cookies spread too much, chill dough for 30 minutes before baking. For extra marbling, swirl a toothpick through each dough ball before baking.
- Notes: The doughs are thick—don’t worry if they look a bit stiff. If using natural peanut butter, expect a little more spread. You’ll know the cookies are done when the edges are lightly golden and the centers don’t jiggle when tapped.
Personal tip: I sometimes make a double batch and freeze half the dough. That way, I can bake fresh cookies whenever the craving hits (and trust me, it hits often!).
Cooking Tips & Techniques
After making marbled chocolate peanut butter swirl cookies a ton of times, I’ve picked up a few tricks that make the process smoother and the results consistently awesome.
- Chill the dough: If your kitchen is warm, pop both doughs in the fridge for 20–30 minutes before marbling. This keeps the swirls distinct and prevents spreading.
- Don’t overmix the swirl: I learned the hard way—if you fold the doughs too much, you lose the beautiful marbled effect and the flavors get muddled. Three gentle folds is perfect.
- Room temperature ingredients: Butter and eggs mix better when they’re not cold, so let them sit out for 20 minutes before starting.
- Even sizing: Use a cookie scoop for uniform cookies. They’ll bake evenly and look extra pretty on the tray.
- Watch the bake time: Err on the side of underbaking—cookies keep baking on the sheet even after you pull them out. This gives you soft centers and crisp edges.
- Rotate your pans: My oven has a hot spot in the back, so I always rotate the tray halfway through. If your cookies brown unevenly, try this simple fix.
- Double up the batch: The dough freezes well! Scoop dough balls onto a tray, freeze, then pop into a zip-top bag. Bake straight from frozen, adding 1-2 extra minutes.
Common mistakes? Overbaking (cookies turn dry), using natural peanut butter without stirring, or forgetting to measure flour properly (spoon and level—don’t scoop!). If you end up with flat cookies, chilling the dough usually solves it. Once, I accidentally melted the butter instead of softening it. The cookies tasted great but spread like crazy. Lesson learned—softened means just pliable, not liquid!
Multitasking tip: While the cookies bake, wash up your mixing bowls and measuring cups. You’ll have less cleanup later and, let’s face it, more time to enjoy those warm cookies fresh from the oven.
Variations & Adaptations
One of the best things about marbled chocolate peanut butter swirl cookies is how easy it is to tweak them for your own taste or dietary needs. Here are some favorite variations I’ve tried (and loved):
- Gluten-Free: Swap the all-purpose flour with a 1:1 gluten-free blend. The texture is a bit softer, but the flavor remains spot-on.
- Vegan: Use plant-based butter and substitute each egg with 1 tbsp flaxseed meal mixed with 2.5 tbsp water (let it sit for 5 minutes). The cookies are still rich and satisfying!
- Triple Chocolate: Add 1/4 cup (45g) white chocolate chips to the chocolate dough, or drizzle cooled cookies with melted white chocolate.
- Nut-Free: Substitute sunflower seed butter for peanut butter. It tastes a little different but still gives you those creamy swirls.
- Seasonal Twist: In fall, mix in a pinch of cinnamon or pumpkin spice to the peanut butter dough for a cozy flavor boost.
For different cooking methods, you can bake these in a brownie pan for marbled cookie bars—just swirl both doughs in the pan and bake for 20–25 minutes at 350°F (175°C). If you want crispier cookies, flatten the dough balls a bit more before baking and increase bake time by 2 minutes.
My personal favorite adaptation? I add chopped mini peanut butter cups to the dough and sprinkle flaky sea salt on top after baking. It’s salty-sweet heaven! Whatever variation you try, these cookies are super forgiving and fun to experiment with.
Serving & Storage Suggestions
Marbled chocolate peanut butter swirl cookies are best enjoyed just a bit warm—when the chocolate chips are gooey and the peanut butter aroma fills the air. Serve them on a pretty platter for maximum Pinterest appeal, or stack them in a mason jar tied with ribbon for an easy homemade gift.
Pair these cookies with a cold glass of milk, a hot mug of coffee, or—my favorite—a scoop of vanilla ice cream. They’re versatile enough for dessert trays and casual snacking alike. If you want to make them extra special, drizzle with melted chocolate or sprinkle with chopped peanuts just before serving.
For storage, let cookies cool completely before transferring to an airtight container. They stay fresh at room temperature for 3–4 days, or in the fridge up to a week. To freeze, place cookies in a single layer on a tray until solid, then transfer to a freezer bag. Thaw at room temp or pop into a 300°F (150°C) oven for 2–3 minutes to refresh.
As they sit, the flavors meld and deepen—sometimes I think they taste even better the next day! Just don’t be surprised if they disappear faster than you expect.
Nutritional Information & Benefits
Each marbled chocolate peanut butter swirl cookie is about 120–140 calories, with 2–3g protein, 15g carbs, and 7g fat (depending on add-ins and size). Peanut butter adds healthy fats and a bit of protein, while cocoa brings antioxidants and rich flavor. If you use whole wheat flour, you’ll get a little extra fiber, too.
These cookies are naturally nutty and low in lactose, but do contain gluten and eggs (unless you use the variations above). Watch for peanut allergies—sunflower seed butter works well if needed. As a baker who tries to balance treats with healthy eating, I appreciate that these cookies aren’t overly sweet and can fit into most routines as an occasional treat.
My wellness tip? Pair one with fruit or Greek yogurt for a balanced snack. Honestly, it’s all about treating yourself in moderation—and these cookies make every bite worth it!
Conclusion
If you’re looking for a cookie that’s both show-stopping and simple, marbled chocolate peanut butter swirl cookies are the answer. They combine the best of both worlds—rich chocolate and creamy peanut butter—in every bite, with a gorgeous marbled pattern that’s straight out of a Pinterest dream.
Customize them with your favorite add-ins, swap ingredients to fit your diet, and don’t stress about perfection—the swirls are meant to be unique! I keep coming back to this recipe because it delivers every time, whether I’m baking for family, friends, or just myself.
Give these cookies a try, then let me know how you make them your own. Share your photos, comment with your favorite variation, and spread the cookie love! Honestly, every baker needs a go-to recipe like this—so go ahead, bake a batch and enjoy all the sweet moments they bring.
Frequently Asked Questions
How do I get perfect marbling in the cookies?
Gently fold the peanut butter and chocolate doughs together just 3–4 times. Overmixing blends the flavors too much and loses the swirl. For extra marbling, swirl a toothpick through each dough ball before baking.
Can I make these cookies gluten-free?
Yes! Use a 1:1 gluten-free flour blend instead of all-purpose flour. The cookies will be a bit softer, but still delicious.
How do I store marbled chocolate peanut butter swirl cookies?
Let cookies cool, then store in an airtight container at room temperature for up to 4 days or in the fridge for a week. They also freeze well for up to 2 months.
What’s the best peanut butter for this recipe?
Creamy peanut butter (like Skippy or Jif) gives the best texture. Natural peanut butter works, but the cookies may spread a little more—just stir it well before using.
Can I add other mix-ins to this recipe?
Absolutely! Try chocolate chips, chopped peanuts, white chocolate, or mini peanut butter cups. Mix-ins make them even more fun and customizable.
Pin This Recipe!
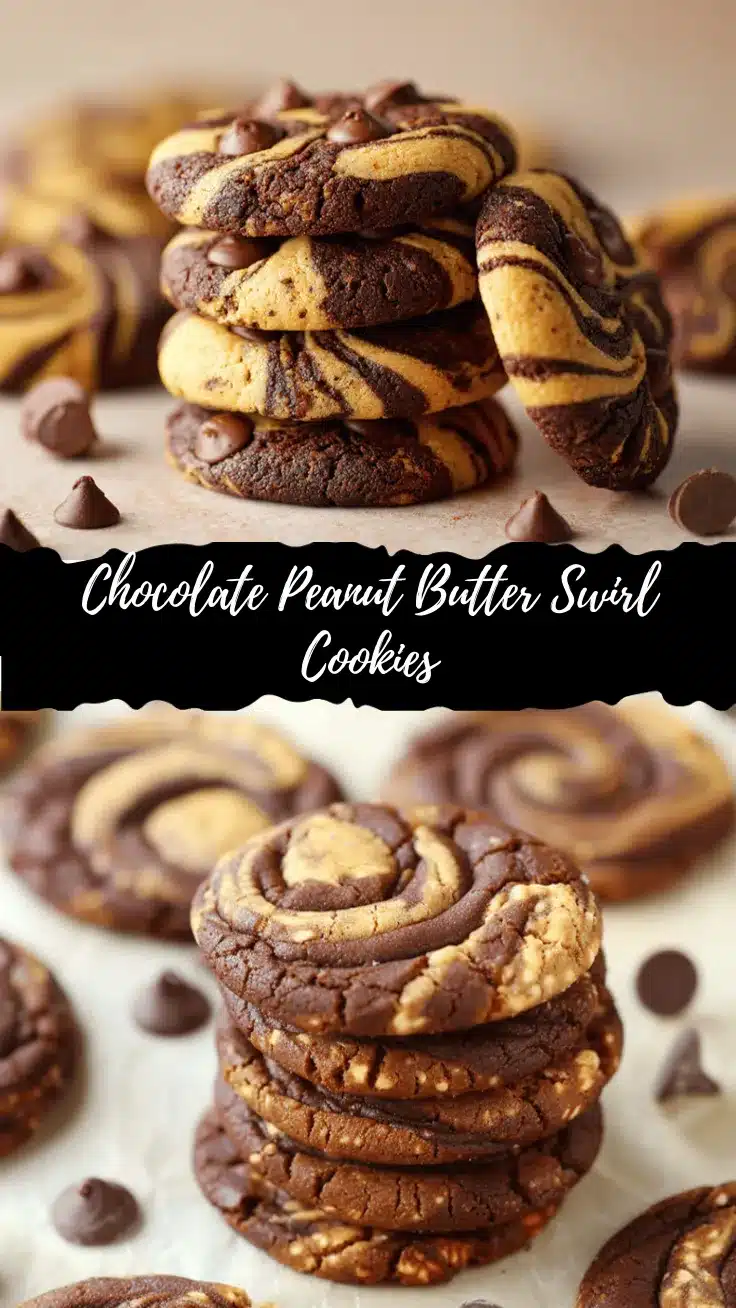
Marbled Chocolate Peanut Butter Swirl Cookies

These marbled chocolate peanut butter swirl cookies combine rich chocolate and creamy peanut butter in a soft, chewy cookie with a beautiful marbled pattern. Easy to make and customizable, they’re perfect for any occasion and sure to impress both kids and adults.
- Prep Time: 15 minutes
- Cook Time: 12 minutes
- Total Time: 30 minutes
- Yield: 24 cookies 1x
- Category: Dessert
- Cuisine: American
Ingredients
- 1/2 cup (120g) creamy peanut butter
- 1/4 cup (60g) unsalted butter, softened
- 1/2 cup (100g) granulated sugar
- 1/4 cup (50g) light brown sugar, packed
- 1 large egg, room temperature
- 1/2 tsp vanilla extract
- 1 cup (120g) all-purpose flour
- 1/2 tsp baking soda
- 1/4 tsp salt
- 1/2 cup (120g) unsalted butter, softened
- 1/2 cup (100g) granulated sugar
- 1/4 cup (50g) light brown sugar, packed
- 1 large egg, room temperature
- 1/2 tsp vanilla extract
- 3/4 cup (90g) all-purpose flour
- 1/4 cup (25g) unsweetened cocoa powder
- 1/2 tsp baking soda
- 1/4 tsp salt
- 1/2 cup (90g) semi-sweet chocolate chips (optional)
- Chopped roasted peanuts (optional)
- White chocolate chips (optional)
- Mini peanut butter cups, chopped (optional)
Instructions
- Preheat the oven to 350°F (175°C). Line two baking sheets with parchment paper.
- Make the peanut butter dough: In a medium bowl, cream 1/2 cup peanut butter and 1/4 cup unsalted butter until smooth (about 2 minutes).
- Add 1/2 cup granulated sugar and 1/4 cup brown sugar. Beat for 1 minute until fluffy.
- Mix in 1 large egg and 1/2 tsp vanilla extract. Beat until combined.
- Stir in 1 cup flour, 1/2 tsp baking soda, and 1/4 tsp salt. Mix until just combined; dough will be thick.
- Make the chocolate dough: In another bowl, cream 1/2 cup unsalted butter until smooth.
- Add 1/2 cup granulated sugar and 1/4 cup brown sugar. Beat for 1 minute until light and fluffy.
- Mix in 1 large egg and 1/2 tsp vanilla extract. Beat until incorporated.
- Sift together 3/4 cup flour, 1/4 cup cocoa powder, 1/2 tsp baking soda, and 1/4 tsp salt. Gradually add to wet ingredients, mixing just until combined.
- Fold in 1/2 cup chocolate chips if using.
- Marble the doughs: Take spoonfuls of each dough and drop them side by side into a large bowl. Use a spatula to gently fold the doughs together about 3-4 times—don’t overmix! You want visible streaks.
- Shape the cookies: Using a cookie scoop or tablespoon, portion out balls of dough (about 2 tbsp or 30g each). Place on prepared baking sheets, spacing about 2 inches apart. If you like flatter cookies, gently press down with your fingers.
- Bake for 10-12 minutes, until edges are set but centers look slightly underdone (they’ll firm up as they cool). Rotate pans halfway through baking if your oven has hot spots.
- Let cookies rest on the baking sheet for 5 minutes, then transfer to a wire rack to cool completely.
- If cookies spread too much, chill dough for 30 minutes before baking. For extra marbling, swirl a toothpick through each dough ball before baking.
Notes
For best marbling, gently fold doughs together only 3-4 times. Chill dough if your kitchen is warm to prevent spreading. Use room temperature butter and eggs for best texture. Dough freezes well; bake from frozen with 1-2 extra minutes. For gluten-free, use a 1:1 GF flour blend. For vegan, use plant-based butter and egg substitute.
Nutrition
- Serving Size: 1 cookie
- Calories: 130
- Sugar: 8
- Sodium: 90
- Fat: 7
- Saturated Fat: 3
- Carbohydrates: 15
- Fiber: 1
- Protein: 2.5
Keywords: marbled cookies, chocolate peanut butter cookies, swirl cookies, easy cookie recipe, homemade cookies, peanut butter dessert, chocolate dessert, kid friendly cookies, party cookies, baking


