“You brought *those* again? The red, white, and blue ones?” my neighbor chuckled from across the picnic table. Honestly, I wasn’t sure if it was a compliment or a playful jab. But every 4th of July, those layered jello cream cheese dessert cups—bright, colorful, and just a little nostalgic—became the unofficial star of our block party.
The first time I whipped up this dessert, it was more out of a pinch situation than anything else. I had promised something festive but my usual go-to desserts had all vanished from the pantry. So, with a half-empty box of jello packets and some cream cheese lurking in the fridge, I figured, “Why not layer them in cups and see what happens?” What I didn’t expect was how the creamy white layer mellowed the tangy jello flavors perfectly, making it a refreshing treat that everyone, kids included, kept asking for again and again.
That year, I made these dessert cups three times in one week—each batch disappearing faster than I could say “red, white, and blue.” There’s something about the way the layers sit just so, the jiggly texture paired with the smooth cream cheese that feels both playful and indulgent. Plus, they’re so easy to transport, which is key when you’re juggling summer barbecues and last-minute invites.
Over time, this simple recipe stuck with me—not just for Independence Day but for those moments when I want a no-fuss dessert that feels like a mini celebration. It’s the kind of recipe that’s approachable but still brings a little “wow” without the hassle. And honestly, after trying so many complicated desserts with mixed results, these cups were the kind of no-nonsense winner that makes you want to keep making them year after year.
So if you’re looking for a sweet that’s quick, crowd-pleasing, and has a little patriotic flair, these red white and blue layered jello cream cheese dessert cups might just become your new holiday staple. They’re proof that sometimes the simplest ideas can bring the biggest smiles—and that a little layering magic goes a long way.
Why You’ll Love This Recipe
After countless tries and tweaks, this dessert became a reliable favorite for celebrations, especially when time is tight and the crowd is hungry. From personal experience and plenty of feedback from friends and family, here’s why these jello cream cheese dessert cups deserve a spot on your holiday table:
- Quick & Easy: Ready in about 30 minutes of active prep, these cups chill while you relax or prep other dishes.
- Simple Ingredients: No obscure items here—just jello packets, cream cheese, cool whip, and some milk. I usually keep brands like Kraft for the cream cheese and Jell-O for the jelly packets on hand for consistent results.
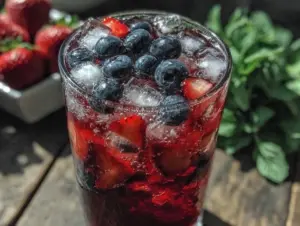
- Perfect for 4th of July or Summer Gatherings: The red, white, and blue theme makes these cups an instant festive hit at picnics, potlucks, or casual cookouts.
- Crowd-Pleaser: Both kids and adults love the creamy layers mingling with the fruity jello—plus, the individual portions make it easy to serve.
- Unbelievably Delicious: The cream cheese layer cuts through the sweetness, adding a silky texture that balances the tangy jello. It’s comfort food with a fresh, summery twist.
- More Than Just Jello: This isn’t your basic gelatin cup. The whipped cream and cream cheese bring a richness that makes it feel like a dessert, not just a snack.
What sets this recipe apart is the light, whipped cream cheese layer that brings a subtle tang and creamy softness, making the jello flavors pop without overwhelming. It’s also flexible—you can swap out flavors or adjust sweetness to suit your taste. That balance and simplicity is why it keeps coming back to my table year after year.
What Ingredients You Will Need
This recipe uses straightforward, pantry-friendly ingredients to build those iconic patriotic layers. Each plays a role in texture and flavor, building a dessert that’s both familiar and fun.
- Red Jello Layer: 1 package (3 oz / 85 g) strawberry or cherry flavored gelatin – I prefer using classic Jell-O brand for the best color and flavor punch.
- Blue Jello Layer: 1 package (3 oz / 85 g) berry blue gelatin – the vibrant blue adds a playful pop, and any trusted brand works well.
- Cream Cheese Layer:
- 8 oz (225 g) cream cheese, softened – I usually grab Philadelphia brand for that smooth, reliable texture.
- 1 cup (240 ml) cold milk (whole or 2%) – cold milk helps blend the cream cheese smoothly.
- 1 cup (240 ml) whipped topping (like Cool Whip), thawed – this lightens the cream cheese layer, making it fluffy and airy.
- ¾ cup (90 g) powdered sugar – sweetens the cream cheese without grit.
- 1 teaspoon vanilla extract – adds subtle warmth to the creamy layer.
- Additional: Small clear plastic or glass cups for layering.
If you want to customize, you can swap the cream cheese for dairy-free cream cheese or use coconut milk yogurt for a dairy-free version. For the jello, sugar-free packets are an option if you need to reduce sugar. In summer, swapping the red gelatin for fresh strawberries or blueberries can add a natural twist, though you’ll lose the classic bright layers.
Equipment Needed
- Mixing bowls (at least two) – I like glass bowls for easy microwaving and cleanup.
- Electric mixer or sturdy whisk – to cream the cream cheese and blend the layers smoothly. A hand mixer works great here.
- Measuring cups and spoons – accuracy helps with the layering and sweetness balance.
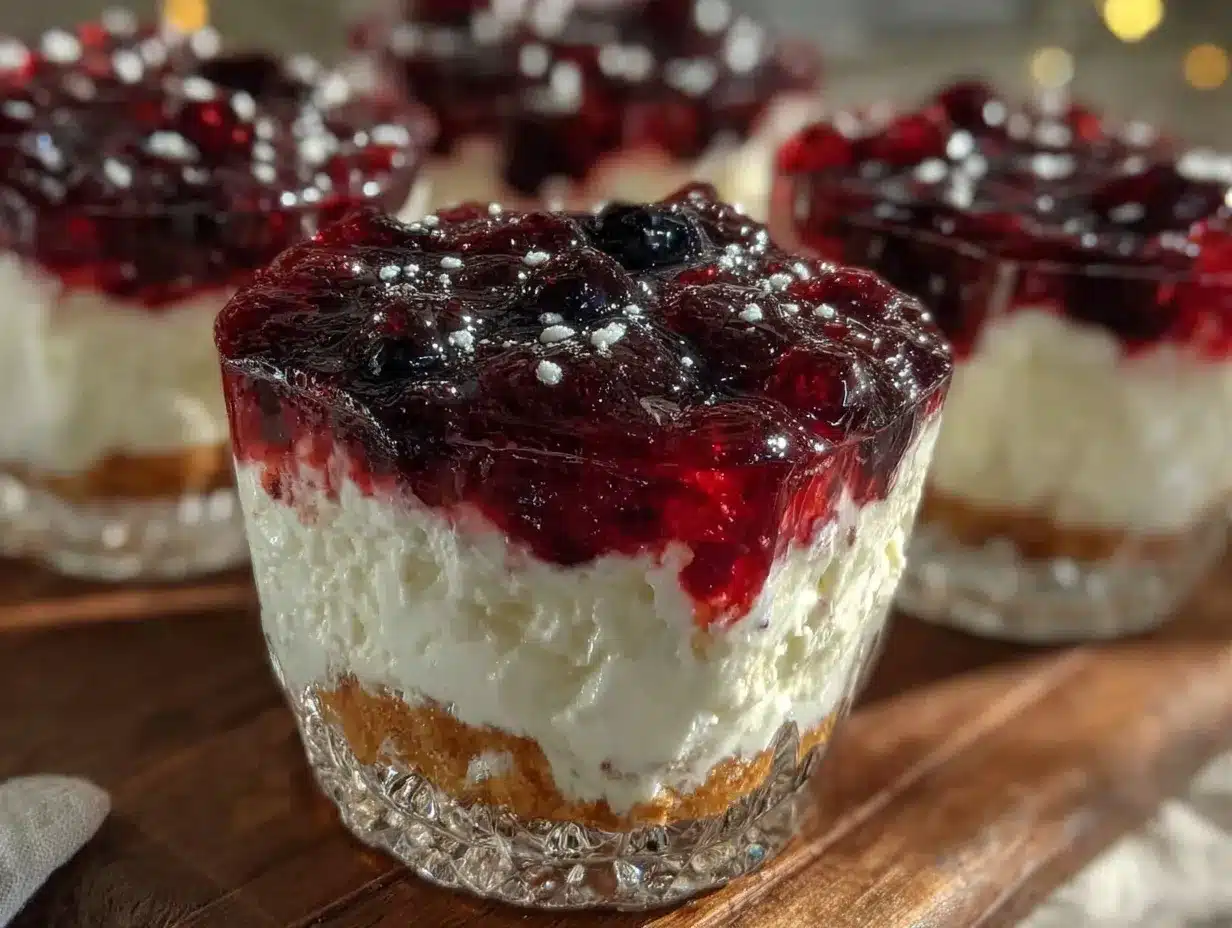
- Small clear dessert cups or mason jars – clear cups make the red, white, and blue layers shine visually.
- Microwave-safe measuring cup or bowl – for melting the gelatin packets quickly.
- Spoons or small spatulas – for layering without mixing the colors.
You could use a stand mixer if you have one, but a handheld mixer is perfectly fine. If you want to be budget-friendly, a good wire whisk and a bit of elbow grease can do the trick, though the texture might not be quite as smooth. For storage, a covered container or plastic wrap helps keep the cups fresh in the fridge.
Preparation Method
- Prepare the Red Jello Layer:
Dissolve 1 package (3 oz / 85 g) of red gelatin in 1 cup (240 ml) boiling water. Stir for about 2 minutes until completely dissolved. Add ½ cup (120 ml) cold water, mix, and pour about 2-3 tablespoons into each dessert cup. Refrigerate for at least 30 minutes until the layer is firm but not rock solid.
Tip: The layer should jiggle slightly when ready; if it’s too soft, the next layer might mix in. - Make the Cream Cheese Layer:
While the red layer chills, beat 8 oz (225 g) softened cream cheese with ¾ cup (90 g) powdered sugar in a bowl until smooth and creamy. Slowly add 1 cup (240 ml) cold milk, beating continuously for about 3 minutes until the mixture thins out.
Gently fold in 1 cup (240 ml) whipped topping and 1 teaspoon vanilla extract until combined and fluffy.
Note: If the cream cheese isn’t fully softened, you’ll get lumps. Room temperature cream cheese is key here. - Layer the Cream Cheese Mixture:
Spoon or pipe the cream cheese layer over the set red jello in each cup. Aim for about 2-3 tablespoons per cup. Return to the fridge for 30 minutes to firm up slightly. - Prepare the Blue Jello Layer:
Repeat the gelatin process with the blue package: dissolve in 1 cup (240 ml) boiling water, stir, add ½ cup (120 ml) cold water. Let cool to room temperature but don’t let it set.
Carefully spoon the blue gelatin over the cream cheese layer—about 2-3 tablespoons per cup. Chill for at least 2 hours, or overnight for best results.
Warning: Make sure the blue gelatin isn’t hot or it will melt the cream cheese layer. - Serve and Enjoy:
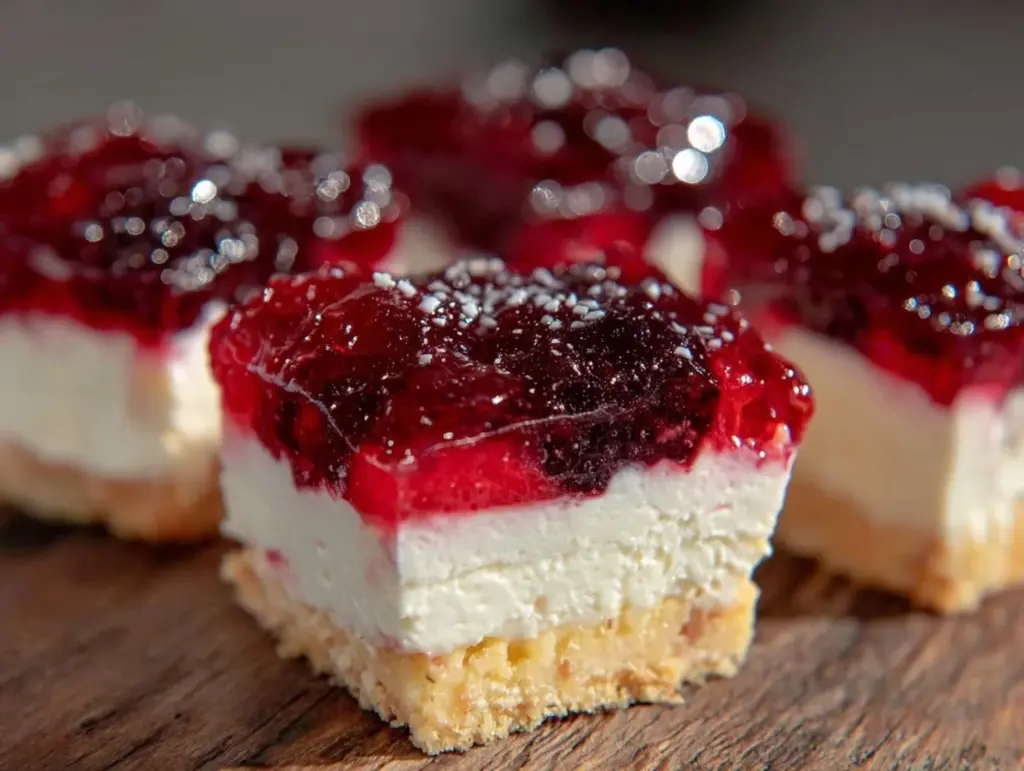
Once fully set, these cups should have distinct, vibrant red, white, and blue layers. You can garnish with fresh berries or a sprig of mint if you want to fancy them up a bit.
Personal tip: When serving, use a small spoon to enjoy all three layers in one bite. The combination is where the magic happens!
Cooking Tips & Techniques
Honestly, layering jello with cream cheese can be a little finicky at first, but once you get the hang of it, it’s a breeze. The key is patience and temperature control.
- Softening the Cream Cheese Properly: This step can’t be rushed. Cold cream cheese lumps ruin the smooth texture. I usually leave mine out 30 minutes ahead or zap it in 10-second bursts in the microwave.
- Chilling Between Layers: Don’t skip the chilling steps. Letting each layer set enough prevents colors from bleeding or mixing together. It’s tempting to rush, but those 30-60 minutes make a big difference.
- Cool the Blue Jello Before Layering: Pouring hot blue gelatin onto the cream cheese will melt it and ruin the defined layers. I usually let it sit for 10-15 minutes after dissolving to cool but still pourable.
- Use Clear Cups: Presentation counts, especially with patriotic desserts. The contrast is eye-catching and perfect for sharing on social media or at parties.
- Mixing the Cream Cheese Layer: Beat the cream cheese and sugar first until smooth, then slowly add the milk. This avoids lumps and helps the mixture become silky.
- Don’t Overfill: It’s better to have neat layers than overstuffed cups where the layers run together.
When I first made these, I accidentally poured the blue gelatin too hot and ended up with a messy swirl instead of layers. It taught me that the slight wait is worth it! Also, multitasking helps—while the jello chills, I prep other dishes like my creamy sweet corn chowder recipe, which is a hit at summer gatherings.
Variations & Adaptations
You can easily play around with this recipe to fit different tastes or dietary needs. Here are some ideas I’ve tried or thought about:
- Dairy-Free Version: Swap cream cheese with vegan cream cheese and use coconut whipped topping. Be sure to check gelatin brands for vegetarian options or use agar-agar for a plant-based alternative.
- Flavor Twists: Instead of classic strawberry and berry blue, try raspberry and lemon jello for a red-yellow-blue combo or use grape for a deeper blue-purple shade.
- Layering Techniques: For a fun twist, try swirling the cream cheese and jello layers slightly instead of fully setting each, creating a marbled effect.
- Mini Trifles: Use clear jars and add fresh fruit layers—blueberries, strawberries, and banana slices—to add texture and freshness.
- Lower Sugar Option: Use sugar-free gelatin and reduce the powdered sugar in the cream cheese layer, adjusting to taste.
Personally, I once swapped out the blue jello for a homemade blueberry gelatin made with fresh berries and a bit of honey, which gave it a more natural flavor and less artificial color. It was a hit but required more prep time.
Serving & Storage Suggestions
These dessert cups are best served chilled straight from the fridge. The cool temperature enhances the refreshing jello texture and keeps the cream cheese layer firm but soft. I like to garnish with a few fresh blueberries and sliced strawberries for extra flair, but they’re lovely plain, too.
They pair well with light summer dishes—think grilled chicken or a fresh salad—or can be a sweet finale to a hearty meal like creamy crockpot chicken tortellini soup. For a picnic, they’re easy to transport and serve, making cleanup a breeze.
Store the cups covered in the refrigerator for up to 3 days. The layers hold up well but may soften slightly over time. Avoid freezing as the texture changes and can become watery upon thawing.
When reheating is needed (rare for this dessert), allow cups to sit at room temperature for about 10 minutes before serving. The flavors tend to meld and mellow a bit, which some people enjoy.
Nutritional Information & Benefits
Each serving of these layered jello cream cheese dessert cups contains approximately:
| Nutrient | Amount per serving |
|---|---|
| Calories | 150-180 kcal |
| Fat | 6-8 g |
| Carbohydrates | 25-28 g |
| Protein | 2-4 g |
| Sugar | 20-22 g |
The cream cheese adds a moderate amount of protein and calcium, while the jello provides hydration and a fun burst of flavor without high fat. Using low-fat milk and sugar-free gelatin can reduce calories for a lighter version.
Keep in mind, gelatin contains collagen, which some find beneficial for skin and joint health, though amounts here are small. For anyone with dairy allergies, substituting with plant-based creams and yogurts can make these cups accessible without sacrificing taste.
Conclusion
These Patriotic Red White and Blue Layered Jello Cream Cheese Dessert Cups are a simple, cheerful treat that brings a bit of festive sparkle to summer gatherings. They deliver on ease, flavor, and fun presentation without demanding hours in the kitchen.
Whether you’re a seasoned party host or a last-minute dessert savior, this recipe offers flexibility and reliable results. I love how it combines playful colors with creamy textures, making it a dessert that feels special but never complicated.
Give it a try and tweak the layers to your liking—maybe adding fresh fruit or switching flavors. And if you’re looking for other crowd-pleasing dishes to round out your menu, the creamy sweet corn chowder is a perfect hearty companion.
I’d love to hear how your version turns out—drop a comment or share your own twists on this recipe. Here’s to simple, sweet celebrations filled with color and joy!
FAQs
Can I make these dessert cups ahead of time?
Yes! Prepare and layer the jello cups a day in advance. Just keep them covered and refrigerated. The layers will hold up well overnight.
What if I don’t have cream cheese?
You can substitute with mascarpone or even a thick Greek yogurt, but the texture and tang will be slightly different.
How do I prevent the jello layers from mixing?
Make sure each layer is fully set or at least firm before adding the next. Also, pour the next layer gently over the back of a spoon to avoid breaking the layer underneath.
Can I use fresh fruit instead of jello packets?
Fresh fruit can be added as a topping or mixed into layers, but it won’t set like gelatin. For a more natural approach, homemade fruit gelatin with agar-agar is an option but requires more prep.
Are these dessert cups gluten-free?
Yes, all ingredients in this recipe are naturally gluten-free. Just double-check your gelatin brand if you have a sensitivity.
Pin This Recipe!
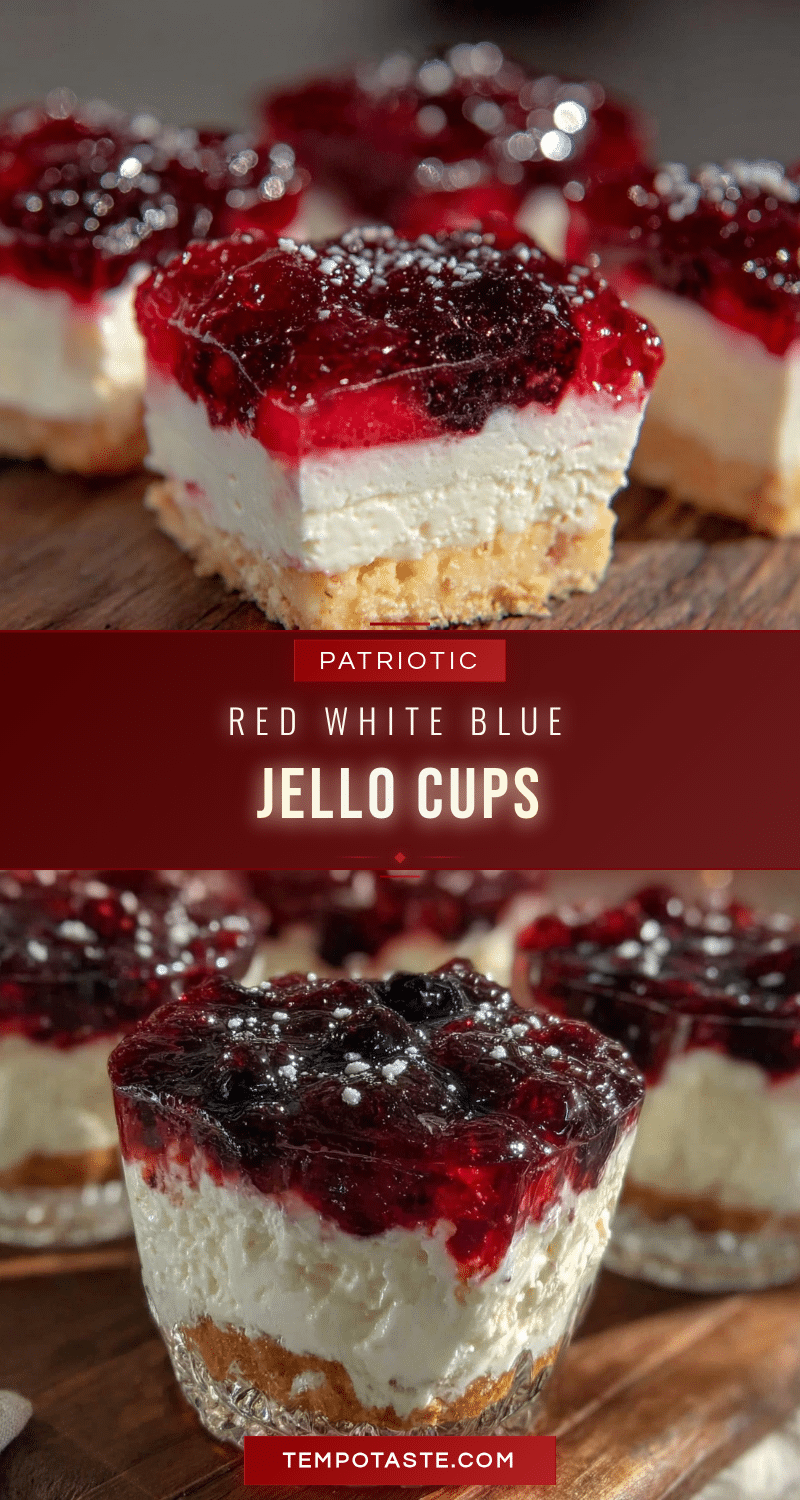
Patriotic Red White and Blue Layered Jello Cream Cheese Dessert Cups

A quick and easy layered dessert featuring red and blue jello with a creamy white cream cheese layer, perfect for 4th of July celebrations and summer gatherings.
- Prep Time: 30 minutes
- Cook Time: 0 minutes
- Total Time: 2 hours 30 minutes
- Yield: 8 servings 1x
- Category: Dessert
- Cuisine: American
Ingredients
- 1 package (3 oz / 85 g) strawberry or cherry flavored gelatin (red layer)
- 1 package (3 oz / 85 g) berry blue gelatin (blue layer)
- 8 oz (225 g) cream cheese, softened
- 1 cup (240 ml) cold milk (whole or 2%)
- 1 cup (240 ml) whipped topping (like Cool Whip), thawed
- 3/4 cup (90 g) powdered sugar
- 1 teaspoon vanilla extract
- Small clear plastic or glass cups for layering
Instructions
- Dissolve 1 package (3 oz / 85 g) of red gelatin in 1 cup (240 ml) boiling water. Stir for about 2 minutes until completely dissolved. Add 1/2 cup (120 ml) cold water, mix, and pour about 2-3 tablespoons into each dessert cup. Refrigerate for at least 30 minutes until the layer is firm but slightly jiggly.
- Beat 8 oz (225 g) softened cream cheese with 3/4 cup (90 g) powdered sugar in a bowl until smooth and creamy. Slowly add 1 cup (240 ml) cold milk, beating continuously for about 3 minutes until the mixture thins out. Gently fold in 1 cup (240 ml) whipped topping and 1 teaspoon vanilla extract until combined and fluffy.
- Spoon or pipe the cream cheese layer over the set red jello in each cup, about 2-3 tablespoons per cup. Return to the fridge for 30 minutes to firm up slightly.
- Dissolve 1 package (3 oz / 85 g) of blue gelatin in 1 cup (240 ml) boiling water, stir, then add 1/2 cup (120 ml) cold water. Let cool to room temperature but do not let it set.
- Carefully spoon the blue gelatin over the cream cheese layer, about 2-3 tablespoons per cup. Chill for at least 2 hours or overnight for best results.
- Serve chilled. Optionally garnish with fresh berries or a sprig of mint.
Notes
Ensure cream cheese is fully softened to avoid lumps. Chill each layer sufficiently to prevent mixing. Cool blue gelatin before layering to avoid melting the cream cheese layer. Use clear cups for best presentation. Store covered in refrigerator up to 3 days. Avoid freezing.
Nutrition
- Serving Size: 1 dessert cup
- Calories: 165
- Sugar: 21
- Fat: 7
- Carbohydrates: 26
- Protein: 3
Keywords: 4th of July dessert, layered jello cups, cream cheese dessert, patriotic dessert, easy summer dessert, red white and blue dessert