“Wait, the oven’s on, but the ice cream’s still frozen?” I remember muttering that to myself one chilly evening, standing in a kitchen that looked like a mess after a baking marathon. I’d been playing around with desserts that felt fancy but weren’t supposed to require a degree in rocket science. Baked Alaska was on my radar — that iconic combo of cold ice cream, warm cake, and toasted meringue sounded like magic but also a headache waiting to happen. Honestly, I was skeptical. How could something so dramatic be doable at home without a blowtorch firefighter moment?
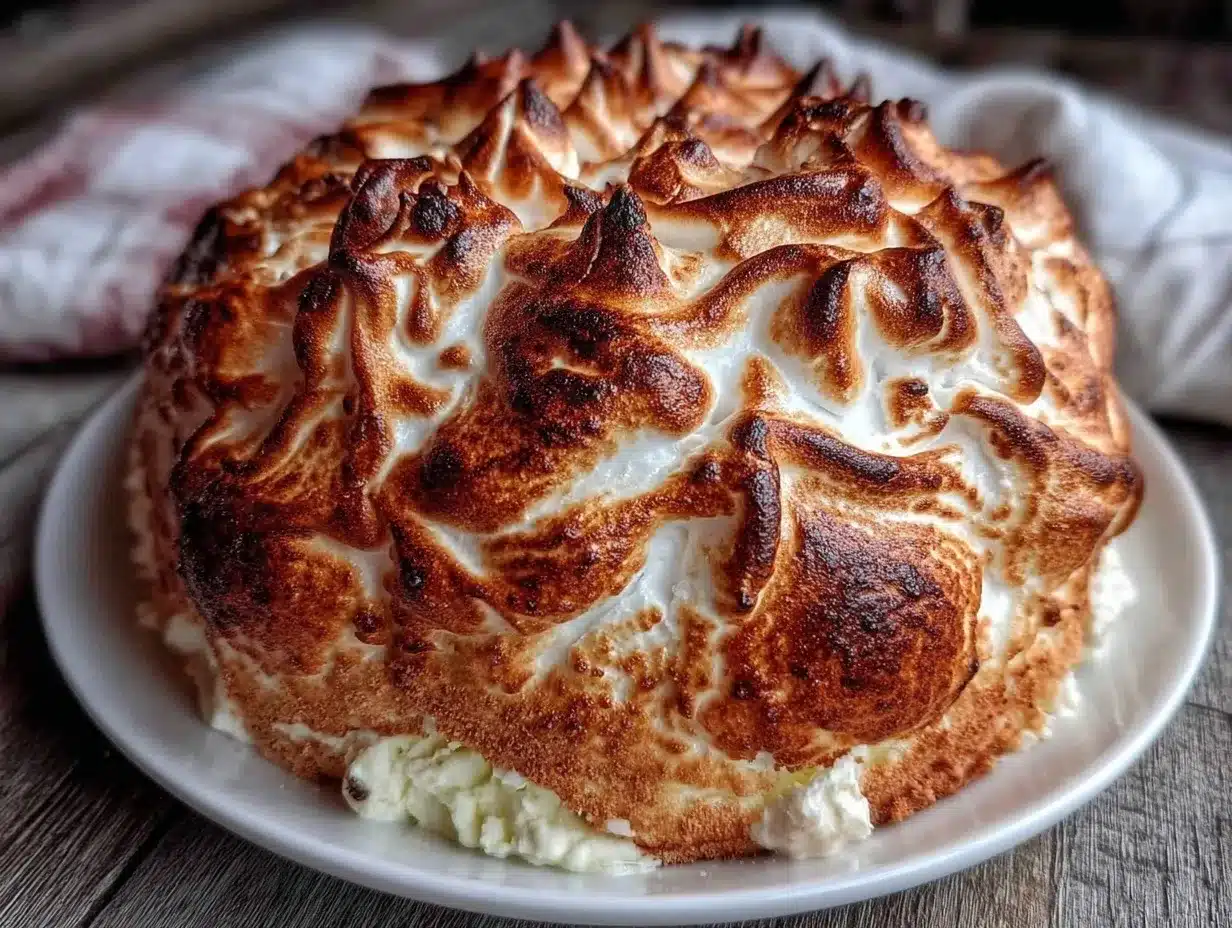
That night, armed with a half-baked sponge, a tub of vanilla ice cream, and a whisk, I gave it a shot. The golden torched meringue was the real game-changer — that crisp, slightly caramelized shell hiding fluffy clouds underneath made me pause. The contrast of textures and temperatures was like a tiny party in my mouth. It wasn’t just a dessert; it felt like a celebration of every baking trial that came before it. I made it again the next week, and then the one after, tweaking it until I got it just right.
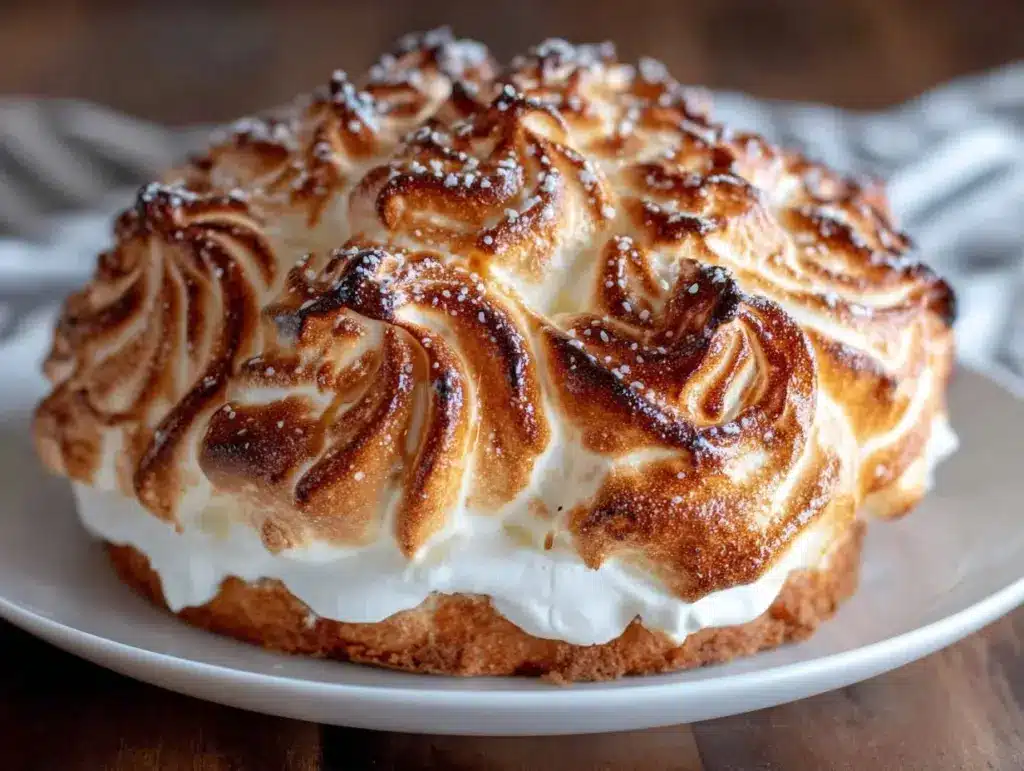
This Perfect Classic Baked Alaska with Golden Torched Meringue stuck with me because it’s the kind of dessert that looks show-stopping but somehow remains reassuringly doable. No fancy equipment beyond a kitchen torch (and you can skip that with a broiler if need be). It’s a cozy, impressive recipe for those moments you want to impress without stress or for when you just want to treat yourself — you know, to something that’s both elegant and oddly comforting.
So, if you’ve ever hesitated about attempting this dessert, I get it. But stick around: there’s a reason this recipe keeps making an encore in my kitchen.
Why You’ll Love This Recipe
This Perfect Classic Baked Alaska with Golden Torched Meringue is one of those recipes that’s as rewarding as it is delicious. I’ve tested it multiple times (and yes, admittedly, tasted it far more than necessary) to make sure the steps are clear and the results always wow-worthy. Here’s why it stands out:
- Quick & Easy: It comes together in about an hour, making it perfect for last-minute dessert plans or a special weekend treat.
- Simple Ingredients: No need for exotic items — just cake, ice cream, eggs, sugar, and vanilla. You probably have everything chilling in your fridge or pantry already.
- Perfect for Celebrations: Whether it’s a birthday, holiday, or an impromptu dinner party, this dessert adds that wow factor without stress.
- Crowd-Pleaser: Kids, adults, picky eaters — everyone tends to ask for seconds. The combination of cold ice cream and warm, toasted meringue is pure magic.
- Unbelievably Delicious: The golden torched meringue isn’t just for looks — it adds a caramelized crunch that contrasts beautifully against the soft cake and creamy center.
What sets this recipe apart is the balance between tradition and practicality. Instead of fussing with complicated layers, it uses a simple sponge base that’s light yet sturdy, paired with a luscious ice cream center and a perfectly whipped meringue. Plus, the meringue torching technique is broken down step-by-step so you don’t have to guess or worry about burning it to a crisp. This isn’t just another baked Alaska — it’s the version that feels like yours after a few rounds of trial, error, and sweet success.
Honestly, it’s that moment when you slice through the warm meringue, revealing the cold ice cream inside, that makes you close your eyes and savor every bite. It’s a comforting classic with a bit of flair, ready to become a favorite in your dessert lineup.
What Ingredients You Will Need
This recipe uses simple, wholesome ingredients to deliver bold flavor and satisfying texture without the fuss. Most are pantry staples, and you can easily swap a few to fit your preferences or dietary needs.
- Sponge Cake Base:
- 3 large eggs, room temperature (for a fluffy, airy cake)
- ⅔ cup (130g) granulated sugar
- ½ cup (65g) all-purpose flour, sifted
- ¼ teaspoon salt
- 1 teaspoon vanilla extract (adds warm aroma and depth)
- Ice Cream Filling:
- 1 quart (950ml) quality vanilla ice cream (I recommend Häagen-Dazs or any creamy brand for smooth texture)
- Optional: fresh berries or fruit preserves to layer inside (for a fruity surprise)
- Meringue Topping:
- 4 large egg whites, room temperature (room temp whips better)
- ½ cup (100g) granulated sugar
- ¼ teaspoon cream of tartar (stabilizes the meringue)
- 1 teaspoon vanilla extract (optional, for subtle flavor)
Ingredient Selection Tips: Look for firm, high-quality ice cream; it holds its shape better when covered with meringue. For the sponge, if you want a gluten-free option, almond flour works nicely but expect a slightly denser texture. You can also swap vanilla extract for almond or citrus zest to customize flavors.
Equipment Needed
- Mixing bowls — glass or metal preferred for whipping egg whites effectively
- Electric mixer or stand mixer — essential for whipping meringue to stiff peaks
- Rubber spatula — for folding ingredients gently
- 9-inch (23 cm) round cake pan or equivalent bowl to shape your cake and ice cream dome
- Kitchen torch — for that signature golden torched meringue finish (a handheld butane torch works best)
- Offset spatula or butter knife — helpful for spreading meringue evenly
- Baking sheet lined with parchment paper — for assembling and baking
If you don’t have a kitchen torch, a broiler can be used, but keep a close eye on it to avoid burning. I’ve found a small handheld torch is worth the investment if you plan to make this dessert more than once — it’s also great for caramelizing baked brie or finishing caramel apple cakes.
Preparation Method
- Prepare the Sponge Cake: Preheat oven to 350°F (175°C). Grease and flour a 9-inch round cake pan. In a bowl, beat 3 large eggs and ⅔ cup sugar using an electric mixer on high speed for about 5 minutes until pale, thick, and ribbon-like. Gently fold in sifted flour and salt in two batches using a rubber spatula, then stir in vanilla extract. Pour batter into the pan and bake for 20-25 minutes or until a toothpick inserted comes out clean. Let cool completely.
- Shape the Ice Cream Dome: Line a 9-inch bowl with plastic wrap. Soften the vanilla ice cream slightly (5-10 minutes at room temp), then spoon it into the bowl, pressing evenly to fill the shape. Freeze for at least 2 hours or until solid. If you want, swirl in a layer of fresh berries or preserves before sealing with more ice cream.
- Make the Meringue: In a clean, dry mixing bowl, beat 4 egg whites and cream of tartar at medium speed until foamy. Gradually add ½ cup sugar, a tablespoon at a time, increasing speed to high. Beat until stiff, glossy peaks form (about 5-7 minutes). Beat in vanilla extract if using.
- Assemble the Baked Alaska: Place the cooled sponge cake on a baking sheet. Unmold the ice cream dome onto the cake. Immediately spread the meringue all over the ice cream and cake, sealing edges completely to insulate the ice cream. Use an offset spatula to create peaks and swirls in the meringue for that dramatic look.
- Torch the Meringue: Using a kitchen torch, carefully brown the meringue in circular motions until golden and slightly caramelized. If you don’t have a torch, place under a preheated broiler for 1-2 minutes, watching closely to prevent burning.
- Serve: Serve immediately for the best contrast of temperatures and textures. If you want to prep ahead, assemble and freeze the dessert fully but torch just before serving.
Tips: Make sure the meringue completely covers the ice cream to prevent melting during browning. The cake base should be cool and firm to support the layers. If the meringue starts to weep (release liquid), it usually means it’s been overmixed or the sugar wasn’t dissolved properly — fresh egg whites and gradual sugar addition help prevent this.
Cooking Tips & Techniques
Getting that perfect golden torched meringue is half the fun and a bit of a skill. Here’s what I’ve learned along the way:
- Use Room Temperature Eggs: Your egg whites will whip up fluffier and hold better if they’re not cold. I usually leave them out for 30 minutes before starting.
- Gradual Sugar Addition: Adding sugar slowly while whipping helps stabilize the meringue and gives it that glossy sheen. Rushing this step can lead to grainy or weepy meringue.
- Complete Coverage: Don’t skimp on the meringue layer — it acts like insulation, keeping the ice cream from melting too fast when broiled or torched.
- Torching Tips: Keep the torch moving in small circles. Holding it too long in one spot causes burnt patches instead of that even caramelized golden color.
- Timing Is Key: Serve as soon as you torch the meringue for the best contrast of warm and cold. The longer it sits, the more the ice cream melts (though some prefer a slightly softened center).
- Multitasking: While the cake is baking, prep the ice cream dome and whip the meringue. This keeps the process smooth and efficient.
- Common Pitfalls: If your meringue isn’t stiff enough, it won’t hold the shape or torch properly. If it’s weeping, you might have undercooked sugar or overbeaten the whites. Practice makes perfect!
Variations & Adaptations
Baked Alaska is a canvas for creativity, and this recipe welcomes tweaks to match your tastes and dietary needs.
- Flavor Twists: Swap the vanilla ice cream for chocolate, strawberry, or even a sorbet for a fruitier, lighter touch. I once tried a lemon ice cream with a blueberry compote swirl — a refreshing summer version.
- Gluten-Free: Use almond or coconut flour for the sponge to keep it gluten-free. It’ll change the texture slightly but still delicious.
- Dairy-Free Option: Substitute ice cream with coconut milk-based or almond milk-based frozen desserts. Make sure the meringue is egg-white based or try an aquafaba meringue for a vegan twist.
- Mini Baked Alaskas: Use a muffin tin and small silicone molds to create individual portions — great for parties and easier to serve.
- Alternative Meringue: Try Swiss or Italian meringue for a silkier finish and potentially more stable topping, especially if you plan to transport the dessert.
Serving & Storage Suggestions
Serve this dessert immediately after torching the meringue for that perfect contrast of warm and cold. The golden peaks make a stunning centerpiece on any dessert table. A simple sprinkle of fresh berries or a drizzle of berry coulis adds a pop of color and freshness.
This dessert pairs wonderfully with a cup of strong coffee or a lightly sweet dessert wine. For a cozy dinner, it makes a great finale after dishes like creamy butter chicken or a rich stew.
Storage is best done by assembling the cake and ice cream layers in advance, then freezing solid before applying the meringue and torching. If you have leftovers (and lucky you if you do!), cover well and freeze. Reheat briefly under the broiler to refresh the meringue, but avoid long reheats to keep the ice cream from melting too much.
Flavors tend to meld beautifully overnight if kept frozen, so you can prep ahead for stress-free entertaining.
Nutritional Information & Benefits
This classic dessert, while indulgent, can be enjoyed in moderation as part of a balanced diet. The key ingredients—egg whites and vanilla ice cream—offer a good source of protein and calcium, respectively.
Using homemade or high-quality ice cream without excessive additives makes a difference in both nutrition and flavor. The egg whites in the meringue are low in calories and fat, making the golden torched layer a lighter alternative to buttercream or heavy frostings.
Gluten-free and dairy-free adaptations make it accessible for different dietary needs, and you can control sugar levels by selecting lower-sugar ice creams or sugar substitutes.
Remember, desserts like this one are about enjoyment and making moments special — a little treat that brings joy and culinary satisfaction.
Conclusion
This Perfect Classic Baked Alaska with Golden Torched Meringue is a dessert that’s as approachable as it is impressive. With simple ingredients and clear steps, you can create something that feels truly special, whether it’s for a holiday, a dinner party, or just a cozy night in. I love this recipe because it blends the unexpected — cold ice cream wrapped in warm, caramelized meringue — into a harmonious bite every time.
Don’t hesitate to play with flavors or sizes to make it your own. If you ever want a dessert that’s a little show stopper but won’t leave you stressed, this is it. I’d love to hear how your Baked Alaska turns out or any personal twists you add — sharing those stories is what keeps recipes alive and evolving.
Happy baking, and here’s to many golden, torched meringue moments ahead!
FAQs About Perfect Classic Baked Alaska
Can I make Baked Alaska ahead of time?
Yes! You can prepare the sponge and ice cream layers separately and freeze them. Assemble and add meringue just before torching and serving for best results.
What if I don’t have a kitchen torch?
You can use your oven’s broiler to brown the meringue. Keep a close eye and rotate the dessert to avoid burning, as broilers can be uneven.
Can I use store-bought cake instead of making sponge?
Absolutely! A simple, light sponge or even pound cake works fine. Just make sure it’s sturdy enough to support the ice cream dome.
Is it possible to make this recipe dairy-free?
Yes, swap traditional ice cream for dairy-free alternatives like coconut or almond milk-based ice creams. Use aquafaba for meringue if avoiding eggs.
How do I prevent the ice cream from melting while assembling?
Work quickly and keep the ice cream well frozen before assembly. Covering the ice cream completely with meringue acts as insulation to protect it during torching.
Pin This Recipe!

Perfect Classic Baked Alaska Recipe Easy Step-by-Step with Golden Torched Meringue

A show-stopping yet approachable dessert combining cold ice cream, warm sponge cake, and golden torched meringue for a perfect contrast of textures and temperatures.
- Prep Time: 20 minutes
- Cook Time: 25 minutes
- Total Time: 3 hours 5 minutes
- Yield: 8 servings 1x
- Category: Dessert
- Cuisine: American
Ingredients
- 3 large eggs, room temperature
- ⅔ cup (130g) granulated sugar
- ½ cup (65g) all-purpose flour, sifted
- ¼ teaspoon salt
- 1 teaspoon vanilla extract
- 1 quart (950ml) quality vanilla ice cream
- Optional: fresh berries or fruit preserves
- 4 large egg whites, room temperature
- ½ cup (100g) granulated sugar
- ¼ teaspoon cream of tartar
- 1 teaspoon vanilla extract (optional)
Instructions
- Preheat oven to 350°F (175°C). Grease and flour a 9-inch round cake pan.
- In a bowl, beat 3 large eggs and ⅔ cup sugar using an electric mixer on high speed for about 5 minutes until pale, thick, and ribbon-like.
- Gently fold in sifted flour and salt in two batches using a rubber spatula, then stir in vanilla extract.
- Pour batter into the pan and bake for 20-25 minutes or until a toothpick inserted comes out clean. Let cool completely.
- Line a 9-inch bowl with plastic wrap. Soften the vanilla ice cream slightly (5-10 minutes at room temp), then spoon it into the bowl, pressing evenly to fill the shape.
- Freeze for at least 2 hours or until solid. Optionally swirl in a layer of fresh berries or preserves before sealing with more ice cream.
- In a clean, dry mixing bowl, beat 4 egg whites and cream of tartar at medium speed until foamy.
- Gradually add ½ cup sugar, a tablespoon at a time, increasing speed to high. Beat until stiff, glossy peaks form (about 5-7 minutes). Beat in vanilla extract if using.
- Place the cooled sponge cake on a baking sheet. Unmold the ice cream dome onto the cake.
- Immediately spread the meringue all over the ice cream and cake, sealing edges completely to insulate the ice cream. Use an offset spatula to create peaks and swirls.
- Using a kitchen torch, carefully brown the meringue in circular motions until golden and slightly caramelized. Alternatively, place under a preheated broiler for 1-2 minutes, watching closely to prevent burning.
- Serve immediately for the best contrast of temperatures and textures. If prepping ahead, assemble and freeze fully but torch just before serving.
Notes
Use room temperature eggs for better meringue volume. Add sugar gradually to stabilize meringue. Completely cover ice cream with meringue to prevent melting. Keep torch moving to avoid burnt spots. Serve immediately after torching for best texture contrast. Broiler can be used if no torch is available but watch carefully.
Nutrition
- Serving Size: 1 slice (1/8 of the
- Calories: 350
- Sugar: 35
- Sodium: 150
- Fat: 15
- Saturated Fat: 9
- Carbohydrates: 45
- Fiber: 1
- Protein: 6
Keywords: Baked Alaska, meringue, ice cream dessert, classic dessert, baked Alaska recipe, easy baked Alaska, torch meringue, sponge cake dessert


