“Hey, did you bring those cheesecake pops?” That’s what my sister’s friends asked the moment I walked into her graduation party last year. Honestly, I wasn’t expecting much fuss over a no-bake dessert I whipped up in a pinch. The whole thing started with a last-minute scramble—no oven, no time, and definitely no stress allowed. I needed something sweet, festive, and totally fuss-free. So, I grabbed some cream cheese, crushed up cookies, and melted chocolate, thinking, “Well, let’s see if this turns out.”
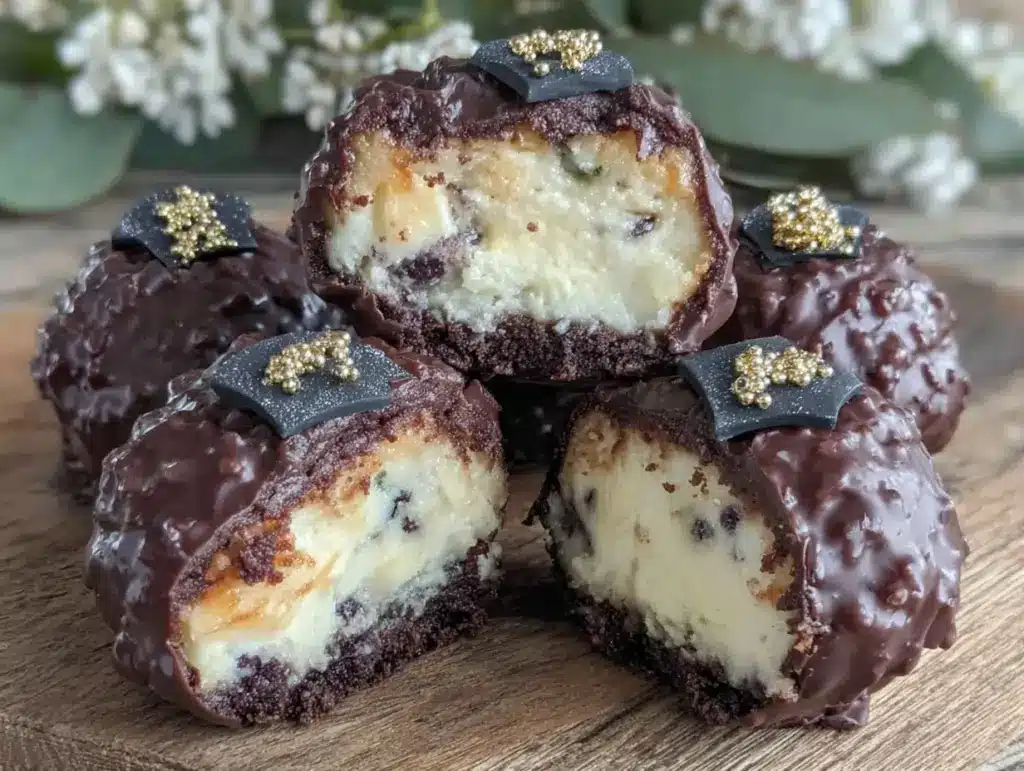
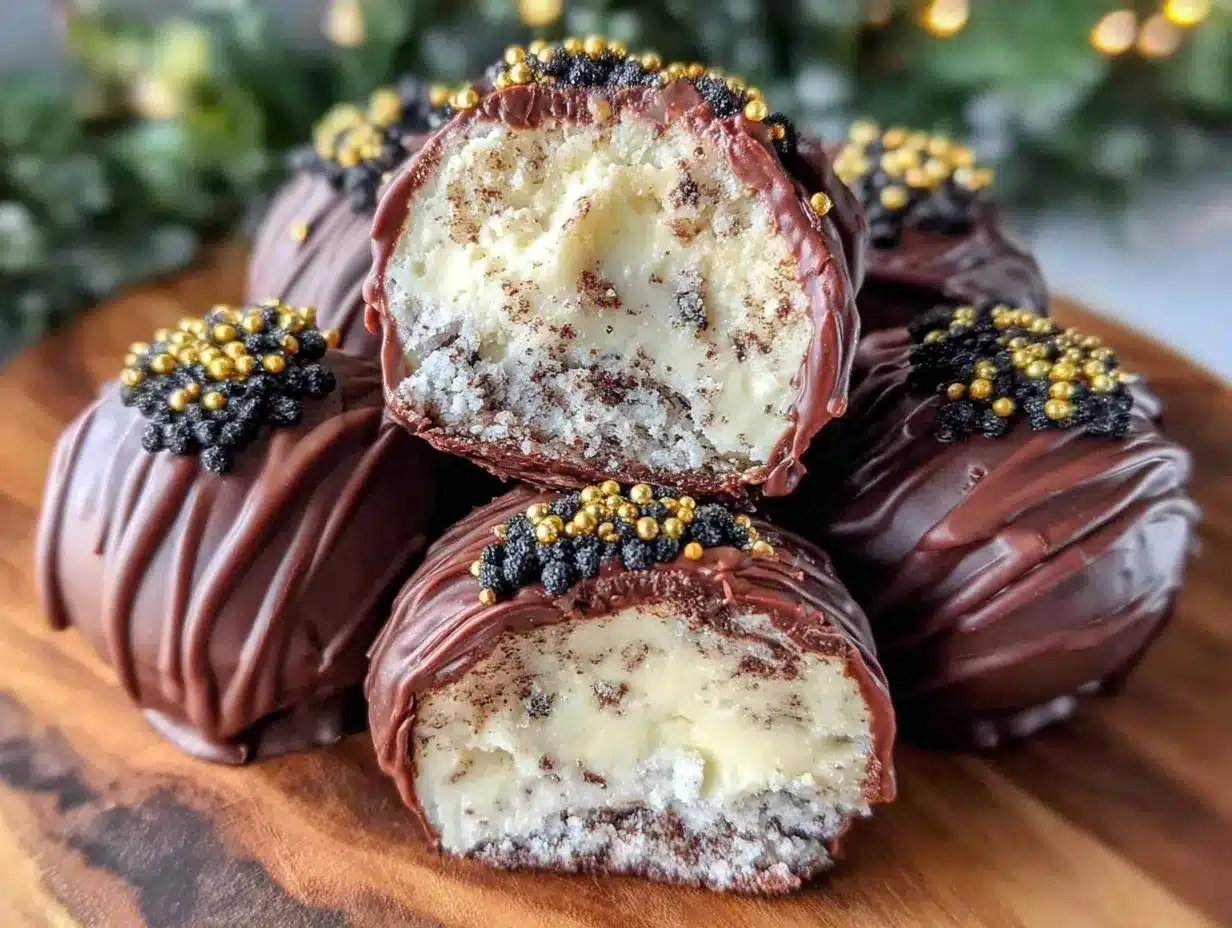
To my surprise, those perfect no-bake cheesecake graduation pops with chocolate shell disappeared faster than any cake at the party. The rich, creamy filling paired with the crisp chocolate coating made them feel like a mini celebration in every bite. Plus, the pops made it easy for guests to mingle without awkward fork juggling. That day, I realized simple treats can steal the show without hours of effort.
Since then, I’ve found myself making these cheesecake pops for every occasion that calls for a little sweetness and convenience. They’re not just dessert—they’re a moment of joy you can hold in your hand. And honestly, they remind me that sometimes the easiest ideas turn into the best memories.
Why You’ll Love This Recipe
These perfect no-bake cheesecake graduation pops with easy chocolate shell recipe is a total game changer, especially if you’re juggling celebrations and a busy schedule. After testing this recipe multiple times, here’s why it’s become a go-to treat for me and my friends:
- Quick & Easy: Ready in under 30 minutes (plus chilling time), these pops are perfect for last-minute parties or when your oven just isn’t playing along.
- Simple Ingredients: Everything’s pantry-friendly—cream cheese, crushed cookies, chocolate—and you don’t have to hunt down anything fancy.
- Perfect for Graduation Parties & Celebrations: The pops are festive and fun, making them a hit at any gathering, from outdoor barbecues to indoor soirées.
- Crowd-Pleaser: Kids and adults alike love them. The creamy filling and the crisp chocolate shell balance each other out beautifully.
- Unbelievably Delicious Texture & Flavor: The velvety cheesecake center contrasts with the snap of the chocolate shell in a way that’s honestly addictive.
- Unique Touch: Instead of the usual slice, serving cheesecake on a stick adds a playful twist that’s both practical and charming.
This recipe isn’t just another no-bake cheesecake version. The chocolate shell is surprisingly easy to get just right—it hardens quickly and snaps perfectly without cracking all over. Plus, the pops are customizable with sprinkles, crushed nuts, or even a drizzle of caramel. It’s comfort food turned handheld delight, perfect for making celebrations feel extra special without the stress.
What Ingredients You Will Need
This recipe uses simple, wholesome ingredients to deliver bold flavor and a satisfying texture without the fuss. Most are pantry staples, but there’s room to tweak based on what you have or prefer.
- Cream Cheese, softened (8 oz / 225 g) – The star of the filling, providing richness and that classic cheesecake tang. I prefer Philadelphia for its smoothness.
- Powdered Sugar (1 cup / 120 g) – Sweetens the filling while keeping it silky smooth.
- Vanilla Extract (1 teaspoon) – Adds warmth and depth to the cheesecake flavor.
- Graham Cracker Crumbs (1 cup / 100 g) – For texture and that familiar crust taste inside the pops. If you want a gluten-free option, crushed gluten-free cookies work wonders.
- Heavy Cream (1/4 cup / 60 ml) – Whipped slightly to lighten the filling and add creaminess.
- Chocolate Chips or Chopped Chocolate (12 oz / 340 g) – For the shell. Semi-sweet chocolate works best for balance, but feel free to use milk or dark chocolate depending on your sweet tooth.
- Coconut Oil (1 tablespoon) – Optional but helps the chocolate shell set with a glossy finish and perfect snap.
- Sprinkles, Crushed Nuts, or Mini Chocolate Chips – For decorating the chocolate shell if you want to get fancy.
For a little extra flair, you might add lemon zest or swap vanilla for almond extract in the filling. And if you want to keep these dairy-free, cream cheese alternatives and coconut cream can step in nicely—though the texture shifts a bit.
Equipment Needed
- Mixing Bowls: A couple of medium-sized bowls for combining the filling ingredients.
- Electric Mixer or Hand Whisk: An electric hand mixer makes whipping the filling a breeze, but a sturdy whisk works if you’re ready for a workout.
- Baking Sheet or Tray: Lined with parchment paper or a silicone mat to place the pops for chilling.
- Popsicle Sticks or Lollipop Sticks: Essential for that fun handheld presentation. Wooden sticks are budget-friendly and sturdy.
- Microwave-Safe Bowl or Double Boiler: For melting chocolate gently. I prefer a double boiler to avoid burning, but the microwave is faster if you watch carefully.
- Spatula or Spoon: For mixing and coating the pops in chocolate.
Nothing fancy needed here, which makes this recipe great for casual cooks and those who don’t want to clutter the kitchen. I’ve found that a silicone spatula is perfect for scraping every last bit of filling out without waste. Plus, if you don’t have popsicle sticks, sturdy wooden skewers can work in a pinch.
Preparation Method
- Prepare the Filling (10 minutes): In a mixing bowl, beat the softened cream cheese until smooth and creamy. Add the powdered sugar and vanilla extract, mixing until fully combined. The mixture should be thick but spreadable.
- Mix in the Graham Cracker Crumbs: Gently fold in the graham cracker crumbs, making sure they’re evenly distributed without breaking down the mixture. Then, lightly whip the heavy cream until it forms soft peaks and fold it into the cream cheese mixture to add lightness. The filling should feel smooth with a slight grainy texture from the crumbs.
- Shape the Pops (15 minutes): Line a baking sheet with parchment paper. Using a cookie scoop or spoon, portion out the cheesecake filling into small, round balls (about 1.5 inches / 4 cm diameter). Place the balls on the tray and insert a popsicle stick gently into each one. Freeze for at least 1 hour until firm. This step is key for making chocolate coating easier.
- Melt the Chocolate Shell (5-7 minutes): Melt the chocolate and coconut oil together using a double boiler or microwave in 20-second bursts, stirring well between each. The coconut oil thins the chocolate for a smooth coating and helps it set quickly with a shine.
- Coat the Cheesecake Pops: Working quickly, dip each frozen cheesecake ball into the melted chocolate, turning to coat evenly. Let excess drip off before placing back on the parchment paper. If desired, sprinkle toppings immediately so they stick.
- Chill to Set (30 minutes): Place the coated pops back in the freezer or refrigerator until the chocolate shell is fully hardened and snaps when bitten. Store in an airtight container until serving.
A quick tip: If your chocolate starts to thicken while dipping, gently rewarm it for a few seconds to keep the coating smooth. Also, don’t skip the freezing step before dipping—it helps prevent the filling from melting and makes a crisp shell.
Cooking Tips & Techniques
One thing I learned early on is that the temperature of the filling and chocolate is everything. If the cheesecake balls aren’t frozen solid, the chocolate shell melts and slides off—total mess. So, patience with that freezing step pays off big time.
When melting chocolate, low and slow is your friend. Using a double boiler prevents scorching and keeps the chocolate silky. If microwaving, short bursts with stirring in between stop it from seizing up like a horror show in your bowl.
If you want a really glossy chocolate shell, adding coconut oil is a neat trick I picked up. It thins the chocolate just enough to coat smoothly but sets firm enough for that satisfying snap. Without it, the shell can be dull or brittle.
Lastly, don’t overmix the cream cheese. Overworking the filling can make it too soft and tricky to shape. Just mix until combined and creamy, then fold in crumbs and whipped cream gently. Your hands will thank you later when rolling the pops.
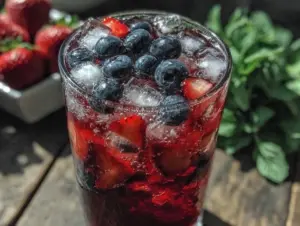
By the way, if you want to keep things light and fresh alongside these pops, try pairing with a refreshing peach bellini—it’s a fantastic contrast to the rich cheesecake.
Variations & Adaptations
This recipe is pretty flexible, which I love. Here are some fun ways to mix things up:
- Berry Swirl: Fold in some fresh or frozen raspberries or strawberries into the filling for a fruity twist. Just mash them lightly before folding in.
- Chocolate Peanut Butter: Add a tablespoon of peanut butter to the filling and coat with milk chocolate instead of semi-sweet. It’s a nostalgic combo that always wins me over.
- Gluten-Free Option: Swap graham cracker crumbs for crushed gluten-free cookies or almond flour to keep it safe for gluten-sensitive guests.
- Nut-Free: Skip any nut toppings and use seed-based sprinkles or shredded coconut instead.
- Alternative Coatings: Instead of chocolate, try a white chocolate shell tinted with natural food coloring for school colors or party themes.
One time, I even rolled the pops in crushed pistachios after dipping in chocolate for a festive green and brown look—it was a hit at a friend’s baby shower. Feel free to get creative! If you want ideas for party snacks to accompany these pops, a fresh Mediterranean mezze board is always a crowd favorite.
Serving & Storage Suggestions
Serve these cheesecake pops chilled or slightly softened at room temperature—just 5 minutes out of the fridge is perfect for that creamy bite without being too melty. They look adorable arranged on a platter or stuck upright in a foam block decorated with tissue paper for a festive display.
They pair wonderfully with sparkling drinks or a rich cup of coffee. If you’re planning a graduation party, they’re a neat handheld dessert that keeps guests mingling without the need for plates and forks.
Store leftover pops in an airtight container in the refrigerator for up to 3 days or freeze for up to 2 weeks. When reheating frozen pops, let them thaw in the fridge for a couple of hours before serving to avoid condensation softening the chocolate shell.
Over time, the flavors actually mellow and develop more depth, especially if you let the filling sit overnight before shaping. That’s a trick I use when prepping ahead.
Nutritional Information & Benefits
Each cheesecake pop is a modest indulgence, roughly 150-180 calories depending on size and toppings. The cream cheese provides a decent amount of protein and calcium, while the chocolate adds antioxidants when using higher cocoa content.
This dessert is gluten-free if you choose appropriate cookie crumbs and dairy-free if you swap the cream cheese and heavy cream for plant-based alternatives, making it adaptable for various diets.
Of course, it’s a treat best enjoyed in moderation, but it’s nice to have a dessert that feels decadent without being overly heavy or complicated. Plus, homemade means you skip preservatives and control the sugar level.
Conclusion
These perfect no-bake cheesecake graduation pops with easy chocolate shell recipe quickly became one of my favorite desserts to share, especially when celebrations pop up unexpectedly. They’re simple, fun, and just the right amount of indulgence to make any moment feel special. The best part? You can customize them endlessly, making each batch uniquely yours.
Give them a try, and I bet you’ll find yourself making these pops not only for graduations but for birthdays, baby showers, or just because. And hey, if you’re curious about pairing these with a fun drink, my creamy homemade Thai iced tea is a smooth complement to these pops—you can find the recipe here.
I’d love to hear how you put your spin on this recipe—drop a comment or share your photos. Here’s to sweet, stress-free celebrations!
FAQs
Can I make these cheesecake pops ahead of time?
Absolutely! You can prep the filling and shape the pops several days in advance. Keep them frozen until ready to dip and serve.
What’s the best way to store leftover cheesecake pops?
Store them in an airtight container in the fridge for up to 3 days, or freeze for up to 2 weeks. Thaw in the fridge before serving.
Can I use a different type of cookie crumb for the filling?
Yes! Graham cracker crumbs are classic, but crushed Oreos, digestive biscuits, or gluten-free cookies all work well.
How do I prevent the chocolate shell from melting too quickly?
Make sure the cheesecake pops are well frozen before dipping. Also, use coconut oil in the chocolate to help it harden firmly and keep pops chilled until serving.
Can I add flavors like lemon or almond to the cheesecake filling?
Definitely! Adding lemon zest or almond extract gives a fresh twist. Just adjust amounts to taste so the flavor complements the chocolate shell.
Pin This Recipe!

Perfect No-Bake Cheesecake Graduation Pops with Easy Chocolate Shell Recipe

These no-bake cheesecake pops feature a creamy filling and a crisp chocolate shell, perfect for celebrations and easy to make without an oven.
- Prep Time: 25 minutes
- Cook Time: 7 minutes
- Total Time: 1 hour 62 minutes
- Yield: 12 servings 1x
- Category: Dessert
- Cuisine: American
Ingredients
- 8 oz (225 g) cream cheese, softened
- 1 cup (120 g) powdered sugar
- 1 teaspoon vanilla extract
- 1 cup (100 g) graham cracker crumbs (or gluten-free cookie crumbs for gluten-free option)
- 1/4 cup (60 ml) heavy cream, whipped slightly
- 12 oz (340 g) chocolate chips or chopped chocolate (semi-sweet recommended)
- 1 tablespoon coconut oil (optional, for glossy chocolate shell)
- Sprinkles, crushed nuts, or mini chocolate chips for decorating (optional)
Instructions
- Prepare the Filling (10 minutes): In a mixing bowl, beat the softened cream cheese until smooth and creamy. Add the powdered sugar and vanilla extract, mixing until fully combined. The mixture should be thick but spreadable.
- Mix in the Graham Cracker Crumbs: Gently fold in the graham cracker crumbs, making sure they’re evenly distributed without breaking down the mixture. Then, lightly whip the heavy cream until it forms soft peaks and fold it into the cream cheese mixture to add lightness. The filling should feel smooth with a slight grainy texture from the crumbs.
- Shape the Pops (15 minutes): Line a baking sheet with parchment paper. Using a cookie scoop or spoon, portion out the cheesecake filling into small, round balls (about 1.5 inches / 4 cm diameter). Place the balls on the tray and insert a popsicle stick gently into each one. Freeze for at least 1 hour until firm.
- Melt the Chocolate Shell (5-7 minutes): Melt the chocolate and coconut oil together using a double boiler or microwave in 20-second bursts, stirring well between each. The coconut oil thins the chocolate for a smooth coating and helps it set quickly with a shine.
- Coat the Cheesecake Pops: Working quickly, dip each frozen cheesecake ball into the melted chocolate, turning to coat evenly. Let excess drip off before placing back on the parchment paper. If desired, sprinkle toppings immediately so they stick.
- Chill to Set (30 minutes): Place the coated pops back in the freezer or refrigerator until the chocolate shell is fully hardened and snaps when bitten. Store in an airtight container until serving.
Notes
Freeze cheesecake balls before dipping to prevent melting and ensure a crisp chocolate shell. Use coconut oil in the chocolate for a glossy finish and perfect snap. Rewarm chocolate gently if it thickens during dipping. Avoid overmixing the cream cheese to keep filling firm enough to shape.
Nutrition
- Serving Size: 1 cheesecake pop (ap
- Calories: 150180
- Sugar: 14
- Sodium: 90
- Fat: 10
- Saturated Fat: 6
- Carbohydrates: 18
- Fiber: 1
- Protein: 3
Keywords: no-bake cheesecake, cheesecake pops, chocolate shell, graduation dessert, easy dessert, party treats, no oven dessert