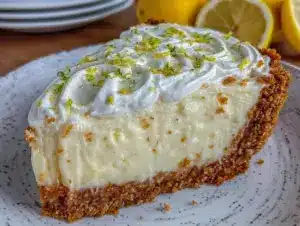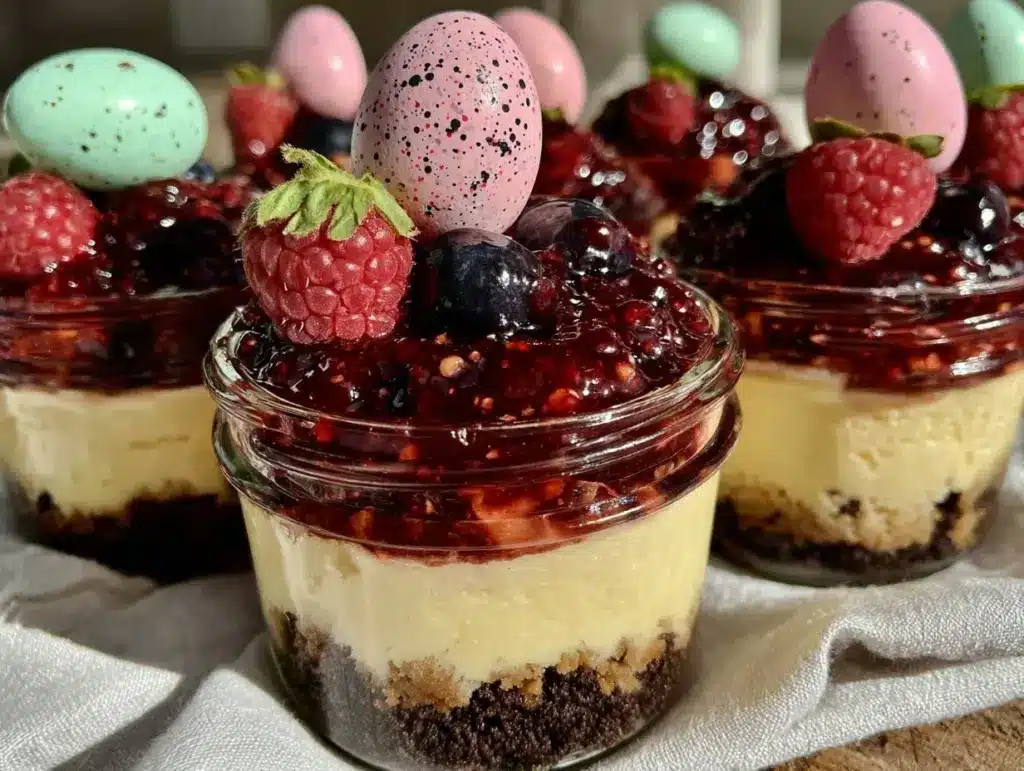
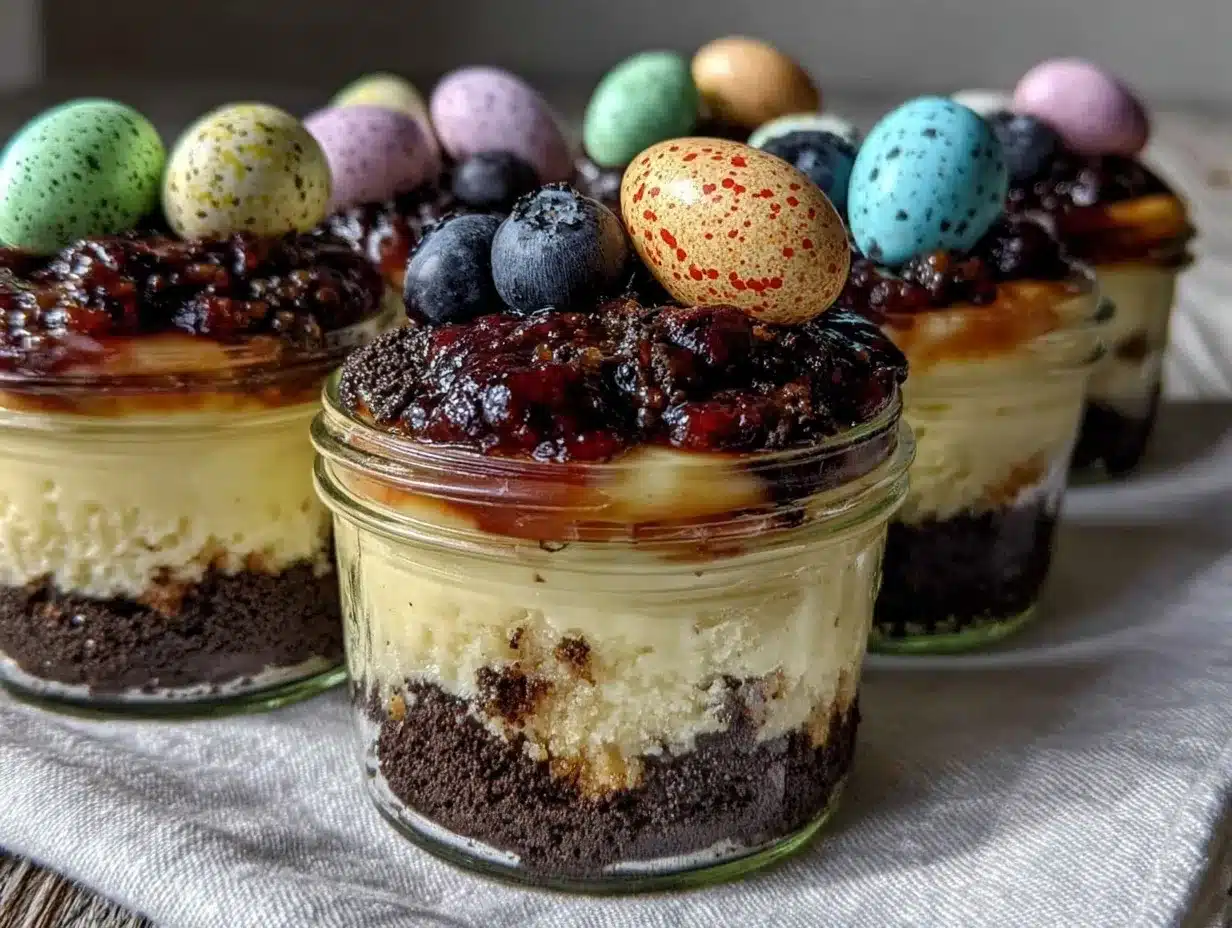
“You brought cheesecake jars for Easter? Honestly, didn’t expect much,” my cousin teased as I handed over one of these little beauties. I couldn’t blame her skepticism—who really thinks no-bake desserts can impress? But there I was, watching as she took a tentative bite, her eyebrows shooting up in surprise. The creamy texture, the subtle sweetness, and the playful bursts of spring colors from the edible Easter egg decorations somehow felt just right for a light, festive treat. This recipe for Perfect No-Bake Easter Egg Cheesecake Jars for Spring Celebrations wasn’t originally meant to be a showstopper. In fact, it started as a quick fix on a busy day when I had no time to bake but wanted something special that captured the season’s spirit.
The jars sat quietly in the fridge, waiting while I fussed over other dishes. But when I finally pulled one out, the smooth, cool cheesecake mixed with crushed cookies and pastel candy eggs struck a chord—like spring on a spoon. What surprised me most was how it became the star of the table, requested again and again, even by those who usually skip dessert. The no-bake aspect means it’s perfect for anyone who, like me, sometimes just wants an easy win without the oven drama. Plus, serving in individual jars adds a touch of charm and makes sharing feel effortless. I guess sometimes the simplest ideas turn into the most memorable moments, and this cheesecake jar recipe has quietly earned its place in my spring celebrations ever since.
Why You’ll Love This Recipe
From my many attempts (and occasional cheesecake mishaps), I can genuinely say this recipe nails that balance of creamy richness and light spring freshness without the hassle of baking. Here’s why this no-bake cheesecake jar recipe has stuck around for me and, honestly, my whole family:
- Quick & Easy: It comes together in about 20 minutes, with just a few hours chilling time—no oven required, which is a lifesaver during busy spring days.
- Simple Ingredients: You likely have most of these on hand—cream cheese, whipped topping, sugar, and some crushed cookies. No fancy supermarket runs needed.
- Perfect for Spring Gatherings: The pastel Easter egg decorations make it festive and fun, great for Easter brunches, potlucks, or casual family dinners.
- Crowd-Pleaser: Both kids and adults adore these jars—the individual servings keep things neat and everyone happy.
- Unbelievably Delicious: The texture is silky and smooth, with just the right amount of sweetness, complemented by the crunchy cookie base.
What really sets this cheesecake jar recipe apart is the layering technique. I use crushed buttery cookies for a sturdy, crumbly base that stops the filling from feeling too heavy. The cheesecake filling itself is whipped just right, blending cream cheese with a little sugar and whipped topping for fluffiness. And the Easter egg candies on top? They’re not just cute—they add a satisfying little crunch and bursts of color that scream spring. Honestly, this isn’t just another cheesecake jar recipe; it’s my go-to for effortless celebrations when I want something that feels special but won’t stress me out.
Plus, it pairs beautifully with light, refreshing drinks like the creamy homemade Thai iced tea, especially if you’re hosting a brunch or garden party. It’s dessert that feels both indulgent and easygoing, just like spring itself.
What Ingredients You Will Need
This recipe uses simple, wholesome ingredients to deliver bold flavor and satisfying texture without the fuss. Most ingredients are pantry staples or easy to find in any grocery store, and you can swap a few if needed. Here’s what you’ll need:
- For the Crust:
- 1 ½ cups (150g) crushed buttery cookies (graham crackers or digestive biscuits work great)
- 3 tablespoons (43g) unsalted butter, melted (adds richness and holds the crust together)
- For the Cheesecake Filling:
- 16 ounces (450g) cream cheese, softened (I prefer Philadelphia brand for smooth texture)
- 1 cup (240ml) heavy whipping cream, chilled
- ¾ cup (90g) powdered sugar (adjust sweetness to taste)
- 1 teaspoon pure vanilla extract (for that subtle warm flavor)
- For the Topping and Decoration:
- Assorted mini pastel Easter egg candies or chocolate eggs (adds festive color and crunch)
- Optional: fresh berries or edible flowers for extra spring flair
Ingredient tips: If you want a lighter option, substitute heavy cream with whipped coconut cream, which also keeps the no-bake vibe intact. For a gluten-free crust, crushed almond flour cookies or gluten-free graham crackers work nicely. And if you’re short on pastel candies, colorful sprinkles or chopped nuts can add texture and fun.
Equipment Needed
Luckily, this recipe calls for only basic kitchen tools, which means no specialized gadgets are required.
- Mixing bowls – one large for the filling, and another for the crust mix.
- Electric hand mixer or stand mixer – to whip the cream and cream cheese smoothly. If you don’t have one, a sturdy whisk and patience work too, though it’s more effort.
- Measuring cups and spoons – precise measurements keep the texture spot-on.
- Small jars or clear dessert cups – for assembling the cheesecake jars. I use 8-ounce (240ml) mason jars, which are perfect for individual servings and look charming on the table.
- Rubber spatula – for folding the whipped cream into the cream cheese without deflating it.
For budget-friendly options, you can reuse recycled jam jars or small plastic containers (just make sure they’re food-safe). I’ve experimented with different jar sizes before, and 8-ounce jars hit the sweet spot—not too much, not too little. Also, keeping your cream cheese at room temperature before mixing really helps with a smooth filling—something I learned the hard way the first few tries!
Preparation Method
- Prepare the crust: In a medium bowl, combine 1 ½ cups (150g) crushed buttery cookies with 3 tablespoons (43g) melted unsalted butter. Mix until the crumbs are evenly coated and look like wet sand. This usually takes about 2 minutes.
- Assemble the crust layer: Spoon about 2 tablespoons (20g) of the crumb mixture into each jar. Press down gently but firmly with the back of a spoon to create a compact base. This helps prevent the crust from mixing with the filling later. Place jars into the fridge while preparing the filling (about 10 minutes chilling).
- Make the cheesecake filling: In a large mixing bowl, beat 16 ounces (450g) softened cream cheese with ¾ cup (90g) powdered sugar and 1 teaspoon vanilla extract on medium speed until smooth and creamy (about 3-4 minutes). Scrape down the sides as needed.
- Whip the cream: In a separate chilled bowl, whip 1 cup (240ml) heavy cream until stiff peaks form. This usually takes around 5 minutes with a mixer on high speed. Be careful not to overwhip, or it’ll turn grainy.
- Combine filling and whipped cream: Gently fold the whipped cream into the cream cheese mixture using a rubber spatula. Use a light hand to keep the mixture airy and fluffy. This step takes about 2 minutes.
- Fill the jars: Spoon or pipe the cheesecake filling over the crust layer in each jar until nearly full, leaving a little room at the top for decoration.
- Chill: Cover the jars loosely with lids or plastic wrap and refrigerate for at least 3 hours, preferably overnight. This chilling time lets the flavors meld and the cheesecake set.
- Decorate before serving: Just before serving, top each jar with pastel Easter egg candies or your chosen decorations. For an extra fresh touch, add a few berries on top.
Pro tip: If you want a smoother crust layer, pulse your cookies in a food processor until fine. But I like a bit of crunch, so I leave some larger crumbs. Also, don’t skip chilling the jars before adding filling—it helps keep the crust crisp.
Cooking Tips & Techniques
Working with no-bake cheesecakes can be tricky if you’re used to traditional baked versions. Here are some lessons I picked up along the way:
- Softening cream cheese: Always let cream cheese sit at room temperature for at least 30 minutes before mixing. Otherwise, you’ll end up with lumps and a rough texture.
- Whipping cream to stiff peaks: Watch carefully—overwhipping can cause it to turn grainy or start separating. Stop as soon as stiff peaks hold their shape but still look glossy.
- Folding technique: Use a gentle folding motion instead of stirring vigorously when mixing cream with cream cheese. It keeps that fluffy, airy texture that makes the cheesecake feel light.
- Crust pressing: Firmly pressing the crust crumbs into the jar helps avoid a crumbly mess when eating. But don’t overdo it, or it gets too dense.
- Chilling time: Patience pays off—letting the jars chill overnight makes the filling firm up perfectly and flavors blend better. If you’re in a rush, at least 3 hours works.
One time, I skipped chilling the jars and the crust got soggy fast—lesson learned! Also, I often whip the cream in a metal bowl chilled in the freezer for 10 minutes; it helps it whip faster and hold better. Multitasking tip: whip your cream while the crust chills in the fridge to save time.
Variations & Adaptations
This cheesecake jar recipe is surprisingly versatile. Here are some ways to mix things up for different tastes and dietary needs:
- Flavor twists: Add lemon zest or a tablespoon of fruit puree (like raspberry or strawberry) into the cheesecake filling for a fresh fruity note. You could even swirl in some melted chocolate or caramel for richness.
- Gluten-free option: Swap the cookie crumbs with almond flour mixed with a touch of melted butter or gluten-free cookie crumbs. It keeps the crust crunchy and friendly for gluten-sensitive folks.
- Dairy-free alternative: Use dairy-free cream cheese and coconut whipped cream. The texture is a bit different but still creamy and delicious.
- Seasonal variations: Instead of Easter egg candies, top the jars with fresh spring berries like strawberries, blueberries, or edible flowers for an elegant touch.
- Personal favorite: Once, I added crushed pistachios between layers for a nutty surprise—totally recommend it for a little texture contrast.
Serving & Storage Suggestions
These cheesecake jars are best served chilled, straight from the fridge. The cool temperature keeps the filling firm and refreshing, especially on those warmer spring days.
Presentation-wise, serving in clear jars lets the pretty layers shine, making them perfect for spring celebrations or Easter brunch tables. Pair them with light, floral drinks like the lavender gin fizz cocktail to keep the vibe bright and refreshing.
For storing, keep the jars tightly sealed in the refrigerator for up to 3 days. If you need to prep ahead, assembling them a day in advance is ideal. Avoid freezing, as the texture changes and can get grainy upon thawing.
When reheating (if you must), just let the jars sit at room temperature for 10-15 minutes before serving to soften slightly. But honestly, cold is best here.
Flavors actually deepen after a day in the fridge—the cheesecake filling becomes silkier and the crust absorbs just a hint of moisture, making each bite more harmonious.
Nutritional Information & Benefits
Each jar contains roughly 300-350 calories, depending on the exact cookie and candy toppings you use. This no-bake cheesecake offers a good balance of protein from the cream cheese and fat from the whipping cream, making it a satisfying treat that doesn’t spike your sugar too quickly.
Key ingredients like cream cheese provide calcium and vitamin A, while the heavy cream adds some vitamin D. Using real butter in the crust delivers a bit of richness but also saturated fat, so moderation is key.
For those watching carbs, swapping the cookie crust with almond flour lowers the carb content significantly. This recipe is gluten-free if you choose gluten-free cookies or alternatives.
Allergens include dairy and gluten (unless substituted), and potential egg traces if you use certain candies, so keep that in mind for sensitive guests.
From a wellness perspective, I appreciate this recipe for being a treat that feels indulgent without being overly complicated or loaded with artificial ingredients. It fits nicely into a balanced approach to eating, especially when enjoyed in small portions.
Conclusion
If you’re looking for a dessert that captures the light, playful spirit of spring without the fuss of baking, these Perfect No-Bake Easter Egg Cheesecake Jars truly deliver. They bring just the right amount of sweetness, texture, and festive charm to your table—whether it’s a casual family dinner or a lively Easter celebration. The ease of preparation combined with the pretty presentation means anyone can get these ready with minimal stress and maximum smiles.
Feel free to customize, play around with the toppings, or try the variations to make it your own. I love that this recipe feels both classic and fresh, a little indulgence that fits perfectly into the season’s vibe. If you try it out, I’d love to hear how you decorated your jars or what twists you added—don’t hesitate to share your thoughts and photos.
Here’s to sweet spring moments and desserts that make life a bit sweeter, one jar at a time.
FAQs
Can I make these cheesecake jars ahead of time?
Yes! They actually taste better after chilling overnight, so preparing them a day in advance is perfect for stress-free entertaining.
What can I use instead of mini Easter egg candies?
Fresh berries, edible flowers, colorful sprinkles, or chopped nuts all work well as toppings, depending on your taste and occasion.
Is it possible to make these gluten-free?
Absolutely. Use gluten-free cookie crumbs or almond flour mixed with melted butter for a delicious gluten-free crust.
Can I freeze these cheesecake jars?
Freezing isn’t recommended as it changes the texture of the filling and crust, often making it grainy or soggy after thawing.
How long do these jars keep in the fridge?
Stored in an airtight container, they stay fresh for up to 3 days. For best texture and flavor, enjoy within that timeframe.
Pin This Recipe!
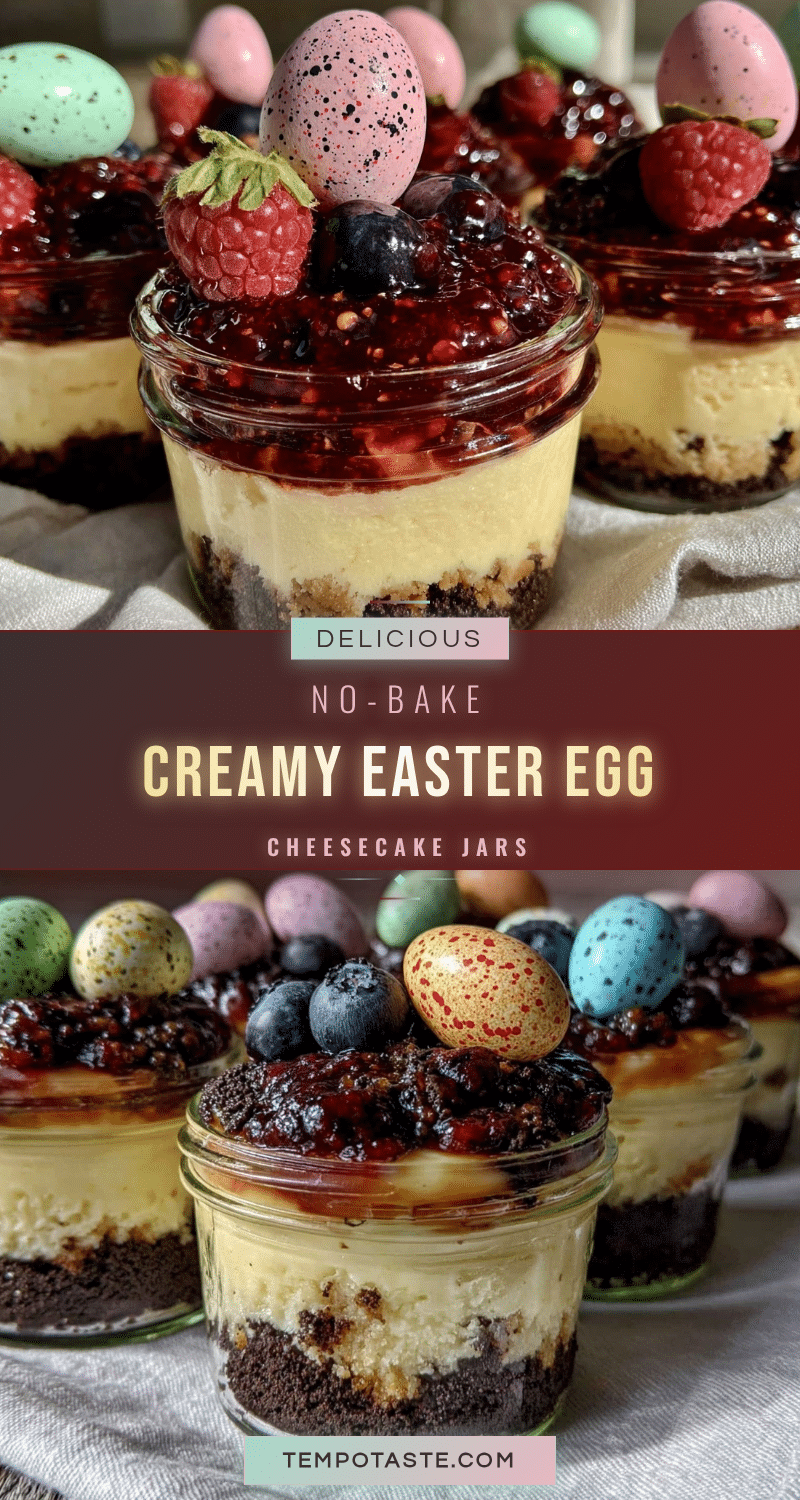
Perfect No-Bake Easter Egg Cheesecake Jars

A quick and easy no-bake cheesecake recipe served in individual jars, decorated with pastel Easter egg candies for a festive spring dessert.
- Prep Time: 20 minutes
- Cook Time: 0 minutes
- Total Time: 3 hours 20 minutes
- Yield: 6 servings 1x
- Category: Dessert
- Cuisine: American
Ingredients
- 1 ½ cups (150g) crushed buttery cookies (graham crackers or digestive biscuits)
- 3 tablespoons (43g) unsalted butter, melted
- 16 ounces (450g) cream cheese, softened
- 1 cup (240ml) heavy whipping cream, chilled
- ¾ cup (90g) powdered sugar
- 1 teaspoon pure vanilla extract
- Assorted mini pastel Easter egg candies or chocolate eggs
- Optional: fresh berries or edible flowers for decoration
Instructions
- In a medium bowl, combine crushed buttery cookies with melted unsalted butter. Mix until crumbs are evenly coated and look like wet sand (about 2 minutes).
- Spoon about 2 tablespoons (20g) of the crumb mixture into each jar. Press down gently but firmly to create a compact base. Refrigerate jars while preparing filling (about 10 minutes).
- In a large mixing bowl, beat softened cream cheese with powdered sugar and vanilla extract on medium speed until smooth and creamy (3-4 minutes). Scrape down sides as needed.
- In a separate chilled bowl, whip heavy cream until stiff peaks form (about 5 minutes). Be careful not to overwhip.
- Gently fold whipped cream into cream cheese mixture using a rubber spatula to keep mixture airy and fluffy (about 2 minutes).
- Spoon or pipe cheesecake filling over crust layer in each jar until nearly full, leaving room at the top for decoration.
- Cover jars loosely with lids or plastic wrap and refrigerate for at least 3 hours, preferably overnight.
- Before serving, top each jar with pastel Easter egg candies or chosen decorations. Add fresh berries if desired.
Notes
Let cream cheese sit at room temperature for at least 30 minutes before mixing to avoid lumps. Whip cream to stiff peaks but do not overwhip. Use gentle folding to keep filling airy. Press crust firmly but not too dense. Chill jars before adding filling to keep crust crisp. For gluten-free option, use almond flour or gluten-free cookie crumbs. Dairy-free alternative: use dairy-free cream cheese and coconut whipped cream. Avoid freezing as it changes texture.
Nutrition
- Serving Size: One 8-ounce jar
- Calories: 325
- Sugar: 18
- Sodium: 210
- Fat: 22
- Saturated Fat: 13
- Carbohydrates: 25
- Fiber: 1
- Protein: 5
Keywords: no-bake cheesecake, Easter dessert, cheesecake jars, spring dessert, easy cheesecake, no oven dessert, individual servings