Introduction
The scent of caramelized pineapple, brown sugar, and buttery cookie dough baking together is enough to make anyone hover impatiently by the oven. I still remember the first time I decided to turn my favorite classic pineapple upside-down cake into easy, shareable cookie bars—the result was a gooey, golden treat that disappeared within minutes. Honestly, these pineapple upside-down cookie bars have become my go-to whenever I need something festive but fuss-free. You know how some desserts feel nostalgic and new all at once? This is that sweet spot.
I stumbled onto this recipe during a summer picnic when I was searching for something that could travel well, please a crowd, and not require a fork (because let’s face it—kids and grownups alike love treats you can just grab and go). Pineapple upside-down cookie bars hit every mark: they’re buttery, fruity, and topped with the classic cherry-pineapple combo but baked as easy bars instead of a cake. Plus, this homemade dessert is way more forgiving than the traditional cake—no flipping drama, just slice and serve.
I’ve tested these bars over a dozen times (friends and family never complain about taste tests!), tweaking the ratios and technique to get that perfect blend of chewy cookie base and juicy fruit topping. If you’re looking for a dessert that’s cheerful, quick, and packed with tropical flavor, these pineapple upside-down cookie bars are about to become your new favorite. They’re perfect for busy families, potlucks, or anyone who wants a taste of summer year-round.
Why You’ll Love This Recipe
- Quick & Easy: These pineapple upside-down cookie bars come together in under 45 minutes, so you’re never far from a homemade treat—even on busy evenings.
- Simple Ingredients: Nothing fancy here! You probably have everything you need in your kitchen already (except maybe the pineapple).
- Perfect for Every Occasion: Whether you’re heading to a picnic, hosting brunch, or just craving something sweet, these bars are a sure hit.
- Crowd-Pleaser: Kids love the colorful cherry topping, grownups appreciate the nostalgia, and everyone asks for seconds.
- Unbelievably Delicious: The combo of caramelized pineapple and rich cookie base is pure comfort food—gooey, chewy, and totally addictive.
What sets this recipe apart? Instead of fighting with a sticky upside-down cake flip, you get the same flavors baked into portable bars—plus, the cookie base means a sturdier, more satisfying bite. I always blend the pineapple with a spoonful of its juice for extra moisture (learned that after a few crumbly batches). And a touch of almond extract? Trust me, it’s the secret weapon for depth.
This isn’t just another pineapple dessert—it’s the one that’ll make you close your eyes on that first bite. Whether you’re making memories with your kids or treating yourself after a long day, these pineapple upside-down cookie bars bring sunshine to any table. I’ve shared them at potlucks, birthday parties, and just-because weekends, and every time, someone asks for the recipe. It’s comfort food, but with a playful, tropical twist!
What Ingredients You Will Need
This recipe uses simple, wholesome ingredients to deliver bold flavor and satisfying texture—no complicated shopping required. Most of these are pantry staples, and you can easily swap a few things to suit your needs. Here’s what you’ll want for irresistible pineapple upside-down cookie bars:
For the Topping:
- 1/2 cup (100g) packed light brown sugar (creates that classic caramelized layer)
- 1/4 cup (60g) unsalted butter, melted (for richness)
- 1 can (20 oz / 565g) pineapple slices, drained and juice reserved (I prefer Dole for consistent texture)
- 10–12 maraschino cherries, halved and patted dry (for that iconic pop of color)
For the Cookie Bar Base:
- 1/2 cup (115g) unsalted butter, softened
- 3/4 cup (150g) granulated sugar
- 1 large egg, room temperature
- 1 tsp vanilla extract (pure, not imitation)
- 1/4 tsp almond extract (optional, but highly recommended for depth)
- 1 3/4 cups (210g) all-purpose flour
- 1/2 tsp baking powder
- 1/4 tsp baking soda
- 1/2 tsp salt
- 1/4 cup (60ml) reserved pineapple juice (adds moisture—don’t skip this!)
Ingredient Tips & Substitutions:
- Flour: For gluten-free bars, swap in a 1:1 gluten-free baking blend.
- Dairy-Free: Use plant-based butter for both topping and base.
- Pineapple: Fresh pineapple works if you’re feeling fancy—just slice thinly and use extra juice as needed.
- Cherries: If you’re out of maraschino cherries, dried cranberries or pitted fresh cherries make a fun twist.
Honestly, these ingredients are so forgiving. I’ve used coconut sugar instead of brown for a deeper caramel flavor, and swapped almond extract for a splash of rum—both winners! If you want to make these bars in winter, canned pineapple keeps things simple, but in summer, fresh pineapple is a treat. If you’re short on pineapple juice, a splash of orange juice works in a pinch.
Equipment Needed
- 9×13-inch (23x33cm) baking pan: Nonstick works best, but glass or ceramic is fine—just grease well.
- Mixing bowls: One for wet ingredients, one for dry.
- Hand mixer or stand mixer: Makes creaming the butter and sugar a breeze (but a sturdy whisk will do if you’re feeling old-school).
- Measuring cups and spoons: Accuracy helps with texture—especially for the cookie base.
- Rubber spatula: For folding and scraping down the bowl.
- Offset spatula or butter knife: For smoothing batter and topping evenly.
- Parchment paper: Optional, but lining the pan makes lifting bars out way easier (especially for Pinterest-worthy photos!).
If you don’t have a hand mixer, I’ve made these bars with a big wooden spoon—just a little elbow grease required. Metal pans give crispier edges, while glass pans result in softer bars. Maintenance tip: If using a nonstick pan, avoid metal utensils to keep the coating intact. For budget-friendly baking, you don’t need fancy equipment—my favorite mixing bowl is a thrift-store find!
Preparation Method
- Prep the Pan & Oven: Preheat your oven to 350°F (175°C). Grease a 9×13-inch (23x33cm) baking pan with butter or nonstick spray. For easy removal, line with parchment paper, letting the edges overhang.
- Make the Topping: In a small bowl, mix 1/2 cup (100g) brown sugar with 1/4 cup (60g) melted butter until combined. Spread evenly over the bottom of your prepared pan using an offset spatula. Arrange pineapple slices on top, cutting slices as needed to fit. Place cherry halves in the center of each pineapple ring and scattered between (it looks cute and tastes great!).
- Prepare Cookie Bar Base: In a large mixing bowl, cream 1/2 cup (115g) softened butter and 3/4 cup (150g) sugar together until light and fluffy—about 2–3 minutes with a mixer, longer by hand. Beat in the egg, vanilla, and almond extract (if using) until smooth.
- Combine Dry Ingredients: In a separate bowl, whisk together 1 3/4 cups (210g) flour, 1/2 tsp baking powder, 1/4 tsp baking soda, and 1/2 tsp salt.
- Mix Wet and Dry: Add half the dry mixture to the wet ingredients, mixing gently. Pour in 1/4 cup (60ml) reserved pineapple juice, then add the rest of the dry mix. Stir until just combined—don’t overmix! The dough will be thick but spreadable.
- Spread Cookie Dough: Drop large spoonfuls of dough over the pineapple topping, then gently spread to cover using a spatula or your fingers. Try not to dislodge the fruit. It’s okay if a little topping peeks through.
- Bake: Bake in the center of the oven for 28–32 minutes, or until the top is golden and a toothpick inserted in the center comes out mostly clean (moist crumbs are fine). The edges will be light brown and the fruit bubbling.
- Cool & Slice: Let the bars cool in the pan on a rack for at least 15–20 minutes. For perfect slices, chill in the fridge for 30 minutes after cooling (reduces stickiness!). Lift out using parchment overhang and cut into bars—wipe your knife between cuts for neat edges.
Prep notes: If your dough seems too dry, add an extra tablespoon of pineapple juice. If it’s too wet, sprinkle in a tablespoon of flour. The topping layer should fully cover the pan—any gaps can lead to sticky spots after baking. For a gooier bar, bake on the lower end of the time range. If your oven runs hot, check at 25 minutes.
Sensory cues: The bars are done when the top is golden, the edges set, and you smell pineapple-caramel heaven wafting from the oven. If you notice browning too fast, cover loosely with foil for the last 5 minutes.
Efficiency tip: Prep the topping and base while the oven preheats. I always chop cherries and arrange pineapple first, then mix the dough. Less waiting, more snacking!
Cooking Tips & Techniques
- Don’t Overmix: Stir just until the flour disappears; overmixing leads to tough bars (learned that the hard way!).
- Pat Dry Fruit: Excess liquid from pineapple or cherries can make the bars soggy. Pat fruit dry before layering—trust me, it’s worth the extra minute.
- Even Spreading: Use an offset spatula or wet fingers to spread the cookie dough gently over the fruit, especially near edges. Gaps can cause the topping to bubble up and stick.
- Watch Oven Time: My first batch was overbaked (distracted by a phone call). Start checking at 28 minutes; the bars should be golden and just set.
- Chill for Clean Slices: Bars are stickiest when warm. For Pinterest-worthy squares, cool fully and chill before slicing.
- Multitasking: While bars bake, wash up your bowls and prep serving plates—less mess, more fun after!
- Consistency: If making for a party, bake two pans at once (rotate halfway through for even baking). Uniform pineapple slices make each bar look great and taste balanced.
I’ve learned that using parchment paper is a lifesaver for removal—one time I skipped it and spent way too long prying bars out with a spatula. Don’t be afraid to experiment with fruit placement (kids love making patterns!). If you’re making these in a rush, you can prep the topping and dough the night before, then assemble and bake fresh.
Keep an eye on the caramel layer; sometimes it bubbles up around the edges, which is totally normal—it’s part of the gooey charm. If you want extra crunch, sprinkle a tablespoon of chopped pecans or coconut on the topping before spreading the dough.
Variations & Adaptations
- Gluten-Free: Substitute all-purpose flour with a 1:1 gluten-free baking blend. The bars stay chewy and delicious—my niece loved them!
- Dairy-Free: Swap all butter with plant-based margarine or coconut oil. The coconut adds a tropical note that pairs perfectly with pineapple.
- Seasonal Twists: In winter, add a pinch of cinnamon or nutmeg to the dough for warmth. In summer, blend a handful of fresh berries with the pineapple for a colorful, tangy variation.
- Flavor Boost: Drizzle the cooled bars with a rum glaze (2 tbsp rum + 1/2 cup powdered sugar) for a grown-up treat.
- Nutty Crunch: Fold in 1/4 cup chopped pecans or walnuts into the cookie dough for extra texture.
- Allergen Substitutions: For egg-free bars, use a flax egg (1 tbsp ground flaxseed + 3 tbsp water, mixed and set for 5 minutes). Works like a charm!
I once tried replacing the cherries with dried apricots—surprisingly tasty and pretty! If you prefer less sweet, use crushed pineapple instead of rings, and reduce the sugar in the topping by half. For a fun party platter, cut bars into triangles or use cookie cutters for shapes.
If you make your own version, I’d love to hear about it! These pineapple upside-down cookie bars are endlessly adaptable, so get creative.
Serving & Storage Suggestions
These bars are best served slightly warm or at room temperature—the flavors really pop when not ice-cold. For a pretty presentation, arrange bars on a platter with extra cherries and pineapple slices. I like to sprinkle a little powdered sugar over the top for a bakery look.
- Serving: Serve with whipped cream, vanilla ice cream, or a dollop of Greek yogurt for a brunch treat.
- Beverage Pairings: Try with tropical iced tea, light coffee, or sparkling water—refreshing and balanced.
- Storage: Store leftover bars in an airtight container in the fridge for up to 4 days. For longer storage, freeze bars individually wrapped in plastic, then in a freezer bag, for up to 2 months. Thaw overnight in the fridge.
- Reheating: Warm in the microwave for 10–15 seconds or in a low oven (300°F/150°C) for 5 minutes. The caramel topping softens up and the fruit gets juicy again.
- Flavor Development: These bars taste even better the next day as the pineapple melds with the cookie base—if you can wait that long!
If you’re packing for a picnic, stack bars between sheets of parchment in a sturdy container. For parties, cut into small squares for bite-sized treats. The bars hold up beautifully and don’t dry out quickly, making them perfect for sharing.
Nutritional Information & Benefits
| Per Bar (1/16th of recipe) | Estimate |
|---|---|
| Calories | ~180 kcal |
| Fat | 7g |
| Carbohydrates | 27g |
| Sugar | 18g |
| Protein | 2g |
Key Ingredient Benefits: Pineapple is packed with vitamin C and bromelain (hello, natural digestive aid!). The cookie dough uses moderate sugar and can be adapted for gluten-free or dairy-free diets. There’s no heavy cream or artificial colors—just simple, honest ingredients.
Dietary Notes: These bars can be made gluten-free and dairy-free. Main allergens: wheat, egg, dairy (if not substituted), and possibly nuts if added.
From my experience, these bars are lighter than traditional cake, with a balance of sweet, tangy, and buttery flavors. If you’re watching sugar, simply reduce the topping or use pineapple packed in juice, not syrup. These are indulgent, but not over-the-top, making them an occasional treat that fits into most healthy routines.
Conclusion
If you’ve been searching for a cheerful, easy dessert that everyone will love, these pineapple upside-down cookie bars are a must-try. They bring together the best of classic flavors and modern convenience—no fancy equipment, no complicated steps, just bright, tropical deliciousness in every bite.
Customize with your favorite fruits, swap in gluten-free flour, or add a personal twist with spices or nuts. There’s really no wrong way to enjoy these bars. I can’t get enough of their sweet nostalgia and gooey charm—every batch brings a smile to my kitchen.
Give them a try, and let me know in the comments how you made them your own! Share with friends, pin to Pinterest, or snap a photo for your next party. Happy baking—and may your cookie bars always be golden and delicious!
Frequently Asked Questions
Can I use fresh pineapple instead of canned?
Absolutely! Just slice it thin and pat dry. You’ll want about 2 cups of slices or chunks. Use the juice from the fresh pineapple for extra flavor in the dough.
How do I keep the bars from sticking to the pan?
Line your pan with parchment paper and grease it well. Let bars cool before lifting out—it makes a huge difference.
Can I make these pineapple upside-down cookie bars ahead of time?
Yes! Bake, cool, and chill overnight. The flavors meld and the bars slice cleaner, making them perfect for prepping ahead.
What’s the best way to cut neat bar squares?
Let bars cool fully, chill for 30 minutes, then use a sharp knife (wiped clean between cuts) for tidy edges. Parchment paper helps you lift the whole batch out easily.
Do these bars freeze well?
They sure do! Wrap each bar in plastic and freeze for up to 2 months. Thaw in the fridge overnight and warm gently before serving for best texture.
PrintPineapple Upside-Down Cookie Bars
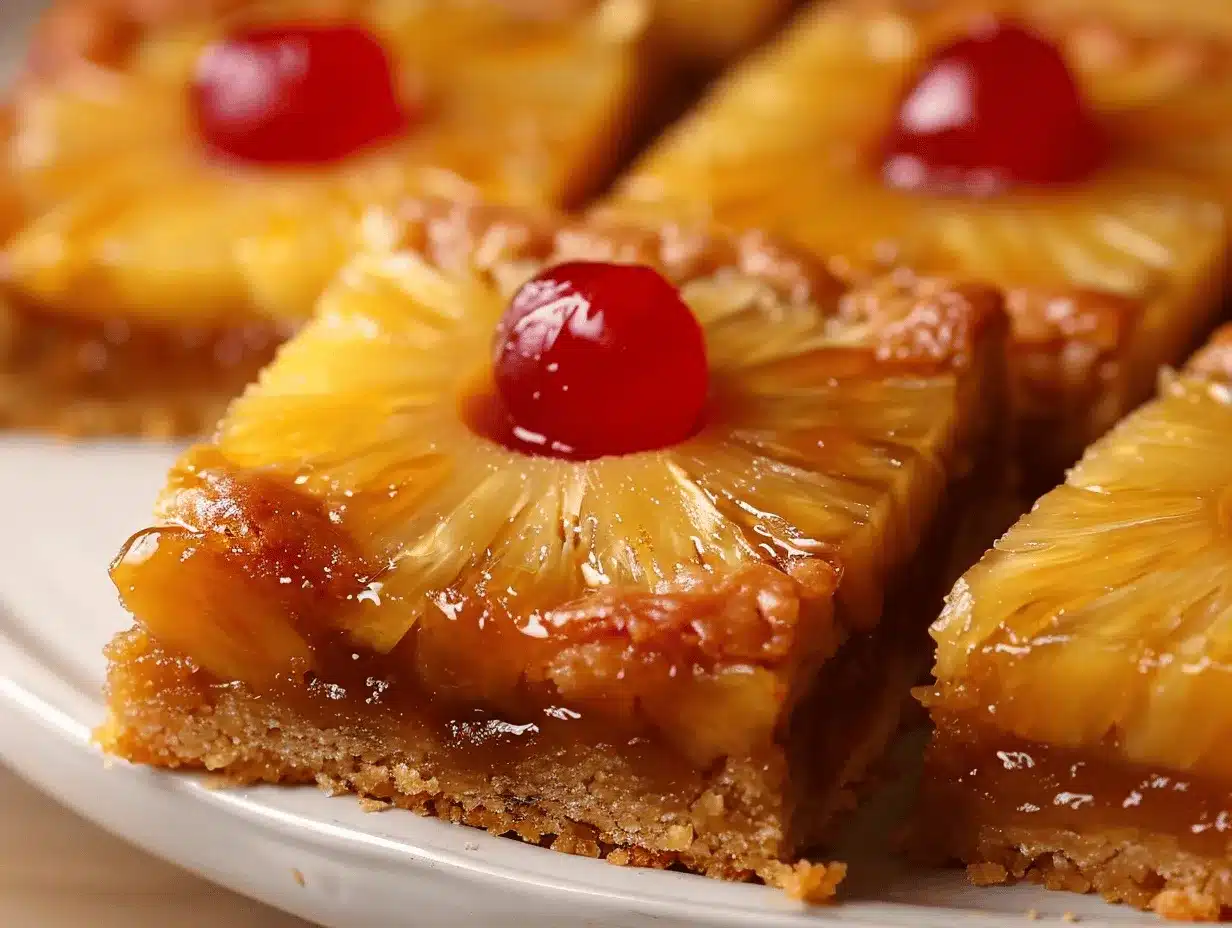
These easy homemade dessert bars combine the nostalgic flavors of pineapple upside-down cake with the convenience of chewy cookie bars. Buttery, fruity, and topped with caramelized pineapple and cherries, they’re perfect for sharing at potlucks, parties, or family gatherings.
- Prep Time: 15 minutes
- Cook Time: 30 minutes
- Total Time: 45 minutes
- Yield: 16 bars 1x
- Category: Dessert
- Cuisine: American
Ingredients
- 1/2 cup packed light brown sugar
- 1/4 cup unsalted butter, melted
- 1 can (20 oz) pineapple slices, drained and juice reserved
- 10–12 maraschino cherries, halved and patted dry
- 1/2 cup unsalted butter, softened
- 3/4 cup granulated sugar
- 1 large egg, room temperature
- 1 tsp vanilla extract
- 1/4 tsp almond extract (optional)
- 1 3/4 cups all-purpose flour
- 1/2 tsp baking powder
- 1/4 tsp baking soda
- 1/2 tsp salt
- 1/4 cup reserved pineapple juice
Instructions
- Preheat oven to 350°F (175°C). Grease a 9×13-inch baking pan and line with parchment paper, letting edges overhang.
- In a small bowl, mix brown sugar and melted butter. Spread evenly over the bottom of the prepared pan.
- Arrange pineapple slices on top of the sugar-butter mixture, cutting slices as needed to fit. Place cherry halves in the center of each pineapple ring and scattered between.
- In a large mixing bowl, cream softened butter and granulated sugar until light and fluffy (2–3 minutes with a mixer). Beat in the egg, vanilla, and almond extract until smooth.
- In a separate bowl, whisk together flour, baking powder, baking soda, and salt.
- Add half the dry mixture to the wet ingredients, mixing gently. Pour in reserved pineapple juice, then add the rest of the dry mix. Stir until just combined; do not overmix.
- Drop large spoonfuls of dough over the pineapple topping and gently spread to cover using a spatula or fingers.
- Bake in the center of the oven for 28–32 minutes, or until the top is golden and a toothpick inserted in the center comes out mostly clean.
- Let bars cool in the pan on a rack for at least 15–20 minutes. For cleaner slices, chill in the fridge for 30 minutes after cooling.
- Lift out using parchment overhang and cut into bars, wiping the knife between cuts for neat edges.
Notes
Pat fruit dry to avoid soggy bars. Do not overmix the dough for best texture. For gluten-free or dairy-free adaptations, substitute flour and butter as needed. Chill bars before slicing for neat squares. Bars freeze well for up to 2 months. For extra crunch, add chopped nuts or coconut to the topping.
Nutrition
- Serving Size: 1 bar (1/16th of recipe)
- Calories: 180
- Sugar: 18
- Sodium: 90
- Fat: 7
- Saturated Fat: 4
- Carbohydrates: 27
- Fiber: 1
- Protein: 2
Keywords: pineapple upside-down bars, cookie bars, pineapple dessert, easy dessert, summer dessert, potluck recipe, homemade bars, tropical dessert


