The first time I bit into a red velvet crinkle cookie, I was instantly hooked. Honestly, the contrast between that deep red, almost velvet-like dough and the delicate white crinkles made me pause—it’s like a festive surprise in every bite. You know, it’s not just about looks; the cookie’s tender crumb combined with a subtle cocoa hint is downright addictive. I’ve tried a handful of red velvet cookie recipes over the years, but this one? It’s become my go-to, made dozens of times for family, friends, and yes, myself whenever I need a sweet pick-me-up.
Red velvet crinkle cookies have this way of feeling both fancy and comforting, which I love. They’re perfect for holiday cookie exchanges, birthdays, or just when you want to treat yourself without fuss. Plus, I’ve tweaked this recipe to be easy enough for busy bakers but still packed with that homemade charm. Whether you’re a seasoned baker or just dipping your toes into cookie-making, these red velvet crinkle cookies are a fun, forgiving project that’ll impress everyone around your kitchen table.
After testing and tasting multiple batches, I can say with confidence this recipe strikes the perfect balance—moist, chewy, and with that iconic crinkle top that makes them irresistible. If you’re ready to bake something that’s as joyful to look at as it is to eat, keep reading. Let’s make these red velvet crinkle cookies your new favorite treat!
Why You’ll Love This Recipe
- Quick & Easy: You can whip these up in about 30 minutes of hands-on time, great for last-minute cravings or holiday baking sprints.
- Simple Ingredients: No weird additives or exotic stuff here—just pantry basics you probably already have, plus that classic red velvet flair.
- Perfect for Any Occasion: Whether it’s a cozy winter night, a festive party, or a casual weekend treat, these cookies fit right in.
- Crowd-Pleaser: Kids, adults, picky eaters—they all love the soft texture and sweet cocoa undertones.
- Unbelievably Delicious: The blend of cream cheese frosting potential (if you want to get fancy!) with the subtle chocolatey depth makes these cookies truly next-level.
This recipe isn’t your typical cookie mix. What makes it stand out is the crinkle effect—achieved by rolling the dough balls in powdered sugar before baking. This simple trick creates that snowy, cracked surface everyone drools over. And because I blend just the right amount of cocoa and red food coloring, the flavor and color pop without being overpowering.
I’ve baked these cookies dozens of times, each batch teaching me a little more about timing and dough texture. This recipe feels like a little secret passed down among friends, and now you get to have it too. Trust me, these red velvet crinkle cookies aren’t just treats—they’re moments of pure joy wrapped in sugar and cocoa.
What Ingredients You Will Need
This recipe uses simple, wholesome ingredients to deliver bold flavor and a satisfying texture without the fuss. Most of these are kitchen staples, and a few you might already have from other baking adventures.
- All-purpose flour (2 ½ cups / 312 grams) – The base for our cookies, providing structure.
- Cocoa powder (¼ cup / 25 grams, unsweetened) – Adds that subtle chocolate flavor essential for red velvet.
- Baking powder (1 teaspoon) – Helps the cookies rise and get that light texture.
- Salt (½ teaspoon) – Balances sweetness and enhances flavors.
- Unsalted butter (1 cup / 226 grams, softened) – For richness and tenderness. I like using Land O’Lakes for consistent results.
- Granulated sugar (1 ½ cups / 300 grams) – Sweetens the dough perfectly without being cloying.
- Brown sugar (½ cup / 100 grams, packed) – Adds moisture and a slight caramel note.
- Large eggs (2, room temperature) – Binds everything together.
- Vanilla extract (2 teaspoons) – Brings warmth and depth.
- Red food coloring (2 tablespoons) – The signature red velvet hue. I recommend gel-based color like AmeriColor for vibrant results without thinning the dough.
- Powdered sugar (1 cup / 120 grams) – For rolling the dough balls to get that iconic crinkle effect.
Pro tip: If you want to make these gluten-free, swap the all-purpose flour for a 1-to-1 gluten-free baking blend. For a dairy-free version, use vegan butter and an egg replacer like flax eggs. I’ve done both, and they turn out surprisingly well!
Equipment Needed
- Mixing bowls: At least two—one for dry ingredients, one for wet.
- Electric mixer: A stand or hand mixer helps cream the butter and sugars smoothly, but a sturdy whisk and muscle power work too.
- Measuring cups and spoons: For precise ingredient amounts (I prefer using a digital scale for flour).
- Rubber spatula: Great for folding and scraping down the bowl.
- Baking sheets: Non-stick or lined with parchment paper to prevent sticking and burning.
- Cooling rack: Essential for letting cookies cool evenly without sogginess.
- Spoon or cookie scoop: For portioning dough evenly. I use a medium cookie scoop for consistent size.
If you don’t have a mixer, no worries. Just beat the butter and sugar longer by hand until creamy. For budget-friendly baking sheets, you can find good options at discount stores or online. Keeping your equipment clean and dry is key—especially the baking sheets—to get those perfect cookie edges every time.
Detailed Preparation Method
- Preheat your oven to 350°F (175°C) and line two baking sheets with parchment paper. This gives your cookies a non-stick surface and easy cleanup.
- Mix dry ingredients: In a medium bowl, sift together 2 ½ cups (312g) all-purpose flour, ¼ cup (25g) unsweetened cocoa powder, 1 teaspoon baking powder, and ½ teaspoon salt. Sifting helps prevent lumps and ensures even mixing. Set aside.
- Cream butter and sugars: In a large bowl, beat 1 cup (226g) softened unsalted butter, 1 ½ cups (300g) granulated sugar, and ½ cup (100g) brown sugar together with an electric mixer on medium speed until light and fluffy—this usually takes about 3-4 minutes. You’ll notice the mixture becomes pale and smooth, which means air is getting in, helping your cookies stay tender.
- Add eggs and vanilla: Beat in 2 large eggs, one at a time, mixing well after each addition. Then stir in 2 teaspoons vanilla extract and 2 tablespoons of red food coloring (gel recommended). The batter will turn a vibrant red at this point.
- Combine wet and dry: Gradually add the dry ingredient mixture to the wet ingredients, mixing on low speed just until incorporated. Avoid overmixing here; you want the dough just combined to keep cookies tender.
- Chill the dough: Cover the dough with plastic wrap and refrigerate for at least 30 minutes. Chilling solidifies the butter and makes dough easier to handle, plus it helps the cookies keep their shape while baking.
- Form and coat dough balls: Scoop dough with a medium cookie scoop (about 1 ½ tablespoons / 22 grams per cookie). Roll each ball generously in powdered sugar until fully coated. This step is why you get those beautiful crinkles after baking.
- Bake: Place the coated dough balls about 2 inches apart on the prepared baking sheets. Bake for 10-12 minutes at 350°F (175°C). Cookies should look set but still soft in the center. They will continue baking slightly after removal.
- Cool: Let the cookies cool on the baking sheet for 5 minutes before transferring them to a wire rack to cool completely. This prevents breakage and helps them finish firming up.
- Enjoy: Serve once cooled or store in an airtight container. These cookies keep well for up to 5 days at room temperature, or freeze for longer storage.
Cooking Tips & Techniques
One thing I learned early on is not to overbake these cookies. They look a bit underdone when you pull them out, but that’s exactly what keeps them chewy and moist inside. Overbaking leads to dry edges—and nobody wants that.
Using gel food coloring instead of liquid helps keep the dough from getting too runny. Trust me, when I first tried liquid color, the dough was too soft, and the cookies spread too much. Gel is a game-changer.
Chilling the dough is a must. It’s tempting to skip it, but chilling helps the cookies maintain their shape and develop richer flavor. I usually chill mine an hour if I have time, but 30 minutes works in a pinch.
When rolling dough balls in powdered sugar, don’t skimp. A thick coating ensures those signature crinkles and adds a subtle sweetness on top. Also, make sure your powdered sugar isn’t clumpy—sifting it before rolling can help.
And hey, don’t forget to rotate your baking sheets halfway through baking if your oven heats unevenly. This little trick keeps cookies baking uniformly golden.
Variations & Adaptations
- White Chocolate Chip Red Velvet: Fold in ½ cup of white chocolate chips to the dough before chilling for a melty, sweet surprise.
- Vegan Version: Use vegan butter and replace eggs with flax eggs (1 tablespoon ground flaxseed + 3 tablespoons water per egg). The texture is slightly different but still delicious.
- Spiced Red Velvet: Add ½ teaspoon cinnamon and a pinch of nutmeg to the dry ingredients for a cozy twist, perfect for fall baking.
- Gluten-Free: Substitute the all-purpose flour with a 1-to-1 gluten-free baking blend. Make sure it contains xanthan gum for structure.
- Different Shapes & Sizes: For bite-sized treats, use a teaspoon to scoop smaller dough balls and reduce baking time to about 8 minutes.
I once tried swirling in a bit of cream cheese frosting before baking. It was a fun experiment that gave the cookies a marbled look and added tangy richness. Totally worth trying if you want to get creative!
Serving & Storage Suggestions
These cookies are best served at room temperature, fresh from the cooling rack. Honestly, the first bite when they’re still a bit warm is pure magic.
Pair them with a cold glass of milk, a cup of coffee, or even a creamy hot chocolate for a cozy treat. They also make a festive addition to any cookie platter or holiday dessert table.
To store, keep the cookies in an airtight container at room temperature for up to 5 days. If you want to keep them longer, freeze the baked cookies in a single layer on a baking sheet, then transfer to a freezer-safe bag for up to 3 months.
To reheat, pop frozen cookies in a warm oven (about 300°F / 150°C) for 5-7 minutes or microwave for 15-20 seconds. The flavors deepen after a day or two, so if you can wait, they get even better!
Nutritional Information & Benefits
Each cookie (based on 24 servings) has approximately:
| Calories | 160 |
|---|---|
| Fat | 7g |
| Carbohydrates | 23g |
| Protein | 2g |
| Sugar | 14g |
While these red velvet crinkle cookies are definitely a treat, they include cocoa powder, which contains antioxidants and adds a subtle chocolate depth without excess sugar. Using unsalted butter lets you control the salt level, and the recipe avoids artificial fillers.
For those with dietary needs, gluten-free and vegan options are easy to make with simple swaps. Just be mindful of allergens like eggs and dairy if serving to guests.
From a wellness standpoint, I see these cookies as a joyful indulgence—a way to enjoy sweet moments without guilt, especially when baked at home with wholesome ingredients you trust.
Conclusion
In the end, these red velvet crinkle cookies are more than just a recipe—they’re a little bit of happiness baked into every batch. They bring the perfect combo of soft, chewy texture with that eye-catching crinkled look that’s sure to impress anyone lucky enough to try one.
Don’t be afraid to tweak the recipe and make it your own! Whether you add chocolate chips, try a vegan version, or just stick to the classic, these cookies are forgiving and fun to bake.
I love this recipe because it turns simple ingredients into something special, and it’s become a staple in my kitchen for celebrations and everyday treats alike. Give it a go, then come back and share your favorite twists or moments enjoying these delights.
Happy baking—and remember, every cookie has a story!
FAQs
How do I get the perfect crinkle effect on my red velvet cookies?
Roll the chilled dough balls generously in powdered sugar before baking. The sugar coating cracks as the cookie expands, creating that signature crinkle look.
Can I make this dough ahead of time?
Absolutely! You can chill the dough overnight or freeze it for up to 2 weeks. Just thaw in the fridge before baking.
What if I don’t have red food coloring?
You can try using beet juice or powder for natural coloring, but the color will be less vibrant. Alternatively, omit the coloring for a more subtle cocoa cookie.
Why are my cookies spreading too much?
Usually, this happens if the dough is too warm or you didn’t chill it enough. Also, make sure your butter isn’t melted but just softened.
Can I add mix-ins like nuts or chocolate chips?
Yes! Fold in up to ½ cup of your favorite mix-ins after combining wet and dry ingredients for extra texture and flavor.
Pin This Recipe!

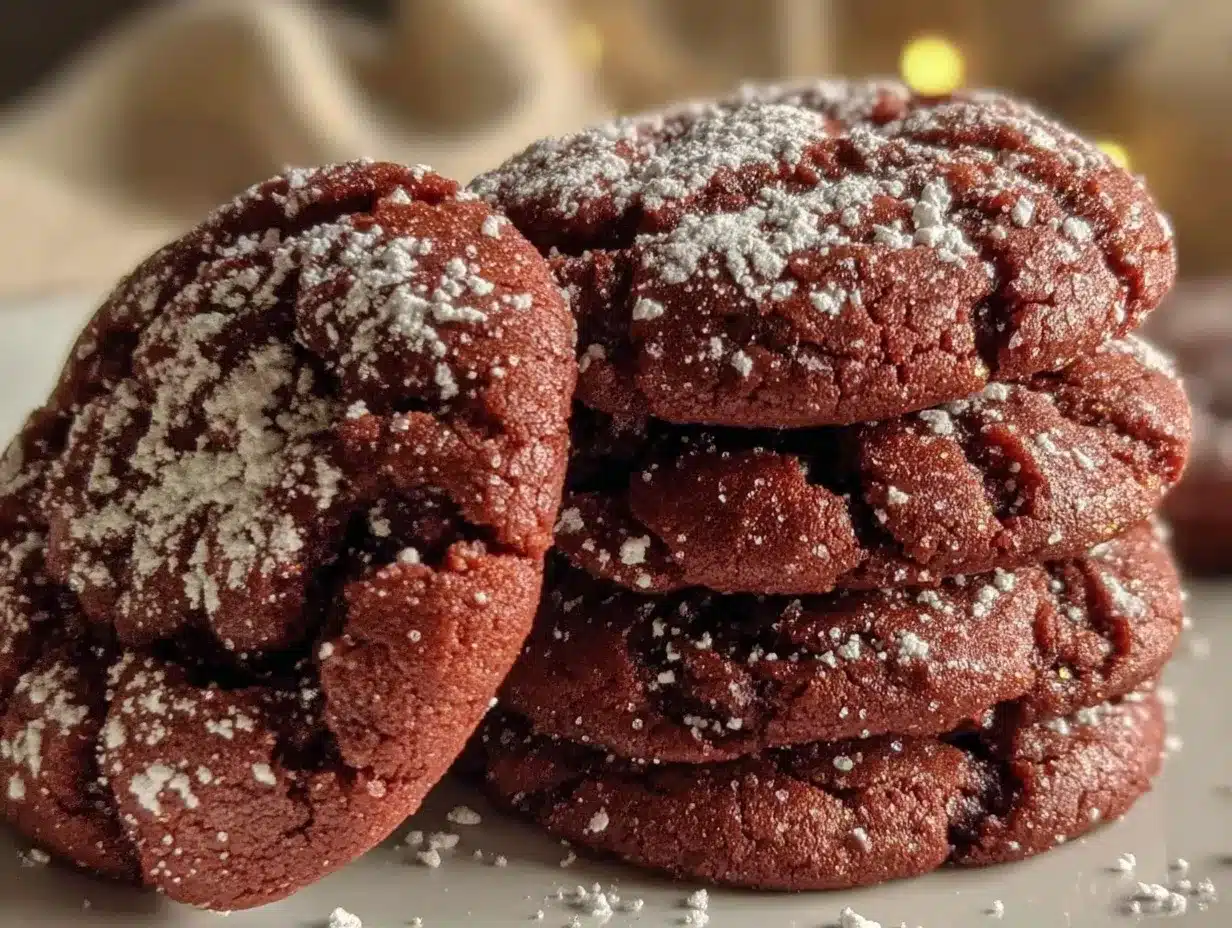
Red Velvet Crinkle Cookies

These red velvet crinkle cookies feature a tender crumb with a subtle cocoa hint and a festive crinkle top, perfect for holiday baking or any occasion.
- Prep Time: 15 minutes
- Cook Time: 12 minutes
- Total Time: 45 minutes
- Yield: 24 servings 1x
- Category: Dessert
- Cuisine: American
Ingredients
- 2 ½ cups (312 grams) all-purpose flour
- ¼ cup (25 grams) unsweetened cocoa powder
- 1 teaspoon baking powder
- ½ teaspoon salt
- 1 cup (226 grams) unsalted butter, softened
- 1 ½ cups (300 grams) granulated sugar
- ½ cup (100 grams) packed brown sugar
- 2 large eggs, room temperature
- 2 teaspoons vanilla extract
- 2 tablespoons red food coloring (gel-based recommended)
- 1 cup (120 grams) powdered sugar (for rolling dough balls)
Instructions
- Preheat your oven to 350°F (175°C) and line two baking sheets with parchment paper.
- In a medium bowl, sift together the all-purpose flour, cocoa powder, baking powder, and salt. Set aside.
- In a large bowl, beat the softened unsalted butter, granulated sugar, and brown sugar with an electric mixer on medium speed until light and fluffy, about 3-4 minutes.
- Beat in the eggs one at a time, mixing well after each addition. Stir in vanilla extract and red food coloring until the batter is vibrant red.
- Gradually add the dry ingredient mixture to the wet ingredients, mixing on low speed just until incorporated. Avoid overmixing.
- Cover the dough with plastic wrap and refrigerate for at least 30 minutes.
- Scoop dough with a medium cookie scoop (about 1 ½ tablespoons / 22 grams per cookie). Roll each ball generously in powdered sugar until fully coated.
- Place the coated dough balls about 2 inches apart on the prepared baking sheets.
- Bake for 10-12 minutes at 350°F (175°C) until cookies look set but still soft in the center.
- Let the cookies cool on the baking sheet for 5 minutes before transferring to a wire rack to cool completely.
- Serve once cooled or store in an airtight container.
Notes
Do not overbake to keep cookies chewy and moist. Use gel food coloring to avoid runny dough. Chilling dough is essential for shape and flavor. Roll dough balls generously in powdered sugar for the signature crinkle effect. Rotate baking sheets halfway through baking if oven heats unevenly.
Nutrition
- Serving Size: 1 cookie
- Calories: 160
- Sugar: 14
- Fat: 7
- Carbohydrates: 23
- Protein: 2
Keywords: red velvet cookies, crinkle cookies, holiday cookies, easy cookies, homemade treats, cocoa cookies, festive cookies