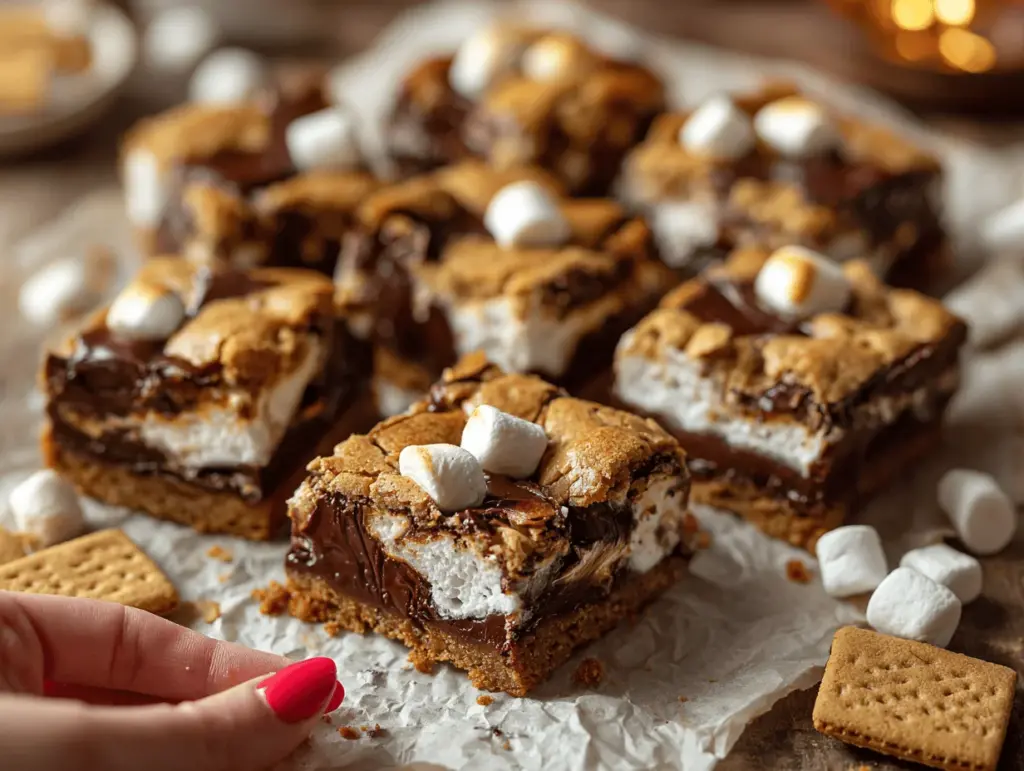
Imagine the first bite: buttery graham cracker crust, melty chocolate, and a cloud of toasted marshmallow—all in a single, gooey square. That’s what you get with these s’mores cookie bars. Honestly, just thinking about them brings back memories of sticky fingers around the campfire, but without the smoke in your eyes or the hunt for a perfect roasting stick. I first made these s’mores cookie bars on a rainy afternoon when my kids were restless and craving something sweet. We didn’t have a fire pit, but we did have a baking pan and a wild love for all things s’mores. The rest, as they say, is dessert history.
These bars are more than just another cookie recipe—they’re a shortcut to pure nostalgia. Whether you’re making them for a backyard BBQ, a birthday party, or (let’s face it) a Tuesday night pick-me-up, these easy s’mores cookie bars bring that golden campfire flavor right to your kitchen. No sticky marshmallow sticks, no bugs, just gooey, chocolatey goodness that’s impossible to resist. Plus, they’re a breeze to whip up, even if you’re baking with kids or have never toasted a marshmallow in your life.
I’ve tested this recipe at least a dozen times (sometimes just as an excuse to eat more), and I’ve tweaked the chocolate-to-marshmallow ratio to absolute perfection. If you crave that classic s’mores combo but want it in a portable, shareable form, this is the recipe you’ll come back to again and again. So, fire up your oven and let’s make some s’mores cookie bars magic!
Why You’ll Love This S’mores Cookie Bars Recipe
If you’re anything like me, you know the disappointment of a lackluster s’mores dessert: too dry, not enough goo, or somehow missing that toasted magic. This s’mores cookie bars recipe fixes all of that (and then some). Here’s why these bars are always a hit in my house (and among my friends who “just happened to drop by” when they smell them baking):
- Quick & Easy: Ready in under 40 minutes—no need for campfire skills or fancy techniques.
- Simple Ingredients: Everything you need is probably already in your pantry. No weird specialty items, just the classics.
- Perfect for Every Occasion: Ideal for picnics, cozy movie nights, birthday parties, or bake sales.
- Crowd-Pleaser: Kids, adults, picky eaters… everyone wants seconds. These are always the first thing gone at potlucks.
- Unbelievably Delicious: Gooey marshmallow, melty chocolate, and buttery cookie layers—each bite is pure comfort.
What makes this s’mores cookie bars recipe stand out is the technique: I blend softened butter into the graham base for a cookie-like chew, and I use both chocolate chips and chopped chocolate bars for pockets of molten bliss. The marshmallows get perfectly golden on top, so every piece looks and tastes like it came straight from a campfire (minus the mess). These bars aren’t just another Pinterest snack—they’re the answer to every s’mores craving, rain or shine, summer or winter. There’s nothing quite like closing your eyes after that first bite and tasting childhood all over again.
And let’s be real: when you need a dessert that feels a little special but doesn’t require hours in the kitchen, these gooey bars are your secret weapon. Whether you’re impressing guests or just treating yourself, they always deliver that ooey-gooey s’mores magic.
What Ingredients You Will Need
This s’mores cookie bars recipe leans into simple, familiar ingredients that pack a punch in flavor and texture. You probably have most of these on hand, and if not, any grocery store will have what you need. Here’s how it all comes together:
- For the Graham Cookie Layer:
- 1 cup (226g) unsalted butter, softened (adds rich, buttery flavor and chewiness)
- 1 cup (200g) light brown sugar, packed (for sweetness and a hint of caramel)
- 1/2 cup (100g) granulated sugar
- 2 large eggs, room temperature
- 2 teaspoons pure vanilla extract (for warmth and extra flavor)
- 2 1/2 cups (320g) all-purpose flour
- 1 1/2 cups (150g) graham cracker crumbs (about 12 full sheets, crushed finely)
- 1 teaspoon baking soda
- 1/2 teaspoon salt
- For the Chocolate & Marshmallow Layers:
- 1 1/2 cups (255g) semi-sweet chocolate chips (I like Ghirardelli or Guittard for best melt)
- 2 full-size (90g each) milk chocolate bars, chopped (classic Hershey’s or your favorite brand)
- 3 cups (150g) mini marshmallows (mini’s are best for even coverage, but you can cut large ones if needed)
Ingredient tips:
- If you want a deeper chocolate flavor, use bittersweet chips or add a sprinkle of flaky sea salt over the chocolate layer.
- Need a gluten-free option? Swap in a cup-for-cup gluten-free flour blend and gluten-free graham crackers. It works like a charm.
- No mini marshmallows? Cut big ones in half—they’ll still toast up beautifully.
- For a dairy-free version, use plant-based butter and allergen-friendly chocolate chips like Enjoy Life.
- Want to mix it up? Add a handful of chopped nuts or a swirl of peanut butter for a twist (see the variations section below for more ideas!).
I always say, don’t stress if you’re missing one ingredient—these s’mores cookie bars are pretty forgiving. The magic is in the layering and that perfect golden bake!
Equipment Needed
You don’t need a professional kitchen or fancy gadgets for this s’mores cookie bars recipe—just a few basics and a bit of enthusiasm. Here’s what I use every time:
- 9×13-inch baking pan (Glass or metal both work. I slightly prefer metal for crisper edges, but use what you have!)
- Mixing bowls (one large, one medium)
- Electric hand mixer or stand mixer (makes creaming the butter and sugar a breeze, but you can use elbow grease and a wooden spoon if you’re feeling old-school)
- Measuring cups and spoons
- Silicone spatula (for scraping the bowl and spreading the dough)
- Offset spatula or butter knife (helps get an even layer, especially with the sticky dough)
- Parchment paper or nonstick spray (for easy removal; trust me, don’t skip this step!)
- Sharp knife or bench scraper (for cutting clean bars once they’ve cooled)
If you don’t have a stand mixer, don’t worry—the dough is soft enough to mix by hand. Budget-friendly tip: you can find sturdy metal pans and mixers at thrift shops or discount stores. Just give pans a good scrub, and they’ll be as good as new. And always line your pan—clean-up will take seconds, not hours.
How to Make S’mores Cookie Bars
-
Preheat and Prep:
Preheat your oven to 350°F (175°C). Line a 9×13-inch (23x33cm) pan with parchment paper, leaving an overhang for easy removal, or coat well with nonstick spray. This keeps the bars from sticking and makes lifting them out a breeze. -
Cream Butter and Sugars:
In a large bowl, beat together 1 cup (226g) unsalted butter, 1 cup (200g) brown sugar, and 1/2 cup (100g) granulated sugar until light and fluffy—about 2–3 minutes. The mixture should look pale and creamy. If it’s looking greasy or clumpy, your butter may be too cold. -
Add Eggs and Vanilla:
Beat in 2 large eggs, one at a time, mixing well after each addition. Stir in 2 teaspoons vanilla extract. Don’t rush this part—proper mixing gives you a smooth, even dough. -
Combine Dry Ingredients:
In a separate bowl, whisk together 2 1/2 cups (320g) all-purpose flour, 1 1/2 cups (150g) graham cracker crumbs, 1 teaspoon baking soda, and 1/2 teaspoon salt. Gradually add the dry mix to the wet ingredients, mixing just until combined. Overmixing can make the bars tough, so go easy once the flour is in. -
Spread Half the Dough:
Scoop about 2/3 of the dough into your prepared pan. Use a spatula or your hands (a little damp helps) to press it into an even layer. It will be a little sticky—don’t worry, just do your best to get the corners. -
Add the Chocolate Layers:
Sprinkle 1 1/2 cups (255g) chocolate chips and the chopped milk chocolate bars evenly over the dough. For extra gooey pockets, press a few chunks of chocolate into the corners. -
Add Marshmallows:
Sprinkle 2 cups (100g) of mini marshmallows over the chocolate layer. Save the remaining 1 cup for later (this ensures a perfectly toasted top). -
Top with Remaining Dough:
Drop spoonfuls of the remaining dough over the marshmallows. It won’t cover everything—aim for a cobblestone look. The marshmallows will puff and fill the gaps while baking. -
Bake:
Bake in the center of your oven for 22–25 minutes, until the cookie top is golden and set but the center still jiggles a bit. Don’t overbake—gooey is the goal! At the 18-minute mark, sprinkle the remaining marshmallows on top for extra toastiness. -
Cool and Slice:
Let the bars cool in the pan for at least 1 hour (I know, it’s hard to wait). The bars will firm up as they cool, making them much easier to cut. Use the parchment to lift them out, then slice into squares with a sharp knife.
Troubleshooting: If your marshmallows start to brown too quickly, loosely tent with foil. If the center seems too gooey after cooling, pop the bars in the fridge for 20 minutes—they’ll set up nicely. And don’t stress if the bars look messy—the gooier, the better!
Cooking Tips & Techniques for the Best S’mores Cookie Bars
- Don’t Overmix: Once you add the flour, mix just until no streaks remain. Overmixing leads to tough bars—nobody wants that.
- Even Layers Matter: Press the bottom layer evenly for a uniform bake. If it’s thicker in some spots, those pieces may turn out doughy.
- Timing Is Everything: Check bars at the 20-minute mark. Ovens vary—mine loves to run hot, so I always peek early. The top should be golden, but the middle a bit soft.
- Don’t Skip the Parchment: It makes removal and slicing so much easier. Trust me, I’ve tried prying them out with a spatula… not fun.
- Let Them Cool: Warm bars are delicious but messy. For clean slices (and the best texture), cool at least an hour. If you’re impatient, pop them in the fridge to speed things up.
- Toast the Marshmallows: For extra golden tops, turn on the broiler for 1–2 minutes at the very end. Watch closely—marshmallows go from golden to scorched in seconds. I once walked away “just for a sec” and came back to a pan of s’mores charcoal. Lesson learned.
- Double Up for a Crowd: You can easily double the recipe for parties and bake in two pans. Bars freeze beautifully, so leftovers are never a problem.
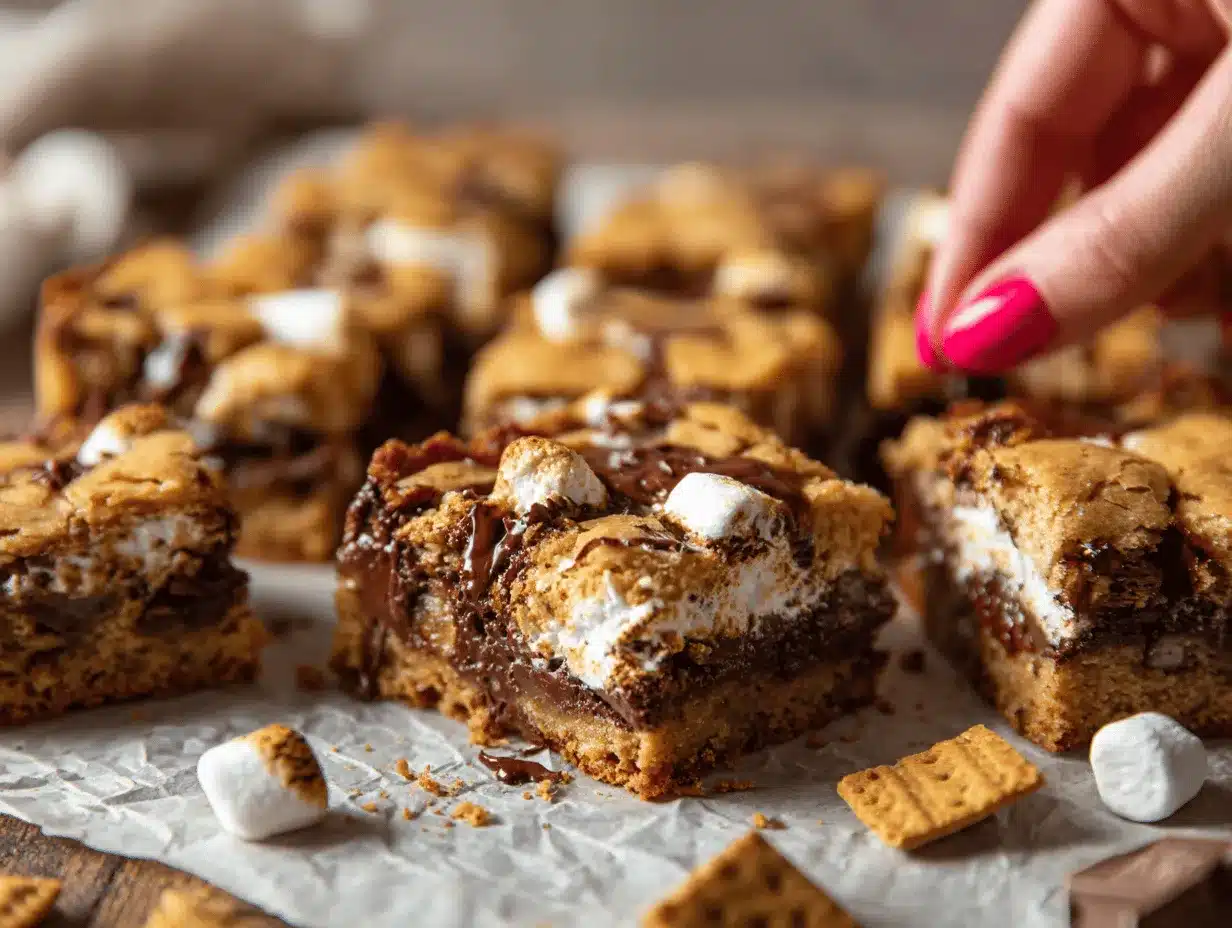
Personal tip: I always reserve a few chocolate chunks and marshmallows to press into the top before baking. It just makes the bars look extra tempting—especially for Pinterest-worthy photos!
Variations & Adaptations
One of the best things about this s’mores cookie bars recipe is how easy it is to tweak and make your own. Here are some of my favorite variations (and a few from readers!):
- Peanut Butter S’mores Bars: Swirl in 1/2 cup (130g) creamy peanut butter on top of the chocolate layer before adding marshmallows. The salty-sweet combo is next-level comfort food.
- Gluten-Free S’mores Bars: Substitute a 1:1 gluten-free all-purpose flour blend for the regular flour, and use gluten-free graham crackers. You won’t notice the difference, promise!
- Salted Caramel S’mores Bars: Drizzle caramel sauce over the chocolate layer, then sprinkle with a pinch of flaky sea salt before baking. The caramel melts into the bars, making them even gooier.
- Nutty S’mores Bars: Add 1/2 cup (60g) chopped toasted pecans or walnuts to the dough for crunch and flavor.
- Dairy-Free S’mores Bars: Use dairy-free butter and allergy-friendly chocolate chips. There are also vegan marshmallows available if you want to go fully plant-based.
I once tried adding chopped strawberries for a “summer berry s’mores” version—totally delicious, especially in July! You can also bake the bars in muffin tins for individual servings, just reduce the baking time by about 5 minutes. Make it your own, and let your cravings be your guide.
Serving & Storage Suggestions
These s’mores cookie bars are at their best slightly warm, with chocolate still a little melty and marshmallows toasty. I like to serve them:
- Fresh from the oven (but cooled for 20–30 minutes for easier slicing)
- With a scoop of vanilla ice cream—seriously, it’s dessert heaven
- Alongside fresh berries for a lighter touch
- Paired with cold milk, hot cocoa, or a creamy iced coffee
For storage, keep bars in an airtight container at room temperature for up to 3 days. If your house is hot or humid, stash them in the fridge—they’ll last up to a week. Freeze for up to 2 months; wrap tightly in plastic and then foil. To reheat, pop a bar in the microwave for 10–15 seconds for that fresh-baked gooeyness. The flavors actually get even better by day two as everything melds together!
Nutritional Information & Benefits
Each s’mores cookie bar (based on 24 bars) has approximately:
- Calories: 230
- Fat: 10g
- Carbohydrates: 32g
- Sugar: 19g
- Protein: 2g
These bars are definitely a treat, but they do offer a little calcium from the marshmallows and chocolate, and a small amount of protein thanks to the eggs. You can make them gluten-free or dairy-free (see adaptations above) to fit your dietary needs. They do contain wheat, dairy, eggs, and soy, so be mindful of allergies. I’m a firm believer that treats like these can be part of a balanced life—they put a smile on your face, and sometimes that’s the most important benefit of all.
Conclusion
If you’re searching for the ultimate easy, gooey dessert that’s guaranteed to make everyone smile, you have to try these s’mores cookie bars. They’re nostalgic, simple, and totally satisfying—like a campfire treat, but with way less mess. I love how easy they are to customize, and honestly, they’re now my go-to for everything from bake sales to lazy weekends at home. Every batch disappears faster than I can hide a piece for myself!
So grab your favorite chocolate, a bag of marshmallows, and make these bars your own. Let me know in the comments how you put your spin on them—did you add peanut butter, try the gluten-free version, or sneak in some berries? I’d love to hear your twists! Pin this recipe to your dessert board, share it with a friend, and don’t forget to tag me when you bake a batch. Happy baking—and happy s’mores-eating!
Frequently Asked Questions
How do I keep my s’mores cookie bars from getting too dry?
Be careful not to overbake! Pull the bars when the top is golden but the center is still a little soft. Cooling helps them set up without drying out.
Can I make these s’mores cookie bars gluten-free?
Absolutely! Just swap in a gluten-free flour blend and gluten-free graham crackers. The bars turn out just as deliciously gooey.
Do s’mores cookie bars freeze well?
Yes! Wrap them tightly and freeze for up to 2 months. Thaw at room temperature or warm gently in the microwave for a just-baked taste.
Can I use regular marshmallows instead of mini?
Definitely. Just cut them into smaller pieces so they melt and toast evenly. Minis do give the best coverage, though.
Is it okay to use only chocolate chips?
Of course! I like the mix of chips and chopped bars for texture, but using just chocolate chips works just fine—use what you have!
Pin This Recipe!

S’mores Cookie Bars
These gooey s’mores cookie bars combine a buttery graham cracker cookie base, melty chocolate, and toasted marshmallows for the ultimate nostalgic dessert—no campfire required. Perfect for parties, bake sales, or a cozy night in, they’re easy to make and impossible to resist.
- Prep Time: 15 minutes
- Cook Time: 25 minutes
- Total Time: 40 minutes
- Yield: 24 bars 1x
- Category: Dessert
- Cuisine: American
Ingredients
- 1 cup (226g) unsalted butter, softened
- 1 cup (200g) light brown sugar, packed
- 1/2 cup (100g) granulated sugar
- 2 large eggs, room temperature
- 2 teaspoons pure vanilla extract
- 2 1/2 cups (320g) all-purpose flour
- 1 1/2 cups (150g) graham cracker crumbs (about 12 full sheets, crushed finely)
- 1 teaspoon baking soda
- 1/2 teaspoon salt
- 1 1/2 cups (255g) semi-sweet chocolate chips
- 2 full-size (90g each) milk chocolate bars, chopped
- 3 cups (150g) mini marshmallows
Instructions
- Preheat your oven to 350°F (175°C). Line a 9×13-inch pan with parchment paper or coat with nonstick spray.
- In a large bowl, beat together butter, brown sugar, and granulated sugar until light and fluffy (about 2–3 minutes).
- Beat in eggs, one at a time, then stir in vanilla extract.
- In a separate bowl, whisk together flour, graham cracker crumbs, baking soda, and salt.
- Gradually add the dry ingredients to the wet mixture, mixing just until combined.
- Scoop about 2/3 of the dough into the prepared pan and press into an even layer.
- Sprinkle chocolate chips and chopped milk chocolate bars evenly over the dough.
- Sprinkle 2 cups of mini marshmallows over the chocolate layer, reserving 1 cup for later.
- Drop spoonfuls of the remaining dough over the marshmallows (it won’t cover completely).
- Bake for 22–25 minutes, until the top is golden and set but the center is still a bit soft. At the 18-minute mark, sprinkle the remaining marshmallows on top.
- Let the bars cool in the pan for at least 1 hour before lifting out and slicing into squares.
Notes
For extra gooey bars, avoid overbaking and let them cool before slicing. Use parchment for easy removal. To toast marshmallows more, broil for 1–2 minutes at the end, watching closely. Bars can be made gluten-free or dairy-free with simple swaps. Store in an airtight container for up to 3 days or freeze for up to 2 months.
Nutrition
- Serving Size: 1 bar (1/24 of recipe)
- Calories: 230
- Sugar: 19
- Sodium: 120
- Fat: 10
- Saturated Fat: 6
- Carbohydrates: 32
- Fiber: 1
- Protein: 2
Keywords: s'mores, cookie bars, dessert, easy, chocolate, marshmallow, graham cracker, bake sale, party, gooey, nostalgic, summer, kid-friendly