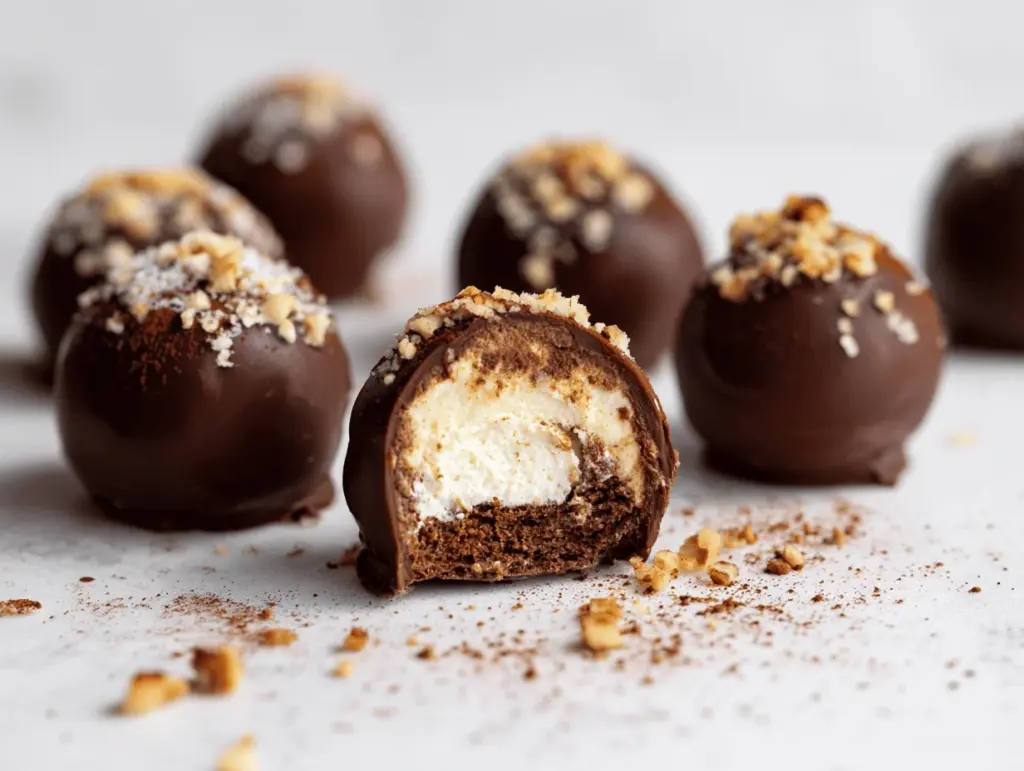
The first time I bit into a tiramisu truffle, I couldn’t believe how a tiny treat could pack such a punch of flavor—rich espresso, velvety mascarpone, and just a hint of cocoa. It’s the sort of dessert that looks like you’ve spent all afternoon fussing over it, but (honestly?) comes together in less than an hour—even if you’re juggling a million things. If you love classic tiramisu but want something a little more fun (and perfectly poppable), these tiramisu truffles are about to become your new go-to Italian dessert for parties, holidays, or just a Tuesday night pick-me-up.
I stumbled across the idea for tiramisu truffles after a family gathering where my aunt served the most decadent homemade tiramisu. Everyone raved, but let’s face it: not everyone wants to fuss with layers and soaking ladyfingers. So, I took the classic Italian flavors and transformed them into bite-sized truffles—no baking, no slicing, and barely any cleanup. Over the years, I’ve tweaked the recipe, tested different coatings, and even experimented with gluten-free ladyfingers. The result? Irresistible tiramisu truffles that everyone fights over (yep, even the kids who claim they don’t like coffee desserts!).
Why make these? For starters, tiramisu truffles deliver all the elegance of a fancy Italian dessert but with a cozy, homemade twist. They’re perfect for entertaining because you can make them ahead, and they always get oohs and ahhs when you serve them on a pretty platter. Whether you want a creative addition to your holiday cookie tray, a romantic treat for date night, or just a sweet bite with your afternoon coffee, tiramisu truffles check every box. If you’ve never made truffles at home, don’t worry—I’ve broken down everything you need, step by step, with plenty of pro tips from my own kitchen to yours.
Why You’ll Love This Tiramisu Truffles Recipe
Let’s just say, these tiramisu truffles are a little bit magic—simple to make, but impressive enough for any occasion. I’ve made them for bridal showers, book clubs, and family gatherings, and I’ve never brought a single one home. Here’s why you’ll want to keep this recipe close:
- Quick & Easy: No oven needed—just mix, chill, and roll. You can whip up a batch in under an hour, making them perfect for last-minute entertaining or spontaneous cravings.
- Simple Ingredients: You don’t have to hunt down anything fancy. Most of the ingredients are pantry staples, and you can easily find authentic Italian mascarpone and ladyfingers at most grocery stores. (I always keep a pack of ladyfingers on hand just for this!)
- Perfect for Any Occasion: These little bites are ideal for holiday parties, dessert buffets, wedding showers, or even as a cute homemade gift. Just pop them in a box with parchment and you’ve got instant edible elegance.
- Crowd-Pleaser: Even my friends who “don’t like coffee” go back for seconds. The espresso flavor is subtle, and the creamy mascarpone filling wins over even picky eaters.
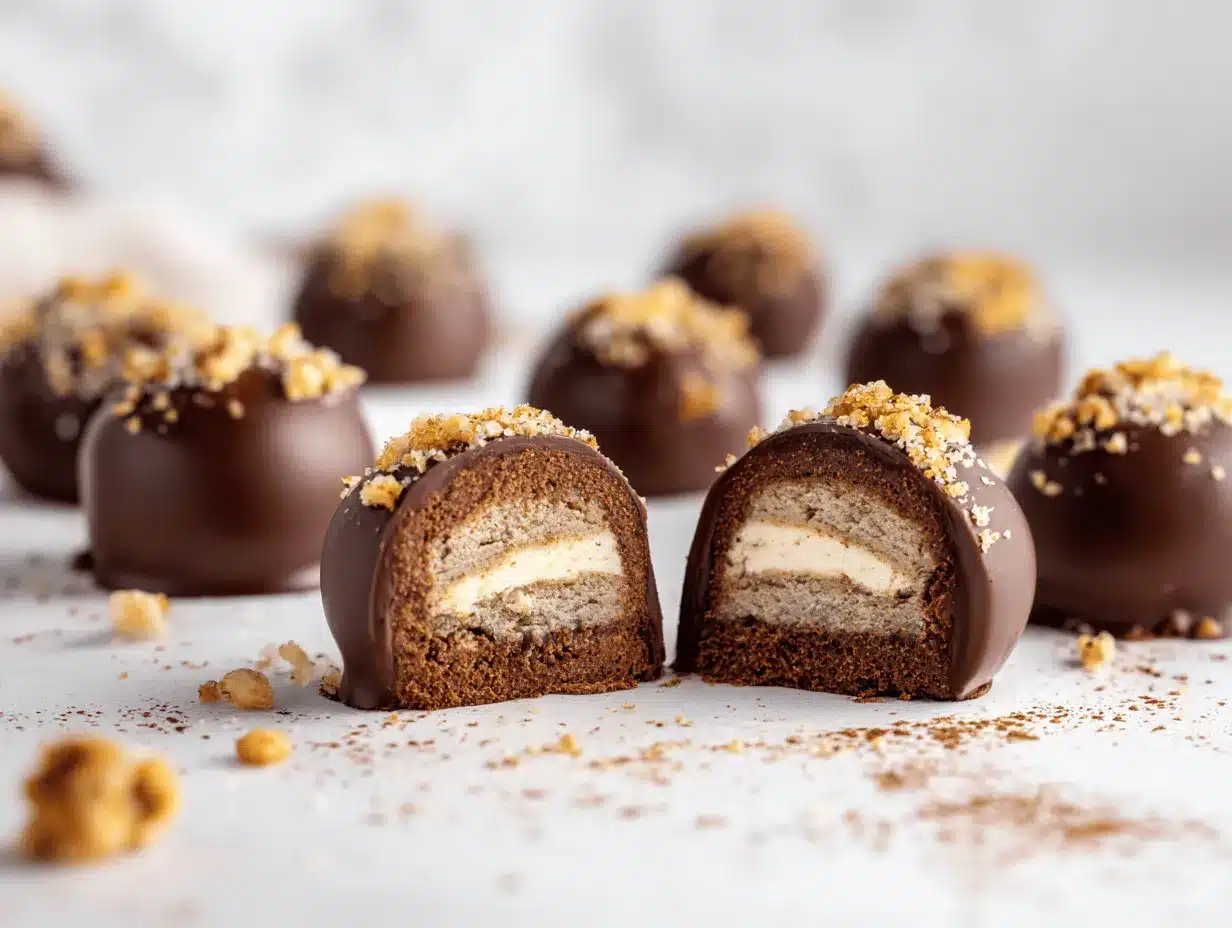
- Unbelievably Delicious: Imagine the best parts of tiramisu—creamy, coffee-kissed, chocolatey—condensed into a rich, melt-in-your-mouth truffle. There’s a reason these disappear fast!
What sets my tiramisu truffles apart? I blend the mascarpone until it’s silky-smooth, and use a splash of real espresso for a flavor that’s bold but not overpowering. Dusting them in cocoa gives you that classic tiramisu finish, but you can also dip them in chocolate if you’re feeling extra fancy. This recipe is all about taking something classic and making it easier—and, honestly, more fun—without losing the soul of the original. There’s something deeply comforting about that first bite. Trust me: you’ll want to savor every crumb.
What Ingredients You Will Need
This tiramisu truffles recipe leans on simple, high-quality ingredients to bring out those classic Italian flavors. Most are easy to find, and you probably have a few in your pantry already. Here’s what you’ll need:
- Ladyfingers (savoiardi), 5 oz (140g): These classic Italian cookies are the backbone of tiramisu. They soak up espresso flavor and give the truffles their structure. I like to use the traditional, crunchy kind (brands like Balocco or Vicenzi are reliable), but any firm ladyfinger will do. For gluten-free truffles, swap in a GF variety.
- Mascarpone cheese, 8 oz (225g), room temperature: This creamy Italian cheese is what makes tiramisu so luscious. Don’t substitute with cream cheese—it’s just not the same. For best results, let the mascarpone soften slightly before mixing.
- Powdered sugar, 1/2 cup (60g): Adds just the right amount of sweetness and helps bind the truffle mixture. If you like things less sweet, you can dial this down a bit.
- Espresso or strong brewed coffee, 2–3 tbsp (30–45ml), cooled: The heart of tiramisu! Use real espresso for the richest flavor, but strong coffee will work in a pinch. Don’t skip the cooling step—you don’t want to melt the mascarpone.
- Pure vanilla extract, 1 tsp (5ml): Rounds out the flavors and adds warmth. I always reach for a good-quality vanilla here (homemade or Nielsen-Massey is my fave).
- Dark rum or coffee liqueur (optional), 1 tbsp (15ml): Traditional tiramisu often includes a splash of booze. Kahlúa or dark rum gives a pleasant kick, but you can skip it if you’re serving kids.
- Unsweetened cocoa powder, for dusting: The classic tiramisu finish! Sift it for a delicate dusting, or roll the truffles for a more intense cocoa hit.
- Semi-sweet or dark chocolate, 4 oz (115g), melted (optional): For dipping the truffles if you want an extra decadent shell. I do this for special occasions!
- Pinch of salt: Brings out all the flavors. Just a tiny bit makes a big difference.
If you want to switch things up, you can use decaf espresso, swap the rum for almond extract, or even roll the truffles in crushed nuts for a fun twist. I’ve tried these with gluten-free ladyfingers and dairy-free mascarpone (Kite Hill is a solid option), and the results are almost as dreamy as the classic version. My only tip: don’t skimp on the quality of the mascarpone—splurge for the good stuff if you can!
Equipment Needed
You don’t need fancy tools to make tiramisu truffles, which is part of their charm. Here’s what I always reach for:
- Mixing bowls: One medium (for crushing the ladyfingers) and one large (for mixing the filling). Glass or stainless steel both work fine.
- Hand mixer or sturdy spatula: A hand mixer makes blending the mascarpone and sugar a breeze, but a spatula and some elbow grease work in a pinch.
- Measuring cups and spoons: For getting the ratios just right. I like to use digital scales for extra accuracy when measuring ladyfingers.
- Baking sheet or tray: To arrange the truffles for chilling. Line it with parchment paper for easy cleanup.
- Small cookie scoop or spoon: Helps portion the truffles evenly. (A melon baller works, too!)
- Fine-mesh sieve: For dusting the truffles with cocoa powder. You can use a tea strainer if you don’t have a sieve.
- Microwave-safe bowl or double boiler: Only needed if you’re melting chocolate for dipping.
Honestly, I’ve made these with nothing more than a bowl, my hands, and a fork for crushing ladyfingers. If you’re going to invest in one thing, a small cookie scoop makes rolling the truffles much less messy. Keep your tools dry—especially the mixing bowl for the mascarpone—so the filling stays creamy, not runny. And parchment paper is your best friend for easy transfer and cleanup!
How to Make Irresistible Tiramisu Truffles
-
Crush the Ladyfingers (5 minutes):
Place 5 oz (140g) of ladyfingers in a zip-top bag. Gently crush them with a rolling pin or the bottom of a glass until you have fine crumbs (think graham cracker crust). A few larger bits are okay—they add texture!
Tip: Don’t use a food processor—it’s too easy to over-process and end up with powder. -
Prepare the Mascarpone Mixture (7 minutes):
In a large bowl, combine 8 oz (225g) mascarpone cheese (room temperature), 1/2 cup (60g) powdered sugar, 1 tsp (5ml) vanilla extract, and a pinch of salt. Beat with a hand mixer (or a sturdy spatula) until smooth and creamy, about 2–3 minutes.
Watch for lumps! If your mascarpone is cold, it can clump. Let it sit at room temp for 10-15 minutes first. -
Add Espresso and Rum (if using) (2 minutes):
Gradually add 2–3 tbsp (30–45ml) cooled espresso or strong coffee, and 1 tbsp (15ml) dark rum or coffee liqueur (optional). Mix until fully incorporated. The mixture should be thick and creamy—not runny.
If it gets too soft, add a spoonful of extra ladyfinger crumbs to thicken. -
Combine with Ladyfinger Crumbs (3 minutes):
Gently fold the ladyfinger crumbs into the mascarpone mixture. Stir until everything is well combined. The mixture should hold its shape when scooped.
If it feels sticky, chill for 10 minutes before shaping. -
Shape the Truffles (10–15 minutes):
Line a baking sheet with parchment. Using a small cookie scoop or spoon, portion out about 1 tablespoon (20g) of mixture for each truffle. Roll between your palms to form smooth balls. You should get 18–22 truffles, depending on the size.
Tip: Lightly dampen your hands to keep the mixture from sticking. -
Chill the Truffles (20–30 minutes):
Place the tray in the refrigerator and chill until firm, at least 20 minutes. This step is key—don’t skip it, or your truffles may fall apart during coating. -
Finish with Cocoa or Chocolate (5–10 minutes):
For classic tiramisu truffles, roll each ball in sifted unsweetened cocoa powder using a fine-mesh sieve. For chocolate-dipped truffles, melt 4 oz (115g) dark chocolate and dip each chilled truffle; let set on parchment.
If you’re feeling fancy, drizzle with extra chocolate or sprinkle with espresso powder. -
Serve and Enjoy:
Arrange truffles on a pretty platter, dust with extra cocoa, and serve chilled or at room temperature. (They’re best eaten within a few days, but honestly—they never last that long in my house!)
Troubleshooting? If your mixture is too soft, add more ladyfinger crumbs a tablespoon at a time. If it’s too dry, splash in a little more espresso. And if the chocolate cracks after chilling, let the truffles rest at room temperature for 5 minutes before dipping. You’ll find your groove—I promise!
Cooking Tips & Techniques
After making tiramisu truffles at least a dozen times, I’ve picked up a few tricks (and had a couple of kitchen fails, too!). Here’s what works:
- Use Room-Temperature Mascarpone: Cold mascarpone can make the filling lumpy and hard to mix. Let it sit out for 10–15 minutes before you start. If you forget, gently warm the bowl by setting it over a pot of warm water (but don’t let it get hot, or it’ll separate!).
- Don’t Overmix: Once the ladyfinger crumbs go in, mix just until combined. Overmixing can make the truffles dense and heavy.
- Chill Before Shaping: If your mixture is sticky, refrigerate for 10–15 minutes. It’ll be much easier to roll and coat.
- Espresso Amount Matters: Too much coffee can make the mixture runny. Start with 2 tablespoons and add more only if needed.
- Chocolate Dipping Tips: If dipping, make sure the truffles are well chilled before dunking. Warm chocolate plus soft filling = messy disaster (trust me, I learned the hard way!).
- Multitasking Magic: While the truffles chill, prep your cocoa or melt chocolate. It keeps the process moving and saves time.
- Consistency is Key: Use a cookie scoop for even sizes. Not only do they look prettier, but they’ll chill and set evenly, too.
The one mistake I made early on? Using too much espresso and ending up with puddles instead of truffles. If that happens, no worries—just add more ladyfinger crumbs until the mixture firms up. And remember, slightly imperfect truffles still taste amazing. Embrace the homemade look!
Variations & Adaptations
One of the things I love about tiramisu truffles is how easy they are to customize. Whether you’re working around dietary restrictions, switching up flavors, or just feeling creative, here are a few of my favorite tweaks:
- Gluten-Free: Swap in gluten-free ladyfingers (Schar makes a good one). The texture is nearly identical, and nobody will guess they’re GF.
- Dairy-Free: Use a dairy-free mascarpone or thick coconut yogurt in place of regular mascarpone. The flavor will be slightly different, but still super creamy and delicious.
- Chocolate Lovers: Mix mini chocolate chips into the truffle mixture, or roll the finished truffles in grated chocolate instead of cocoa powder. I’ve even drizzled them with white chocolate for a two-tone look—so pretty!
- Nutty Crunch: Roll the truffles in finely chopped toasted hazelnuts or almonds instead of cocoa powder for a Ferrero Rocher vibe. My kids go wild for this version.
- Seasonal Flavors: Add a touch of orange zest to the filling for a bright, citrusy note, or sprinkle ground cinnamon in the cocoa coating around the holidays.
- Alcohol-Free: Just skip the rum or liqueur and use a dash more espresso or vanilla. Still delicious, and kid-friendly.
Personally, I love making a half-and-half batch—some dipped in chocolate for the grown-ups, some rolled in cocoa for the kids. Don’t be afraid to experiment with flavors that make you happy. That’s the beauty of homemade truffles!
Serving & Storage Suggestions
Tiramisu truffles are dreamy straight from the fridge, but they taste great at room temperature, too. For the prettiest presentation, pile them on a white platter (I sometimes sprinkle a little extra cocoa powder on the plate for drama) or nestle them in mini cupcake liners.
These truffles pair beautifully with espresso or a glass of dessert wine (Vin Santo is classic, but honestly, coffee is my go-to). They’re a fun addition to a holiday cookie tray, or an elegant ending to an Italian dinner with friends.
Store tiramisu truffles in an airtight container in the refrigerator for up to 5 days. If you’ve dipped them in chocolate, separate layers with parchment to prevent sticking. For longer storage, freeze the truffles (undusted with cocoa) for up to one month. Thaw overnight in the fridge, then roll in cocoa before serving. I find the flavors actually deepen after a day or two—if you can wait that long!
Nutritional Information & Benefits
Each tiramisu truffle clocks in at about 90–110 calories, depending on size and coating. They offer a little protein from the mascarpone, and you can make them gluten-free or dairy-free with a few simple swaps. The espresso gives a gentle caffeine kick, but not enough to keep you up all night (unless you eat a dozen… been there!).
Key ingredients like mascarpone bring calcium and a lovely creamy texture, while cocoa powder is rich in antioxidants. If you’re watching sugar, use less powdered sugar or opt for a lower-sugar chocolate for dipping. These are not allergy-friendly for dairy or gluten unless you adapt the ingredients as noted above—so always double-check for guests.
From a wellness angle, I think of tiramisu truffles as a joyful treat—one that satisfies both your sweet tooth and your craving for something a little bit special. Everything in moderation, right?
Conclusion
So, why make tiramisu truffles? Because they bring all the flavor and romance of classic tiramisu into a fun, fuss-free package. They’re easy, endlessly adaptable, and guaranteed to make any gathering feel a little more Italian (and a lot more delicious!).
I come back to this recipe again and again for its simplicity and crowd-pleasing magic. Whether you stick with the classic or play with new flavors, tiramisu truffles are the kind of treat you’ll want to share with friends—or just keep in the fridge for late-night cravings. If you try them, leave a comment below or tag me on Pinterest—I’d love to see your creations and hear how you made them your own.
Go on, give yourself (and your loved ones) a little taste of Italy. You deserve it!
Frequently Asked Questions About Tiramisu Truffles
How long do tiramisu truffles last in the fridge?
They’ll keep for up to 5 days in an airtight container in the refrigerator, but honestly, they rarely last that long in my house!
Can I make tiramisu truffles ahead of time?
Absolutely! In fact, the flavors develop even more after a day or two. Just store them in the fridge and dust with fresh cocoa powder before serving.
Can I freeze tiramisu truffles?
Yes! Freeze undusted truffles in a single layer, then transfer to a zip-top bag or container. Thaw overnight in the fridge and roll in cocoa before serving.
What can I use instead of mascarpone cheese?
You can try a thick, full-fat cream cheese as a substitute, though the flavor will be a little tangier. For dairy-free, use a plant-based cream cheese or coconut yogurt.
Do I have to use coffee or rum in the recipe?
Nope! You can skip the alcohol for a kid-friendly version, and use decaf coffee or even just milk for a milder flavor. They’ll still be delicious—promise!
Pin This Recipe!

Tiramisu Truffles

These easy tiramisu truffles pack all the classic Italian dessert flavors—espresso, mascarpone, and cocoa—into bite-sized, no-bake treats. Perfect for parties, holidays, or a quick homemade indulgence, they come together in under an hour and are endlessly adaptable.
- Prep Time: 20 minutes
- Cook Time: 0 minutes
- Total Time: 50 minutes
- Yield: 18–22 truffles 1x
- Category: Dessert
- Cuisine: Italian
Ingredients
- 5 oz (140g) ladyfingers (savoiardi), about 15 cookies
- 8 oz (225g) mascarpone cheese, room temperature
- 1/2 cup (60g) powdered sugar
- 2–3 tbsp (30–45ml) espresso or strong brewed coffee, cooled
- 1 tsp (5ml) pure vanilla extract
- 1 tbsp (15ml) dark rum or coffee liqueur (optional)
- Unsweetened cocoa powder, for dusting
- 4 oz (115g) semi-sweet or dark chocolate, melted (optional, for dipping)
- Pinch of salt
Instructions
- Place ladyfingers in a zip-top bag and crush with a rolling pin or glass until fine crumbs form. Set aside.
- In a large bowl, combine mascarpone cheese, powdered sugar, vanilla extract, and a pinch of salt. Beat with a hand mixer or spatula until smooth and creamy, about 2–3 minutes.
- Gradually add cooled espresso and rum or coffee liqueur (if using), mixing until fully incorporated. The mixture should be thick and creamy.
- Gently fold in the ladyfinger crumbs until well combined. The mixture should hold its shape when scooped.
- Line a baking sheet with parchment. Using a small cookie scoop or spoon, portion about 1 tablespoon of mixture for each truffle. Roll between your palms to form smooth balls (makes 18–22 truffles).
- Chill truffles on the baking sheet in the refrigerator until firm, at least 20–30 minutes.
- Finish by rolling each truffle in sifted unsweetened cocoa powder, or dip in melted chocolate if desired. Let chocolate set on parchment.
- Arrange truffles on a platter, dust with extra cocoa, and serve chilled or at room temperature.
Notes
Use room-temperature mascarpone for a smooth filling. If the mixture is too soft, add more ladyfinger crumbs; if too dry, add a splash more espresso. Chill the mixture before shaping if sticky. For gluten-free or dairy-free versions, substitute as needed. Truffles can be made ahead and stored in the fridge for up to 5 days or frozen (undusted) for up to 1 month.
Nutrition
- Serving Size: 1 truffle
- Calories: 100
- Sugar: 6
- Sodium: 25
- Fat: 6
- Saturated Fat: 3.5
- Carbohydrates: 10
- Fiber: 0.5
- Protein: 2
Keywords: tiramisu truffles, Italian dessert, no bake, mascarpone, espresso, party dessert, easy truffles, homemade truffles, holiday dessert, chocolate truffles


