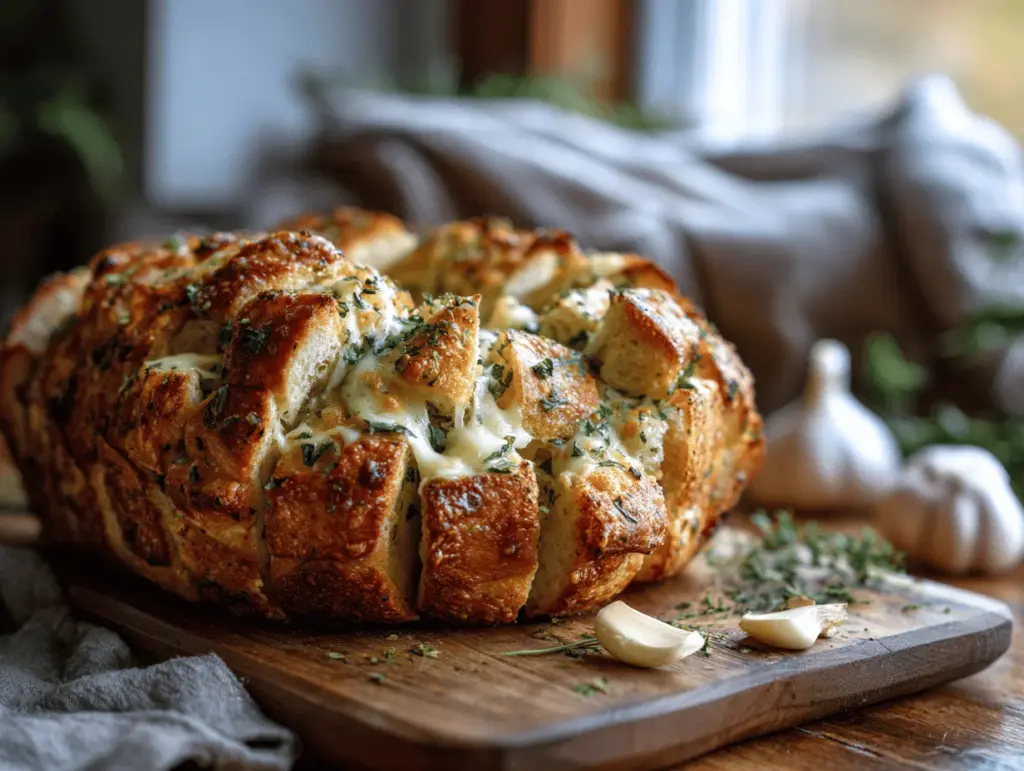
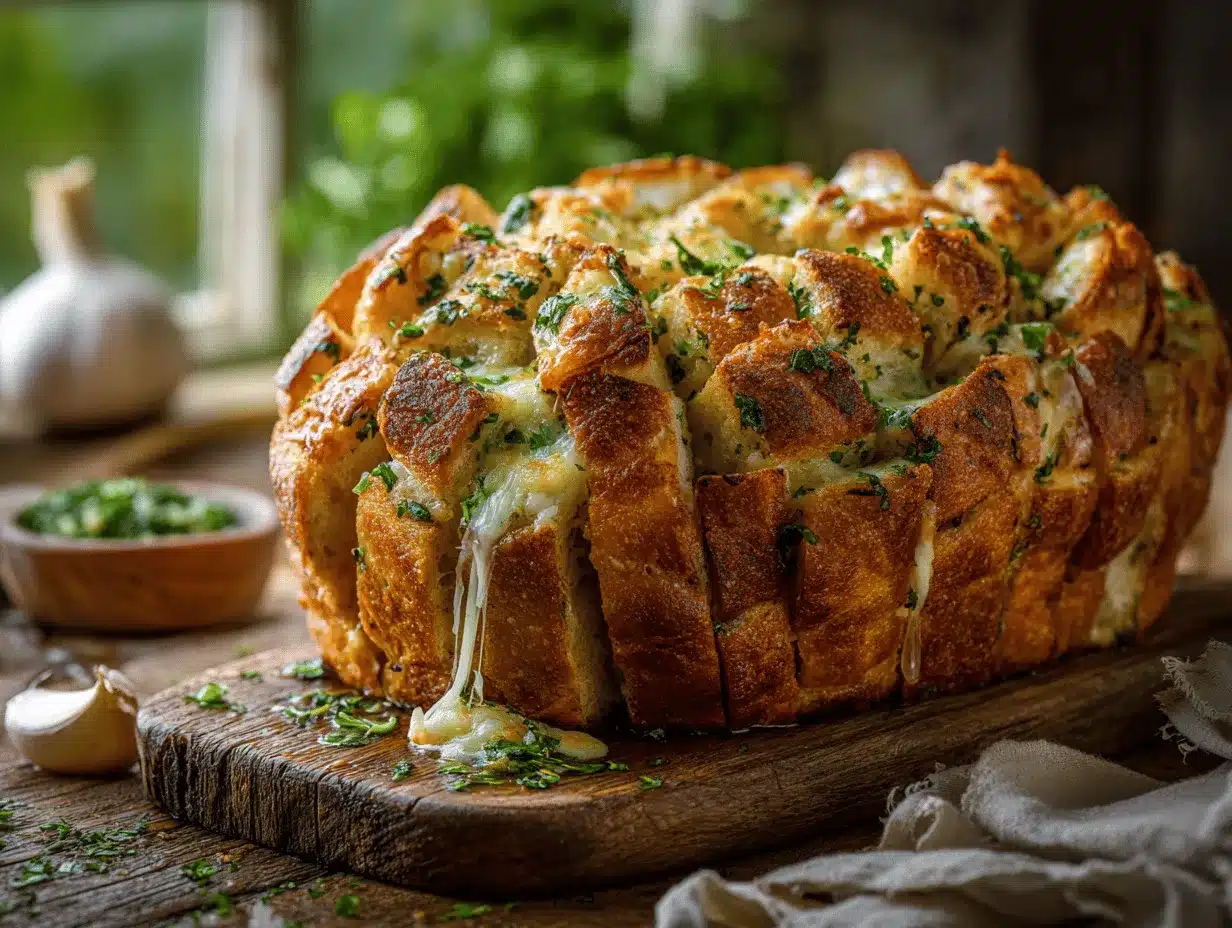
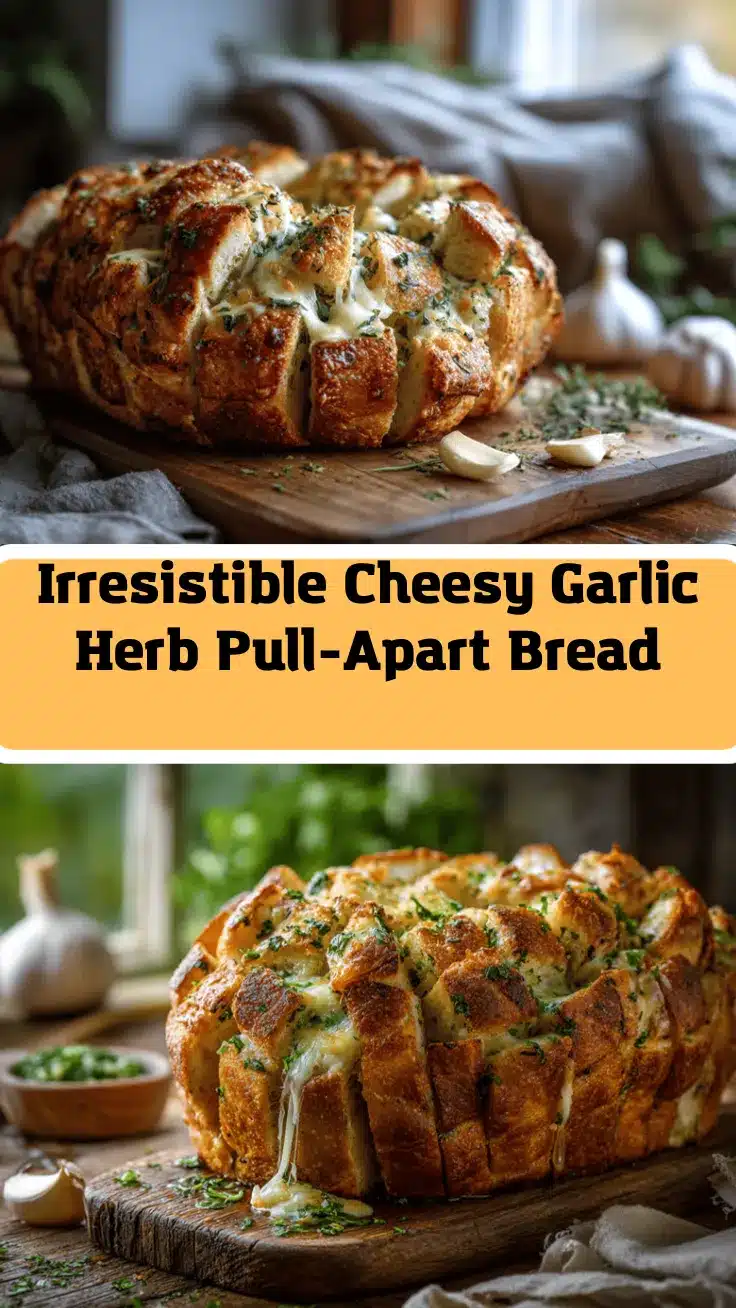
The first time I pulled a golden, bubbling loaf of cheesy garlic herb pull-apart bread from the oven, the aroma alone was enough to stop everyone in their tracks. Picture this: melted cheese stretching between pieces, flecks of fresh herbs peeking through, and that unmistakable scent of garlic butter wafting through the whole house. Seriously, this cheesy garlic herb pull-apart bread recipe is the kind of appetizer that turns a regular get-together into a wow moment.
I stumbled onto this recipe by accident, honestly. Years back, I was hosting a game night and needed something fast but impressive—something more exciting than chips and salsa, but not so fussy that I’d be tied to the kitchen all night. After a few experiments (and some hilarious cheese explosions), this pull-apart bread became my go-to party trick. It’s the perfect balance of crunchy edges and gooey, cheesy insides. Plus, it’s seriously fun to eat—everyone just grabs a piece and digs in!
This cheesy garlic herb pull-apart bread isn’t just for parties, though. I’ve made it for cozy movie nights at home, potlucks, and even as a side with soup during chilly weather. The best part? You don’t need fancy ingredients or bread-making skills. If you can slice a loaf and mix up a simple garlic-herb butter, you’re set. Whether you’re feeding a crowd or just treating yourself, this is one recipe you’ll want to make again and again.
After testing (and tasting) this recipe more times than I should admit, I can promise it’s foolproof. There’s no stress, just melty, garlicky, cheesy perfection every time. Let’s get into why you’ll absolutely love this cheesy garlic herb pull-apart bread recipe—and how you can make it your new signature appetizer!
Why You’ll Love This Recipe
After years of kitchen experiments and plenty of taste-testers (my family and friends have never complained), I can say with confidence that this cheesy garlic herb pull-apart bread isn’t just another appetizer—it’s a total crowd-pleaser that checks all the boxes. Here’s what makes it stand out:
- Quick & Easy: This recipe comes together in about 15 minutes of prep, then bakes while you get ready for guests. No stress, no kneading dough—just chop, mix, slather, and bake.
- Simple Ingredients: Everything you need is probably already in your fridge or pantry. A loaf of bread, some cheese, garlic, butter, and your favorite herbs—that’s it.
- Perfect for Entertaining: This cheesy garlic herb pull-apart bread is an instant hit at parties, game days, or even casual family dinners. It looks impressive on any table, and it’s made for sharing.
- Crowd-Pleaser: I’ve never had leftovers—kids, adults, picky eaters, and cheese lovers all go back for seconds (and thirds).
- Unbelievably Delicious: The combination of gooey cheese, savory garlic butter, and herby freshness tucked into every bite is absolute comfort food. It’s the kind of appetizer that makes people close their eyes and sigh in happiness.
What really makes this cheesy garlic herb pull-apart bread recipe special is the technique: slicing the bread in a criss-cross pattern lets the cheese and garlicky butter seep into every nook and cranny. Each pull-apart piece is loaded with flavor—no bland or dry bits here. And while some recipes use pre-shredded cheese, I always recommend grating your own for the best melt and flavor (trust me, it’s worth the extra minute).
This isn’t just a quick snack—it’s the centerpiece that brings people together. Whether you’re a seasoned host or a first-time entertainer, you’ll love how easy and impressive this bread is. And if you’re craving comfort food with a twist, this recipe fits right in. Seriously, once you try it, you’ll want to make it for every occasion (and maybe just because you’re craving something cozy and cheesy). It’s party food, comfort food, and happy food—all in one.
What Ingredients You Will Need
This cheesy garlic herb pull-apart bread recipe is all about using accessible, flavorful ingredients that come together effortlessly. Most of these are kitchen staples, and a few small tweaks can easily fit dietary needs or whatever you have on hand.
- 1 large rustic loaf or sourdough bread (about 1 lb/450 g; round or oval works best for pull-apart style—day-old bread is perfect)
- 2 cups (200 g) shredded mozzarella cheese (for that classic melty stretch; you can blend in provolone or fontina for extra flavor)
- 1 cup (100 g) shredded sharp cheddar cheese (adds a tangy bite and golden color)
- 1/2 cup (115 g) unsalted butter, melted (rich, creamy base for the garlic-herb mixture)
- 4–5 cloves garlic, minced (fresh garlic packs the most punch—don’t use the pre-minced stuff if you can help it)
- 1/4 cup (15 g) fresh parsley, finely chopped (adds herby freshness; you can swap in basil or chives for variety)
- 1 tablespoon fresh rosemary, minced (optional, but it makes the bread smell amazing—thyme also works)
- 1/2 teaspoon salt (to balance the richness of the cheese and butter)
- 1/4 teaspoon black pepper (a little kick—totally optional but recommended)
- 1/4 teaspoon crushed red pepper flakes (optional, for a hint of heat if your crowd likes spice)
Ingredient Notes & Suggestions:
- Bread: Look for a firm, crusty loaf like sourdough or French bread. A soft sandwich loaf won’t hold up as well—trust me, it gets soggy fast.
- Cheese: I always grate my own cheese for the best melt. Pre-shredded cheese can sometimes have anti-caking agents that mess with the texture. Go for a mix of mozzarella (for stretch) and cheddar (for flavor), but you can swap in Monterey Jack or pepper jack for a twist.
- Butter: Use unsalted so you can control the saltiness. If you only have salted butter, just skip most of the added salt.
- Herbs: Fresh herbs make all the difference! If you’re in a pinch, dried herbs will work—just use half the amount since they’re more concentrated.
- Substitutions: Gluten-free bread works great if you need it. For a dairy-free version, swap in vegan cheese and plant-based butter (I’ve tried it and it’s still delish!).
All in all, this cheesy garlic herb pull-apart bread recipe is super forgiving—use what you have, and don’t be afraid to get creative with your cheese and herb mix!
Equipment Needed
You don’t need a fancy kitchen to whip up this cheesy garlic herb pull-apart bread. Here’s what you’ll want on hand:
- Serrated bread knife: For making those criss-cross cuts without squishing the loaf. If you don’t have one, a sharp chef’s knife will do, but go slow.
- Small mixing bowl: To stir up that garlicky, herby butter mixture.
- Pastry brush: Helps you get the butter into every nook and cranny. In a pinch, you can use a spoon or even your fingers (I’ve done it plenty of times!).
- Baking sheet or oven-safe skillet: A rimmed sheet keeps any melted cheese from escaping, but a cast iron skillet works beautifully for extra crispy edges.
- Aluminum foil: Essential for covering the bread during baking so the cheese melts before the top browns.
- Grater: For shredding cheese (if you’re going the homemade route—highly recommended for the best melt).
If you’re on a budget or just starting out, don’t stress about having the perfect tools. I made this recipe with a regular kitchen knife and a battered old baking sheet for years, and it still turned out great. Just keep your knives sharp and use what you’ve got—homemade bread doesn’t judge!
Quick tip: Clean your grater and pastry brush right after using, before the cheese or butter dries on—makes cleanup way easier.
Preparation Method
-
Preheat the Oven:
Preheat your oven to 375°F (190°C). Give it a good 10 minutes to get nice and hot so the bread bakes evenly. -
Prepare the Bread:
Place your loaf on a cutting board. Using a serrated knife, cut the bread in a criss-cross pattern, making slices about 1 inch (2.5 cm) apart in both directions. Don’t cut all the way through the bottom—leave about 1/2 inch (1.25 cm) intact so your loaf holds together.
Tip: If your bread is a day old, it’s easier to slice without tearing. -
Mix the Garlic Herb Butter:
In a small bowl, combine 1/2 cup (115 g) melted butter, minced garlic, chopped parsley, rosemary (if using), salt, black pepper, and red pepper flakes. Stir until everything is well mixed.
Sensory cue: The smell is already amazing—garlicky and fresh! -
Stuff the Bread:
Carefully open up the cuts in the bread with your fingers. Use a spoon or pastry brush to drizzle and dab the garlic herb butter into all the crevices. Be generous—this is where all the flavor goes!
Next, stuff the shredded mozzarella and cheddar into the cuts. Press the cheese down so it’s spread out evenly inside.
Note: Don’t worry if it looks a little messy; that’s normal! -
Wrap and Bake:
Place the bread on a baking sheet or skillet. Wrap the loaf loosely with aluminum foil—this keeps the cheese from burning while it melts. Bake for 15 minutes. -
Uncover and Finish Baking:
After 15 minutes, remove the foil and bake for another 10–12 minutes. The cheese should be fully melted and the top golden and bubbly.
Sensory cue: Listen for that gentle sizzle and look for golden edges. -
Cool Slightly and Serve:
Let the bread cool for 5 minutes before serving (the cheese is lava-hot at first). Serve warm so every bite is oozy and delicious.
Troubleshooting:
If the cheese isn’t melting after the first bake, your oven may run cool—give it a few extra minutes. If the top browns too quickly, tent with foil. If your bread feels dry, add a bit more melted butter on top right after baking. And if you accidentally cut through the bottom, just squeeze the loaf back together and keep going—it’ll still taste fantastic!
Personal tip: Prep the bread up to the point of baking and refrigerate if you need to make it ahead—just add 5 extra minutes to the baking time.
Cooking Tips & Techniques
After making this cheesy garlic herb pull-apart bread more times than I can count (and a few epic fails along the way), I’ve picked up some tricks for consistent, drool-worthy results:
- Use Day-Old Bread: Fresh bread can be too soft and tricky to slice. A slightly stale loaf holds together better and soaks up all that garlic butter without turning mushy.
- Grate Your Own Cheese: Pre-shredded cheese is tempting, but it doesn’t melt as smoothly. Grab a block and grate it fresh—it’s worth it for those gooey cheese pulls.
- Don’t Skimp on the Butter: The butter-herb mixture is what gives every bite its flavor and moisture. If your loaf is large, mix up a bit more to make sure every nook is coated.
- Stuff Cheese Deep: Get your fingers in there and really push the cheese down into the cuts. The deeper you go, the cheesier each piece will be—nobody wants a boring bite!
- Bake Covered, Then Uncover: Covering with foil first lets the cheese melt without burning. Uncover for the last bit so you get those irresistible golden edges.
- Troubleshooting Soggy Bottom? Place your loaf on a rack over the baking sheet if you want a crispier base. I learned that one after a few soggy-bottomed loaves in my early days.
- Timing Is Everything: If you’re serving this for a party, time it so the bread is coming out of the oven just before guests arrive. It’s best warm, and the smell alone will get everyone excited.
Honestly, the only real “mistake” I’ve made is not making enough. The loaf disappears faster than you’d think! Don’t be afraid to experiment with different cheese and herb combos—once you get the technique down, the options are endless.
And if you ever forget to cover the bread, don’t panic! Just keep an eye on it and tent with foil if it’s browning too quickly. Every oven is a little different, so use your senses—look for bubbling cheese, golden edges, and that glorious smell.
Variations & Adaptations
This cheesy garlic herb pull-apart bread recipe is a blank canvas for all sorts of fun twists. Here are a few of my favorite adaptations (and some reader favorites!):
- Spicy Jalapeño-Cheddar Pull-Apart Bread: Add sliced jalapeños between the bread cuts and swap in pepper jack cheese for extra kick. Perfect for spice lovers!
- Caprese Pull-Apart Bread: Use mozzarella, chopped sun-dried tomatoes, and fresh basil. Drizzle with balsamic glaze after baking for a fresh, summery twist.
- Gluten-Free Version: Use your favorite gluten-free rustic loaf. The technique and flavor are just as good—I’ve made this for gluten-sensitive friends and nobody could tell the difference.
- Vegan/Dairy-Free Option: Substitute dairy-free butter and your preferred vegan melty cheese. Add a sprinkle of nutritional yeast for extra cheesy flavor.
- Different Cooking Methods: Try baking the bread in a Dutch oven for a super-steamy, soft interior, or on a pizza stone for extra crunch.
- Personal Favorite: I love adding a sprinkle of crumbled bacon or crispy prosciutto between the layers for a savory, smoky upgrade. Just cook and drain first to keep things crisp!
Don’t be afraid to play around with flavors you love. Swap herbs, cheeses, or even add roasted garlic for something richer. If allergies are a concern, always check your cheese and bread labels for hidden gluten or dairy (some brands sneak it in!). The point is, this pull-apart bread can fit almost any table or taste—just have fun with it!
Serving & Storage Suggestions
This cheesy garlic herb pull-apart bread is at its absolute best when served hot and fresh, straight from the oven. The cheese will be gooey, the crust crisp, and the aroma…well, let’s just say you won’t have to call everyone to the table twice!
- Serving Temperature: Warm is best! Let it rest for 5 minutes to avoid burning fingers, then serve at the center of the table and let everyone pull off pieces.
- Presentation: Garnish with extra chopped herbs or a dusting of Parmesan for a pretty finish. Serve on a wooden board or in a cast iron skillet for rustic charm.
- Pairings: This bread is perfect with soups (like tomato or minestrone), fresh salads, or as a side with grilled meats. For parties, pair with a simple marinara or ranch dip.
- Storage: If you’re lucky enough to have leftovers, wrap the bread tightly in foil and refrigerate for up to 3 days.
- Reheating: Warm in a 350°F (175°C) oven, covered with foil, for about 10 minutes. Microwave works in a pinch, but the oven keeps it crispier.
- Make-Ahead Tip: Assemble the bread (stuffed and buttered) up to a day in advance, cover, and refrigerate. Bake just before serving, adding a few extra minutes to the baking time.
- Flavor Development: The garlic and herbs get even more fragrant as the bread sits, so leftovers are still super tasty, especially when reheated!
Honestly, it rarely lasts long enough to worry about storage. But on the off chance you’ve got some left, you’ll be happy to know it’s just as good the next day—maybe even better!
Nutritional Information & Benefits
Here’s a quick look at what you’re getting with this cheesy garlic herb pull-apart bread recipe (per serving, based on 8 servings):
- Calories: ~300–350
- Total Fat: ~18g (from cheese and butter—hello, comfort food!)
- Carbohydrates: ~28g
- Protein: ~10g
- Sodium: ~420mg
Benefits & Considerations:
- Calcium boost: Thanks to all that cheese, you get a good hit of calcium and protein.
- Herbs: Parsley and rosemary aren’t just for flavor—they add a little vitamin K and antioxidants too.
- Dietary notes: You can make this gluten-free with the right bread, or dairy-free with vegan swaps. Just keep an eye on sodium if you’re watching your intake.
- Allergens: Contains dairy, gluten, and may contain traces of nuts depending on your bread. Always check your labels if allergies are a concern.
I believe in balance—sometimes you just need a little cheesy, garlicky joy in your life. This recipe brings plenty of smiles, and if you use fresh, quality ingredients, you’ll get a little nutrition mixed in with all that comfort.
Conclusion
If you’re looking for a guaranteed hit for your next party, family dinner, or cozy night in, this cheesy garlic herb pull-apart bread recipe delivers every time. It’s easy, adaptable, and so much fun to share—plus, you don’t need any fancy skills or ingredients. Whether you stick with the classic combo or try one of the fun variations, you’ll end up with a loaf that’s golden, gooey, and loaded with flavor.
What I love most is how this bread brings everyone together. There’s something special about a dish you eat with your hands, pulling apart cheesy pieces and laughing over the table. Go ahead and make it your own—add your favorite herbs, toss in some spicy peppers, or switch up the cheese blend. You really can’t go wrong.
If you give this recipe a try, let me know how it turns out—leave a comment, share your twists, or tag me if you snap a pic. I promise, once you make this cheesy garlic herb pull-apart bread, it’ll become your signature party appetizer too. Happy baking, and here’s to many melty, garlicky memories ahead!
Frequently Asked Questions
How do I stop my pull-apart bread from getting soggy?
Use a rustic or day-old loaf, don’t overdo the butter, and bake uncovered for the last 10 minutes to crisp things up. Placing the bread on a rack over your baking sheet also helps keep the bottom dry.
Can I make cheesy garlic herb pull-apart bread ahead of time?
Absolutely! Assemble the bread up to a day in advance. Keep it wrapped in the fridge, then bake just before serving—just add a few extra minutes to the baking time.
What’s the best cheese to use for pull-apart bread?
Mozzarella for meltiness and cheddar for flavor are my favorites, but you can use Monterey Jack, provolone, or even a little Parmesan for extra punch. Grate your own for best results!
Can I freeze leftover pull-apart bread?
Yes! Wrap tightly in foil and freeze for up to 2 months. Reheat in a 350°F (175°C) oven straight from the freezer (covered with foil) until hot and bubbly, about 20 minutes.
How do I make this recipe gluten-free or dairy-free?
Use a gluten-free rustic loaf and swap in your favorite vegan cheese and plant-based butter. I’ve made both versions and they’re still super tasty!
Pin This Recipe!
Cheesy Garlic Herb Pull-Apart Bread

This cheesy garlic herb pull-apart bread is a crowd-pleasing appetizer featuring gooey melted cheese, fresh herbs, and garlicky butter tucked into every bite. It’s quick to prepare, fun to eat, and perfect for parties, potlucks, or cozy nights in.
- Prep Time: 15 minutes
- Cook Time: 25 minutes
- Total Time: 40 minutes
- Yield: 8 servings 1x
- Category: Appetizer
- Cuisine: American
Ingredients
- 1 large rustic loaf or sourdough bread (about 1 lb; round or oval, day-old preferred)
- 2 cups shredded mozzarella cheese
- 1 cup shredded sharp cheddar cheese
- 1/2 cup unsalted butter, melted
- 4–5 cloves garlic, minced
- 1/4 cup fresh parsley, finely chopped
- 1 tablespoon fresh rosemary, minced (optional)
- 1/2 teaspoon salt
- 1/4 teaspoon black pepper
- 1/4 teaspoon crushed red pepper flakes (optional)
Instructions
- Preheat your oven to 375°F (190°C) and allow it to heat for about 10 minutes.
- Place the loaf on a cutting board. Using a serrated knife, cut the bread in a criss-cross pattern, making slices about 1 inch apart in both directions, but do not cut all the way through—leave about 1/2 inch at the bottom.
- In a small bowl, mix together the melted butter, minced garlic, chopped parsley, rosemary (if using), salt, black pepper, and red pepper flakes until well combined.
- Carefully open up the cuts in the bread. Use a spoon or pastry brush to drizzle and dab the garlic herb butter into all the crevices.
- Stuff the shredded mozzarella and cheddar cheese evenly into the cuts, pressing the cheese down into the bread.
- Place the stuffed loaf on a baking sheet or oven-safe skillet. Wrap the loaf loosely with aluminum foil.
- Bake for 15 minutes covered with foil.
- Remove the foil and bake for another 10–12 minutes, until the cheese is fully melted and the top is golden and bubbly.
- Let the bread cool for 5 minutes before serving. Serve warm and enjoy!
Notes
Use day-old bread for best texture and easier slicing. Grate your own cheese for optimal melt. For a gluten-free or dairy-free version, substitute with gluten-free bread and vegan cheese/butter. Assemble ahead and bake just before serving for convenience. If the bread browns too quickly, tent with foil. Serve warm for the best gooey texture.
Nutrition
- Serving Size: 1/8 loaf
- Calories: 325
- Sugar: 2
- Sodium: 420
- Fat: 18
- Saturated Fat: 10
- Carbohydrates: 28
- Fiber: 1
- Protein: 10
Keywords: cheesy bread, garlic bread, pull-apart bread, party appetizer, easy appetizer, herb bread, mozzarella, cheddar, comfort food, game day snack


