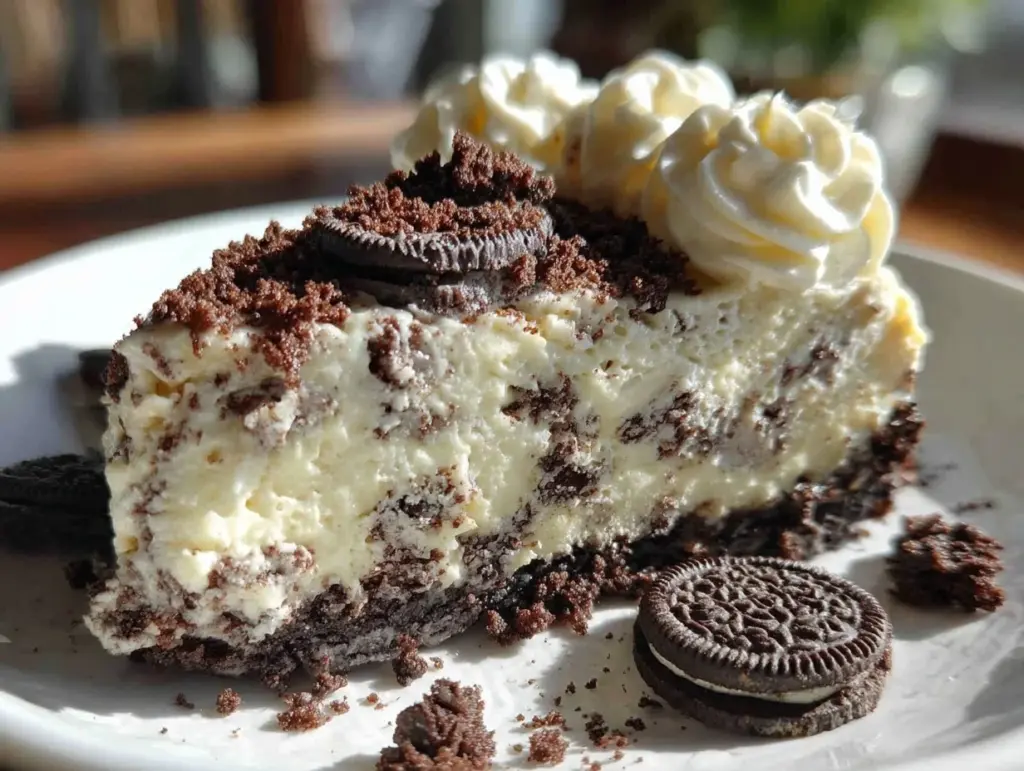
“Are you sure this doesn’t need baking?” my friend asked, eyeing the glossy cream piled high over the crushed cookie crust. Honestly, I was skeptical myself at first. Cheesecakes usually meant hours of fussing and that nerve-wracking wait for the oven to cool and flavors to settle. But one rainy afternoon, armed with just a handful of ingredients and zero patience, I whipped up this creamy no-bake Oreo cheesecake with fluffy whipped topping. It was supposed to be a quick fix for a last-minute craving, but it turned into something way more special.
The texture was almost surreal: silky, rich, yet light enough to keep you reaching for another spoonful without feeling weighed down. And the Oreo pieces? They gave just the right crunch and that nostalgic chocolate twist that makes you smirk with every bite. I kept making it over and over that week—friends showed up unexpectedly, and somehow this cheesecake saved the day every time. The best part? No oven needed, which made it my go-to when I just want something sweet without the mess or heat.
That quiet realization—that sometimes, the simplest recipes can surprise you—made this creamy no-bake Oreo cheesecake stick around in my rotation. It’s the kind of dessert that feels like a cozy hug but shows up on your table looking downright fancy. And, you know, isn’t that what we all secretly want?
Why You’ll Love This Recipe
After countless tests, tweaks, and “just one more bite” moments, this recipe has become a little legend in my kitchen. Here’s why it stands out:
- Quick & Easy: You can whip this up in under 20 minutes — perfect for those evenings when you suddenly crave something sweet but don’t want to start baking at 9 pm.
- Simple Ingredients: No need to hunt down fancy components. Most are pantry staples or easily found in any grocery store.
- Perfect for Any Occasion: Whether it’s a casual family dinner, a potluck, or just a cheeky weekend treat, this cheesecake fits right in.
- Crowd-Pleaser: I’ve yet to meet someone who didn’t ask for seconds, from kids to adults alike.
- Unbelievably Delicious: The contrast between the creamy filling and crunchy Oreo crust, topped with fluffy whipped cream, makes every bite a little moment of joy.
What sets this apart? It’s not just another no-bake cheesecake. The secret lies in gently folding the whipped topping into the cream cheese mixture, making it light without losing that creamy indulgence. And the Oreo crust isn’t just crushed cookies—it’s pressed just right so you get that satisfying snap when you dig in. Honestly, this recipe hits all the right notes every time.
If you want a dessert that feels both effortless and special, this is your winner. Plus, if you’re into other creamy, easy desserts, you might enjoy my creamy no-bake tiramisu cups or the creamy coconut mango sticky rice—both favorites when I want simple elegance on the table.
What Ingredients You Will Need
This creamy no-bake Oreo cheesecake with fluffy whipped topping keeps it straightforward with ingredients that come together to give you rich flavor and smooth texture, without any fuss.
- Oreo cookies (about 24 cookies): Crushed for the crust and some reserved for garnish. I like the classic Oreo, but double-stuff works nicely if you want extra creaminess.
- Unsalted butter (6 tablespoons / 85 grams), melted: Helps bind the crust with a rich flavor. I prefer using Land O’Lakes for its creamy texture.
- Cream cheese (16 oz / 450 grams), softened: The star of the filling. Make sure it’s room temperature for smooth mixing.
- Granulated sugar (3/4 cup / 150 grams): Sweetens the filling just right without overpowering.
- Vanilla extract (1 teaspoon): A splash adds warmth and depth.
- Heavy whipping cream (1 cup / 240 ml), cold: Whipped to fluffy perfection for the topping and also folded into the filling for lightness.
- Powdered sugar (2 tablespoons / 15 grams): Added to the whipped cream for a smooth sweet finish.
- Optional: mini Oreo cookies or shavings for garnish: For that extra visual and textural oomph.
If you want to swap things up, you can use dairy-free cream cheese and coconut cream for a vegan-friendly cheesecake. Almond flour crust is also a fun alternative if you don’t want the cookie crunch but still want that buttery base.
Remember, quality ingredients make a difference here. Softened cream cheese is a must—cold cream cheese will give you lumps, and nobody wants that! Also, chilling the heavy cream before whipping helps it fluff up beautifully. This recipe leans on classic pantry staples, so you won’t need an extra trip to the store unless you’re like me and keep forgetting Oreo cookies.
Equipment Needed
- 9-inch (23 cm) springform pan: Ideal for easy cheesecake removal without damaging the crust.
- Mixing bowls: One large for the filling, another for whipping cream.
- Hand mixer or stand mixer: Essential for whipping the cream and mixing the filling until silky smooth. I’ve used both, but the stand mixer saves your arms.
- Food processor or plastic bag and rolling pin: To crush the Oreo cookies finely for the crust. Both work well, though the food processor is faster.
- Spatula: For folding whipped cream into the cream cheese mixture gently.
- Measuring cups and spoons: Accurate measurements help keep the cheesecake perfect every time.
Don’t worry if you don’t have a springform pan—you can use a regular pie dish, but the cheesecake might be trickier to slice neatly. For the food processor, a sturdy zip-top bag and rolling pin do the job just fine (and give you a bit of a workout!). Cleaning the mixer right away saves you some scrubbing later, trust me on that.
Preparation Method
- Prepare the crust: Crush the Oreo cookies into fine crumbs using a food processor or by placing them in a zip-top bag and rolling with a pin. Reserve about 1/2 cup (60 grams) of crumbs for garnish. In a medium bowl, combine the crushed Oreos with the melted butter until evenly coated. Press the mixture firmly into the bottom of a 9-inch (23 cm) springform pan to form an even crust layer. Use the back of a spoon or a flat-bottomed glass for an even press. Chill in the fridge for at least 15 minutes while preparing the filling.
- Whip the cream: In a cold mixing bowl, pour 1 cup (240 ml) of cold heavy whipping cream and add 2 tablespoons (15 grams) of powdered sugar. Beat on medium-high speed until stiff peaks form—this usually takes about 3-4 minutes. The cream should hold its shape without being grainy or over-beaten. Refrigerate the whipped topping until ready to use.
- Make the filling: In a large bowl, beat the softened cream cheese with 3/4 cup (150 grams) granulated sugar and 1 teaspoon vanilla extract until smooth and creamy—about 2-3 minutes. Scrape down the sides as needed to avoid lumps.
- Fold in whipped cream: Gently fold half of the whipped cream into the cream cheese mixture using a spatula. Be careful not to deflate the cream; fold with a light hand to keep the filling airy and smooth.
- Add crushed Oreos: Fold in about 1 cup (120 grams) of coarsely crushed Oreo pieces into the filling for texture and flavor bursts.
- Assemble the cheesecake: Pour the filling over the chilled crust and spread evenly with a spatula. Smooth the surface and then dollop or pipe the remaining whipped cream on top, creating fluffy peaks or swirls.
- Garnish: Sprinkle the reserved Oreo crumbs or mini Oreos over the whipped topping for a pretty finish.
- Chill and set: Refrigerate the cheesecake for at least 4 hours, preferably overnight, to let it firm up and the flavors meld together.
- Serve: Run a knife around the edges before releasing the springform pan to get clean slices. Serve cold and enjoy!
Tip: If your cream cheese isn’t soft enough, microwave it in 5-second bursts to avoid lumps. And if you want extra flair, try swirling a little chocolate ganache on top just before serving.
Cooking Tips & Techniques
Making this cheesecake foolproof is all about the little details. Here’s what I’ve learned through trial and error:
- Softening the cream cheese: This is key. Cold cream cheese will make the filling lumpy and frustrating. I usually leave mine out for 30-60 minutes before starting or zap it briefly in the microwave.
- Whipping cream just right: Stop whipping as soon as stiff peaks form. Overwhipping can turn the cream grainy or even into butter, and underwhipping won’t give you that fluffy texture.
- Folding gently: When mixing the whipped cream into the cream cheese, fold slowly with a spatula rather than stirring vigorously. This keeps the filling light and airy.
- Pressing the crust firmly: A well-packed crust holds together when you slice and prevents crumbling. I use the bottom of a flat glass to really press it down evenly.
- Timing the chill: Don’t rush the chilling process. At least 4 hours in the fridge helps the cheesecake firm up nicely, and overnight is even better for flavor development.
- Multitasking: While the crust chills, whip your cream and beat the filling to save time. This way, you’re assembling quickly and not letting ingredients warm up too much.
I once tried skipping the chilling time out of impatience — big mistake! The slices just wouldn’t hold. Trust the fridge here, even if it’s tempting to dig in immediately.
Variations & Adaptations
This recipe is a great base for playing around with flavors and dietary needs. Here are some ideas I’ve enjoyed or imagined:
- Chocolate Lover’s Twist: Add 1/3 cup (35 grams) cocoa powder to the cream cheese mixture and use chocolate sandwich cookies for the crust. For an extra touch, drizzle melted chocolate over the whipped topping.
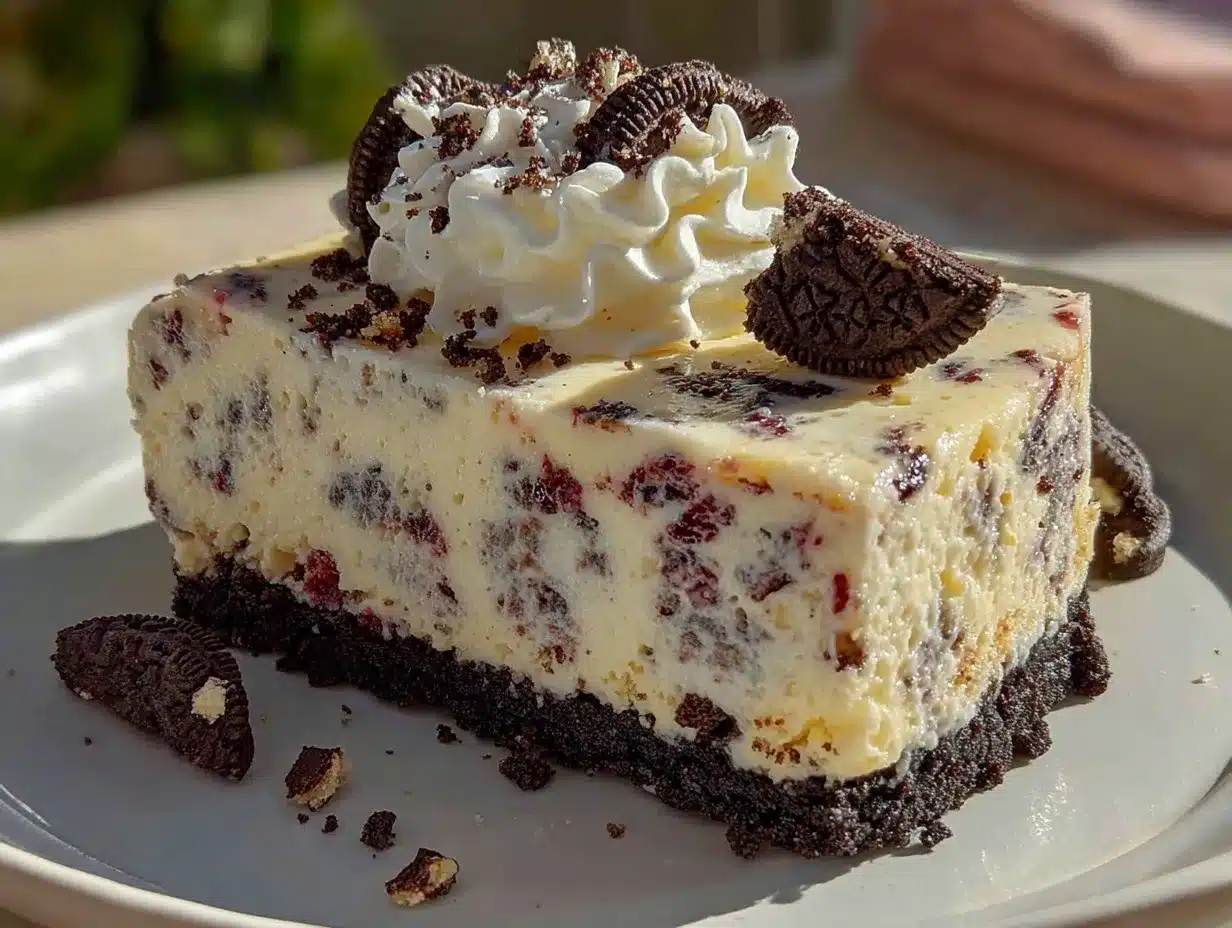
- Fruit Infusion: Fold in chopped strawberries or raspberries into the filling before chilling. Fresh berries add a bright contrast to the rich creaminess. You could also top the cheesecake with a fresh berry compote for a colorful presentation.
- Gluten-Free Option: Swap the Oreo crust for a gluten-free cookie crust, like crushed almond flour cookies or gluten-free chocolate wafers. Just make sure your Oreos are the gluten-free variety if you want to keep the signature flavor.
- Vegan Adaptation: Use vegan cream cheese and coconut cream whipped topping. The texture will be slightly different but still delightfully creamy and fluffy.
- Mini Cheesecakes: Make individual servings using a muffin tin or small jars. These are perfect for parties or portion control.
One time, I tried adding a hint of espresso powder to the filling for a mocha vibe—surprisingly good! If you like the idea of creamy desserts with a twist, you might enjoy the creamy lemon posset with raspberry coulis for a citrus kick.
Serving & Storage Suggestions
This cheesecake is best served chilled, straight from the fridge. The cool, creamy texture contrasts beautifully with the crunchy Oreo crust and fluffy whipped topping. I like to slice it with a sharp knife dipped in hot water (and wiped dry) to get smooth, clean edges.
It pairs wonderfully with a cup of coffee or a refreshing summer drink like the fresh blueberry lavender lemonade—the fruity notes balance the richness perfectly.
For storage, cover the cheesecake tightly with plastic wrap or store it in an airtight container. It keeps well in the fridge for up to 4 days. You can freeze it for up to 2 months; just thaw overnight in the fridge before serving. Reheating isn’t recommended since the whipped topping loses its fluffiness, but you can refresh the surface with a quick re-whip of cream if you like.
Flavors deepen a bit after a day or two, so if you can wait, the cheesecake tastes even better the next day. Just don’t tell anyone it’s a no-bake secret—they might not believe you!
Nutritional Information & Benefits
Each slice (assuming 12 servings) contains approximately:
| Calories | 350 kcal |
|---|---|
| Fat | 25 grams |
| Carbohydrates | 28 grams |
| Protein | 5 grams |
This cheesecake offers calcium from the cream cheese and cream, along with some antioxidants from the chocolate in the Oreos. While it’s an indulgent treat, using real cream cheese and fresh ingredients means you’re avoiding unnecessary additives found in many store-bought desserts.
If you’re mindful about sugar or dairy, try swapping in reduced-fat cream cheese or a sugar substitute, though that might tweak the texture slightly. The recipe is naturally gluten-containing due to the Oreos, but as mentioned, gluten-free alternatives are easy to substitute.
From a wellness standpoint, I see this dessert as a little slice of joy to savor in moderation—comfort food that doesn’t require guilt or hours of prep. That balance feels just right.
Conclusion
This creamy no-bake Oreo cheesecake with fluffy whipped topping is proof that sometimes the easiest recipes become favorites for life. It’s quick, fuss-free, and hits that perfect sweet spot between rich and light. Whether you keep it classic or try one of the variations, it’s a dessert that invites you to slow down, savor, and share.
I love how it brings people together without the stress of complicated steps or long baking times. It’s that reliable friend in your recipe box you’ll reach for again and again. If you give it a try, I’d love to hear how you make it your own—drop a comment or share your twists!
Here’s to many creamy, fluffy, Oreo-filled moments ahead.
FAQs
Can I use a different cookie for the crust instead of Oreos?
Absolutely! Graham crackers, chocolate wafers, or gluten-free cookies all work well. Just crush them finely and mix with melted butter as usual.
Do I need to bake this cheesecake?
Nope! This is a no-bake recipe, so it sets in the fridge. Just make sure to chill it for at least 4 hours to firm up properly.
How long can I store leftover cheesecake?
Store leftovers in the fridge covered for up to 4 days. You can also freeze it for up to 2 months, but thaw in the fridge overnight before serving.
Can I make this cheesecake ahead of time for a party?
Yes, it’s perfect for make-ahead dessert. Prepare it the day before and keep chilled until serving.
Is it possible to make this recipe vegan?
Yes. Use vegan cream cheese and coconut cream whipped topping. The texture will differ slightly but will still be deliciously creamy and fluffy.
Pin This Recipe!
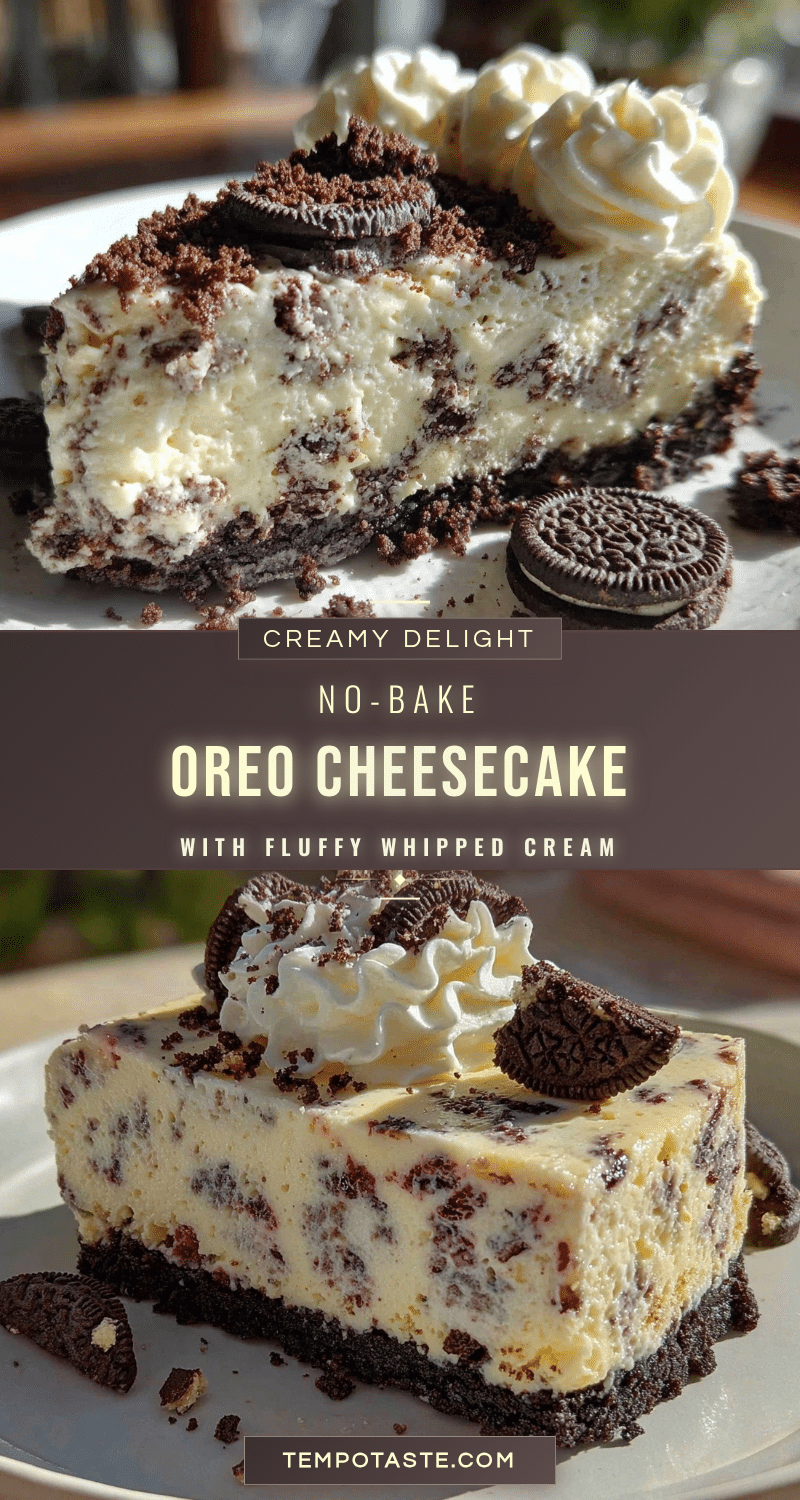
Creamy No-Bake Oreo Cheesecake Recipe with Easy Fluffy Whipped Topping

A quick and easy no-bake Oreo cheesecake with a rich, creamy filling and fluffy whipped topping, perfect for any occasion without the need for an oven.
- Prep Time: 20 minutes
- Cook Time: 0 minutes
- Total Time: 4 hours 20 minutes
- Yield: 12 servings 1x
- Category: Dessert
- Cuisine: American
Ingredients
- 24 Oreo cookies (crushed, with some reserved for garnish)
- 6 tablespoons (85 grams) unsalted butter, melted
- 16 oz (450 grams) cream cheese, softened
- 3/4 cup (150 grams) granulated sugar
- 1 teaspoon vanilla extract
- 1 cup (240 ml) heavy whipping cream, cold
- 2 tablespoons (15 grams) powdered sugar
- Optional: mini Oreo cookies or shavings for garnish
Instructions
- Crush the Oreo cookies into fine crumbs using a food processor or by placing them in a zip-top bag and rolling with a pin. Reserve about 1/2 cup (60 grams) of crumbs for garnish.
- In a medium bowl, combine the crushed Oreos with the melted butter until evenly coated.
- Press the mixture firmly into the bottom of a 9-inch (23 cm) springform pan to form an even crust layer. Use the back of a spoon or a flat-bottomed glass for an even press.
- Chill the crust in the fridge for at least 15 minutes while preparing the filling.
- In a cold mixing bowl, pour 1 cup (240 ml) of cold heavy whipping cream and add 2 tablespoons (15 grams) of powdered sugar. Beat on medium-high speed until stiff peaks form (about 3-4 minutes). Refrigerate the whipped topping until ready to use.
- In a large bowl, beat the softened cream cheese with 3/4 cup (150 grams) granulated sugar and 1 teaspoon vanilla extract until smooth and creamy (about 2-3 minutes). Scrape down the sides as needed.
- Gently fold half of the whipped cream into the cream cheese mixture using a spatula, being careful not to deflate the cream.
- Fold in about 1 cup (120 grams) of coarsely crushed Oreo pieces into the filling.
- Pour the filling over the chilled crust and spread evenly with a spatula.
- Dollop or pipe the remaining whipped cream on top, creating fluffy peaks or swirls.
- Sprinkle the reserved Oreo crumbs or mini Oreos over the whipped topping for garnish.
- Refrigerate the cheesecake for at least 4 hours, preferably overnight, to let it firm up and the flavors meld together.
- Run a knife around the edges before releasing the springform pan to get clean slices. Serve cold and enjoy.
Notes
Use softened cream cheese to avoid lumps. Chill heavy cream before whipping for best results. Fold whipped cream gently to keep filling airy. Press crust firmly to prevent crumbling. Chill cheesecake at least 4 hours or overnight for best texture and flavor. For vegan option, use vegan cream cheese and coconut cream. For gluten-free, substitute Oreo crust with gluten-free cookies.
Nutrition
- Serving Size: 1 slice (1/12 of che
- Calories: 350
- Fat: 25
- Carbohydrates: 28
- Protein: 5
Keywords: no-bake cheesecake, Oreo cheesecake, easy dessert, creamy cheesecake, whipped topping, quick dessert, no oven dessert