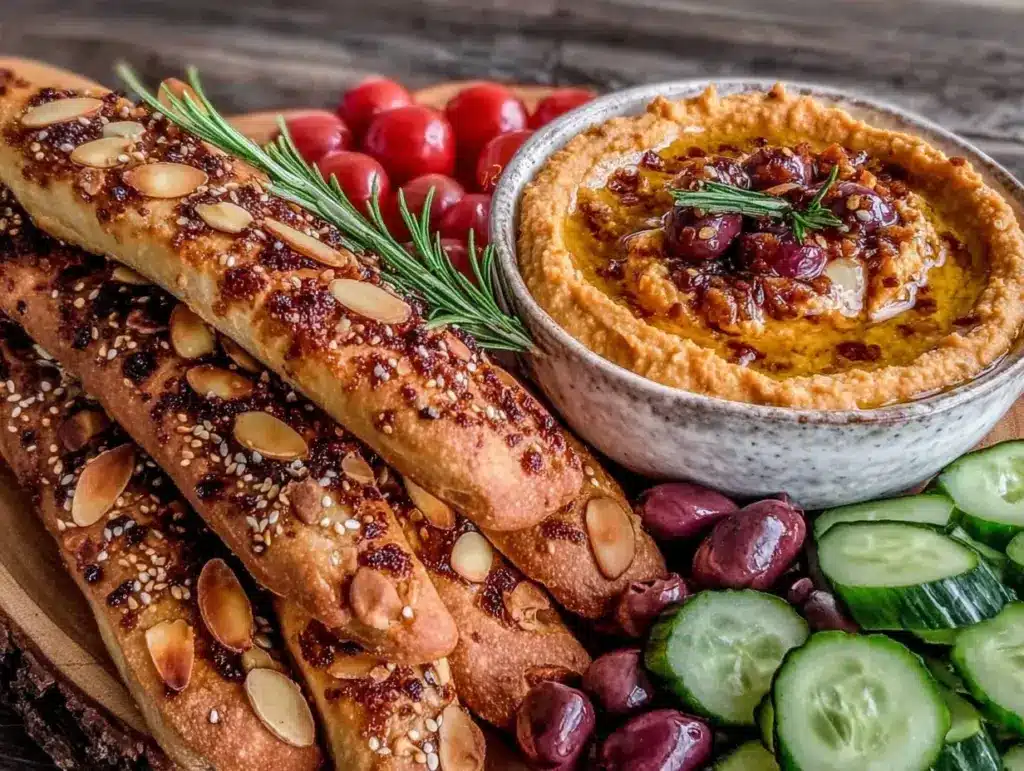
Witch finger breadsticks feel like the perfect eerie snack to have out at a Halloween party — you know, the kind that’s just creepy enough to make people look twice but tasty enough that they can’t stop eating. I’m staring at the dough, fingers itching to shape those twisted breadsticks into something that’s not just a snack but a sort of edible Halloween centerpiece. The garlic aroma swirling in the kitchen already has me hooked, but it’s the detail — the almond “nails” and the little slashes that make them look like something out of a spooky story — that really seals the deal. It’s silly how a simple breadstick can turn into a conversation starter, and honestly, it’s been my go-to when I want a flavorful Halloween party snack board that’s both fun and delicious.
Throwing together a snack board that balances creepy vibes with real flavor is surprisingly satisfying. The crunch of fresh veggies, the tang of dips, and those witch fingers with a hint of garlic and herbs make it more than just a platter of random snacks. It’s an experience. I’ve played with different combos and dips to get that perfect balance — no one leaves hungry, and the board actually looks like it belongs at a Halloween bash, not just a last-minute afterthought.
What’s stuck with me is how this recipe manages to bring a little magic to the table without being complicated or requiring weird ingredients. It’s those simple touches, like the right sprinkle of Italian seasoning or the perfectly baked crispness of the breadsticks, that make this Halloween party snack board stand out, giving everyone a reason to linger and nibble. That’s why I keep coming back to this one — it’s not just about the spooky look, but the flavorful bite that keeps guests reaching for more.
Why You’ll Love This Recipe
Honestly, this flavorful Halloween party snack board with witch finger breadsticks is my favorite way to bring a little spooky fun to gatherings without sacrificing taste or effort. I’ve tested this recipe through multiple parties (and a few late-night cravings), and here’s why it always wins:
- Quick & Easy: The whole board, including the witch finger breadsticks, comes together in under an hour. Perfect if you realize last minute you want to impress without stress.
- Simple Ingredients: You probably have all the basics already — flour, garlic, almonds, and some fresh veggies. No special store runs needed.
- Perfect for Halloween Parties: Whether it’s a casual hangout or a kids’ gathering, this snack board fits right in with the spooky vibes and offers variety.
- Crowd-Pleaser: The breadsticks get rave reviews every time — that garlic-herb flavor with the fun almond nails is a hit even with picky eaters.
- Unbelievably Delicious: The textures and flavors mesh so well you might forget it’s a themed snack board. It’s got soul food comfort wrapped in Halloween fun.
This recipe isn’t just a basic breadstick throw-together. The key is a simple yet special dough recipe that yields soft insides with a crisp crust, and the garlic and herb seasoning is perfectly balanced — not too overpowering, just enough to make your taste buds sit up. Plus, shaping those fingers is kind of addictive once you get the hang of it.
For me, it’s about bringing a bit of theater to the table without losing the essence of good food. It’s the kind of snack board that makes you want to linger, chat, and maybe sneak a few extra breadsticks before anyone’s watching. Honestly, it’s become my signature when I want something both fun and flavorful—and I trust it’ll do the same for you.
What Ingredients You Will Need
This flavorful Halloween party snack board relies on straightforward ingredients that come together to create a delicious and visually fun spread. The witch finger breadsticks are the star, but the supporting elements add crunch, color, and variety.
- For the Witch Finger Breadsticks Dough:
- All-purpose flour (about 3 cups / 375 g) – I prefer King Arthur for consistent results
- Active dry yeast (2 1/4 tsp / one packet)
- Warm water (1 cup / 240 ml) – not too hot or it kills the yeast
- Olive oil (2 tbsp / 30 ml) – adds moisture and richness
- Sugar (1 tsp) – feeds the yeast for good rise
- Salt (1 tsp) – balances the flavor
- Garlic powder (1 tsp) and dried Italian herbs (1 tsp total) – for that savory, herby kick
- For the Witch Finger Details:
- Whole almonds (about 20) – these become the creepy “fingernails”
- Tomato paste or marinara (optional) – for a bloody effect on the nails
- For the Snack Board:
- Assorted fresh veggies: baby carrots, celery sticks, cucumber slices, cherry tomatoes
- Cheese varieties: cheddar cubes, mozzarella balls, or pepper jack slices
- Dips: ranch dressing, hummus, or a spicy salsa
- Crackers or breadsticks (additional, if desired)
- Olives and pickles – for sharp, salty bites
You can mix and match the veggies and cheeses based on what’s in season or what your guests prefer. For example, swapping baby carrots for roasted red peppers or adding some sliced apples works well for a touch of sweetness. If you want a gluten-free option, using almond flour or a store-bought gluten-free dough mix could work, but you might lose some of the breadstick texture.
Equipment Needed
- Mixing Bowls: A large bowl for the dough and smaller ones for dips and veggie prep.
- Measuring Cups and Spoons: Precise measurements keep the dough consistent.
- Baking Sheet: A rimmed baking sheet lined with parchment paper to bake those witch finger breadsticks evenly.
- Pastry Brush: For brushing olive oil or egg wash (if you want a shiny crust) over the breadsticks before baking.
- Knife or Kitchen Scissors: To make the slashes that give the finger effect.
- Cooling Rack: Important to let the breadsticks cool down without getting soggy.
Don’t worry if you don’t have a pastry brush—your clean fingers or a spoon can work just fine for brushing oil. When it comes to shaping the breadsticks, I’ve found that a simple butter knife works better than sharp knives for making the slashes without cutting them completely through. If you like multitasking in the kitchen, prepping the veggies and dips while the dough rises can save a lot of time.
Preparation Method
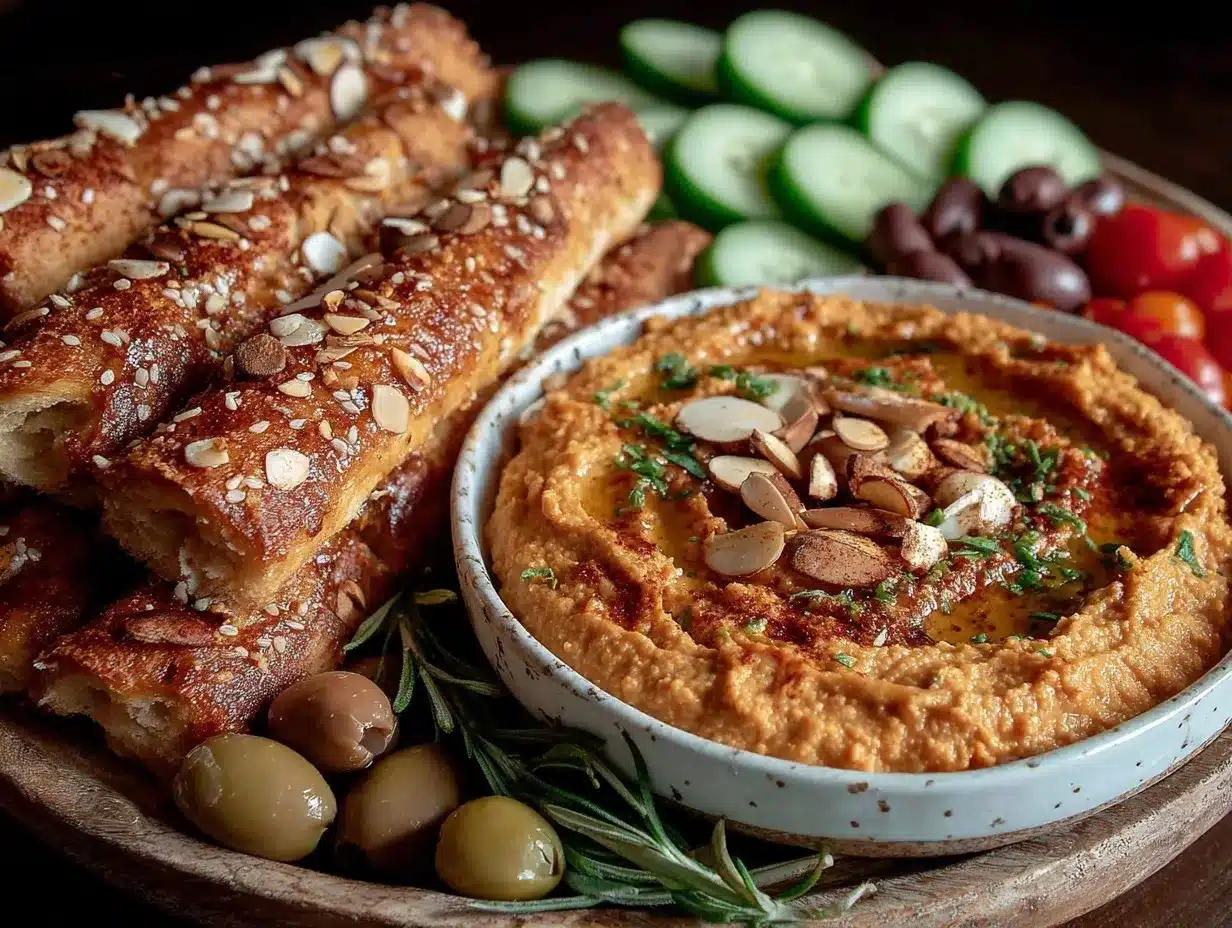
- Activate the Yeast: In a large bowl, combine 1 cup (240 ml) warm water (about 110°F/43°C), 1 tsp sugar, and the yeast packet (2 1/4 tsp). Let it sit for about 5-7 minutes until it becomes frothy, signaling the yeast is alive and kicking.
- Make the Dough: Add 3 cups (375 g) all-purpose flour, 1 tsp salt, 1 tsp garlic powder, and 1 tsp dried Italian herbs to the yeast mixture. Pour in 2 tbsp (30 ml) olive oil. Stir with a wooden spoon until a shaggy dough forms.
- Knead the Dough: Turn the dough onto a lightly floured surface and knead for 8-10 minutes until smooth and elastic. If the dough is sticky, sprinkle a little more flour, but be careful not to add too much or the breadsticks will get tough.
- First Rise: Place the dough in a lightly oiled bowl, cover with a clean kitchen towel or plastic wrap, and let it rise in a warm spot for about 1 hour or until doubled in size.
- Shape the Witch Fingers: Punch down the dough gently and divide it into 16 equal pieces (about 1.5 oz / 45 g each). Roll each piece into a 5-inch (12 cm) long finger shape, slightly tapering the ends.
- Add the Details: Use a knife or kitchen scissors to make 3-4 small slashes along each finger to mimic knuckles. Press a whole almond onto one end of each finger for the fingernail. Optional: dab a little tomato paste under the almond to create a bloody effect.
- Second Rise: Place the shaped fingers on a parchment-lined baking sheet, cover loosely, and let them rest for 20 minutes to puff up slightly.
- Bake: Preheat your oven to 375°F (190°C). Bake the fingers for 18-22 minutes until golden brown and cooked through. They should smell garlicky and look crisp on the outside.
- Cool and Assemble: Let the breadsticks cool on a wire rack. Meanwhile, arrange your snack board with fresh veggies, cheeses, olives, dips, and any other accompaniments you like.
- Serve: Place the witch finger breadsticks prominently on the board — they’re the perfect spooky centerpiece that’s both a little creepy and a lot delicious.
Pro tip: If your dough feels too dry while shaping, dampen your hands to keep the surface smooth. Also, don’t skip the garlic powder in the dough — it’s subtle but adds a fantastic savory depth that pairs beautifully with the herbs. And if you want a glossy finish on your breadsticks, brushing them with olive oil before baking works wonders.
Cooking Tips & Techniques
Making witch finger breadsticks is fun but there are a few things I’ve learned to get them just right. First, the yeast activation is crucial — if your water is too hot, the yeast dies, and your dough won’t rise. I always keep a kitchen thermometer handy or test water temperature by feel: warm but not hot.
Kneading is another important step. I’ve made the mistake of under-kneading, and the breadsticks came out dense. Knead until elastic but don’t overdo it or the dough can get tough. It’s a delicate balance that comes with practice.
When shaping the fingers, don’t cut too deep with your slashes — just enough to look like knuckles without splitting the dough. Also, pressing the almond “nail” firmly helps it stay put during baking. If you want extra flair, brushing the almonds with tomato paste before baking gives a slightly sinister look.
Finally, timing is key — keep an eye on the breadsticks in the oven. They should be golden but not burnt, with a slight crisp on the outside and soft inside. I often start checking at 18 minutes and adjust depending on my oven’s quirks. While the breadsticks bake, multitasking by prepping veggies or dips helps keep everything ready at the same time.
If you like to mix savory with a bit of sweet, try adding a pinch of smoked paprika to the dough next time. It adds a subtle smoky warmth that really complements the garlic and herbs.
Variations & Adaptations
This Halloween snack board is super versatile. Here are a few ways I’ve tweaked it:
- Spicy Witch Fingers: Add 1/2 tsp crushed red pepper flakes into the dough for a little heat that kicks in with the garlic and herbs.
- Gluten-Free Option: Use a gluten-free all-purpose flour blend designed for bread baking. The texture will be slightly different but still tasty. Just add a bit more water if the dough feels stiff.
- Cheesy Variation: Incorporate 1/2 cup grated Parmesan into the dough for cheesy witch fingers. They get extra golden and savory.
- Seasonal Veggie Swaps: In place of the usual carrots and celery, try roasted pumpkin slices or sautéed mushrooms on the snack board for an autumn twist.
- Different Dips: Beyond ranch and hummus, a creamy spinach-artichoke dip or a tangy cranberry chutney adds a festive touch.
One variation I’ve come back to is adding fresh rosemary to the dough. It’s subtle but adds a piney aroma that gives the breadsticks a foresty edge, perfect for Halloween themes. Also, I once baked the breadsticks in a cast-iron skillet to get a rustic crust, which was a fun change from the baking sheet.
Serving & Storage Suggestions
Serve the snack board at room temperature so the flavors of the breadsticks and dips shine through. Arrange the witch finger breadsticks in a circle or fan shape to create a spooky, eye-catching centerpiece. Pair with crisp veggies like celery and cucumber for freshness, and add some sharp cheeses and olives for contrast.
Leftovers keep well in an airtight container at room temperature for up to 2 days. For longer storage, wrap the breadsticks tightly in foil and freeze for up to a month. To reheat, pop them in a 350°F (175°C) oven for 5-7 minutes until warmed through and crisp again.
Interestingly, the garlic and herb flavors deepen after a day, so the breadsticks often taste even better the next day. The dips, however, are best fresh.
If you want ideas for other crowd-pleasing dishes to pair with this snack board, the quick skillet lasagna is a hearty option, or a bowl of loaded baked potato soup keeps things cozy and comforting after snacking.
Nutritional Information & Benefits
This snack board offers a balanced mix of carbs, protein, and healthy fats. Each witch finger breadstick (about 1.5 oz / 45 g) contains approximately 150 calories, with 28 g carbohydrates, 4 g fat (mostly from olive oil), and 4 g protein. The garlic and herbs provide antioxidants and anti-inflammatory benefits, which add a nice healthy touch to the indulgence.
The fresh veggies add fiber, vitamins, and minerals to the board, making it more than just empty calories. Choosing whole fresh ingredients over processed snacks makes this Halloween treat a bit more nourishing for everyone.
If you’re mindful of gluten or dairy, you can swap ingredients to fit your dietary needs without losing flavor. For example, vegan cheese or dairy-free dips keep the board inclusive and fun.
Conclusion
This flavorful Halloween party snack board with witch finger breadsticks has become my top pick for spooky gatherings because it’s fun, easy, and delicious — all three are hard to find in one place around the holiday. The breadsticks bring a playful yet savory punch that makes guests smile and reach for more, while the veggie and cheese accouterments keep it balanced and colorful.
What I love most is how customizable it is — you can keep it simple or get creative with herbs, dips, and veggies to suit your style. It’s never felt like a chore to prepare, just a chance to get a little creative and bring some magic to the table.
If you try this recipe, I’d love to hear how you dressed up your Halloween board or what variations you made. Sharing those little twists always makes this kind of cooking feel like a community. Here’s to spooky, flavorful fun that everyone can enjoy!
FAQs
Can I make the witch finger breadsticks ahead of time?
Absolutely! You can shape the breadsticks and refrigerate them overnight, then bake fresh the next day. Just bring them to room temperature before baking for even cooking.
What can I use instead of almonds for the fingernails?
If you’re allergic or prefer a different look, pumpkin seeds or pecan halves make great alternatives. You can also use small pieces of bell pepper for a colorful twist.
How do I keep the breadsticks soft inside but crispy outside?
Make sure not to overbake and use olive oil in the dough for moisture. Baking at 375°F (190°C) gives a nice crust without drying them out.
Can I add cheese inside the breadsticks?
Yes! Rolling in a bit of shredded mozzarella or cheddar before shaping adds a gooey surprise inside. Just seal the edges well to prevent leaks.
What dips pair best with this snack board?
Ranch, hummus, and marinara are classics, but you could also try a spicy chipotle mayo or creamy spinach artichoke dip for variety.
Pin This Recipe!
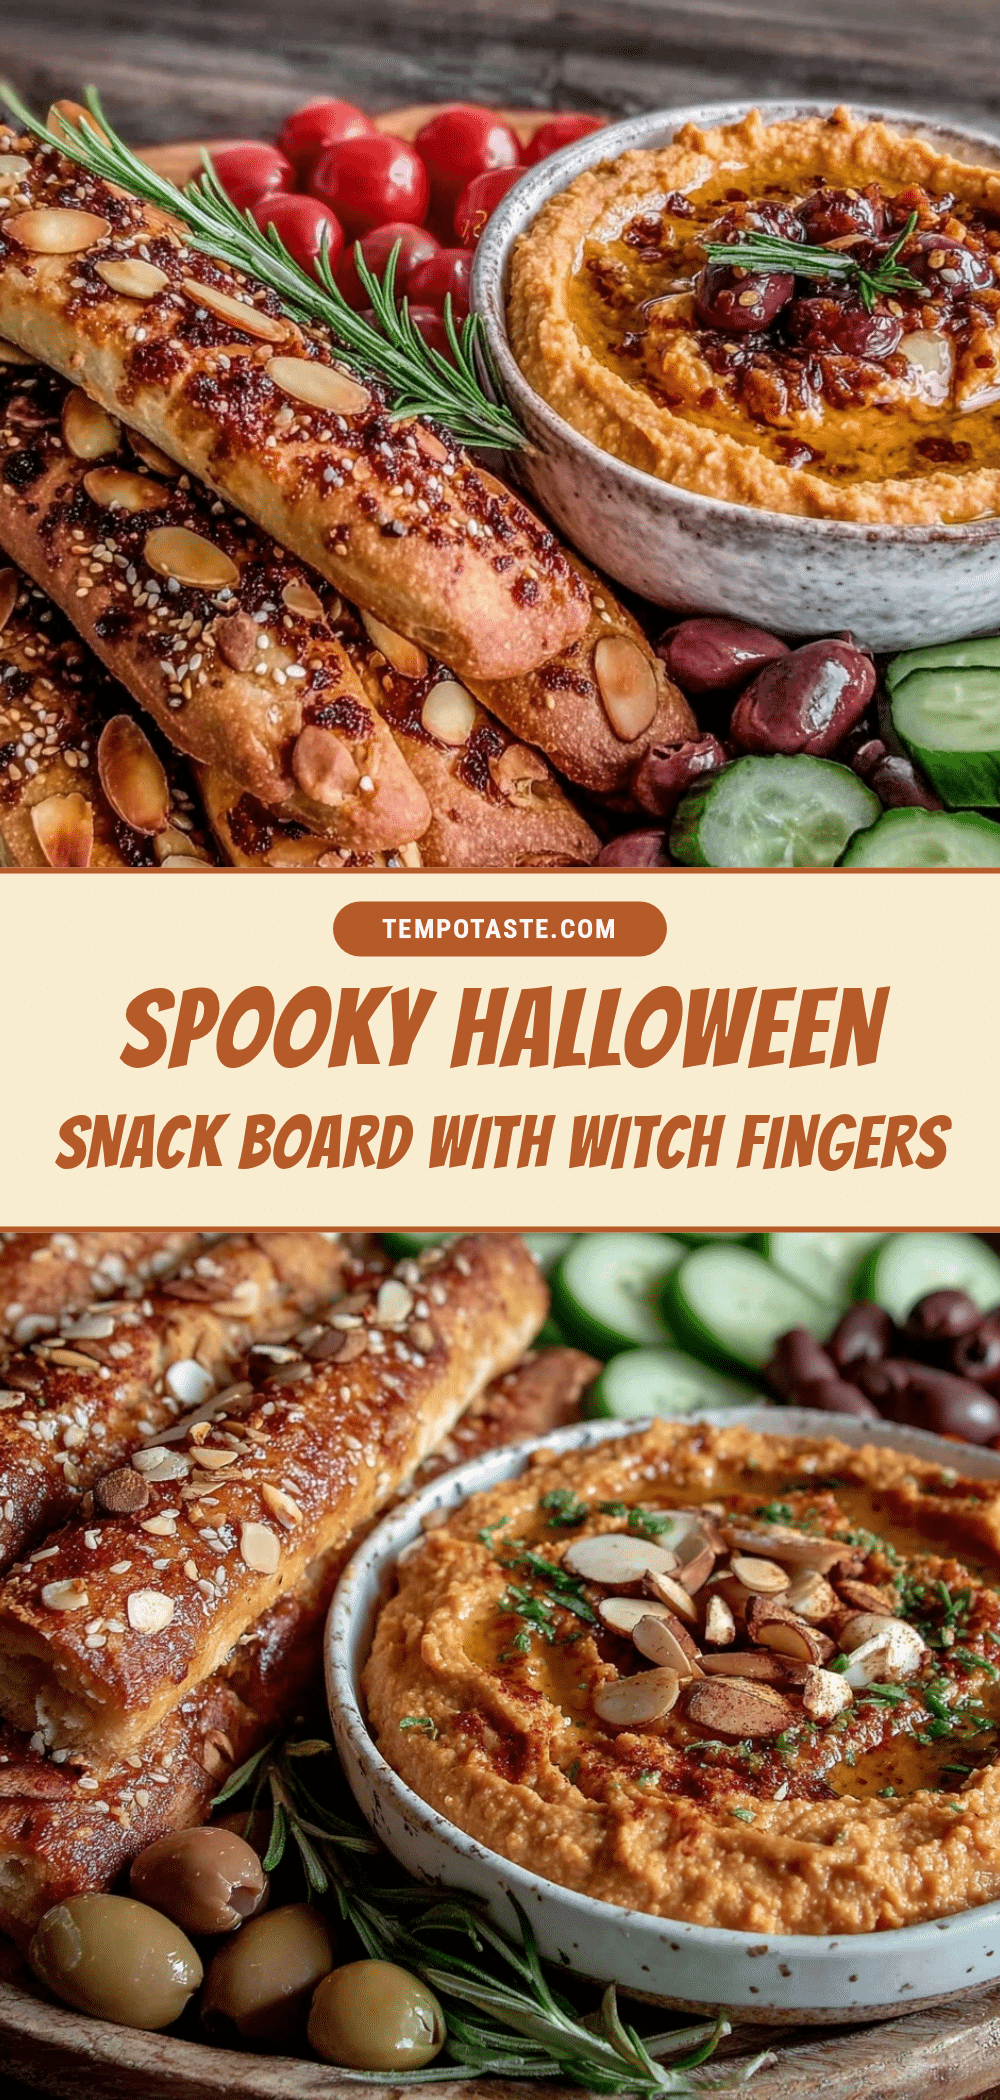
Flavorful Halloween Party Snack Board with Easy Witch Finger Breadsticks Recipe

A spooky yet delicious Halloween party snack board featuring garlic-herb witch finger breadsticks with almond nails, paired with fresh veggies, cheeses, and dips for a fun and flavorful gathering centerpiece.
- Prep Time: 15 minutes
- Cook Time: 20 minutes
- Total Time: 1 hour 35 minutes
- Yield: 16 breadsticks 1x
- Category: Snack
- Cuisine: American
Ingredients
- 3 cups (375 g) all-purpose flour
- 2 1/4 tsp active dry yeast (one packet)
- 1 cup (240 ml) warm water (about 110°F/43°C)
- 2 tbsp (30 ml) olive oil
- 1 tsp sugar
- 1 tsp salt
- 1 tsp garlic powder
- 1 tsp dried Italian herbs
- About 20 whole almonds (for fingernails)
- Tomato paste or marinara (optional, for bloody effect)
- Assorted fresh veggies: baby carrots, celery sticks, cucumber slices, cherry tomatoes
- Cheese varieties: cheddar cubes, mozzarella balls, or pepper jack slices
- Dips: ranch dressing, hummus, or spicy salsa
- Crackers or additional breadsticks (optional)
- Olives and pickles
Instructions
- Activate the yeast by combining 1 cup warm water, 1 tsp sugar, and yeast packet in a large bowl. Let sit 5-7 minutes until frothy.
- Add 3 cups flour, 1 tsp salt, 1 tsp garlic powder, and 1 tsp dried Italian herbs to the yeast mixture. Pour in 2 tbsp olive oil and stir until a shaggy dough forms.
- Turn dough onto a floured surface and knead for 8-10 minutes until smooth and elastic, adding flour if sticky but not too much.
- Place dough in a lightly oiled bowl, cover, and let rise in a warm spot for about 1 hour until doubled in size.
- Punch down dough and divide into 16 equal pieces (~1.5 oz each). Roll each into a 5-inch finger shape, tapering ends slightly.
- Make 3-4 small slashes along each finger to mimic knuckles using a knife or kitchen scissors. Press an almond onto one end for the fingernail. Optionally dab tomato paste under almond for a bloody effect.
- Place shaped fingers on parchment-lined baking sheet, cover loosely, and let rest for 20 minutes to puff up.
- Preheat oven to 375°F (190°C). Bake breadsticks for 18-22 minutes until golden brown and cooked through.
- Cool breadsticks on a wire rack. Meanwhile, arrange snack board with fresh veggies, cheeses, olives, dips, and other accompaniments.
- Serve witch finger breadsticks prominently on the board as a spooky centerpiece.
Notes
Use warm water (not hot) to activate yeast properly. Knead dough until elastic but not overworked. Make shallow slashes for knuckles to avoid splitting dough. Press almonds firmly for fingernails. Brushing olive oil before baking adds a glossy crust. Breadsticks can be shaped ahead and refrigerated overnight before baking. For a gluten-free option, use gluten-free flour blend and adjust water as needed. Variations include adding crushed red pepper flakes for heat or Parmesan for cheesy flavor.
Nutrition
- Serving Size: 1 breadstick (about
- Calories: 150
- Fat: 4
- Carbohydrates: 28
- Protein: 4
Keywords: Halloween snack, witch finger breadsticks, party snack board, garlic breadsticks, spooky snacks, Halloween party food